Advertisement
- 1 SAFETY ALERT KEY
- 2 IMPORTANT SAFETY INFORMATION
- 3 ACTIVATE YOUR WARRANTY
- 4 ASSEMBLY GUIDE
- 5 USING YOUR APPLIANCE
- 6 TROUBLESHOOTING
- 7 CUSTOMER SERVICE
- 8 Documents / Resources
SAFETY ALERT KEY

Indicates a hazardous situation that, if not avoided, will result in death or serious injury.

Indicates a hazardous situation that, if not avoided, could result in minor or moderate injury.

Indicates a hazardous situation that, if not avoided, could result in death or serious injury.
NOTICE
Indicates information considered important, but not hazardrelated (e.g. messages related to property damage).
IMPORTANT SAFETY INFORMATION
If you smell gas:
- Shut off gas to the appliance.
- Extinguish any open flame.
![burn hazard]() If odor continues, keep away from the appliance and immediately call your gas supplier or your fire department.
If odor continues, keep away from the appliance and immediately call your gas supplier or your fire department.
Failure to follow these instructions could result in fire or property damage, personal injury or death.
- NEVER operate this appliance unattended.
- NEVER operate this appliance within 10 ft (3.0 m) of any structure, combustible material or other gas cylinder.
- NEVER operate this appliance within 25 ft (7.5 m) of any flammable liquid.
![burn hazard]() If a fire should occur, keep away from the appliance and immediately call your fire department. DO NOT attempt to extinguish an oil or a grease fire with water.
If a fire should occur, keep away from the appliance and immediately call your fire department. DO NOT attempt to extinguish an oil or a grease fire with water.
Failure to follow these instructions could result in fire or property damage, personal injury or death.
- DO NOT store or use gasoline or other flammable liquids or vapors in the vicinity of this or any other appliance.
- An LPG cylinder not connected for use shall not be stored in the vicinity of this or any other appliance.
GAS APPLIANCE SAFETY
- The use of alcohol, prescription, or non-prescription drugs may impair the consumer's ability to properly assemble or safely operate the appliance.
- Keep children and pets away from the appliance at all times.
- Have a type BC or ABC fire extinguisher readily available.
DO NOT USE FOR PURPOSES OTHER THAN INTENDED:
- DO NOT use for commercial cooking.
- DO NOT use this appliance as a heater.
THIS APPLIANCE SHALL BE USED OUTDOORS ONLY.
- DO NOT use this appliance inside buildings, garages, or any other enclosed area.
- DO NOT install this appliance in or on a boat.
- DO NOT install this appliance in or on a recreational vehicle.
MAINTAIN PROPER CLEARANCES FROM COMBUSTIBLE MATERIAL:
- DO NOT use this appliance on or under any apartment or condominium balcony or deck.
- DO NOT use this appliance under overhead combustible construction.
- DO NOT obstruct the flow of combustion and ventilation air.
- DO NOT operate this appliance any closer than 36 in (1 m) from the sides and back of the appliance.
![]()
A = 36" (1 m)

INSTALLATION MUST CONFORM WITH LOCAL CODES
In the absence of local codes, installation must conform with:
- National Fuel Gas Code, ANSI Z223.1/NFPA 54, Storage and Handling of Liquefied Petroleum Gases, ANSI/NFPA 58; or
- Natural Gas and Propane Installation Code, CSA B149.1; Propane Storage and Handling, CSA B149.2; or
- The Standard for Recreational Vehicles, ANSI A119.2/NFPA 1192; and Recreational Vehicle Code, CSA Z240 RV series, as applicable.
ACTIVATE YOUR WARRANTY
TO ENABLE THIS WARRANTY, YOU WILL NEED TO PROVIDE:
Your appliance's serial Number
The Serial Number can be found on your appliance's Manufacturer Label.
(The Manufacturer label is a large silver sticker found on the body of your appliance.)

Register your appliance at
BlackstoneProducts.com/register

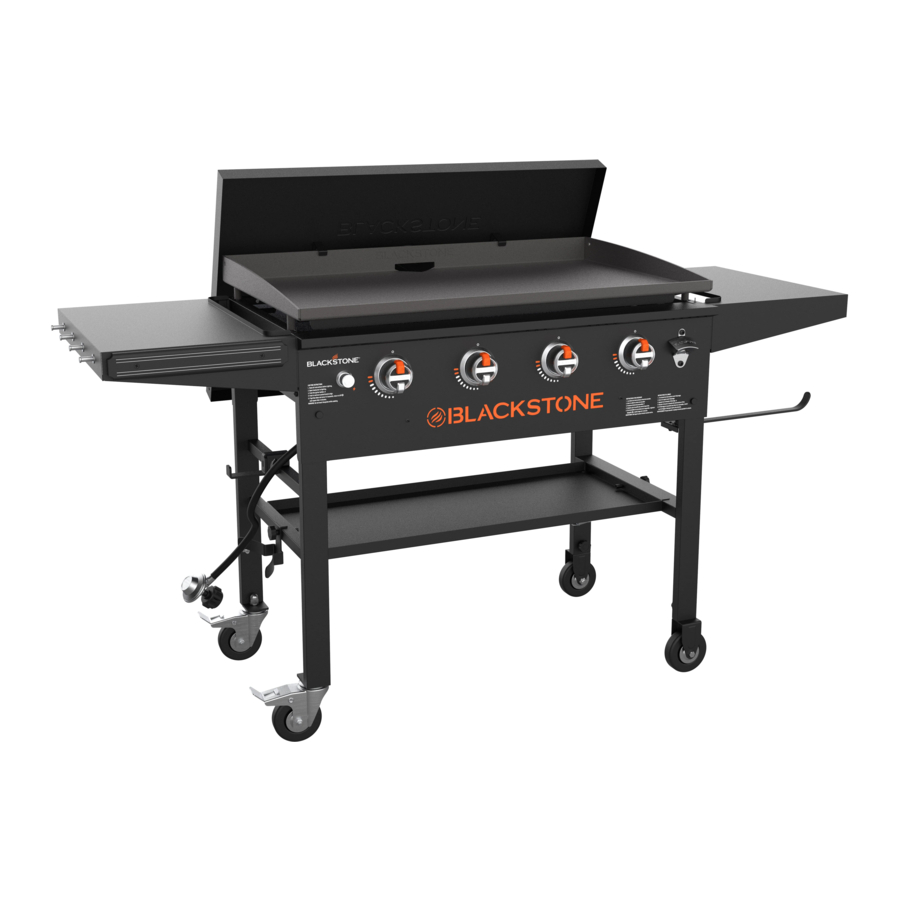
ASSEMBLY GUIDE
EXPLODED VIEW

PARTS LIST


- Hardware pack (1 piece)
- Shelf pegs (8 pieces)
- M4x10 screws (4 pieces)
- M6x12 screws (13 pieces)
- M6 step bolts (8 pieces)
- Small thumbscrews (2 pieces)
- Shelf peg washers (8 pieces)
- Large thumbscrew (1 piece)
- Medium thumbscrew (1 piece)
- Shear pin (1 piece)
- Cotter pin (1 piece)
- Washers (2 pieces)
- Acorn nuts (2 pieces)
- Lock washers (2 pieces)
ASSEMBLY INSTRUCTIONS
Find a large, clean area to assemble your appliance.
Remove all packing material before assembling.
Sharp edges. Wear gloves while assembling.
Heavy pieces. Two people should assemble this appliance.

NOT INCLUDED:
LPG cylinder
Size: 18 x 12 in (45 x 30 cm), 20 lb (9 kg)
LPG cylinder must include collar to protect LPG cylinder valve.

NOT INCLUDED:
AA battery

TOOLS NEEDED:
Phillips head screwdriver & Adjustable wrench
- With the help of another person, remove the griddle body from the packaging and lay it upside down on a smooth, flat surface.
Unlatch and unfold the legs to their vertical position.

- Use two (2) small thumb screws to attach the fixed wheels onto the ends of the right leg assembly.
- Use two (2) acorn nuts and two (2) spring washers to attach the two (2) caster wheels onto the left leg assembly. (Ensure that the caster wheels are locked.)
- Place the bottom shelf between the leg assemblies.

- Use one (1) large thumb screw to secure the shelf to the left leg assembly.
- Use one (1) medium thumb screw to attach the LPG support and secure the shelf to the right leg assembly.
- With the help of another person, set the griddle body on its feet.
Use one (1) shear pin and one (1) cotter pin to attach the propane tank hanger to the upper bar of the left leg assembly.

- Use one (1) M6x12 screw and two (2) washers to attach the paper towel holder to the paper towel bracket.

- Install the four (4) control knobs by pushing them into place in the OFF position.

- Use four (4) M6x12 bolts to install the side handle to the left side of the griddle body.

- Use four (4) M6x12 bolts to attach one (1) side shelf bracket (l), and one (1) side shelf bracket (R) to the right side of the griddle body. Repeat this step with the left side of the griddle body.

- Thread four (4) side shelf pegs through four (4) peg washers and into the right side shelf.
Repeat with the left side shelf.
![]()
- Thread two (2) M6 step bolts into the upper holes of the right side shelf. Repeat with the left side shelf.
![]()

- Slide the right side shelf onto the side shelf brackets. (The threaded M6 step bolts will hook and hold the shelf.)
- Use two (2) M6 step bolts to secure the right side shelf to the side shelf brackets. Repeat with the left side shelf.
- Hang the grease cup in the slot on the back of the griddle body.
![]()
- With the help of another person, place the griddle top onto the griddle body by aligning the four foot pins to the holes on top of the unit.


Make sure the front pins are fully seated in the holes, then push the griddle top back to lock the griddle in place.
- Use four (4) M4x10 screws to attach the two (2) hard cover handles and two (2) hard cover hooks to the hard cover.


(Hang hard cover on back of griddle top when in use, and place hard cover on the griddle top when not in use.)
- Proceed to USING YOUR APPLIANCE


Handle will get hot while appliance is in use.
DO NOT touch the handle while appliance is hot.
NOTICE
- Maximum weight on the side shelf is 10 lbs (4.5 kg).
- The side shelf may get hot while appliance is in use.
USING YOUR APPLIANCE

THE LPG CYLINDER VALVE MUST HAVE:
- Type 1 valve outlet (thread on the outside).
- Safety relief valve.
- UL listed Overfill Protection Device (OPD). This OPD safety feature is identified by a unique triangular hand wheel.
- Safety cap (dust cap).
LPG CYLINDER REQUIREMENTS
- The LPG supply cylinder to be used must be constructed and marked in accordance with the specifications for LP gas cylinders, U.S. department of Transportation (DOT) or the standard for Cylinders, spheres and Tubes for the Transportation of dangerous Goods, CAN/CSA-B339.
- Only LPG cylinders marked "propane" shall be used.
The LPG cylinder supply system must be arranged for vapor withdrawal.
- Always keep new LPG cylinders in upright position during use, transit or storage.
- Always keep the ventilation opening(s) of the cylinder enclosure free and clear from debris.
REGULATOR SAFETY
Cross threading can occur if you force thread a connection at an improper angle. This will damage the threads, lead to propane leaking, and potentially result in a build-up of fuel that can ignite.
DO NOT cross thread the connection between your LPG cylinder and regulator.
If you can not connect the regulator, DO NOT use the regulator.
Regulator must be replaced with a Blackstone approved model by a professionally licensed, authorized dealer.
Use this appliance, as purchased, only with gas and regulator/valve assembly supplied.
FITTINGS & HOSES
- Annual checking and tightening of metal fittings is recommended.
- Keep the fuel supply hose away from any heated surfaces.
- Before each use, check to see if hoses are cut or worn.
Replace damaged hose before using appliance. (Use only Blackstone approved replacement parts for valve, hose, or regulator. Failure to comply will void the warranty.)
CONNECT THE LPG CYLINDER
20 LB (9 KG)
- Turn the control knobs to OFF
![]()
- Ensure that the LPG cylinder is OFF by turning the OPD hand wheel clockwise to a full stop
- Remove the safety cap from the Type 1 valve outlet
- Hold the regulator in a straight line with the Type 1 valve outlet so as not to cross thread the connection.
Center and insert the regulator nipple into the Type 1 valve outlet.
Hand-tighten the coupling nut in a clockwise direction.
(DO NOT use tools to connect.)
If connection cannot be completed, disconnect regulator and repeat this step.
![]()
- Secure the LPG cylinder to the appliance by hanging it on the LPG hook so that it nestles against the LPG support.
![]()


LEAK TEST INSTRUCTIONS
NOTICE
DO NOT use household cleaning agents. Damage to gas valve, hose, and regulator components may result.
Use a clean paintbrush and a 10/90 mild soap and water solution to perform the leak test.
LPG CYLINDER LEAK TEST
- leak test new and exchanged LPG cylinders BEFORE connecting to griddle.
- DO NOT smoke during leak test.
- DO NOT use an open flame to check for gas leaks.
- Appliance must be leak tested outdoors in a well-ventilated area, away from ignition sources such as gas fired or electrical appliances.
- During leak test, keep appliance away from open flames or sparks.
- Brush soapy solution onto joint areas of the LPG cylinder. (Indicated by arrows in figure 01.)
(Indicated by arrows in figure 01.)
![]()
- Leaks are indicated by growing bubbles.

If growing bubbles appear during leak test, DO NOT use or move the LPG cylinder.
Immediately contact an LPG supplier or fire department.
VALVES/HOSE & REGULATOR LEAK TEST
- Turn the control knobs to OFF.
- Connect the regulator to the LPG cylinder.
- Completely open the LPG tank by turning the OPD hand wheel counterclockwise.
- If you hear a rushing sound, turn gas off immediately. There is a major leak at the connection.
- Immediately close the LPG cylinder by turning the OPD hand wheel clockwise and re-tighten connections. If leaks cannot be stopped DO NOT TRY TO REPAIR.
- Brush soapy solution onto joint areas of valves and regulator. (Indicated by arrows in figure 02.)
(Indicated by arrows in figure 02.)
![]()
- Leaks are indicated by growing bubbles.
- Immediately close the LPG cylinder by turning the OPD hand wheel clockwise and re-tighten connections.

If leaks cannot be stopped, DO NOT try to repair.
Regulator must be replaced with a Blackstone approved model by a professionally licensed, authorized dealer.
CLEANING YOUR PRODUCT TOP
NOTICE
Soap will ruin a seasoned griddle. This is the only time you should use soap on the griddle cooking surface.

- Wash the griddle cooking surface with hot, soapy water.
- Rinse and dry completely.
IGNITION INSTRUCTIONS
CHECK VALVES

- Turn knob to OFF position.
- Push in knob and release. Knob should spring back.
If knobs DO NOT spring back, replace valve assembly before using appliance. - Rotate knob to LOW then turn back to OFF. Knob should turn smoothly.
If burner does not ignite with open LPG cylinder valve, gas will continue to flow out of burner and could accidentally/inadvertently ignite with risk of injury.
Ensure gas is off at the supply shut off valve before checking appliance valves.
BATTERY POWERED IGNITION
 DO NOT lean over the appliance while lighting.

- Insert one (1) AA battery (not included) under the ignitor button.
Screw the button into place over the positive terminal.
![]()
![]() Turn the control knob to OFF.
Turn the control knob to OFF.- Turn gas ON at the LPG cylinder by turning the OPD hand wheel counterclockwise 1 to 3 turns.
![]()
![]() Push and hold the ignitor button.
Push and hold the ignitor button.
![]() Push and turn the control knob counter-clockwise to HIGH.
Push and turn the control knob counter-clockwise to HIGH.
(Release the ignitor button when the burner lights.)
![]() Adjust the temperature to desired level.
Adjust the temperature to desired level.

 Turn the control knob to OFF.
 Push and hold the ignitor button.
 Push and turn the control knob counter-clockwise to HIGH.
 Adjust the temperature to desired level.
 CHECK BURNER FLAME
Always check burner flame before use.
- Light burners and rotate knobs from HIGH to LOW.
- Look below the cooking top to view burners. When knob is at HIGH, flames should be larger than when knob is at LOW.

A clogged burner can lead to a fire beneath the appliance.
Burner should be removed and cleaned annually or whenever heavy build-up or insects/insect nests are found.

HEALTHY BURNER FLAME PATTERN
- Flickers of yellow color.
- Dark blue color.
- Vibrant blue.

BURNER FLAMES ARE YELLOW OR IRREGULAR
If there is a sudden drop or low flame issue, please reference the Troubleshooting chapter.
APPLIANCE SEASONING INSTRUCTIONS

WHAT OIL IS BEST TO USE
- Blackstone seasoning and Cast Iron Conditioner.
![]()
- Any plant-based cooking oil.
- Rendered animal fat with no additives.

VIDEO TUTORIAL
How to season a New Blackstone Griddle
 youtube.com/watch?v=VspmDVnj2pI&t=3s

- Wipe any debris off griddle top.
![]()
- Set your griddle to high heat until your griddle top changes color. (~10 min)
![]()
- Use tongs to hold a paper towel or cotton cloth and spread 2-3 tablespoons of your seasoning oil across the entire griddle top. When seasoning your griddle top.
When seasoning your griddle top, remember to use a thin and even layer of oil—the thinner the layer of oil, the easier it will be to burn it off.
![]()
- The griddle top is ready for another layer of oil when it stops smoking. Repeat STEP 03 3-4 times, or until the griddle surface is black.
![]()


PREVENTING RUST
Use your griddle frequently. Every time you cook, you are adding to the seasoning, which makes rust less likely.
NOTICE
If you live in a humid or coastal climate, your griddle may require more frequent seasonings between uses. If rust appears on the griddle surface, rub it off with steel wool, low grit sandpaper or the Blackstone Pumice Stone and re-season the surface.
VIDEO TUTORIAL
Recovering your Blackstone Griddle Top
 youtube.com/watch?v=thPE2IgnSiI

COOKING ON YOUR APPLIANCE
Flammable items can spontaneously combust if placed near the appliance. DO NOT place flammable items such as aerosol containers, oily or greasy towels near the cooking surface.
This appliance will be hot during and after use. DO NOT handle hot parts with unprotected hands. Use long-handled cooking utensils and oven mitts.
NOTICE
DO NOT store any items within 3 in (8 cm) of the cooking surface while in use.
IF GREASE OR OTHER HOT MATERIAL DRIPS ONTO VALVE, HOSE OR REGULATOR:
- Turn off gas supply immediately.
- Determine the cause and correct it.
- Clean and inspect valve, hose and regulator.
- Perform a leak test. (Please reference the leak Test Instructions in USING YOUR APPLIANCE.)
VIDEO RECIPES
Find recipes and cooking tips at:
BlackstoneProducts.com/blogs/recipes

youtube.com/c/BlackstoneGriddles

@blackstoneproducts
CLEANING YOUR APPLIANCE
Clean your appliance after each use, after it is cool to the touch.
- DO NOT use abrasive pad on areas with graphics.
- If a bristle brush is used to clean any of the cooking surfaces, ensure no loose bristles remain on cooking surfaces prior to cooking.
Grease build up can cause a fire. Clean any part of the appliance that gets hot and experiences grease build up after each use.
PLASTIC PARTS & PAINTED SURFACES:
Wash with warm soapy water and wipe dry with a non-abrasive cloth.
NOTICE
DO NOT use Citrisol, abrasive cleaners, or a concentrated cleaner on plastic parts. This may result in damage to and failure of parts.
FOR EVERY SURFACE
The Blackstone degreaser and Cleaning Spray is gentle enough to clean every surface of your appliance. Use it on the cooking surface, the appliance frame, or anywhere that experiences a build up of grease.

APPLIANCE STORAGE
DO NOT move the appliance when in use. Allow the appliance to cool to 115°F (45°C) before moving or storing.
COVER FIT GUIDE
Always cover your appliance when stored outdoors.
To find a cover that will fit your appliance, visit BlackstoneProducts.com/support.

CLEANING YOUR PRODUCT TOP
Clean griddle top after each use, while still warm.
- DO NOT use soap on the griddle top. This will destroy the griddle's storing the Appliance goes here seasoning.
- The grease cup must be removed and emptied after each use.
Grease cup will be hot during and after use. DO NOT remove the grease cup until the griddle has completely cooled.
VIDEO TUTORIAL
How to Clean your Blackstone Griddle
 youtube.com/watch?v=-Iedu9z6NPY

- Push loose food debris into the grease cup with spatula or straight metal scraper.
![]()
- Wipe down griddle top with paper towel.
![]()
- Apply a few tablespoons of water to the griddle surface, then scrape the water and debris into the grease cup.
(For stuck-on food residue, use a bit of coarse salt.)
![]()
- Wipe again with a paper towel and dry completely.
![]()
- Apply thin coat of cooking oil to maintain seasoning and protect the griddle top.
![]()


DISCONNECT THE LPG CYLINDER
20 LB (9 KG)
- Ensure that the control knobs are turned to OFF.
![]()
- Ensure that the LPG cylinder is OFF by turning the oPd hand wheel clockwise to a full stop.
- Turn the coupling nut counter-clockwise by hand to remove the regulator. (DO NOT use tools to disconnect.)
- Place safety cap on LPG cylinder valve outlet whenever cylinder is not in use.
Only install the type of safety cap on cylinder valve outlet that is provided with the cylinder valve. other types of caps or plugs may result in leakage of propane.
![]()


STORING LPG CYLINDERS
- DO NOT store a spare LPG cylinder under or near this appliance.
![burn hazard]() DO NOT fill an LPG cylinder beyond 80% full.
DO NOT fill an LPG cylinder beyond 80% full.
If the information above is not followed exactly, a fire causing death or serious injury may occur.
- The LPG cylinder must be turned OFF when the appliance is not in use.
- LPG cylinders must be stored outdoors and out of the reach of children.
- DO NOT store an LPG cylinder inside a building, garage, or any other enclosed area.
FILLING & EXCHANGE
- Use only those reputable exchange companies that inspect, precision fill, test and certify their cylinders. LPG dealer must purge new cylinder before filling.
- Volume of propane in cylinder will vary by temperature.
A frosty regulator indicates gas overfill.
Immediately close LPG cylinder valve and call local LPG dealer for assistance.
- DO NOT release liquid petroleum gas (LPG) into the atmosphere.
- To remove gas from LPG cylinder, contact a certified LPG dealer or local fire department for assistance.
- Exchange cylinder only for an OPD safety feature-equipped cylinder.
Your retailer can help you match a replacement LPG cylinder to your appliance.
TROUBLESHOOTING
SEASONING TROUBLESHOOTING
THERE IS A BROWNISH RESIDUE ON THE PRODUCT SURFACE
| POSSIBLE CAUSES | SOLUTION |
|
|
THE EDGES OF THE PRODUCT SURFACE ARE NOT BLACK
After using your griddle for multiple cooks, the seasoning will even out and improve.
IGNITION TROUBLESHOOTING
BURNER WILL NOT IGNITE
If ignition does not occur in 5 seconds:
- Turn the burner control knob OFF
- Wait 5 minutes.
- Repeat the lighting procedure.
If this does not work, to determine the cause, please try to ignite your appliance with a match.
MATCH LIGHTING INSTRUCTIONS
Before beginning, check for gas leaks. open hood (if applicable).
- Turn control knob to OFF position.
- Light a match (or long lighter) no shorter than 11 inches long.
![]()
- Place the flame next to the burner.
- Push in and turn the control knob to start gas flowing. Ensure burner lights and stays lit.

| IF YOU CAN IGNITE YOUR APPLIANCE WITH A MATCH: | |
| POSSIBLE CAUSES | SOLUTION |
| Dead / improperly installed battery. |  Replace with new battery. |
| Ignitor wire misaligned. |  Ensure that the ignitor needle is positioned 3-7mm away from the burner, and aligned with the burner holes. |
| Damage to the ignition system. | Contact customer service for replacement parts. |
| IF YOU CAN NOT IGNITE YOUR APPLIANCE WITH A MATCH: | |
| POSSIBLE CAUSES | SOLUTION |
| Burner tubes are not receiving fuel. | Clean the burner assembly to remove the obstruction. |
GAS FLOW TROUBLESHOOTING
BURNER FLAMES ARE YELLOW OR IRREGULAR
- Appliance will not achieve a high heat or heats unevenly.
- Burner flames start strong, then immediately drop to low even when burner is set to high position.
- Flame height drops when a second burner is lit.
- Flames DO NOT extend the full length of the burner, or only run on one side of the burner.
- Burner flames are inconsistent.
| POSSIBLE CAUSES | SOLUTION |
| Obstructions in the burner, gas jets, or fuel rail. | Clean the burner, jets, and gas hose. |
| LPG cylinder is empty or low. | Refill or replace the LPG cylinder. |
| The regulator's flow limiting device was triggered. | Reset the safety system:
|
| Regulator stuck in safety position. | Contact customer service for replacement parts. |
A FLAME IS COMING OUT OF THE AIR GATE

| POSSIBLE CAUSES | SOLUTION |
| Something is blocking the venturi in the burner. | Clean the burner assembly to remove the obstruction. |
CLEANING THE BURNER ASSEMBLY
VIDEO TUTORIAL
How to Clean Your Burner Tube
 youtube.com/watch?v=xKQTCrFCzf8

- Ensure that the gas is turned OFF at control knobs and gas supply. Remove the cooking top.
- Carefully detach and remove the burner.
![]()
- Clean the inside of the burner:
![]()
- Run a narrow bottle brush through each burner tube several times. (DO NOT use wire brushes)
- Run a stiff wire bent into a small hook through each burner tube several times.
- Use compressed air to blow through the burner tube and out the burner ports. Check that air blows through each hole. (Wear eye protection)
- Brush entire outer surface of burner to remove grime.
![]()
- Clean any blocked ports with stiff wire such as an open paper clip.
![]()
- Carefully replace burners and reattach.
![]()


The gas rail fuel nozzle must be reengaged within the burner opening.
CUSTOMER SERVICE
Visit us online at BlackstoneProducts.com/support
for assistance concerning appliance use, replacement parts, or your warranty.
CUSTOMER SERVICE HOURS:
Monday – Friday
7:00 am – 5:00 pm (MST)
BLACKSTONEPRODUCTS.COM/SUPPORT
Documents / Resources
References
Register Product - Blackstone Products
![youtube.com]() How To Season a New Blackstone Griddle | Blackstone Griddle - YouTube
How To Season a New Blackstone Griddle | Blackstone Griddle - YouTube![youtube.com]() Recovering your Blackstone Griddle Top - YouTube
Recovering your Blackstone Griddle Top - YouTube![blackstoneproducts.com]() Blackstone Recipes – Blackstone Products
Blackstone Recipes – Blackstone Products![youtube.com]() Blackstone Griddles - YouTube
Blackstone Griddles - YouTube![blackstoneproducts.com]() Support – Blackstone Products
Support – Blackstone Products![youtube.com]() How to Clean Your Blackstone Griddle | Blackstone Griddles - YouTube
How to Clean Your Blackstone Griddle | Blackstone Griddles - YouTube![youtube.com]() How to Clean Your Burner Tube | Blackstone Griddles - YouTube
How to Clean Your Burner Tube | Blackstone Griddles - YouTube
Download manual
Here you can download full pdf version of manual, it may contain additional safety instructions, warranty information, FCC rules, etc.
Advertisement


Need help?
Do you have a question about the 2149 and is the answer not in the manual?
Questions and answers