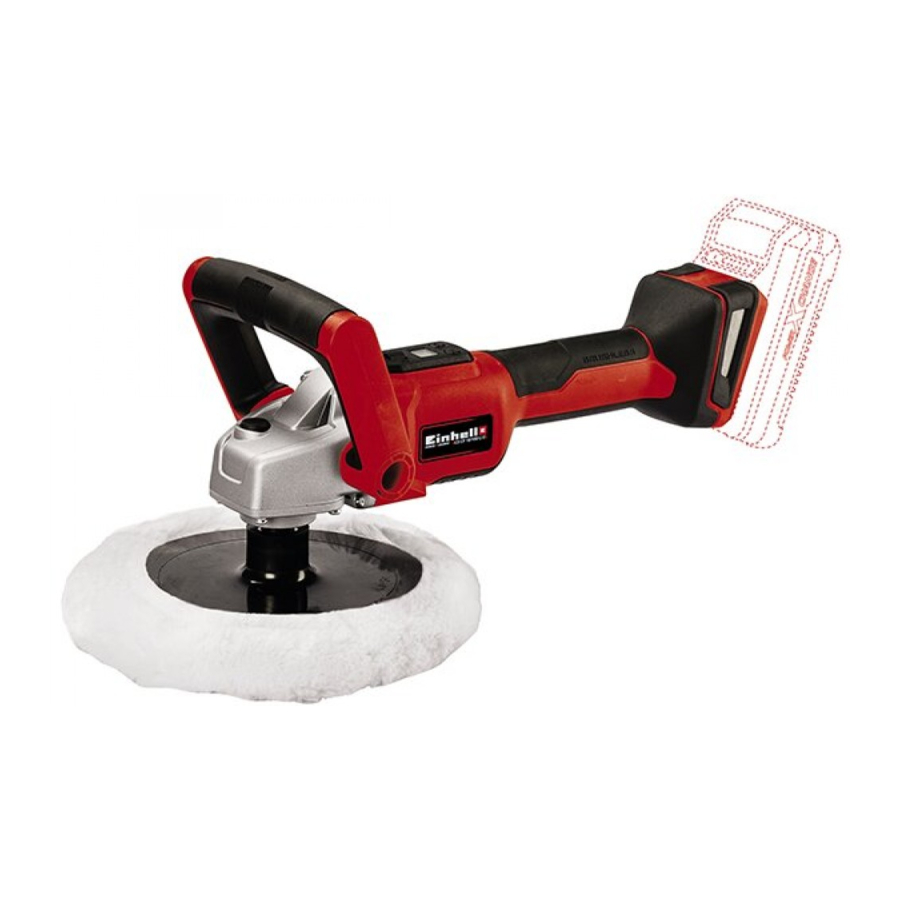
Einhell CE-CP 18/180 Li E (20.933.20) - Polishing/Sanding Machine Manual
- Original operating instructions (228 pages) ,
- Operating instructions manual (175 pages) ,
- Original operating instructions (27 pages)
Advertisement
Safety regulations

When using the equipment, a few safety precautions must be observed to avoid injuries and damage. Please read the complete operating instructions and safety regulations with due care. Keep this manual in a safe place, so that the information is available at all times. If you give the equipment to any other person, hand over these operating instructions and safety regulations as well. We cannot accept any liability for damage or accidents which arise due to a failure to follow these instructions and the safety instructions.
Explanation of the symbols used (see Fig. 13)

![]()
Read the operating instructions to reduce the risk of injury.![]()
Wear ear-muffs. The impact of noise can cause damage to hearing.![]()
Wear a breathing mask. Dust which is injurious to health can be generated when working on wood and other materials. Never use the device to work on any materials containing asbestos!![]()
Wear safety goggles. Sparks generated during working or splinters, chips and dust emitted by the device can cause loss of sight.- Hazard statement: Risk of injury and risk of damage to the device.
The corresponding safety information can be found in the enclosed booklet.
Read all safety regulations and instructions. Any errors made in following the safety regulations and instructions may result in an electric shock, fi re and/or serious injury.
Keep all safety regulations and instructions in a safe place for future use.
Children are not allowed to use this equipment. Children should be supervised so that they do not play with the equipment. Children are not allowed to carry out cleaning or maintenance. This equipment is not allowed to be used by people with limited physical, sensory or mental capacities or by those with insufficient knowledge or experience unless they are supervised or instructed by a person who is responsible for them.
Layout and items supplied
Layout (Fig. 1/3)


- Spindle lock
- Front handle
- On/Off switch
- Speed control
- Rear handle
- Polishing / sanding disk
- Speed indicator
Items supplied (Fig. 2)
Please check that the article is complete as specified in the scope of delivery. If parts are missing, please contact our service center or the sales outlet where you made your purchase at the latest within 5 working days after purchasing the product and upon presentation of a valid bill of purchase. Also, refer to the warranty table in the service information at the end of the operating instructions.

- Open the packaging and take out the equipment with care.
- Remove the packaging material and any packaging and/or transportation braces (if available).
- Check to see if all items are supplied.
- Inspect the equipment and accessories for transport damage.
- If possible, please keep the packaging until the end of the guarantee period.
The equipment and packaging material are not toys. Do not let children play with plastic bags, foils or small parts. There is a danger of swallowing or suffocating!
- Additional handle
- Polishing / sanding disk
- Sanding and polishing machine
- Foamed plastic attachment
- Synthetic polishing attachment
- Sanding attachment K = 60
- Sanding attachment K = 80
- Sanding attachment K = 120
- Hexagon key 8 mm
- Socket head screw M 10 x 20 mm (2 pcs)
- Original operating instructions
- Safety instructions
Proper use
The machine is designed for polishing coated surfaces and for sanding wood, iron, plastic and similar materials using the appropriate abrasive paper.
The equipment is to be used only for its prescribed purpose. Any other use is deemed to be a case of misuse. The user / operator and not the manufacturer will be liable for any damage or injuries of any kind caused as a result of this.
Improper use
All applications with the device which are not stated in the chapter "Intended use" are deemed to be contrary to the intended use. The device must not be used for the following purposes:
- Working on coatings containing lead and working on types of wood and metal which generate harmful or toxic dust
- Sharpening, engraving with corresponding attachments
- Working on materials containing asbestos
- Use in areas where there is a risk of explosion
- Sanding on damp walls
There is a risk of injury.
The user of the device is liable for all damage to property and personal injuries arising as a result of incorrect use.
If any other components or non-original components are used on the machine, the manufacturer's guarantee shall become void.
Please note that our equipment has not been designed for use in commercial, trade or industrial applications. Our warranty will be voided if the machine is used in commercial, trade or industrial businesses or for equivalent purposes.
Residual risks
Even if you use this electric power tool in accordance with instructions, certain residual risks cannot be rules out. The following hazards may arise in connection with the equipment's construction and layout:
- Contact with the unguarded wheel (injuries through cutting)
- Reaching into the wheel while it is still rotating (injuries through cutting)
- Catapulting of parts of the wheel (injuries through cutting or bruising)
- Catapulting of parts of the material being processed (injuries through cutting or bruising)
- Risk of fire from flying sparks
- Damage to hearing if the compulsory hearing protection is not used (hearing loss)
- Inhalation of abrasive particles from the material and wheel
- Electric shock upon contact with non-insulated electrical parts
If the instructions listed in the operating instructions are not adhered to, improper handling of the equipment may result in other residual risks
Technical data
Operating voltage: 18 V DC
Speed n: 500-3000 min -1
Polishing disk ∅: 180 mm
Connection thread: M14
Protection class: III
Weight: 1,6 kg

The equipment is supplied without batteries and without a charger and is allowed to be used only with the lithium-ion batteries of the Power XChange series!
The lithium-ion batteries of the Power X-Change series are allowed to be charged only with the Power X-charger.
Sound and vibration
Sound and vibration values were measured in accordance with EN 60745-1, EN 60745-2-3.
LpA sound pressure level: 71,7 dB(A)
KpA uncertainty: 3 dB
LWA sound power level: 82,7 dB(A)
KWA uncertainty: 3 dB
Wear ear-muffs.
The impact of noise can cause damage to hearing.
Total vibration values (vector sum of three directions) determined in accordance with EN 60745-1, EN 60745-2-3.
Operating mode: Sanding with sanding paper
Vibration emission value ah, DS = 5,194 m/s2
K uncertainty = 1.5 m/s2
Operating mode: Polishing
Vibration emission value ah, P = 4.275 m/s2 K uncertainty = 1.5 m/s2
The specified vibration value was established in accordance with a standardized testing method. It may change according to how the electric equipment is used and may exceed the specified value in exceptional circumstances.
The specified vibration value can be used to compare the equipment with other electric power tools.
The specified vibration value can be used for initial assessment of a harmful effect.
Keep the noise emissions and vibrations to a minimum.
- Only use appliances which are in perfect working order.
- Service and clean the appliance regularly.
- Adapt your working style to suit the appliance.
- Do not overload the appliance.
- Have the appliance serviced whenever necessary.
- Switch the appliance off when it is not in use.
- Wear protective gloves.
- Fit the handles and, if applicable, the optional anti-vibration handles securely to the machine body.
If you experience an unpleasant feeling or skin discoloration on your hands while using the machine, stop your work immediately. Take adequate breaks from your work. If you do not take adequate breaks from your work, you could develop hand-arm vibration syndrome.
You should evaluate the level of strain in relation to the work involved and the use of the machine and take adequate work breaks accordingly. This will enable you to significantly reduce the level of strain over the whole period of work. Minimize the risk to which you are exposed from vibrations. Look after this machine with care in accordance with the operating instructions. If the machine is deployed or used often, you should consult your dealer and possibly consider obtaining anti-vibration accessories (handles).
Do not use the machine at temperatures of t=10°C or lower. Think out a work plan which enables you to limit your exposure to vibrations.
A certain level of noise nuisance is inevitable with this equipment. Carry out noise-intensive jobs at times that are acceptable and allowed. Where applicable, observe rest periods and restrict your working time to a minimum. Suitable ear protection must be worn for your own safety and for the safety of others nearby.
Before starting the equipment
Only press the spindle lock when the equipment is at a standstill.
Assembling the equipment
Remove the rechargeable battery before starting the assembly work.
(Fig. 4-6)


The equipment is supplied without batteries and without a charger.
Fitting the battery
Press the side pushlock button (c) of the battery pack as shown in Fig. 9 and push the battery pack into the mount provided. When the battery is positioned as in Fig. 9, make sure that the pushlock button latches in place! To remove the battery pack, proceed in reverse order.

Charging the battery

- Take the battery pack out of the equipment. Do this by pressing the pushlock button.
- Check that your mains voltage is the same as that marked on the rating plate of the battery charger. Insert the power plug of the charger into the socket outlet. The green LED will then begin to fl ash.
- Insert the battery pack (11) into the battery charger (10).
- In the section entitled „Charger indicator" you will find a table with an explanation of the LED indicator on the charger.
The battery pack can become a little warm during the charging. This is normal. If the battery pack fails to charge, check:
- whether there is voltage at the socket outlet
- whether there is good contact at the charging contacts
If the battery pack still fails to charge, send
- the charging unit
- and the battery pack to our customer service center.
To ensure that items are properly packaged and delivered when you send them to us, please contact our customer service or the point of sale at which the equipment was purchased.
When shipping or disposing of batteries and cordless tools, always ensure that they are packed individually in plastic bags to prevent short circuits and fi res.
To ensure that the battery pack provides long service, you should take care to recharge it promptly. You must recharge the battery pack when you notice that the performance of the device drops. Never allow the battery pack to become fully discharged. This will cause it to develop a defect.
Battery capacity indicator
Press the button for the battery capacity indicator (Item A). The battery capacity indicator (Item B) shows the charge status of the battery using 3 LEDs.
(Fig. 8)

All 3 LEDs are lit:
The battery is fully charged.
2 or 1 LED(s) are lit:
The battery has an adequate remaining charge.
1 LED blinks:
The battery is empty, recharge the battery.
All LEDs blink:
The battery temperature is too low. Remove the battery from the equipment, keep it at room temperature for one day. If the fault reoccurs, this means that the rechargeable battery has undergone exhaustive discharge and is defective. Remove the battery from the equipment. Never use or charge a defective battery.
Operation
Secure your workpiece. Make sure that the workpiece is held securely by a clamping device or a vise.
Switching the equipment ON/OFF
The equipment is turned on (I) and off (0) with the ON/OFF switch (Fig. 3 / Item 3). However, the equipment will only start running after the speed control has been activated.
Before switching off, lift the machine off the surface to the worked.
Using as a polishing machine
Only use special waxing and polishing agents suitable for the machine.
When using waxing and polishing agents, observe the instructions issued by their manufacturer!
The hook-and-loop fastener enables easy changing of the polishing attachment.

To prevent damage to the surfaces of the workpieces you wish to polish, make sure that you observe the following instructions:
- Wash the vehicle before polishing, and keep it free of any foreign bodies.
- Make sure that the polishing attachment supplied is free of any foreign bodies when being used.
- Make sure that the polishing attachment is always mounted precisely in the center of the sanding/grinding disk.
- Before you start the equipment, check to ensure that the attachments are securely fitted.
- Never touch the area you wish to polish with the edge of the sanding/grinding disk.
- To polish, select the speed required for your purposes using the speed controller. The optimum working speed depends on the material to be worked and the (polishing) agent used. If necessary, this can be established by conducting practical tests.
- The polishing machine must lie fully on the surface to be polished.
- Mask plastic parts, since these change color when polished and can become unattractive in appearance.
- Only polish in the shade, and never polish hot paint.
- Polish corners and edges very carefully. The paint layer is thinnest at corners and edges. As a precaution, you can mask these and polish them by hand.
- Excessive pressure results in poor performance and early wearing of the accessory used. Sensitive surfaces may be damaged e.g. due to excessive speed or too high a contact pressure.
Adjust the speed to the surface to be worked before applying the machine to it and allow the machine to run up to the selected speed. Depending on the speed, this may take a few seconds. Particularly when working with the foam plastic pad, the speed may fluctuate due to different surface qualities (different friction) in the lower speed ranges. This is not an equipment defect.
Use the foam plastic pad to apply the polishing agent (Fig. 10).

- First work on the large level surfaces such as the engine hood, boot lid and roof.
- Spread a little polish at points over the foam plastic pad. Press the foam plastic pad onto the surface to be polished several times. The polish is pressed into the foam plastic pad and transferred onto the surface to be polished. This prevents the polish on the foam plastic pad from being sprayed around when the machine is switched on.
- Apply the polish at low speed.
- Only work smaller sections in one go.
- Work the sections evenly, crosswise and lengthwise (first vertically, then horizontally).
- Then move on to working the smaller areas (e.g. doors).
Finish-polishing
- Use the synthetic polishing attachment (Fig. 11b) to remove the layer of polishing agent and finish the polishing work.

- To fit the synthetic polishing attachment, pull the edge upwards (Fig. 11a), press the attachment onto the hook-and-loop surface of the polishing disk and then pull the edge downwards again (Fig. 11b). The edge of the polishing disk is covered by the polishing attachment.

![]()
Do not exert any pressure on the polishing machine!


Care tips
- Wash your car at least every 2 weeks. Avoid using household detergents as these can damage the paintwork and remove the layer of wax.
- Wash your car with a clean sponge, working from top to bottom.
- Remove all insects, bird droppings and tar stains from the paintwork daily.
- If you use any window-cleaning agents, spray them onto a cloth and not directly onto the windows in order to prevent them wetting the paintwork.
Using as a sanding machine
Use the supplied sanding attachments (Fig. 12) for sanding purposes.
The hook-and-loop fastener enables easy changing of the sanding attachments.

- Place the whole surface area of the sanding disk on the material.
- Move the machine with gentle pressure over the „workpiece", making circular or transverse and linear movements.
- Use a coarse grit for coarse sanding and a finer grit for finish sanding. You can find the best grit size for the job by carrying out sanding tests.
Speed Control Display
Use the speed control to set the desired working speed.
Press the "+" button to increase the speed.
Press the "-" button to decrease the speed. Refer to the display (8) for the set speed. Set speed = Display x 100
Adjust the speed to the surface to be worked before applying the machine, and allow the machine to run up to the selected speed. Depending on the speed, this may take a few seconds.
(Fig. 3)
Cleaning, maintenance and ordering of spare parts
Always pull out the mains power plug before starting any cleaning work.
Cleaning
- Keep all safety devices, air vents and the motor housing free of dirt and dust as far as possible. Wipe the equipment with a clean cloth or blow it with compressed air at low pressure.
- We recommend that you clean the device immediately each time you have finished using it.
- Clean the equipment regularly with a moist cloth and some soft soap. Do not use cleaning agents or solvents; these could attack the plastic parts of the equipment. Ensure that no water can seep into the device. The ingress of water into an electric tool increases the risk of an electric shock.
- Wash the polishing attachments only by hand and let them air-dry. Use only mild soap for the purpose.
Maintenance
There are no parts inside the equipment which require additional maintenance.
Ordering replacement parts
Please quote the following data when ordering replacement parts:
- Type of machine
- Article number of the machine
- Identification number of the machine
- Replacement part number of the part required
For our latest prices and information please go to www.Einhell-Service.com
Storage
Store the equipment and accessories in a dark and dry place at above freezing temperature. The ideal storage temperature is between 5 and 30°C. Store the electric tool in its original packaging.
Faults
The equipment does not work
Check that the battery is charged and whether the charging unit is working.
An error code is displayed
| Error code | Possible cause | Possible remedial measures |
| E1 |
|
|
| E3 |
|
|
| E4 |
|
|
| E5 |
|
|
| E6 |
|
|
| E7 |
|
|
| E8 |
|
|
| E9 |
|
|
If the equipment will not work in spite of the troubleshooting measures and the voltage supply being OK, please send it to the customer service address below.
Charger indicator
| Indicator status | Explanations and actions | |
| Red LED | Green LED | |
| Off | Flashing | Ready for use The charger is connected to the mains and is ready for use; there is no battery pack in the charger |
| On | Off | Charging The charger is charging the battery pack in quick charge mode. The charging times are shown directly on the charger. The actual charging times may vary slightly from the stated charging times depending on the existing battery charge. |
| Off | On | The battery is charged and ready for use. (READY TO GO) The unit then changes over to gentle charging mode until the battery is fully charged. To do this, leave the rechargeable battery on the charger for approx. 15 minutes longer. Action: Take the battery pack out of the charger. Disconnect the charger from the mains supply. |
| Flashing | Off | Adapted charging
Action: |
| Flashing | Flashing | Fault Charging is no longer possible. The battery pack is defective. Action: Never charge a defective battery pack. Take the battery pack out of the charger. |
| On | On | Temperature fault The battery pack is too hot (e.g. due to direct sunshine) or too cold (below 0°C). Action: Remove the battery pack and keep it at room temperature (approx. 20°C) for one day. |
Service information
We have competent service partners in all countries named on the guarantee certificate whose contact details can also be found on the guarantee certificate. These partners will help you with all service requests such as repairs, spare and wearing part orders or the purchase of consumables.
Please note that the following parts of this product are subject to normal or natural wear and that the following parts are therefore also required for use as consumables.
| Category | Example |
| Wear parts* | Battery |
| Consumables* | polishing attachments, polishing bonnets, carbon brushes |
| Missing parts |
* Not necessarily included in the scope of delivery!
In the effect of defects or faults, please register the problem on the internet at www.Einhell-Service.com. Please ensure that you provide a precise description of the problem and answer the following questions in all cases:
- Did the equipment work at all or was it defective from the beginning?
- Did you notice anything (symptom or defect) prior to the failure?
- What malfunction does the equipment have in your opinion (main symptom)? Describe this malfunction.
Documents / Resources
References
Download manual
Here you can download full pdf version of manual, it may contain additional safety instructions, warranty information, FCC rules, etc.
Download Einhell CE-CP 18/180 Li E (20.933.20) - Polishing/Sanding Machine Manual
Advertisement


Need help?
Do you have a question about the CE-CP 18/180 Li E and is the answer not in the manual?
Questions and answers