Table of Contents

Subscribe to Our Youtube Channel
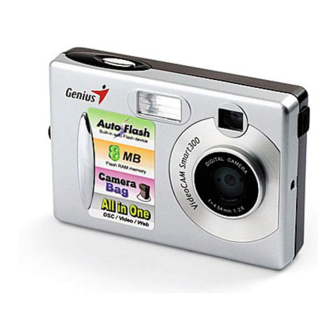
Summary of Contents for Genius VIDEOCAM SMART300
- Page 1 Genius VideoCAM Smart 300 Electronic User’s Manual Introducing the Genius VideoCAM Smart 300 Getting to Know Your Camera Installing the Digital Camera Software Using Your Camera Managing Photos in the Camera Options Using the Camera as a Video Camera Care and Cleaning...
-
Page 2: System Requirements
Once we’ve explained how to attach the camera to your system with the USB cable (included), then you can open any of the bundled video-based programs and use it as a Web Camera. It can also be used for video-conferencing in a program like Microsoft NetMeeting®. So let’s get started and get acquainted with all the features of the VideoCAM Smart 300. -
Page 3: Getting To Know Your Camera
Getting to Know Your Camera... -
Page 5: The Status Display
The Status Display Installing the Digital Camera Software Insert the digital camera software CD-ROM into your CD-ROM drive. The following software installation menu will appear on your screen automatically. Select the software you want to use. -
Page 6: Using Your Camera
Note: If the software installation menu did not appear, open Windows Explore and double-click on the “Setup. exe” icon in the CD- ROM directory. Click the Utility Driver first to install the digital camera software. Follow the on-screen instructions to proceed. When you are done installing the digital camera software, you have the choice to go back to the software installation menu and install the other bundled software programs. - Page 8 Hold the button for 1.5 seconds and this icon blinks on the status display. Press and hold the Delete button for five seconds. All photos and video files in the camera memory will be deleted. Downloading photos from the camera Refer to the illustration below to connect the camera to the PC using the USB cable.
- Page 9 Click the Camera/Scanner button, then click on the Acquire button . The following Twain Interface window will appear. Use the button to preview the picture you just took. Click on Transfer to download the picture from the camera to your PC.
- Page 10 The capturing motion video function allows you to capture motion video. To use this mode, press the Mode button until the capture motion video icon appears. Now press the Shutter and hold it until the timer begins to run. Release the Shutter to stop capturing motion video.
-
Page 11: The Video Camera Mode
Installing the Digital Camera Software (Refer to the section “ ”) Using the Camera as a Video Camera Refer to the illustration below to connect the camera to your PC using the USB cable. “PC” will appear in the display status. - Page 12 Turn your PC on if it isn’t already on. Click the Start button in the Windows Taskbar, and select Programs > ArcSoft VideoImpression > VideoImpression. The following VideoImpression main screen will appear. Click the New button the following Album screen will appear.
- Page 13 Click on Capture and the Capture screen will appear.
- Page 14 Then click on Record and you can capture the video. If you want to stop capturing, press ESC or click on Pause...
-
Page 15: Care And Cleaning
Do not use organic solvents, such as alcohol, etc., to clean your camera. • If the lens or viewfinder is dirty, please use the lens brush or a soft cloth to clean the lens. Do not touch the lens with your fingers.


Need help?
Do you have a question about the VIDEOCAM SMART300 and is the answer not in the manual?
Questions and answers