Table of Contents
Advertisement
Available languages
Available languages
Quick Links
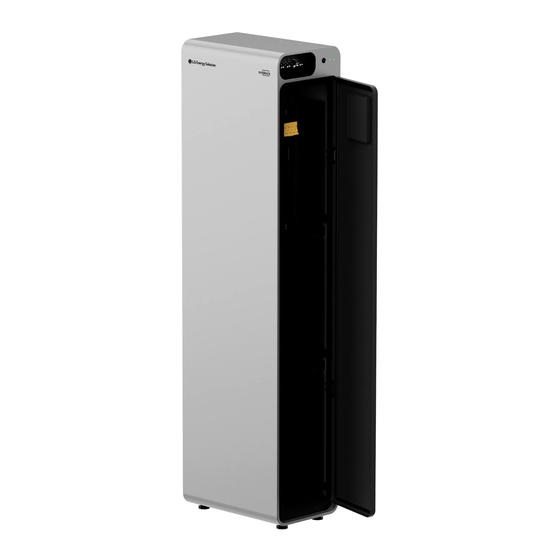
Installation Manual for LG enblock E
Scan QR code to view
[Full Installation Manual PDF File]
LG Energy Solution strongly advises users to exercise due care in following LG Energy Solution's
product installation manual. Warranty claims are invalid if damage is caused by human error in a
manner inconsistent with the installation manual's instructions.
Version 1.0
Scan QR code to view
[Installation Video Guide]
Scan QR code to download
[Monitoring APP (Android)]
Scan QR code to download
[Monitoring APP (iOS)]
Advertisement
Chapters
Table of Contents

Subscribe to Our Youtube Channel
Related Manuals for LG enblock E


Summary of Contents for LG enblock E
- Page 1 [Installation Video Guide] [Monitoring APP (Android)] LG Energy Solution strongly advises users to exercise due care in following LG Energy Solution’s product installation manual. Warranty claims are invalid if damage is caused by human error in a manner inconsistent with the installation manual’s instructions.
-
Page 2: Table Of Contents
NOTICE The information included in this manual is accurate at the time of publication. However, this manual is subject to change without prior notice. In addition, the illustrations in this manual are meant only to help explain system configuration concepts and installation instructions. Please note the image shown is for illustration purposes only. -
Page 3: Safety
1 Safety • Store the product in clean environment, free of dust, dirt and debris. • Disposal of the battery should be carried out by an expert with specialized knowledge and experience in electrical and environmental 1.1 Symbols safety, in accordance with local regulations, at designated waste disposal facilities using safe and appropriate methods. -
Page 4: Installation
IPI Connector Housing 2.1 Package Contents (1ea) 2.1.1 Battery System Package Contents These items are included in the enblock E battery system package. • Enclosure Package (*: Item Box) Power Cable (1EA) IPI Connector Terminal (4ea) 2.2 Basic Lifting Guide Refer to below guide for lifting and carrying the Battery Monitoring &... -
Page 5: Installation Locations
• BPU handling position 2.4 Clearance Recommended clearances for the left, right and top of the product are shown in the figure for the proper ventilation and installers' convenience. Make sure there is 700mm of space in front of the Door so that it open. BPU Weight : 4kg (8.8 lb) Wall 2 "... -
Page 6: Required Tools & Safety Gear
2.5 Required Tools & Safety Gear 2.6 Installing the battery pack The following tools are required to install the Battery Pack: CAUTION Make sure that the Inverter AC and DC are turned off and disconnected before connecting the Power Cable to the Battery Pack. 1) Open the door. - Page 7 4) Place the Enclosure on the Wall Bracket A. 6) Put the Wall Bracket B in the place as below images and tighten the M5 bolts with a torque of 5N·m(3.7lb · ft). Wall Bracket A M5L10 Bolt Wall Bracket A Wall Bracket B Wall Note...
- Page 8 enblock E15 (BPU + 5 Battery Packs) 8) Check if the Circuit Breaker of the BPU is 'OFF'. Connect the power connectors in order. enblock E15 : > > > > > enblock E12 : > > > > When connecting the Power Connector, press the Gray Retainer until you hear a “Click”...
- Page 9 Note 10) Connect the Communication Cable in order If the Power Connector is connected while the Circuit Breaker of the BPU is ‘ON’ , the enblock E15 : > > > > product may be damaged. enblock E12 : > >...
- Page 10 enblock E12 (BPU + 4 Battery Packs) 12) Connect the Inverter Power Cables. ⓐ Unlock the Gland Cap. ⓑ Take the Seal out from the Gland and insert the Cables into the Gland Cap and Seal. ⓒ Insert the Cables into the Gland Body. about : 360mm (14.2") ※...
- Page 11 Note 16) Scan the QR code to register the product in the app. - Communication cable Max. cable length: 35ft(10m), Cable type: 0.326~0.823mm ⓐ Scan the Enclosure QR code attached on the outside of the Door. (18~22AWG/Cable Outer Diameter of Jacket and Ethernet ∅5~6mm (∅0.2~0.24")) ⓑ...
-
Page 12: Cable Connections
2.7 Cable connections 2.7.2 How to crimp the IPI power cable terminal 1) Crimp Preparation A. Strip the cable to 7-8mm (0.27~0.32") with wire stripper. 7~8mm (0.27~0.32") 7~8mm (0.27~0.32") 1 Ethernet communication cable B. Cut the reel part of the terminal (using nippers, etc.) 2 N.C 7~8mm (0.27~0.32") 3 RJ45 connector for inverter communication cable... -
Page 13: Commissioning
* The connector housing has labels attached on the left and right sides, so please assemble the terminals in the correct position. Note This is the standard LED indicators of the enblock E, and please note that the state may be different depending on the matching inverter. -
Page 14: Installation Process For Monitor App
If the LED lights stay off, this indicates FAULT or a failure to operate, do not use the 3.3 Shutting off the battery pack battery system and contact LG Energy Solution or your distributor. Shut off the battery pack through the following steps: 1. -
Page 15: Troubleshooting
HQ (KOR) / When a fault is reported, the inverter immediately terminates operation. Chungcheongbuk-do, South Korea Other Regions If battery pack is not working correctly and the issue persists, contact LG Email essservice@lgensol.com Energy Solution regional contact service Point. 19481 San Jose Ave City of Industry, CA Address 91748, U.S.A... - Page 16 HINWEIS Die in diesem Handbuch enthaltenen Informationen sind zum Zeitpunkt der Veröffentlichung korrekt. Dieses Handbuch kann jedoch ohne vorherige Ankündigung geändert werden. Darüber hinaus dienen die Abbildungen in diesem Handbuch lediglich der Erläuterung von Systemkonfigurationskonzepten und Installationsanweisungen. Bitte beachten Sie, dass das gezeigte Bild nur zur Veranschaulichung dient. Inhaltsverzeichnis 1 Sicherheit ························································17 1.1 Symbole ················································································································...
-
Page 17: Sicherheit
1 Sicherheit • Die Entsorgung der Batterie sollte von einem Experten mit Fachkenntnissen und Erfahrung in elektrischer Sicherheit und Umweltsicherheit gemäß den örtlichen Vorschriften in dafür vorgesehenen Abfallentsorgungseinrichtungen unter Verwendung 1.1 Symbole sicherer und geeigneter Methoden durchgeführt werden. • Die Batterie kann nicht wiederverwendet werden. Vorsicht, Stromschlaggefahr 1.3 Etikett Nicht in der Nähe von brennbaren oder explosiven Mate-... -
Page 18: Installation
Kabelbinder (5 Stück) IPI-Steckergehäuse (1 Stück) 2.1 Packungs Inhalt 2.1.1 Inhalt des Batteriesystempakets Diese Artikel sind im enblock E-Batteriesystempaket enthalten. Stromkabel (1 Stück) IPI-Anschlussklemme (4 Stück) • Gehäusepaket (*: Artikelkarton) 2.2 Grundlegende Anleitung zur Hebung Informationen zum Heben und Tragen der Batterieüberwachungs- und Schutzeinheit und des Batteriepakets während der Installation finden Sie... -
Page 19: Installationsorte
• BPU - Handhabungsposition Wand BPU Gewichtt : 4kg (8.8 lb) 2 " ) ( 1 . ( 2 " ( 2 8 • Handhabungsposition des Gehäuses " ) Wenn die Tür geschlossen ist Wand Gehäusegewicht : 50kg (110.2 lb) ( 1 . -
Page 20: Erforderliche Werkzeuge Und Sicherheitsausrüstung
2.5 Erforderliche Werkzeuge und Sicherheitsausrüstung 2.6 Installation der Batterie Für die Installation der Batterie sind die folgenden Werkzeuge erforderlich: ACHTUNG Stellen Sie sicher, dass der Wechsel- und Gleichstrom des Wechselrichters ausgeschaltet und getrennt ist, bevor Sie das Stromkabel an den Akku anschließen. 1) Die Tür öffnen. - Page 21 Hinweis 6) Platzieren Sie die Wandhalterung B wie in den Abbildungen unten gezeigt und ziehen Sie die M5-Schrauben mit einem Bitte erwerben Sie die M10-Ankerbolzen separat. Sie sind nicht im Paket enthalten. Drehmoment von 5 N·m (3,7 lb · ft) fest. M5L10 Bolzen 4) Platzieren Sie das Gehäuse auf der Wandhalterung A.
- Page 22 enblock E15 (BPU + 5 Batterien) 8) Überprüfen Sie, ob der Leistungsschalter der BPU ausgeschaltet ist. Schließen Sie die Stromanschl sse der Reihe nach an. > > > > > enblock E15 : > > > > enblock E12 : Drücken Sie beim Anschließen des Stromsteckers auf die graue Halterung, bis Sie ein “Klick”-Geräusch hören.
- Page 23 HInweis 10) Schließen Sie das Kommunikationskabel der Reihe nach an Wenn der Stromanschluss angeschlossen wird, während der Schutzschalter der BPU enblock E15 : > > > > eingeschaltet ist, kann das Produkt beschädigt werden. enblock E12 : > > > 9) Ordnen Sie die Kabel an, indem Sie sie an den Kabelhalter ※...
- Page 24 enblock E12 (BPU + 4 Batterien) 12) Schließen Sie die Stromkabel des Wechselrichters an. ⓐ Entriegeln Sie die Verschraubungskappe. ⓑ Nehmen Sie die Dichtung aus der Verschraubung und führen Sie die Kabel in die Verschraubungskappe und die Dichtung ein. ⓒ Die Kabel in den Verschraubungskörper einführen ungefähr: 360 mm (14,2 Zoll) ※...
- Page 25 HInweis 16) Scannen Sie den QR-Code, um das Produkt in der App zu registrieren. - Kommunikationskabel max. Kabellänge: 35 Fuß (10m), Kabeltyp: 0,326~0,823mm (18~22AWG/Kabelaußendurchmesser von Mantel und Ethernet ∅5~6mm ⓐ Scannen Sie den an der Außenseite der Tür angebrachten Gehäuse- (∅0.2~0.24Zoll)) QR-Code.
-
Page 26: Kabelverbindungen
2.7 Kabelverbindungen 2.7.2 Crimpen des IPI-Stromkabelanschlusses 1) Crimp Vorbereitung A. Isolieren Sie das Kabel mit einer Abisolierzange auf 7~8mm (0,27~0,32 Zoll) ab. 7~8mm (0.27~0.32") 1 Ethernet Kommunikationskabel 7~8mm (0.27~0.32") 2 N.C B. Schneiden Sie den Spulenteil des Terminals ab (mit einer Zange usw.) 3 RJ45 Stecker für Wechselrichter-Kommunikationskabel. -
Page 27: Commissioning
* Am Steckergehäuse sind auf der linken und rechten Seite Etiketten angebracht. Montieren Sie die Anschlüsse daher bitte in der richtigen Position. Dies sind die Standard-LED-Anzeigen des Enblock E. Bitte beachten Sie, dass der Zustand je nach passendem Wechselrichter unterschiedlich sein kann. -
Page 28: Installationsprozess Für Die Monitor-App
Betriebsausfall hin. Verwenden Sie das Batteriesystem nicht und wenden Sie sich an Schalten Sie die Batterie mithilfe der folgenden Schritte aus: LG Energy Solution oder Ihren Händler. 1. Schalten Sie den Wechselrichter aus. 2. Öffnen Sie die Abdeckung des Leistungsschalters. (siehe 3.3 Hinweis) 3.2 Installationsprozess für die Monitor-App... -
Page 29: Fehlerbehebung
Chungcheongbuk-do, South Korea Andere Regionen Wenn der Akku nicht richtig funktioniert und das Problem weiterhin Email essservice@lgensol.com besteht, wenden Sie sich an den regionalen Kontaktservicepunkt von LG 19481 San Jose Ave City of Industry, CA Energy Solution. Adresse 91748, U.S.A... - Page 30 AVVISO Le informazioni incluse in questo manuale sono corrette al momento della pubblicazione. Tuttavia, questo manuale è soggetto a modifiche senza preavviso. Inoltre, le illustrazioni nel manuale sono intese solamente per illustrare i concetti per la configurazione del sistema e per le istruzioni per l’installazione. Nota bene che le immagini mostrate sono intese a puro scopo illustrativo.
-
Page 31: Sicurezza
1 Sicurezza • Conservare il prodotto in un ambiente pulito, senza polvere, sporco e detriti. • Lo smaltimento della batteria deve essere eseguito da un esperto 1.1 Simboli specializzato con esperienza in sicurezza elettrica e ambientale, secondo le regolamentazioni locali, presso una struttura autorizzata ed utilizzando metodi sicuri ed appropriati. -
Page 32: Installazione
Alloggio Connettore IPI 2.1 Contenuto della confezione (1c) 2.1.1 Contenuto del sistema batteria Questi articoli sono inclusi nel sistema enblock E batteria. • Confezione della custodia (*: Box Articolo) Cavo Aliment. (1c) Terminale connett. IPI (4c) 2.2 Guida base sollevamento Riferirsi alla guida qui sotto per il sollevamento e il trasporto della Battery Monitoring &... -
Page 33: Luogo Installazione
• Posizione gestione BPU 2.4 Spazio Lo spazio raccomandato per il lato destro, sinistro e per la parte superiore del prodotto è mostrato nella figura per la ventilazione e la comodità di installazione. Assicurarsi di avere 700mm di spazio alla porta centrale per poterla aprire. Peso BPU : 4kg (8.8 lb) Muro 2 "... -
Page 34: Strumenti Richiesti Ed Attrezzatura Di Sicurezza
2.5 Strumenti richiesti ed attrezzatura di sicurezza 2.6 Installazione della batteria Sono richiesti i seguenti strumenti per installare la batteria: ATTENZIONE Assicurarsi che l’invertitore AC e DC siano spenti e scollegati prima di collegare il Cavo di Alimentazione alla batteria. 1) Aprire la porta. - Page 35 4) Piazzare la custodia sulla Staffa A. 6) Piazzare la Staffa B come mostrato sotto e stringere i bulloni M5 con una chiave di 5N·m(3.7lb · ft). Staffa A Bull. M5L10 Staffa A Staffa B Muro Note Riferirsi alla sezione 2.4 spazio per le istruzioni dell’installazione. 7) Installare la Batteria ed il BPU.
- Page 36 enblock E15 (BPU + 5 Batterie) 8) Controllare che l’interruttore del BPU sia su 'OFF'. Collegare i connettori in ordine. enblock E15 : > > > > > enblock E12 : > > > > Per collegare il Connettore di Alimentazione, premere il Fermo Grigio fino a quando non senti un “Click”.
- Page 37 Note 10) Collegare il Cavo Comunicazione in ordine Se il Connettore di Alimentazione è collegato mentre l’interruttore del BPU è su ‘ON’ , enblock E15 : > > > > il prodotto potrebbe essere danneggiato. enblock E12 : > > >...
- Page 38 enblock E12 (BPU + 4 Batterie) 12) Collegare cavi alimentazione invertitore. ⓐ Sblocca il cappuccio. ⓑ Rimuovere il sigillo dall’incasso ed inserire i cavi nel cappuccio e nel sigillo. ⓒ Inserire i cavi nell’incasso. circa : 360mm (14.2") ※ ⓓ Stringere i terminali nei cavi ed inserire il connettore. Connettore Connettore (riferirsi a sezione 2.7.2 Come stringere i cavi alimentazione IPI)
- Page 39 Note 16) Scannerizza il QR code per registrare il prodotto nella app. - Cavo comunicazione Max. lunghezza: 35ft(10m), Tipo cavo: 0.326~0.823mm ⓐ Scannerizza il QR code sulla parte esterna della porta. (18~22AWG/Diametro esterno del Jacket e Ethernet ∅5~6mm (∅0.2~0.24")) ⓑ Scannerizza il QR code del BPU. - Acquistare i Cavi Comunicazione Esterna separatamente.
-
Page 40: Collegamento Cavi
2.7 Collegamento cavi 2.7.2 Come piegare terminale alimentazione IPI 1) Preparazione A. Sguainare il cavo di 7-8mm (0.27~0.32") con una pinza spelafili. 7~8mm (0.27~0.32") 7~8mm (0.27~0.32") 1 Cavo comunicazione Ethernet B. Tagliare il terminale (usando forbici, ecc.) 2 N.C 7~8mm (0.27~0.32") 3 Connettore RJ45 per il cavo invertitore 4 Connettore 8P per alimentazione intra-pack 5 Connettore IPI alimentazione invertitore... -
Page 41: Commissionamento
3 Commissionamento 3) Piegare l’isolante • Posizionare il cavo sulla parte dell’isolante e piegarlo con una pinza. 3.1 Indicatori LED Verde Rosso • Piegare in posizione Ⓓ (50~60A) (Basato sulla pinza IWS-5100A) • Piegare facendo forza come per il conduttore Gli indicatori sulla parte superiore della batteria mostrano ciascun stato. -
Page 42: Processo Di Installazione Della Monitor App
Se le luci dei LED non si accendono vuol dire che c’ è un GUASTO, non usare la batteria 3.3 Spegnimento della batteria e contattare la LG Energy Solution o il tuo distributore. Spegnere la batteria seguendo questi step: 1. Spegnere l’invertitore. -
Page 43: Risoluzione Problemi
Email essservice@lgensol.com Se una batteria non opera correttamente ed il problema persiste, 19481 San Jose Ave City of Industry, CA contattare il service point regionale della LG Energy Solution. Indirizzo 91748, U.S.A Telefono +1 888 375 8044 4.1.1 Check List Post-Installazione... - Page 44 AVISO La información contenida en este manual es correcta al momento de su publicación. Sin embargo, este manual de usuario está sujeto a modificaciones sin previo aviso. Las ilustraciones de este manual están diseñadas exclusivamente para ayudar a explicar los conceptos de la configuración del sistema y las instrucciones de instalación. Todas las imágenes del manual son solo guías ilustrativas.
-
Page 45: Seguridad
1 Seguridad • Almacenar lejos del alcance de niños y animales. • Almacene el producto en un ambiente limpio, libre de polvo, suciedad y residuos. 1.1 Símbolos • La eliminación de la batería debe ser llevada a cabo por un experto con conocimientos y experiencia en seguridad eléctrica y medioambiental en instalaciones designadas para la eliminación de residuos utilizando Precaución, riesgo de descarga eléctrica... -
Page 46: Instalación
2.1 Contenidos del paquete (1 pieza) 2.1.1 Contenidos del paquete del sistema de baterías Estos elementos se incluyen en el paquete del sistema de baterías enblock E. • Paquete de la carcasa (*: Caja de artículos) Cable de alimentación Terminal de conexión de IPI (4 piezas) (1 pieza) 2.2 Guía básica de levantamiento... -
Page 47: Ubicaciones De Instalación
• Posición de manejo del BPU Pared Peso del BPU : 4kg (8.8 lb) 2 " ) ( 1 . ( 2 " ( 2 8 • Posición de manejo de la carcasa " ) Con la puerta cerrada Pared Peso de la carcasa : 50kg (110.2 lb) ( 1 . -
Page 48: Herramientas Y Equipos De Protección Necesarios
2.5 Herramientas y equipos de protección necesarios 2.6 Instalación del bloque de batería Necesitará estas herramientas para instalar el bloque de batería: PRECAUCIÓN Asegúrese de que los Inversores CA y CC estén apagados y desconectados antes de conectar el cable de alimentación al bloque de batería. 1) Abra la puerta. - Page 49 4) Ubique la carcasa en el Soporte de pared A. 6) Coloque el soporte de pared B en el lugar indicado en las imágenes siguientes y apriete los tornillos M5 con un par de Soporte de apriete de 5N·m(3.7lb · ft). pared A Tornillo M5L10 Sop.
- Page 50 enblock E15 (BPU + 5 bloques de batería) 8) Compruebe si el disyuntor de la BPU es 'OFF'. Conecte los conectores de alimentaci n en orden. enblock E15 : > > > > > enblock E12 : > > > >...
- Page 51 Nota 10) Conecte el cable de comunicación en orden El producto puede dañarse si el conector de alimentación está conectado mientras el enblock E15 : > > > > disyuntor del BPU está en is ‘ON’ . enblock E12 : >...
- Page 52 enblock E12 (BPU + 4 bloques de batería) 12) Conecte los cables de alimentación del inversor. ⓐ Abra la tapa del prensaestopas. ⓑ Retire el sello del prensaestopas e inserte el cable en la tapa del prensaestopas y el sello. ⓒ...
- Page 53 Nota 16) Escanee el QR para registrar el producto en la aplicación. - Longitud máxima del cable de comunicación: 35ft(10m), tipo: 0.326~0.823mm ⓐ Escanee el QR de la carcasa que se encuentra en la puerta. (18~22AWG/ Diámetro exterior de la cubierta del cable y Ethernet ∅5~6mm (∅0.2~0.24")) ⓑ...
-
Page 54: Conexión Del Cable
2.7 Conexión del cable 2.7.2 Cómo crimpar el terminal del cable de ali- mentación IPI 1) Preparación A. Pele el cable a 7-8mm (0.27~0.32") con el pelacables. 7~8mm (0.27~0.32") 1 Cable de comunicación Ethernet 7~8mm (0.27~0.32") 2 N.C B. Corte la parte de la bobina del terminal (con tenazas, etc.) 3 Conector RJ45 para el cable de comunicación del inversor 7~8mm (0.27~0.32") 4 Conector 8P para cable de comunicación intrapack... -
Page 55: Puesta En Marcha
* La carcasa del conector tiene etiquetas a la derecha y a la izquierda, úselas para montar los terminales en la posición correcta. Nota Estos son los indicadores LED estándar del enblock E, tenga en cuenta que el estado puede ser diferente según el inversor. -
Page 56: Proceso De Instalación Para La App De Monitoreo
Si las luces LED permanecen apagadas, hay un FALLO o error de funcionamiento, no 3.3 Apagar el bloque de batería utilice el sistema de baterías y póngase en contacto con LG Energy Solution o con su distribuidor. Para apagar el bloque de batería, siga estos pasos: 1. -
Page 57: Resolución De Problemas
Si el bloque de batería parece estar dañado, entre Para obtener más información acerca de la resolución de problemas, ※ en contacto con el punto de contacto de servicio regional de LG Energy consulte el manual completo de instalación. Solution o su distribuidor. - Page 60 Keep this manual for later use. © 2023 LG Energy Solution ESS Battery Division PARC1, 108, Yeoui-daero, Yeongdeungpo-gu, Seoul, Republic of Korea, 07335 https://www.lghomebattery.com http://www.lgensol.com...
Need help?
Do you have a question about the enblock E and is the answer not in the manual?
Questions and answers