Advertisement
Quick Links
Advertisement

Related Manuals for Extremis Panigiri combo


Summary of Contents for Extremis Panigiri combo
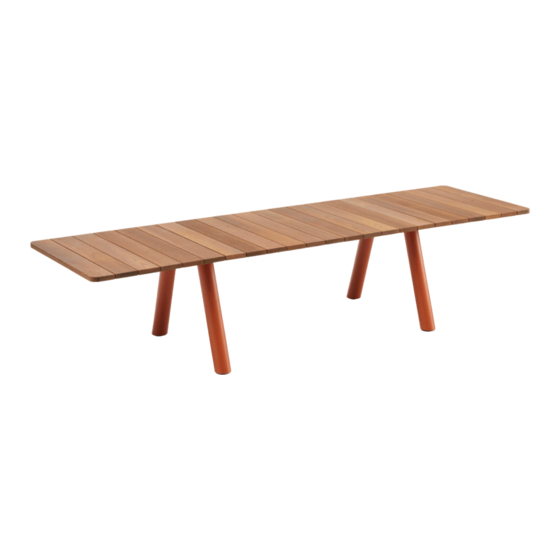
- Page 1 Panigiri combo picnic table...
- Page 2 IMPORTANT! RETAIN FOR FUTURE REFERENCE: READ CAREFULLY.
- Page 4 Table of contents Choose your configuration Assembly Panigiri combo Assembly Panigiri picnic Assembly Panigiri table Optional: add aditional module(s) ...
- Page 5 Table of contents Optional: bench alignment Optional: feet adjustment Mounting kit Warnings - Text instructions - Maintenance This is an interactive PDF You can easily navigate through this manual, allowing you to smoothly jump from one page to the other.
- Page 6 Choose your configuration...
- Page 7 Panigiri combo (base module) N° 13 - 17 N° 4 - 5 - 6 45’ Put the tabletop center frame on two trestles or on a protected surface Picnic leg Table leg 7 - Panigiri combo...
- Page 8 Choose where you want to place the picnic legs (with bench) or table legs 8 - Panigiri combo...
- Page 9 Do not tighten! PNG150 per leg Do this for all four legs 1 x M8x16 1 x M8 1 x M8x16 Turn the table Do not tighten the bolts yet! 9 - Panigiri combo...
- Page 10 Do not tighten! Position the frame connector & insert the bolt (through the leg & frame) Do this on all four corners! PNG147 4 x frame connector 4 x M8x16 10 - Panigiri combo...
- Page 11 Optional Go to page 45 if you want to extend your table with an additional module Otherwise continue with step 7 on the next page. 11 - Panigiri combo...
- Page 12 Hold the end frame Make sure the two engraved lines (on the bottom of the end frame) match the ones on the center frame 12 - Panigiri combo...
- Page 13 Do this for both legs 1 x M8x16 1 x M8 1 x M8x16 Do not Hold the tighten! end frame PNG150 per leg Attach the frame connectors (step 6) 1 x M8x16 Do this for both legs 13 - Panigiri combo...
- Page 14 Hold the end frame Do not tighten! PNG148 Connect the frames in the center 2 x M8 2 x M8x16 14 - Panigiri combo...
- Page 15 Repeat steps 7 - 9 for the other end frame 11a. Start tightening the bolts on the side of the engraved lines ! Tighten carefully! 8 Nm Excessive force may 4kg/8,8lb damage the coating! MAX! 15 - Panigiri combo...
- Page 16 11b. Lift the end frame up while tightening the bolts & nuts in the middle of the frames Tighten carefully! 8 Nm Excessive force may 4kg/8,8lb damage the coating! MAX! 16 - Panigiri combo...
- Page 17 11c. Tighten all bolts! Don’t forget the bolts of the frame connectors Tighten carefully! 8 Nm Excessive force may 4kg/8,8lb damage the coating! MAX! 17 - Panigiri combo...
- Page 18 Connect the tabletop transitions between the end frames and center frame - Tighten these bolts! PNG149 4 x segment connector 8 x M6x6 OPTIONAL Go to page 66 if you want to adjust the height of the feet 18 - Panigiri combo...
- Page 19 Do this for all benches PNG115 per leg 4 x M8x16 OPTIONAL Go to page 63 if you want to optimize the alignment of multiple benches 19 - Panigiri combo...
- Page 20 Panigiri picnic (base module) N° 13 - 17 N° 4 - 5 - 6 45’ Put the tabletop center frame on two trestles or on a protected surface Picnic leg 20 - Panigiri picnic...
- Page 21 21 - Panigiri picnic...
- Page 22 Do not tighten! PNG150 per leg Do this for all four legs 1 x M8x16 1 x M8 1 x M8x16 Turn the table Do not tighten the bolts yet! 22 - Panigiri picnic...
- Page 23 Do not tighten! Position the frame connector & insert the bolt (through the leg & frame) Do this on all four corners! PNG147 4 x frame connector 4 x M8x16 23 - Panigiri picnic...
- Page 24 Optional Go to page 45 if you want to extend your table with an additional module Otherwise continue with step 7 on the next page. 24 - Panigiri picnic...
- Page 25 Hold the end frame Make sure the two engraved lines (on the bottom of the end frame) match the ones on the center frame 25 - Panigiri picnic...
- Page 26 Do not Hold the tighten! end frame PNG150 per leg Do this for both legs 1 x M8x16 1 x M8 1 x M8x16 Do not Hold the tighten! end frame PNG150 per leg Attach the frame connectors (step 6) 1 x M8x16 Do this for both legs 26 - Panigiri picnic...
- Page 27 Hold the end frame Do not tighten! PNG148 Connect the frames in the center 2 x M8 2 x M8x16 27 - Panigiri picnic...
- Page 28 Repeat steps 7 - 9 for the other end frame 11a. Start tightening the bolts on the side of the engraved lines ! Tighten carefully! 8 Nm Excessive force may 4kg/8,8lb damage the coating! MAX! 28 - Panigiri picnic...
- Page 29 11b. Lift the end frame up while tightening the bolts & nuts in the middle of the frames Tighten carefully! 8 Nm Excessive force may 4kg/8,8lb damage the coating! MAX! 29 - Panigiri picnic...
- Page 30 11c. Tighten all bolts! Don’t forget the bolts of the frame connectors Tighten carefully! 8 Nm Excessive force may 4kg/8,8lb damage the coating! MAX! 30 - Panigiri picnic...
- Page 31 Connect the tabletop transitions between the end frames and center frame - Tighten these bolts! PNG149 4 x segment connector 8 x M6x6 OPTIONAL Go to page 66 if you want to adjust the height of the feet 31 - Panigiri picnic...
- Page 32 Do this for all benches PNG115 per leg 4 x M8x16 OPTIONAL Go to page 63 if you want to optimize the alignment of multiple benches 32 - Panigiri picnic...
- Page 33 Panigiri table (base module) N° 13 - 17 N° 4 - 5 - 6 45’ Put the tabletop center frame on two trestles or on a protected surface Table leg 33 - Panigiri table...
- Page 34 34 - Panigiri table...
- Page 35 Do not tighten! PNG150 per leg Do this for all four legs 1 x M8x16 1 x M8 1 x M8x16 Turn the table Do not tighten the bolts yet! 35 - Panigiri table...
- Page 36 Do not tighten! Position the frame connector & insert the bolt (through the leg & frame) Do this on all four corners! PNG147 4 x frame connector 4 x M8x16 36 - Panigiri table...
- Page 37 Optional Go to page 45 if you want to extend your table with an additional module Otherwise continue with step 7 on the next page. 37 - Panigiri table...
- Page 38 Hold the end frame Make sure the two engraved lines (on the bottom of the end frame) match the ones on the center frame 38 - Panigiri table...
- Page 39 Do not Hold the tighten! end frame PNG150 per leg Do this for both legs 1 x M8x16 1 x M8 1 x M8x16 Do not Hold the tighten! end frame PNG150 per leg Attach the frame connectors (step 6) 1 x M8x16 Do this for both legs 39 - Panigiri table...
- Page 40 Hold the end frame Do not tighten! PNG148 Connect the frames in the center 2 x M8 2 x M8x16 40 - Panigiri table...
- Page 41 Repeat steps 7 - 9 for the other end frame 11a. Start tightening the bolts on the side of the engraved lines ! Tighten carefully! 8 Nm Excessive force may 4kg/8,8lb damage the coating! MAX! 41 - Panigiri table...
- Page 42 11b. Lift the end frame up while tightening the bolts & nuts in the middle of the frames Tighten carefully! 8 Nm Excessive force may 4kg/8,8lb damage the coating! MAX! 42 - Panigiri table...
- Page 43 11c. Tighten all bolts! Don’t forget the bolts of the frame connectors Tighten carefully! 8 Nm Excessive force may 4kg/8,8lb damage the coating! MAX! 43 - Panigiri table...
- Page 44 Connect the tabletop transitions between the end frames and center frame - Tighten these bolts! PNG149 4 x segment connector 8 x M6x6 OPTIONAL Go to page 66 if you want to adjust the height of the feet 44 - Panigiri table...
- Page 45 Optional: add additional module(s) 1. Choose where to mount your legs Option 1 Base module Option 2 Choose option 1 or 2 to extend your base module. Take into consideration that the engraved lines always align 45 - Additional modules...
- Page 46 Put the tabletop center frame on two trestles or on a protected surface 46 - Additional modules...
- Page 47 3a. Additional picnic module Choose where to mount your picnic legs - Left or right 3b. Additional table module Choose where to mount your table legs - Left or right 47 - Additional modules...
- Page 48 Do not tighten! PNG150 per leg Do this for both legs 1 x M8x16 1 x M8 1 x M8x16 Turn the table Do not tighten the bolts yet! 48 - Additional modules...
- Page 49 Make sure the two engraved lines (on the bottom of the frame) match the ones on the center frame 49 - Additional modules...
- Page 50 Do not tighten! PNG150 per leg Do this for both legs 1 x M8x16 1 x M8 1 x M8x16 50 - Additional modules...
- Page 51 Do not tighten! PNG150 per leg Attach the frame connectors 1 x M8x16 Do this for both legs 51 - Additional modules...
- Page 52 Do not tighten! PNG148 Connect the frames in the center 2 x M8x16 2 x M8x16 52 - Additional modules...
- Page 53 Do not tighten! Position the frame connector & insert the bolt (through the leg & frame) Do this on all four corners! PNG147 2 x frame connector 2 x M8x16 53 - Additional modules...
- Page 54 Optional Go back to page 46 if you want to add more additional modules. Repeat all steps of the additional modules Otherwise continue with step 12 on the next page. 54 - Additional modules...
- Page 55 Hold the end frame Make sure the two engraved lines (on the bottom of the end frame) match the ones on the center frame 55 - Additional modules...
- Page 56 13a. Do not Hold the tighten! end frame PNG150 per leg Do this for both legs 1 x M8x16 1 x M8 1 x M8x16 13b. Do not Hold the tighten! end frame PNG150 per leg Attach the frame connectors 1 x M8x16 Do this for both legs 56 - Additional modules...
- Page 57 Hold the end frame Do not tighten! PNG148 Connect the frames in the center 2 x M8 2 x M8x16 57 - Additional modules...
- Page 58 15 . Repeat steps 12 - 14 for the other end frame 16a. Start tightening the bolts on the side of the engraved lines ! Tighten carefully! 8 Nm Excessive force may 4kg/8,8lb damage the coating! MAX! 58 - Additional modules...
- Page 59 16b. Lift the end frame up while tightening the bolts & nuts in the middle of the frames Tighten carefully! 8 Nm Excessive force may 4kg/8,8lb damage the coating! MAX! 59 - Additional modules...
- Page 60 16c. Tighten all bolts! Don’t forget the bolts of the frame connectors Tighten carefully! 8 Nm Excessive force may 4kg/8,8lb damage the coating! MAX! 60 - Additional modules...
- Page 61 Connect the tabletop transitions between the end PNG149 frames and center frame, also connect the center frames to each other 4 x segment connector 8 x M6x6 Tighten these bolts! OPTIONAL Go to page 66 if you want to adjust the height of the feet 61 - Additional modules...
- Page 62 Do this for all benches PNG115 per leg 4 x M8x16 OPTIONAL Go to page 63 if you want to optimize the alignment of multiple benches 62 - Additional modules...
- Page 63 Optional: bench alignment In case you want to optimize the alignment of multiple benches, lightly unscrew all bolts (do not remove the bolts!) 63 - Bench alignment...
- Page 64 PNG115 per bench 2 x M10x12 64 - Bench alignment...
- Page 65 PNG115 per bench Fix both set screws with the nuts 2 x M10 Re-tighten all bolts! 65 - Bench alignment...
- Page 66 Optional: feet adjustment To adjust the height of the feet, make sure you rotate the nut and not the feet 66 - Feet adjustment...
- Page 67 Min. 1,5 cm Max. 4 cm 67 - Feet adjustment...
- Page 68 Mounting kit 4 x M8x16 4 x M8 4 x M8x16 2 x M8 2 x M8x16 PNG150 PNG148 Mounting kit to fix Mounting kit to fix the one set of legs frames to each other 4 x M6x6 2 x segment connector PNG149 Mounting kit...
- Page 69 Warnings Text instructions Maintenance Warnings Assembly text instructions Maintenance ...
- Page 70 • Thorough cleaning with Extremis Wood Cleaner. • We strongly recommend that you treat your wood with wood oil to protect it from stains - Small cracks and crevices can also appear as...
- Page 71 part of this process. We strongly advise everyone to treat the furniture with our Wood Protector. It is best to repeat this treatment each year. Galvanized steel • Galvanization will become less shiny when used outdoors. • Flame retarding - NEN-EN13501-1 A1 - Class A1 products will not contribute to fire in any stage, including fully developed fire.
- Page 72 Sunbrella® • Not waterproof, store inside! • Shake or brush off loose dirt immediately. • UV color fasteness: 7/8 (ISO 105-B02). 72 - Warnings...
- Page 73 Assembly text instructions 1 - 2 - 3 - ... Take a look at the drawings, starting from page 7 Panigiri combo (base module) (p7) 1. Put the tabletop center frame on two trestles or on a protected surface. 2. The difference between a picnic and table leg.
- Page 74 do not tighten the bolt yet! 9. Still hold the end frame while connecting the end frame & center frame by inserting two M8x16 bolts with M8 nuts, but do not tighten the bolts yet! 10. Repeat step 7 - 9 for the other end frame. 11.
- Page 75 Make sure the two engraved lines (on the bottom of the end frame) match the ones on the center frame. 8. a. Hold the end frame while attaching both legs to the end frame by inserting one M8x16 bolt with one M8 washer from the bottom side and one M8x16 bolt from the side as shown in the diagram, but do not tighten the bolts yet! b.
- Page 76 5. Now turn the table, but do not tighten the bolts yet! 6. Position four frame connectors halfway in the center frame with the chamfered side facing downwards as show in the diagram and attach with one M8x16 bolt each, but do not tighten the bolt yet! Optional: Go to page 45 if you want to extend your table with an additional module.
- Page 77 Optional: add additional module(s) (p45) 1. Choose where to mount your legs. Choose option 1 or 2 to extend your base module. Take into consideration that the engraved lines always align! 2. Put the tabletop center frame on two trestles or on a protected surface.
- Page 78 13. a. Hold the end frame while attaching both legs to the end frame by inserting one M8x16 bolt with one M8 washer from the bottom side and one M8x16 bolt from the side as shown in the diagram, but do not tighten the bolts yet! b.
- Page 79 Optional: bench alignment (p63) 1. In case you want to optimize the alignment of multiple benches, lightly unscrew all bolts, but do not remove them! 2. Insert the set screws as shown in the diagram. Then adjust the left or right set screw according to how you want to align the bench.
- Page 80 OILING Twice a year Before first use and/or after cleaning and sanding, we strongly recom- mend treating the wood with Extremis Wood Protector to protect it from dirt, moisture and UV rays. DAY TO DAY CLEANING Regularly and after every use Schedule regular maintenance to prolong the life of your garden furnitu- re Regular maintenance ensures that the furniture always looks its best.
- Page 81 doing this just before spring and after summer if your furniture is outside all the year round. Pick one of those humid, cloudy days, as it is better for the moisture level in the wood to dry out slowly after cleaning. SANDING WOOD Every 2 years After a few years, your wood will show cracks and perhaps some distorti-...
- Page 82 Powder coating CLEANING Regularly Use Extremis Multicleaner, a 100% biodegradable detergent or common kitchen cleaning products. Avoid using aggressive products. These sur- faces are best cleaned with a neutral cleaning product diluted in water. REPAIRING DAMAGED POWDER COATING When damaged The impact of sharp objects can damage the coating.
- Page 83 area before ironing the entire fabric. DO NOT use a steamer or iron set to the steam setting. REMOVING STUBBORN STAINS Only if nothing else helps More drastic measures needed? Bleach can be used if nothing else helps. Protect the area around your Sunbrella fabric when using a bleach solution –...
- Page 84 All rights reserved. Unless otherwise specified, all designs and photographs contained in this publication are copyright protected and are the property of Extremis. No part of this publication may be copied or distributed without Extremis’ prior written consent. The names of the authors of photographs to which we do not hold rights are mentioned here. We have done our utmost to provide a...
Need help?
Do you have a question about the Panigiri combo and is the answer not in the manual?
Questions and answers