Extremis MARINA COMBO Assembly And Use Manual
Hide thumbs
Also See for MARINA COMBO:
- Assembly instructions manual (52 pages) ,
- Assembly instructions manual (40 pages) ,
- Manual (40 pages)
Table of Contents
Advertisement
Available languages
Available languages
Quick Links
Advertisement
Table of Contents

Subscribe to Our Youtube Channel
Related Manuals for Extremis MARINA COMBO


Summary of Contents for Extremis MARINA COMBO
- Page 1 © design by metrica READ INSIDE LANGUAGES ASSEMBLY INSTRUCTIONS, EN – NL – DE – FR – IT – ES HOW TO USE, USEFUL TIPS MORE FOR KEEPING YOUR TOOL FOR TOGETHERNESS IN SHAPE WWW.EXTREMIS.COM PRODUCT MARINA COMBO – FLOOR FASTENING – MAINTENANCE...
- Page 2 LANGUAGES ENGLISH P. 3 contents p. 3 assembly marina combi p. 5 assembly floor fastening p. 8 maintenance p. 10 NEDERLANDS P. 13 inhoud p. 13 montage marina combi p. 14 montage grondverankering p. 18 onderhoud p. 20 DEUTSCH P. 23 inhalt p.
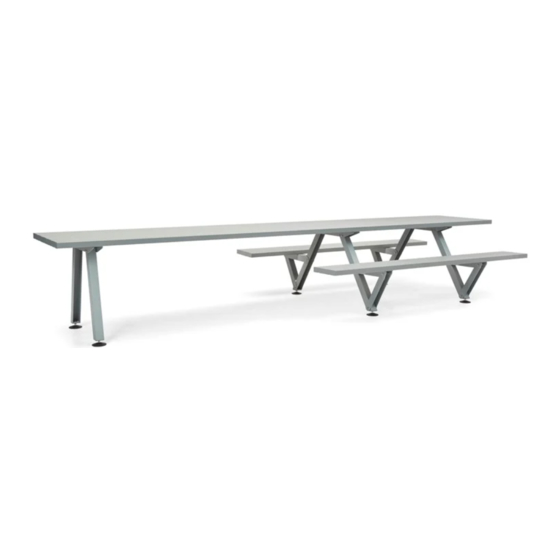
- Page 3 CONTENTS N = number of legs O = number of reinforcement profiles X = number of benches 5/6 x profiles 2 x X x profiles 2 x tabletop end piece 2 x N x bench end piece (for tabletop) (for benches) N x tabletop connection 2 x N x table leg 2 x N x table leg...
- Page 4 2 x N x M8 nut 2 x N x M8 plain 2 x N x M8x100 2 x N x foot 2 x N x 12x60 plug washer dowel screw table picnic leg combi leg contents + assembly marina combo...
- Page 5 ASSEMBLY MARINA COMBO look at p. 4 which type of WHAT YOU NEED legs you have min. 2 people no. 10 - 17 spanner no. 3 - 4 hex key min. (depending on the length of the table) 1. Insert the table legs into the tabletop connection, aligning the 3 holes, and use 12 M6 x 16 hexagon socket bolts and 12 lock nuts to fasten them.
- Page 6 ASSEMBLY MARINA COMBO 4. Now screw the adjustable feet into the legs. Repeat step 1. Insert the table legs into the tabletop connection, 1 through 4 for each table leg assembly and put them aligning the 3 holes, and use 12 M6 x 16 hexagon aside.
- Page 7 2. Insert the tabletop end piece with the lips into the slots 3. Now fasten the table leg assembly with the tabletop from left to right. Fasten them using 5/6 M5 x 12 connection to the profiles, each time at the intended countersunk bolts.
- Page 8 ASSEMBLY FLOOR FASTENING B B1 1. Mark the spot on the ground where you want to put the table. There are two anchor points per leg frame (see diagram above). L = distance between the legs B = width of the leg frame B (5 profiles) = 1100,50 mm B2 (5 profiles) = 240,25 mm L = distance between the legs...
- Page 9 3. Screw the dowel screws into the plugs so that it 4. Align the feet with the dowel screws and put the table protrudes 55 mm. on top of them. Now fasten the table to the ground using the supplied plain washers M8 & nuts M8. english...
- Page 10 The magic sponge can be used on tarpaulin fabric, plastic profiles, glass, steel, chrome, aluminium, porcelain, artificial leather and many types of floor. For more information, contact Extremis: info@extremis.be maintenance...
- Page 11 english...
-
Page 12: Table Of Contents
LANGUAGES ENGLISH P. 3 contents p. 3 assembly marina combi p. 5 assembly floor fastening p. 8 maintenance p. 10 NEDERLANDS P. 13 inhoud p. 13 montage marina combi p. 14 montage grondverankering p. 18 onderhoud p. 20 DEUTSCH P. 23 inhalt p. - Page 13 INHOUD N = aantal poten O = aantal versterkingsprofielen X = aantal banken 5/6 x profielen 2 x X x profielen 2 x eindstuk tafelblad 2 x X x eindstuk bank (voor tafelblad) (voor banken) N x tafelblad connectie 2 x N x tafelpoot 2 x N x tafelpoot 1 x N x tafelpoot 1 x N x tafelpoot...
- Page 14 OPTIONEEL GRONDVERANKERING 2 x N x moer M8 2 x N x sluitring 2 x N x stokeind 2 x N x voetje 2 x N x plug M8x100 12x60 table picnic leg combi leg inhoud + montage marina combo...
- Page 15 MONTAGE MARINA COMBI kijk op p. 12 welk type BENODIGDHEDEN poten u nodig heeft. min. 2 personen steeksleutel nr. 10 - 17 inbussleutel nr. 3 - 4 min. (naargelang de lengte van de tafel) 1. Schuif de tafelpoten in de tafelblad connectie zodat de 3 gaatjes overeen komen, en fixeer deze d.m.v.
- Page 16 4 voor elk tafelpootstel en zet ze daarna sleufopening naar boven gericht en zorg ervoor dat de even aan de kant. kruisjes naar dezelfde kant gericht zijn. Tussen elk profiel op +/- 40 cm van het uiteinde een dikte plaatje steken. montage marina combo...
- Page 17 2. Schuif het tafelblad eindstuk met de lipjes in de 3. Monteer nu het tafelpootstel met de tafelblad connectie sleufopeningen van links naar rechts. Schroef deze tegen de profielen, telkens op de voorziene plaatsen vast met 5/6 M5 x 12 verzonken boutjes. Doe dit voor met 10/12 binnenzeskantbouten M6 x 20 + de beide zijden, de andere kant van rechts naar links.
-
Page 18: Montage Grondverankering
MONTAGE GRONDVERANKERING B B1 1. Teken op de grond af waar de tafel moet komen. Per poot heb je 2 bevestigingspunten (zie tekening hierboven). L = lengte tussen poten B = breedte v/d poten B (5 profielen) = 1100,50 mm B2 (5 profielen) = 240,25 L = afstand tussen poten B (6 profielen) = 1245,50 mm... - Page 19 3. Schuif het tafelblad eindstuk met de lipjes in de 3. Monteer nu het tafelpootstel met de tafelblad connectie sleufopeningen van links naar rechts. Schroef deze tegen de profielen, telkens op de voorziene plaatsen vast met 5/6 M5 x 12 verzonken boutjes. Doe dit voor met 10/12 binnenzeskantbouten M6 x 20 + de beide zijden, de andere kant van rechts naar links.
-
Page 20: Onderhoud
MiraClean gebruikt worden op zeil, pvc, glas, staal, chroom, aluminium, porselein, kunststofleer, en diverse vloeren, artificial leather and many types of floor. Voor meer informatie, contacteer Extremis via info@extremis.be onderhoud... - Page 21 nederlands...
- Page 22 LANGUAGES ENGLISH P. 3 contents p. 3 assembly marina combi p. 5 assembly floor fastening p. 8 maintenance p. 10 NEDERLANDS P. 13 inhoud p. 13 montage marina combi p. 14 montage grondverankering p. 18 onderhoud p. 20 DEUTSCH P. 23 inhalt p.
-
Page 23: Inhalt
INHALT N = Anzahl Beine O = Anzahl Verstärkungsprofile X = Anzahl Banken 5/6 x Profile 2 x X x Profile 2 x Endstück Tischplatte 2 x N x Endstück Bank (für Tischplatte) (für Bank) N x Tischplattenverbindung 2 x N x Tischbein 2 x N x Tischbein 1 x N x Tischbein 1 x N x Tischbein... - Page 24 2 x N x Mutter M8 2 x N x flache 2 x N x stock- 2 x N x Füß 2 x N x Dübel scheiben M8 schrauben M8x100 12x60 table picnic leg combi leg inhalt + montage marina combo...
- Page 25 MONTAGE MARINA COMBO Bestimmen Sie anhand der Abbildung auf Seite 20, welche Tischfuesse Sie WAS SIE BRAUCHEN haben. min. 2 Personen Maulschlüssel Nr. 10 - 17 Inbusschlüssel Nr. 3 - 4 +/- 60 - 120 min. (abhängig von der Länge der Tisch) 1.
-
Page 26: Montage Marina Combi
Wiederholen Sie Schritt 1 bis 4 für jedes Tischbeinpaar Schlitzöffnung weist nach oben. Sorgen Sie dafür, dass und stellen Sie diese dann zur Seite. die Kreuzchen nach derselben Seite zeigen. Stecken Sie ca. 40 cm vom Ende entfernt einen Abstandhalter zwischen jedes Profil. montage marina combo... - Page 27 2. Schieben Sie das Tischplattenendstück mit den 3. Montieren Sie jetzt jedes Tischbeinpaar mit der Laschen in die Schlitzöffnungen von links nach rechts. Tischplattenverbindung mit 10/12 Schrauben Sie es mit 5/6 Senkkopfschrauben M5 x 12 Innensechskantschrauben M6 x 20 an den fest.
-
Page 28: Montage Bodenverankerung
MONTAGE BODENVERANKERUNG B B1 1. Zeichnen Sie auf dem Boden an, wo der Tisch stehen soll. Für jedes Bein benötigen Sie 2 Befestigungspunkte (siehe Zeichnung oben). L = Abstand zwischen den Beinen B = Breite der Beine B (5 Profile) = 1100,50 mm B2 (5 Profile) = 240,25 mm L = Abstand zwischen den Beinen B (6 Profile) = 1245,50 mm... - Page 29 3. Schraube die stockschrauben in den Steckern, so dass 4. Legen Sie die Füße auf die stockschrauben und stellen es 55 mm herausragt. Sie den Tisch darauf. Mit den flache scheiben M8 & mutter M8 befestigen. deutsch...
-
Page 30: Pflege
Wunderschwamm Lösung gegen hartnäckige Flecken wie Filzstifte, Fett, Abriebspuren, Kalkflecken oder Kaffee Flecken. Schwamm kann benutzt werden auf Plane, Kunststoffprofile, Glass, Stahl, Chrom, Aluminium, Porzellan, Kunstleder und viele Arten von Boden. Für weitere Informationen, wenden Sie sich Extremis: info@extremis.be pflege... - Page 31 deutsch...
- Page 32 LANGUAGES ENGLISH P. 3 contents p. 3 assembly marina combi p. 5 assembly floor fastening p. 8 maintenance p. 10 NEDERLANDS P. 13 inhoud p. 13 montage marina combi p. 14 montage grondverankering p. 18 onderhoud p. 20 DEUTSCH P. 23 inhalt p.
- Page 33 CONTENU N = nombre de pieds O = nombre de profiles de renforcement X = nombre de bancs 5/6 x profilés 2 x X x profilés 2 x latte de finition pour 2 x N x latte de finition (plateau de table) (pour bancs) plateau de table pour le banc...
- Page 34 2 x N x écrou M8 2 x N x rondelles 2 x N x vis combo/ 2 x N x pied 2 x N x cheville plates M8 goujons M8x100 12x60 table picnic leg combi leg contenu + montage marina combo...
-
Page 35: Français
MONTAGE MARINA COMBI merci de consulter la page 28 pour voir quels pieds vous avez OUTILS min. 2 personnes clé plate n° 10 - 17 clé Allen n° 3 - 4 +/- 60 - 120 min. (en fonction de la longeur de la table) 1. - Page 36 Déposez ensuite ces assemblages croix sont toutes orientées dans le même sens. Insérez de pieds un moment sur le côté. une plaquette d’épaisseur entre chaque profilé, à environ 40 cm de l’extrémité. montage marina combo...
- Page 37 2. Glissez une latte de finition pour plateau à une 3. Prenez à présent les assemblages de pieds et déposez- extrémité des profilés du plateau en insérant bien les les avec les pièces de raccord pour le plateau contre les languettes dans les gorges de gauche à...
-
Page 38: Montage Ancrage Au Sol
MONTAGE ANCRAGE AU SOL B B1 1. Marquez sur le sol l’endroit où doit venir la table. Il y a 2 points de fixation par pied (voir dessin ci-dessus). L = distance entre les pieds B = largeur des pieds B (5 profilés) = 1100,50 mm B2 (5 profilés) = 240,25 mm L = distance entre les pieds... - Page 39 3. Visser les vis combo/goujons dans les bouchons de 4. Positionnez les pieds au-dessus des vis combo/goujons manière à ce qu’il dépasse 55 mm. et posez la table dessus. Fixez avec des rondelles plates M8 et écrous M8. français...
- Page 40 Le MiraClean peut être utilisé sur bâche, PVC, verre, acier, chrome, aluminium, porcelaine, cuir synthétique et des sols divers. Pour plus d’informations, contactez Extremis: info@extremis.be entretien...
- Page 41 français...
- Page 42 LANGUAGES ENGLISH P. 3 contents p. 3 assembly marina combi p. 5 assembly floor fastening p. 8 maintenance p. 10 NEDERLANDS P. 13 inhoud p. 13 montage marina combi p. 14 montage grondverankering p. 18 onderhoud p. 20 DEUTSCH P. 23 inhalt p.
- Page 43 CONTENUTO N = numero di gambe O = numero di profilo di rinforzo X = numero di panca 5/6 x profili 2 x X x profili 2 x terminale piano del (piano del tavolo) (panca) tavolo 2 x X x terminale panca N x giunzione gamba-piano del tavolo 2 x N x gamba del tavolo 2 x N x gamba del tavolo...
- Page 44 2 x N x dado M8 2 x N x rondelle 2 x N x vite tas- 2 x N x piedino 2 x N x tappo piatte M8 sello M8x100 12x60 table picnic leg combi leg contenuto + montaggio marina combo...
- Page 45 MONTAGGIO MARINA COMBO guadri la pagina 36, NECESSARIO PER IL MONTAGGIO quale tipo di gambe avete? min. 2 personen steeksleutel nr. 10 - 17 inbussleutel nr. 3 - 4 min. (naargelang de lengte van de tafel) 1. Spingere le gambe del tavolo nell’elemento di giunzione gamba-piano del tavolo in modo da far combaciare i 3 fori e fissarle utilizzando 12 viti con esagono incassato M6 x 16 e i 12relativi dadi di sicurezza.Per prima cosa...
- Page 46 MONTAGGIO MARINA COMBO 4. Avvitare i piedini regolabili sulle gambe. Ripetere i 1. Spingere le gambe del tavolo nell’elemento di giunzione passi dall’1 al 4 per ciascuna coppia di gambe del gamba-piano del tavolo in modo da far combaciare i 3 tavolo e per il momento lasciarle da parte.
- Page 47 2. Spingere le linguette del terminale del piano del tavolo 3. Montare sui profili le coppie di gambe con la giunzione nelle scanalature de sinestra a destra. Avvitare il tutto gamba-piano del tavolo nei punti previsti utilizzando con 5/6 viti con testa svasata M5 x 12. Ripetere 10/12 viti con esagono incassato M6 x 20 + profilo di l’operazione per l’altro lato.
- Page 48 MONTAGGIO FISSAGGIO AL SUOLO B B1 1. Segnare sul pavimento i punti dove dovrà essere posizionato il tavolo. Ogni gamba viene fissata in 2 punti (vedere disegno sopra). L = distanza tra le gambe B = larghezza delle gambe B (5 profili) = 1100,50 mm B2 (5 profili) = 240,25 mm L = distanza tra le gambe B (6 profili) = 1245,50 mm...
- Page 49 3. Screw the dowel screws into the plugs so that it 4. Posizionare i piedini sopra i dowel screws e mettervi protrudes 55 mm. sopra il tavolo. Fissare il tutto con i plain washer M8 y dado M8. italiano...
- Page 50 La spugna MiraClean può essere utilizzata sulla tela cerata, sui profilati in PVC, vetro, acciaio, cromo, alluminio, porcellana, pelle sintetica ediversi tipi di pavimenti. ulteriori informazioni, contattare Extremis: info@extremis. manutenzione...
- Page 51 italiano...
- Page 52 LANGUAGES ENGLISH P. 3 contents p. 3 assembly marina combi p. 5 assembly floor fastening p. 8 maintenance p. 10 NEDERLANDS P. 13 inhoud p. 13 montage marina combi p. 14 montage grondverankering p. 18 onderhoud p. 20 DEUTSCH P. 23 inhalt p.
- Page 53 CONTENIDO N = cantidad de patas O = cantidad refuerzo perfil X = cantidad de bancos 5/6 x perfiles 2 x X x perfiles 2 x extremo de tablero 2 x X x extremo de (tablero de mesa) (banco) banco N x conexión de tablero 2 x N x pata de mesa 2 x N x pata de mesa...
- Page 54 2 x N x tuerca M8 2 x N x arandelas 2 x N x tornillos 2 x N x pie 2 x N x taquete planas M8 de palo M8x100 12x60 table picnic leg combi leg contenido + montaje marina combo...
- Page 55 MONTAJE MARINA COMBO observe la página 44, qué tipo de UTENSILOS patas tiene? min. 2 personas llave fija no. 10 - 17 llave macho hexagonal no. 3 - 4 min. (dependiendo longitud de la mesa) 1. Introduzca las patas de mesa en la conexión del tablero de tal manera que los 3 orificios se alineen, y fíjelas bien mediante 12 perno de cabeza...
- Page 56 MONTAJE MARINA COMBO 4. Ponga ahora los pies de ajuste en las patas, girándolos. 1. Introduzca las patas de mesa en la conexión del tablero Repita los pasos 1 a 4 para cada ensamblaje de las patas de tal manera que los 3 orificios se alineen, y fíjelas y guarde todo aparte.
- Page 57 2. Introduzca el extremo de tablero con las lengüetas en 3. Monte ahora el ensamblaje de las patas con la conexión las ranuras de sinistra a destra. Fíjelo bien con los de tablero contra los perfiles, cada vez en los sitios pernos empotrados M5 x 12.
- Page 58 MONTAJE ANCLAJE AL SUELO B B1 1. Dibuje en el suelo el sitio donde quiere colocar la mesa. Hay 2 puntos de fijación por pata (véase el dibujo arriba). L = distancia entre las patas B = anchura de las patas B (5 perfiles) = 1100,50 mm B2 (5 perfiles) = 240,25 mm L = distancia entre las patas...
- Page 59 3. Atornillar los Tornillos el palo en los tapones de 4. Coloque los pies encima de los tornillos de palo y manera que sobresalga 55 mm. ponga la mesa encima de ellos. Fije con los arandelas planas M8 e tuerca M8. español...
- Page 60 Se puede utilizar la esponja MiraClean en toldos, PVC, vidrio, acero, cromo, aluminio, porcelana, cuero sintético y diversos suelos. Para obtener más información, póngase n contacto con Extremis: info@extremis.be mantenimiento...
- Page 61 español...
- Page 64 W W W. E X T R E M I S .CO M All images, ideas, designs and design content are the intellectual property of Extremis and may not be copied, imitated or used, in whole or in part, without the prior written permission of Extremis.
Need help?
Do you have a question about the MARINA COMBO and is the answer not in the manual?
Questions and answers