
Subscribe to Our Youtube Channel
Related Manuals for Extremis Panigiri


Summary of Contents for Extremis Panigiri
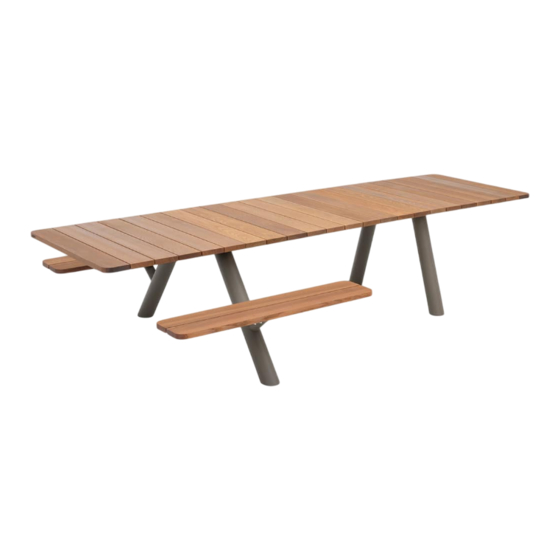
- Page 1 Panigiri Assembly instructions, how to use, useful tips for keeping MANUAL your tool for togetherness in shape. LAB194...
- Page 2 Tools for togetherness © All our designs are original creations and protected by intellectual property rights.
- Page 3 IMPORTANT! RETAIN FOR FUTURE REFERENCE: READ CAREFULLY. BELANGRIJK! LEES DIT DOCUMENT AANDACHTIG EN BEWAAR HET VOOR TOEKOMSTIGE RAADPLEGING! WICHTIG! AUFHEBEN, UM SPÄTER ETWAS NACHSEHEN ZU KÖNNEN: SORGFÄLTIG DURCHLESEN! IMPORTANT! LISEZ ATTENTIVEMENT CE MANUEL ET CONSERVEZ-LE POUR RÉFÉRENCE ULTÉRIEURE!
- Page 4 Do not use power tools!
-
Page 7: Table Of Contents
Table of contents Mounting kit Choose your configuration ..Assembly Panigiri ..Assembly benches ..Optional: add additional module(s) ..Optional: bench alignment ..Warnings – Assembly text instructions – Maintenance .. -
Page 8: Mounting Kit
Mounting kit 4 x M8x16 4 x M8 4 x M8x16 Mounting kit PNG150 to fix one set of legs 2 x frame connector 4 x M8x16 Mounting kit PNG147 to fix the frame connectors to the frames... - Page 9 2 x M8 2 x M8x16 Mounting kit PNG148 to fix the frames to each other 4 x M10 4 x M10x12 8 x M8x16 Mounting kit PNG115 to fix two benches 2 x segment connector 4 x M6x6 Mounting kit PNG149 to fix the tabletop segments to each other...
-
Page 10: Choose Your Configuration
Choose your configuration... -
Page 12: Assembly Panigiri
Assembly Panigiri N° 4 - 5 - 6 N° 13 - 17 p ..Put the tabletop centerframe on two trestless or on a protected surface Picnic leg Table leg... - Page 13 Choose where you want to place the picnic legs (with bench) or table legs...
- Page 14 PNG150 per leg Do this for all four legs 1 x M8x16 1 x M8 1 x M8x16 Do not tighten yet! Turn the table Do not tighten the bolts yet!
- Page 15 PNG147 per frame connector Do this on all four corners Do not tighten yet! 1 x M8x16...
- Page 16 Go to page 24 if you want to extend your table with an additional module Otherwise continue with step 7 (see below) Hold the endframe Make sure the two engraved lines (on the bottom of the endframe) match the ones on the centerframe...
- Page 17 Hold the endframe PNG150 per leg Do this for both legs 1 x M8x16 1 x M8 1 x M8x16 Do not tighten yet! Hold the endframe PNG150 per leg Attach the frame connectors (step 6) Do this for both legs 1 x M8x16 Do not tighten yet!
- Page 18 Hold the endframe PNG148 Connect the frames in the center 2 x M8 2 x M8x16 Do not tighten yet!
- Page 19 Repeat steps 7 - 9 for the other endframe 11a. Start tightening the bolts on the side of the engraved lines ! Tighten these bolts first! Tighten carefully! 8 Nm Excessive force may 4kg/8,8lb damage the coating! MAX!
- Page 20 11b. Lift the endframe up while tightening the bolts & nuts in the middle of the frames Tighten carefully! 8 Nm Excessive force may 4kg/8,8lb damage the coating! MAX!
- Page 21 11c. Tighten all bolts! (don’t forget the bolts of the frame connectors (see step 6 on page 16)) Tighten carefully! 8 Nm Excessive force may 4kg/8,8lb damage the coating! MAX!
- Page 22 Connect the sides of the endframes to the sides of the centerframe (in case of additional modules, also connect the centerframes) Tighten these bolts! PNG149 1 x segment connectors 2 x M6x6...
-
Page 23: Assembly Benches
Assembly benches PNG115 per leg Do this for all benches 4 x M8x16 Optional: Go to page 31 if you want to optimize the alignment of multiple benches... - Page 24 Optional: add additional picnic / table module(s) 1. Choose where to mount your legs Option 1 Base module Option 2 Choose option 1 or 2 to extend your base module. Take into consideration that the engraved lines always align...
- Page 25 Put the tabletop centerframe on two trestless or on a protected surface Additional picnic module Additional table module...
- Page 26 PNG150 per leg Do this for both legs 1 x M8x16 1 x M8 1 x M8x16 Do not tighten yet! Turn the table Do not tighten the bolts yet!
- Page 27 Make sure the two engraved lines (on the bottom of the frame) match the ones on the centerframe...
- Page 28 PNG150 per leg Do this for both legs 1 x M8x16 1 x M8 1 x M8x16 Do not tighten yet! PNG150 per leg Attach the frame connectors Do this for both legs 1 x M8x16 Do not tighten yet!
- Page 29 PNG148 Connect the frames in the center 2 x M8x16 2 x M8x16 Do not tighten yet! PNG147 per frame connector Do this on both corners Do not tighten yet! 1 x M8x16...
- Page 30 In case you want to add more additional modules, repeat all steps of the additional modules To add the endframes, go back to step 7 on page 16...
-
Page 31: Optional Bench Alignment
Optional bench alignment In case you want to optimize the alignment of multiple benches, lightly unscrew the bolts (do not remove the bolts!) - Page 32 PNG115 per bench 2 x M10x12...
- Page 33 PNG115 per bench 2 x M10 Fixate both set screws with the nuts Re-tighten all bolts!
-
Page 34: Warnings - Assembly Text Instructions - Maintenance
2. The difference between a picnic and table leg. the wood’s fibress. 3. Choose where you want to place the picnic • Thorough cleaning with Extremis Wood Cleaner. legs or table legs. Position four legs onto the • We strongly recommend that you treat your wood centerframe. - Page 35 For a thorough cleaning, we 7. Attach the legs of the centerframe by inserting can recommend our Extremis Wood Cleaner. This one M8x16 bolt & M8 washer from the bottom is a bio-degradable cleansing shampoo for wooden side and one M8x16 bolt from the side as shown furniture.
- Page 36 Needless to say we strongly Sunbrella recommend to do this once a year. Extremis Wood Protector is a 100% natural product based on linseed SPILLED LIQUIDS oil. It is colorless, but the wood will be darker after Immediately after use this treatment.
- Page 40 All rights reserved. Unless otherwise specified, all designs and photographs contained in this publication are copyright protected and are the property of Extremis. No part of this publication may be copied or distributed without Extremis’ prior written consent. The names of the authors of photographs to which we do not hold rights are mentioned here. We have done our utmost to provide a...
Need help?
Do you have a question about the Panigiri and is the answer not in the manual?
Questions and answers