Table of Contents
Advertisement
Quick Links
Advertisement
Table of Contents

Subscribe to Our Youtube Channel
Related Manuals for Icare TONOVET Pro


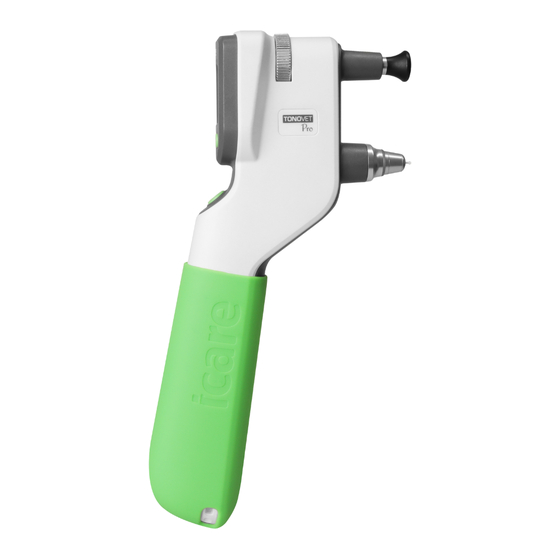
Summary of Contents for Icare TONOVET Pro
- Page 1 TONOVET Pro ENGLISH Instruction Manual...
- Page 2 Icare Finland Oy, all other trademarks are the property of their respective owners. Made in Finland. The Bluetooth® word mark and logos are registered trademarks owned by Bluetooth SIG, Inc. and any use of such marks by Icare Finland Oy is under license. Other trademarks and trade names are those of their respective owners.
-
Page 3: Table Of Contents
18.1.1 Replacing the probe base ......................18 18.1.2 Cleaning the probe base......................18 18.2 Cleaning the tonometer ........................18 18.3 Returning the iCare tonometer for service or repair ................19 18.4 Periodic safety checks ........................... 19 Symbols ................................19 Information to the user regarding the radio communication part of the device .......... 20... -
Page 4: Intended Use
The iCare TONOVET Pro tonometer is intended for veterinary use only. 2 Possible limitations of use Some conditions may cause limitations to the use of the TONOVET Pro. The effectiveness and safety of the TONOVET Pro has been evaluated for patients with healthy eyes. -
Page 5: Package Content
7. Select button 8. Measure button 6 Taking the device into use Before using the iCare TONOVET Pro tonometer for the first time, attach the wrist strap and insert the batteries. 6.1 Attaching the wrist strap 1. Thread the string loop at the end of the wrist strap through the two holes at the bottom of the device (see figure below). -
Page 6: Installing The Batteries For The First Time
6.2 Installing the batteries for the first time PRECAUTION! Remove the batteries from the battery compartment, if you do not intend to use the tonometer for a month or a longer period of time. Removing the batteries temporarily does not affect the subsequent functioning of the tonometer. -
Page 7: Changing The Setting For Different Species
(see figure). The tonometer will magnetize the probe and hold it in the probe base. A probe can be loaded into the iCare TONOVET Pro tonometer even if the device has not yet been turned on. In this case, the tonometer recognizes that a probe has been inserted when entering the measurement sequence and automatically displays the measurement mode selection menu. -
Page 8: Probe Base Indicator Light
9 Probe base indicator light The probe base indicator can emit either red or green light when the tonometer is on. The probe base indicator light serves two purposes. • The indicator light helps guide alignment of the tonometer and probe by emitting a red light – if the device is tilted too far up –... - Page 9 STEP 1. Bring the tonometer near the patient’s eye. Correct head and eye position. Incorrect head and eye position. STEP 2. To perform a successful measurement, the distance from the tip of the probe to the patient’s cornea (see picture) should be about 4-8 mm (about in.).
- Page 10 In addition, if you observe an unusually high or low displayed value of IOP, it is recommended that you make another measurement, either with the iCare tonometer or using an alternative method in order to verify the unusual reading.
-
Page 11: Using Quick Measure
IOP measurement results. The iCare TONOVET Pro’s Quick Measure measures the patient’s IOP with fewer rebound measurements and a faster measurement cycle. The purpose of Quick Measure is to enable the IOP measurement of patients whose IOP cannot be measured with the Default Measure for any reason (such as lack of cooperation or the patient cannot keep the eye open long enough). -
Page 12: User Interface Functions
11 User interface functions The iCare TONOVET Pro tonometer uses a large, color display screen as part of its user interface. Three buttons below the screen allow the user to control the device. • Use the two Navigation buttons (left and right arrows) to change the selection in a displayed menu. - Page 13 LIGHT – Adjusting the Probe base light brightness • The intensity of the Probe base light can be adjusted to any of the three levels or the base light can be switched off entirely by selecting OFF. • The intensity of the light is indicated with a 3-level bar. LIGHT LIGHT LIGHT...
-
Page 14: Wireless Printing
Bluetooth printer. 12.1 Printer To print the measurement results from TONOVET Pro, you must first pair it with a Bluetooth (Classic) printer. Pairing establishes a connection between the TONOVET Pro device and the printer. After pairing the printer and activating printer mode, measurements can be printed immediately after completing the sequence or from the HISTORY menu. -
Page 15: Testing The Activated Printer
MODE REMOVED • Press the Select button to remove the pairing between the TONOVET Pro device and the printer. 12.6 Printing measurement results to paired printer immediately after the measurement • Press the Navigation button in the measurement result screen to go to print menu. -
Page 16: Error And Info Messages
13 Error and info messages The following messages may appear on the display screen. When any error, except CHANGE and CLEAN CHANGE, occurs during the measurement, press the Select button to clear the error or press the Measure button to repeat the measurement. Description Actions Message... -
Page 17: Measurement Flow Chart
14 Measurement flow chart Turn the tonometer ON by pressing the Select or Measure button. This is displayed if you pressed the Select button. Pressing of the Measure button would lead MEASURE directly to Load Probe. Load probe Ready to measure and measurement mode selection. -
Page 18: Accessories, Detachable Parts And Other Supplies
16 x 90 mm Silicone grip, green 26 g 45 x 35 x 113 mm 544B Probe base cover, iCare TONOVET Pro 19 x 11 mm IOP pad 38 g 50 x 53 x 16 mm Aluminum case, iCare TONOVET Pro... -
Page 19: Network Specifications
Connection is secured by link authentication. Intended Information Flow: Measurement data is collected by the TONOVET Pro tonometer. This data is sent via Bluetooth connection to a wireless printer (Bluetooth Classic). Potential Hazardous situations resulting from the failure of the IT network: •... -
Page 20: Maintenance
WARNING! Servicing or maintenance actions must not be performed while the tonometer is in use. WARNING! The tonometer must not be repaired or re-assembled by any other than the manufacturer or its authorized service center. If the tonometer is broken, do not use it. Take it to an authorized iCare service center for repair. -
Page 21: Replacing Or Cleaning The Probe Base
STEP 9. To lock the probe base into its place, screw back the probe base collar. 18.2 Cleaning the tonometer WARNING! Never immerse the iCare tonometer in liquid. Do not spray, pour or spill liquid onto the iCare tonometer, its accessories, connectors, switches or openings in the chassis. Remove any liquid appearing on the surface of the tonometer immediately. -
Page 22: Returning The Icare Tonometer For Service Or Repair
• Lightly wipe the surfaces of the tonometer. • Remove residual fluid using a soft, dry cloth. 18.3 Returning the iCare tonometer for service or repair Contact the seller of the tonometer for shipping instructions. Unless otherwise instructed, there is no need to ship any accessories with the tonometer. -
Page 23: Information To The User Regarding The Radio Communication Part Of The Device
1. This device may not cause harmful interference, 2. This device must accept any interference received, including interference that may cause undesired operation Changes or modifications not expressly approved by Icare Finland Oy could void the user’s authority to operate the equipment. -
Page 24: Electromagnetic Declaration
The iCare TONOVET Pro (TV031) tonometer is a class B equipment and needs special precautions regarding EMC and needs to be installed and put into service according to EMC information provided in following... - Page 25 TONOVET Pro (TV031) is intended for use in a professional veterinary environment with electromagnetic characteristics specified below. The user of the iCare TONOVET Pro tonometer (TV031) should assure that it is used in such an environment. RF emissions CISPR 11...
- Page 26 TONOVET Pro (TV031) is intended for use in a professional veterinary environment with electromagnetic characteristics specified below. The user of the iCare TONOVET Pro tonometer (TV031) should assure that it is used in such an environment. Immunity test IEC 60601 test level...
- Page 27 TONOVET Pro (TV031) is intended for use in a professional veterinary environment with electromagnetic characteristics specified below. The user of the iCare TONOVET Pro tonometer (TV031) should assure that it is used in such an environment. Immunity test IEC 60601 test level...
- Page 28 TONOVET are registered trademarks of Icare Finland Oy. Icare Finland Oy, Icare USA, Inc., iCare World Australia Pty Ltd and CenterVue S.p.A., are parts of Revenio Group and represent the brand iCare. Not all products, accessories, services or offers are approved or offered in every market and approved labelling and instructions may vary from one country to...
Need help?
Do you have a question about the TONOVET Pro and is the answer not in the manual?
Questions and answers