
Related Manuals for TSC ML241P Series


Summary of Contents for TSC ML241P Series
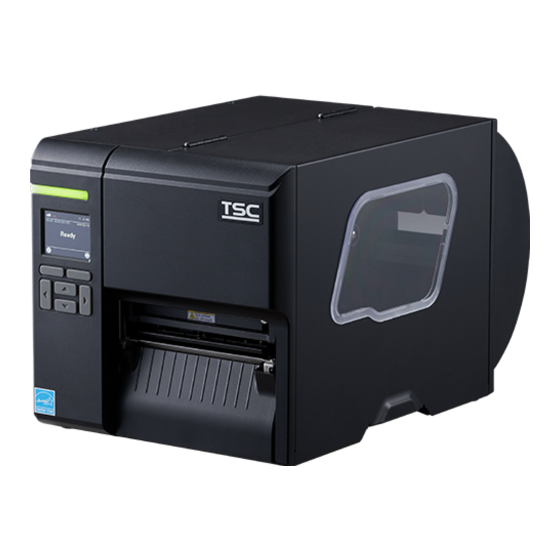
- Page 1 Industrial Barcode Printer ML241P Series Thermal Transfer Direct Thermal Series Models ML241P / ML341P User Manual www.tscprinters.com...
- Page 2 All other trademarks are the property of their respective owners. Information in this document is subject to change without notice and does not represent a commitment on the part of TSC Auto ID Technology Co. No part of this manual may be reproduced or transmitted in any form or by any means, for any purpose other than the purchaser’s personal use, without the expressed written...
-
Page 3: Table Of Contents
Contents Introduction ..............................3 Product Specification ................................ 4 Unpacking and Inspecting ..........................7 Getting to Know Your Printer ........................8 Front View ..................................8 CInner View ..................................9 Rear View ..................................10 Operator Interface ............................11 LED Indicator.................................. 12 Keypads ..................................12 Icon Indicators ................................ - Page 4 TSC Console ..............................36 Starting TSC Console ..............................36 Adding the Ethernet Interface ............................38 Set Wi-Fi and Add to TSC Console Interface ......................... 40 Initialize the Printer Wi-Fi Setting ........................... 43 TPH Care ..................................44 Printer Function ................................45 Setting Post-Print Action ..............................
-
Page 5: Introduction
Thank you very much for purchasing TSC barcode printer. The compact ML241P Series, perfect for height-restricted applications like rack-mounting, supports up to 8-inch O.D. label rolls for high-volume printing and increased uptime. Its intuitive design simplifies the user experience, allowing for easy adjustment of the thermal printhead (TPH) pressure and ribbon tension balance, ensuring optimal printing quality. -
Page 6: Product Specification
1.1 Product Specification Model ML241P ML341P 8 dots/mm (203 dpi) 12 dots/mm (300 dpi) Resolution Print Method Thermal Transfer & Direct Thermal 204 mm (8”) /second 152 mm (6”) /second Max. Print Speed 105.7 mm (4.16”) 108 mm (4.25”) Max. Print Width 25,400 mm (1,000”) 11,430 mm (450”) Max. - Page 7 Model ML241P ML341P Internal universal auto switching power supply ▪ Input: AC 100-240V, 1.5A, 50-60Hz Power ▪ Output: DC 24V, 2.5A, 60W ▪ 2.3” color LCD ▪ 1 bi-color (Green/Red) LED User Interface ▪ 6 buttons (Menu, Pause/Feed, Up, Down, Left, and Right) ▪...
- Page 8 Model ML241P ML341P ▪ Operation: 0˚C to 40˚C (32˚F to 104˚F); 25% to 85% non-condensing Environment Condition ▪ Storage: -40˚C to 60˚C (-40˚F to 140˚F); 10% to 90% non-condensing ▪ Quick start guide ▪ USB port cable Accessories ▪ Power cord Factory Option Internal MFi Bluetooth 5.0 ▪...
-
Page 9: Unpacking And Inspecting
2 Unpacking and Inspecting The printer has been specially packaged to withstand damage during shipment. Retaining the packaging materials is recommended in case you need to ship the printer. When unpacking, ensure that you have received all the following items: Barcode printer x1 ▪... -
Page 10: Getting To Know Your Printer
3 Getting to Know Your Printer 3.1 Front View LED indicator LCD display Front panel buttons Media window Paper exit chute Media cover handle... -
Page 11: Cinner View
3.2 CInner View Ribbon rewind spindle Printhead pressure adjustment knob Printhead release lever Ribbon supply spindle Label roll guard 3-inch core adapter Label supply spindle External label entrance chute Media damper Printhead Platen roller Label guide Black mark sensor (denoted by the ↓ mark) Gap sensor (denoted by the ▽... -
Page 12: Rear View
3.3 Rear View External label entrance chute Power switch USB interface (High speed mode) USB host RS-232 interface Slot-in Wi-Fi interface (optional) Ethernet interface Power cord socket... -
Page 13: Operator Interface
4 Operator Interface LED Indicator Icon Indicators Model Name & Firmware Version Main Screen Printer’s Status Ethernet or Wi-Fi IP Address Left Compound Key Right Compound Key Navigation Keys... -
Page 14: Led Indicator
4.1 LED Indicator Color Description ON: The printer is ready for accepting the print job. Green Blinking: The system is downloading data or the printer is in pause mode. Amber The system is busy. ON: The printer’s top cover is open or cutter error. Blinking: Other errors, such as paper jam, paper empty, ribbon empty, memory error etc. -
Page 15: Icon Indicators
4.3 Icon Indicators Icon Description Indicates that the printer features RFID function. NOTE: ML241P series printers do not feature RFID function. Indicates that the printer is connected to the wireless network. Indicates that the printer is connected to the Ethernet network. -
Page 16: Power-On Utilities
4.4 Power-on Utilities ML241P features a set of utilities which provides quick access to the printer’s mostly used functions. Follow the procedures below to launch the power-on utilities and select the function you want to use. 1. Turn off the printer. 2. - Page 17 Sequence & Function Image Factory Default Black Mark Calibration Gap Calibration Main screen will appear on the display if users do not select any of Ready (Skips AUTO.BAS) the abovementioned functions.
-
Page 18: Web User Interface
Follow the steps below to open the web user interface for the printer: 1. Connect your printer to the Ethernet and obtain the IP address NOTE: For how to know the printer’s IP address, you may refer to TSC Console for detailed information or contact your IT department for further assistance. - Page 19 The password setting rules are as follows: the length is limited to 8 to 15 characters, it must contain at least one uppercase and lowercase letter and a number. The content can be English letters, numbers, or symbols, but does not support double-byte characters. ...
- Page 20 4.5.1 Introduction to Web User Interface Language switch Printer’s basic information Function menu bar Please refer to Function Menu Bar for more information. Visualized control interface The visualized control panel demonstrates the same user interface displayed on the LCD panel. For how to use the buttons and setting options on the control panel, you can refer to Operator...
- Page 21 4.5.2 Function Menu Bar Configuration Item Description Configures the printer using the TSPL command set. Refer to TSPL for more information. Common Adjusts the print and stop location. Refer to TSPL for more information. Adjust Print Media Configures the parameters that relate to the media type and sets the media sensor. Configures the parameters that affect the media calibration.
- Page 22 Function Item Description Sets the MQTT server and manages the CA certificate files. SOTI settings Monitors the printhead’s health status. TPH Care Email Sets the SMTP server. SNTP Sets the SNTP server. Configures the SNMP (Simple Network Management Protocol) for the printer. SNMP Sets the user/administrator name and its corresponding password.
- Page 23 Tool Item Description Manages the files saved in the built-in memory. File Manager Communication Tool Sends command sets or instructions to the printer. Updates the printer’s firmware. Update Firmware Clear Browsing Record Clears the browsing record. Switches to the classic user interface. Classic Webpage Remote Panel It allows users to open the visualized control panel.
-
Page 24: Setting Up The Printer
5 Setting up the Printer 5.1 Connecting the Power Cable Place the printer on a flat surface. Make sure the printer is power off. Connect the printer to the computer with the provided USB cable. Connect the power cord to the power cord socket on the rear side of the printer. IMPORTANT: Make sure the power switch on the rear side of the printer is set to OFF before connecting the power cord to the printer. -
Page 25: Loading The Ribbon
5.2 Loading the Ribbon 1. Open the media cover. 2. Install the ribbon onto the ribbon supply spindle and install the paper core onto the ribbon rewind spindle. 3. Release the lever to open the printhead. 4. Thread the ribbon under the ribbon guide bar and then through ribbon sensor slot. - Page 26 5. Wind the ribbon rewind spindle clockwise ensuring that the ribbon Ribbon Loading Path is smoothly stretched and wrinkle-free. Ink coated inside Ink coated outside 6. Close the printhead.
-
Page 27: Loading The Media
5.3 Loading the Media 1. Open the media cover. 2. Slide the media roll guard to the end of the label spindle and then flip down the guard as indicated. 3. Load the media roll and flip up the media roll guard to secure the 4. - Page 28 5. Adjust the media sensor location ensuring that the sensor can 6. Adjust the label guide to secure the media path. detect the media. Black mark sensor (shown as ) Gap sensor (shown as ) 7. Press down to close the printhead mechanism ensuring that the 8.
-
Page 29: Loading The Fanfold Media
5.4 Loading the Fanfold Media 1. Open the media cover. 2. Feed the fanfold media through the external label entrance chute on the rear side of the printer. 3. Feed and thread the media. For how to feed and thread the 4. -
Page 30: Loading The Media In Peel-Off Mode (Optional)
5.5 Loading the Media in Peel-off Mode (Optional) 1. Open the media cover. 2. Load the ribbon and media roll. For how to load the ribbon and media roll, please refer to Loading the Ribbon Loading the Media. 3. Perform a calibration for the media in use. 4. - Page 31 7. Close the printhead, peel-off module, and media cover. 8. When the main screen appears on the display, press the right compound key to force the printer to feed one blank label and check if the printer can correctly peel off the label.
-
Page 32: Loading The Media In Cutter Mode (Optional)
5.6 Loading the Media in Cutter Mode (Optional) 1. Open the media cover. 2. Load the ribbon and media roll. For how to load the ribbon and media roll, please refer to Loading the Ribbon Loading the Media. 3. Perform a calibration for the media in use. 4. - Page 33 7. When the main screen appears on the display, press the right compound key to force the printer to feed one blank label and check if the printer can correctly cut off the label.
-
Page 34: Adjustment Knobs
6 Adjustment Knobs 6.1 Printhead Pressure Adjustment Knob The printhead pressure adjustment knob features nine positions from left to right. Due to printer’s paper alignment is on left side of the mechanism, different media width requires the different pressure. Users can try which level can meet their expectation. -
Page 35: Ribbon Tension Adjustment Knob
6.2 Ribbon Tension Adjustment Knob The ribbon tension adjustment knob features five positions. The knob enables users to adjust the ribbon tension based on the ribbon width in order to smoothly stretch the ribbon and optimize the print quality. -
Page 36: Mechanism Fine Adjustment To Avoid Ribbon Wrinkles
6.3 Mechanism Fine Adjustment to Avoid Ribbon Wrinkles Ribbon wrinkle is related to the media width, thickness, printhead pressure balance, ribbon film characteristics, print darkness setting etc. If there is wrinkle on the ribbon, you may follow the instructions below to adjust the printer parts. Wrinkle happens from label lower right to upper left direction Feed Direction Switch the ribbon tension adjustment knob clockwise per 1 level and print the label again to check if the wrinkle is gone. - Page 37 Wrinkles happens from label lower left to upper right direction Feed Direction Switch the ribbon tension adjustment knob counterclockwise per 1 level and print the label again to check if the wrinkle is gone. If the tension adjustment knob has positioned on the level of outermost side but does not improve the ribbon wrinkle, please switch the printhead pressure adjustment knob per level and print the label again to check if the wrinkle is gone.
-
Page 38: Tsc Console
7 TSC Console TSC Console is a management tool combining the Printer Management, Diagnostic Tool, CommTool and Printer Webpage settings, which enables you to adjust printer’s settings/status; change printers’ settings; download graphics, deploy fonts, graphics, label templates or upgrade the firmware to the group of printers, and send additional commands to printers at the same time 7.1 Starting TSC Console... - Page 39 Select the current interface of the printer. The printer will be added to TSC Console’s interface. Select the printer and set the settings. NOTE: For more information, you may refer to TSC Console User Manual.
-
Page 40: Adding The Ethernet Interface
7.2 Adding the Ethernet Interface Use USB or COM to establish the interface on TSC Console. Double click to enter the Printer Configuration Page > Click Ethernet tab > Check the IP Address. - Page 41 Return to TSC Console main page > Click Add Printer on the top left of the window. Choose Network > Key in the IP Address > Click Discover to establish the Ethernet interface. The notification will pop up > Click OK to close the window > The Ethernet interface will be shown on TSC Console.
-
Page 42: Set Wi-Fi And Add To Tsc Console Interface
7.3 Set Wi-Fi and Add to TSC Console Interface Use USB or COM Port to set up the interface. Double click to enter the printer configuration page. Click Get to receive printer’s information. Click Wi-Fi to the wi-fi setting page. - Page 43 For WPA-Personal Fill-in the SSID. Select the Encryption option to WPA-Personal. Fill-in the Key. Select DHCP to ON. (For OFF option, please fill-in the IP Address, Subnet Mask and Gateway) After setting, click the Set button. NOTE: Before setting, the entered field will be shown in yellow for reminding.
- Page 44 After clicking Set button, it'll pop-up the window tip as below shown. IP address will be shown in the “IP address” field and the Wi-Fi logo and IP address will be displayed on the LCD control panel. NOTE: IP address should be shown within about 5- 15 seconds after printer turn on.
-
Page 45: Initialize The Printer Wi-Fi Setting
7.4 Initialize the Printer Wi-Fi Setting Return to the main page of TSC Console. Click Functions to expand the page. Click Wi-Fi Default to initialize the printer Wi-Fi module setting to factory default setting. -
Page 46: Tph Care
7.5 TPH Care TPH Care provides users to check the condition of the printhead and be able to set the dot failure threshold for indicating errors when the threshold is triggered. This option is used to set the threshold for unhealthy TPH dot This option is used to enable number. -
Page 47: Printer Function
Exit Line Mode Exits the line mode to page mode Enter Line Mode Leaves page mode and enter line mode Wi-Fi Default Restores the Wi-Fi settings to factory defaults. Configures RFID functions. NOTE: ML241P series RFID printers do not feature RFID functions. -
Page 48: Setting Post-Print Action
When the printer is equipped with other option kits, ex: cutter, peeler, rewinder, please select the mode after finishing the calibration. Follow below procedure to set the post action for the printing: Refer Ch 5.1 to Connect the printer with TSC Console > Double click the printer >... -
Page 49: Printer Configuration
8 Printer Configuration All setting options for the printer can be divided into 6 sub-menus. It allows users to configure the printer without connecting the printer to a computer. Icon Name Description Icon Name Description Allows users to set the OSD language, Configures the printer using the TSPL Setting Advanced... -
Page 50: Setting
Setting It allows users to configure the printer using the TSPL or ZPL2 command set. NOTE: TSPL indicates TSC printer language and ZPL2 indicates an emulation of Zebra printer language. To configure the printer: 1. Press the right compound key to switch between the TSPL and ZPL2 command set. - Page 51 8.1.1 TSPL The following illustration and table describe the TSPL command set. TSPL Speed Density Direction Print Mode Reprint Mode Offset Shift X Shift Y Reference X Reference Y Code Page Country...
- Page 52 Item Description Default 5 (203 dpi) Speed Sets the print speed. 4 (300 dpi) Density Sets the print darkness. Setting range: 0 to 15. Sets the printout direction. Setting options: 0 or 1. (Feed direction: ) Direction When set to 1 When set to 0 Sets the print mode.
- Page 53 Item Description Default Reference Y Specifies the y-coordinate relative to the origin. Setting range: 0 to 999 dot. Code Page Specifies the code page which is associated with the supported characters. Country Sets the country code. ATTENTION: If you print using a label design software or other label printing tools, the commands from the software or tool will overwrite the printer’s settings you set through the LCD display panel.
- Page 54 8.1.2 ZPL2 The following illustration and table describe the ZPL2 command set. ZPL2 Darkness Print Speed Tear Off Print Mode Print Width List Fonts List Images List Formats List Setup Control Prefix Format Prefix Delimiter Char Media Power UP Head Close Label Top Left Position Reprint Mode...
- Page 55 Item Description Default Darkness Sets the print darkness. Setting range: 0 to 30. 5 (203 dpi) Print Speed Sets the print speed. 4 (300 dpi) Tear Off Specifies the stop position of the media after a label is printed. Setting range: -120 to 120 dots. Sets the print mode.
- Page 56 Item Description Default Configures the printer to take specific action after closing the printhead. No Motion: The printer will take no action. The sensor values and media position will not be changed. Length: The printer will detect the length of a label and then advance the label to the correct Head Close No Motion position.
-
Page 57: Sensor
8.2 Sensor The setting options in the Sensor menu allows users to calibrate the printer based on what kind of the media they want to use. It is recommended to perform a calibration anytime you use a different media. Sensor Auto Calibration Preprint Calibration Manual Calibration... - Page 58 Item Description Default If Auto Calibration cannot determine the media type and complete the calibration, it is recommended to use Manual Calibration. After installing the media you want to use, follow the on-screen instructions to complete the calibration. Manual Calibration ...
-
Page 59: Interface
8.3 Interface Interface menu allows users to configure the printer’s I/O interfaces. Interface Serial Ethernet Wi-Fi Bluetooth 8.3.1 Serial The table below describes the configurable items for the printer’s RS-232 interface. Item Description Default Sets Baud Rate for the RS-232 interface. Setting options: 1200 / 2400 / 4800 / 9600 / 19200 / 38400 / Baud Rate 9600 57600 / 115200 bps. - Page 60 8.3.2 Ethernet The table below describes the configurable items for the printer’s Ethernet interface. Item Description Default Status Displays information about the Ethernet connection if the printer is connected to a wired network. Select to use a DHCP server or non-DHCP server. ...
- Page 61 8.3.4 Bluetooth The table below describes the configurable items for the Bluetooth interface. Item Description Default Status Displays information about the Bluetooth status. PS-XXXXXX NOTE: XXXXXX indicates the last Local Name Sets the local name for Bluetooth. six digits of the MAC address. You can find the MAC address in the Status item.
-
Page 62: Advanced
8.4 Advanced The illustration and table below describe the configurable items in the Advanced menu. Advanced Language Printer Information Initialization Vertical Length Adjustment Display Brightness Display Orientation Date & Time Security Ribbon Low Warning Print Head Maintain Key Sound Pause Mode Contact Us... - Page 63 Item Description Default Language Changes the LCD menu language. English Displays printer’s information, such as serial number, printhead mileage, the number of Printer Information printed labels, etc. Initialization Resets the printer to factory default. Vertical Length Adjustment Turns on/off the Vertical Length Adjustment function. Display Brightness Adjusts the brightness for the display.
-
Page 64: File Manager
8.5 File Manager File Manager allows users to check the remaining space of the printer’s built-in memory and manage or execute the files saved in the printer’s DRAM, Flash memory, or SD card. File Manager DRAM FLASH Item Description Allows users to manage or execute files saved in the printer’s DRAM. The executable files must be in .BAS format. DRAM Allows users to manage or execute files saved in the printer’s Flash memory. -
Page 65: Diagnostic
8.6 Diagnostic The illustration and table below describe the functions in the Diagnostic menu. Diagnostic Print Config. Dump Mode Print Head Display Sensor Item Description Prints the printer’s configurations. You can use this function to check if there is a defective dot on the print Print Config. - Page 66 Item Description In this mode, all received characters will be printed in a two-column format. The left column displays the data which is sent from your computer while the right column shows the same data in the hexadecimal format. This function helps engineers troubleshoot a specific problem. same data in hexadecimal original data format...
-
Page 67: Favorites
8.7 Favorites Favorites provides quick access to the mostly used functions. Follow the steps below to add your mostly used functions into the favorites list: Use the navigation keys to select the item you want to add into the favorites list. Press and hold the right compound key. - Page 68 To remove items from the favorites list: When the printer’s main screen is displayed, press and hold the left compound key to open the favorites list. When the Favorites screen is displayed, use the navigation keys to select the item you want to remove from the list. Press the hold the right compound key.
-
Page 69: Troubleshooting
9 Troubleshooting Problem Possible Cause Recovery Procedure ▪ The power cord is not properly ▪ Plug the power cord in printer and outlet. Power indicator does not connected. illuminate ▪ Switch the printer on. ▪ The power switch is closed. Carriage Open The printer carriage is open. - Page 70 Problem Possible Cause Recovery Procedure If peeler module is installed, please remove the label. ▪ ▪ If there is no peeler module in front of the printer, please Peel function is enabled. Take Label switch off the printer and install it. ▪...
- Page 71 Problem Possible Cause Recovery Procedure Printhead pressure is incorrect. ▪ ▪ Please refer to Adjustment Knobs. ▪ Ribbon installation is incorrect. ▪ Please set the suitable density to have good print quality. ▪ Media installation is incorrect. Wrinkle Problem Make sure the label guide touch the edge of the media ▪...
-
Page 72: Maintenance
10 Maintenance This session presents the clean tools and methods to maintain the printer. ◼ For Cleaning Depending on the media used, the printer may accumulate residues (media dust, adhesives, etc.) as a by-product of normal printing. To maintain the best printing quality, you should remove these residues by cleaning the printer periodically. Regularly clean the printhead and supply sensors once change a new media to keep the printer at the optimized performance and extend printer life. - Page 73 Cleaning Tools ◼ Cotton swab ◼ Lint-free cloth ◼ Brush with soft non-metallic bristles ◼ Vacuum cleaner ◼ 75% Ethanol (for disinfecting) ◼ 99% Isopropyl alcohol (for printhead and platen roller cleaning) Genuine printhead cleaning pen ◼ ◼ Mild detergent (without chlorine) Cleaning Process: Printer Part Method...
-
Page 74: Agency Compliance And Approvals
11 Agency Compliance and Approvals EN 55032, Class A EN 55035 EN 301489-1,-17 EN 300 328 EN 62311 EN 60950-1 This is a class A product. In a domestic environment this product may cause radio interference in which case the user may be required to take adequate measures. FCC part 15B, Class A ICES-003, Class A This equipment has been tested and found to comply with the limits for a Class A digital device, pursuant to... - Page 75 EN 62368-1 KS C 9832 / KS C 983535 이 기기는 업무용(A 급) 전자파적합기기로서 판매자 또는 사용자는 이 점을 주의하시기 바라며, 가정외의 지역에서 사용하는 것을 목적으로 합니다. GB 4943.1 GB 9254, Class A GB 17625.1 此为 A 级产品,在生活环境中,该产品可能会造成无线电干扰,在这种情况下,可能需要用户对干扰采取切 实可行的措施。 Energy Star for Imaging Equipment Version 3.2 IS 13252(Part 1)/ IEC 60950-1 CNS 15936 甲類...
- Page 76 Important safety instructions: 1. Read all of these instructions and keep them for later use. 2. Follow all warnings and instructions on the product. 3. Disconnect the power plug from the AC outlet before cleaning or if fault happened. Do not use liquid or aerosol cleaners. Using a damp cloth is suitable for cleaning. 4.
- Page 77 WARNING: For operation safety, please turn off the power by the power switch before opening the media cover to load labels, ribbons, or to repair. After completing the steps, please close the media cover first and then turn on the power to start printing. CAUTION: Any changes or modifications not expressly approved by the grantee of this device could void the user's authority to operate the equipment.
- Page 78 30mW 5470-5725MHz Hereby, TSC Auto ID Technology Co., Ltd. declares that the radio equipment type [Wi-Fi] IEEE 802.11 a/b/g/n is in compliance with Directive 2014/53/EU The full text of the EU declaration of conformity is available at the following internet address: https://www.tscprinters.com...
- Page 79 NCC 警語: 經型式認證合格之低功率射頻電機,非經許可,公司、商號或使用者均不得擅自變更頻率、加大功率或變更原設計之特性及功能。(即低功率電波 輻射性電機管理辦法第十二條) 低功率射頻電機之使用不得影響飛航安全及干擾合法通信;經發現有干擾現象時,應立即停用,並改善至無干擾時方得繼續使用。 前項合法通信,指依電信法規定作業之無線電通信。低功率射頻電機須忍受合法通信或工業、科學及醫療用電波輻射性電機設備之干擾。(即低功 率電波輻射性電機管理辦法第十四條) BSMI Class A 警語: 這是甲類的資訊產品,在居住的環境使用中時,可能會造成射頻干擾,在這種情況下,使用者會被要求採取某些適當的對策。 MFi for Bluetooth Use of the Made for Apple badge means that an accessory has been designed to connect specifically to the Apple product(s) identified in the badge, and has been certified by the developer to meet Apple performance standards. Apple is not responsible for the operation of this device or its compliance with safety and regulatory standards.
- Page 80 For JP Model Made for iPhone XS Max, iPhone XS, iPhone XR, iPhone X, iPhone 8, iPhone 8 Plus, iPhone 7, iPhone 7 Plus, iPhone SE, iPhone 6s, iPhone 6s Plus, iPhone 6, iPhone 6 Plus, iPhone 5s, iPad Pro 12.9-inch (2nd generation), iPad Pro 10.5-inch, iPad (6th generation), iPad (5th generation), iPad Pro 9.7-inch, iPad Pro 12.9-inch (1st generation), iPad Air 2, iPad mini 4, iPad mini 3, iPad Air, iPad mini 2, iPod touch (6th generation) iPad, iPad Air, iPad Pro, iPhone are trademarks of Apple Inc., registered in the U.S.
- Page 81 限用物質及其化學符號 Restricted substances and its chemical symbols 多溴聯苯 多溴二苯醚 六價鉻Hexavalent 鉛Lead 汞Mercury 鎘Cadmium Polybrominated Polybrominated chromium biphenyls diphenyl ethers (Pb) (Hg) (Cd) (PBB) (PBDE) 內外塑膠件 ○ ○ ○ ○ ○ ○ 內外鐵件 ○ ○ ○ ○ ○ 滾輪 ○ ○ ○...
-
Page 82: Revision History
Revision History Date Description Technical Writer Peter Yao 2024/05/08 Official release. - Page 83 www.tscprinters.com...
Need help?
Do you have a question about the ML241P Series and is the answer not in the manual?
Questions and answers