
Related Manuals for VIOMI V3


Summary of Contents for VIOMI V3
- Page 1 Instruction Manual Robot Vacuum Cleaner Model: T h e i n s t r u c t i o n s s h a l l b e k e p t p r o p e r l y f o r a n y t e c h n i c a l s u p p o r t p l e a s e c o n t a c t u s...
-
Page 2: Table Of Contents
CONTENT 1. Safety Instruction 2. Composition 3. Specification 4. Robot WiFi Instruction 5. Use 6. Mop Install Manual 7. Charging Operations 8. Maintenance 9. Common Errors 10. Problem and Solution... -
Page 3: Safety Instruction
1. Safety Instruction 1.1 Safety instructions *This robot is not suitable for individuals with physical, mental, or cognitive disabilities (including children), those without prior operating experience, or those without sufficient knowledge of the robot (To use, please use it under the supervision or guidance of the person specially responsible for their safety.) * Please take care of children and do not allow them to using this robot without supervision. - Page 4 1.3 Battery and charging Only charge indoors. Ensure the robot is charged in a dry condition. Do not use any third-party batteries, adapters, or charging docks. Do not remove, repair, or modify the battery and charging dock without permission. Do not place the charging dock close to heat sources (such as radiators, etc.). Ensure that the power adapter matches the standard socket voltage.
-
Page 5: Composition
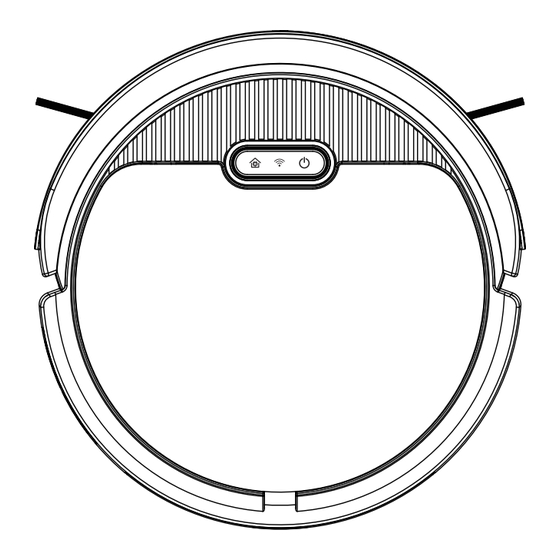
2. Composition 2.1 Package list Description Quantity Item Robot Vacuum 1 pcs 1 pcs Charging Dock Station 1 pcs Adapter Instruction Manual 1 pcs 4 pcs Side Brushes Mop+Velcro 1 set Cyclone Dustbox+ 1 pcs Water Tank(Inside Mackine) Hair Collecting Box 1 pcs Mop plate 1 pcs... - Page 6 View Bumper Power Button Long press: App network connection Short press: Automatic cleaning Short press: Automatic recharge Open Switch Bottom Ground sensor Side brush Charging electrocode Front wheel Suction Port Wheel Outlet...
- Page 7 Side structure Top cover Dustbox Handle Exhaust outlet Dusbox + water tank Dustbox Water tank HEPA-cover Charging dock station Indicator Charging electrode Charging electrode...
-
Page 8: Specification
3.Specification Model DC 11.1V Voltage Rated Power Battery Type Rechargeable lithium battery Battery Capacity 4500mAh Charging Time 5H~6H Working Time 90-120min Work Temperature Range 0 ~ 45 Work Humidity Range Cyclone Dustbox Capacity 500mL Hair Collection Box 650mL Capacity 100mL Water Tank Capacity Noise Size... -
Page 9: Robot Wifi Instruction
4. Operation guide 4.1App installation Scan the QR code on your mobile phone to download the Smart Life app (common to Apple and Android) or search for "Smart Life" in the mobile app store to download, install, register an account and log in. 4.2 App connection The host supports two network configuration methods: WiFi quick connection and Bluetooth network distribution. - Page 10 Next, go to Figure 4, click "Confirm indicator light flashes", then click "WiFi Quick Connect" shown in Figure 5, and wait for the WiFi connection as shown in Figure 6. When the WiFi connection is successful, please click "Finish" shown in Figure 7, and the application connection is completed. Figure 5 Figure 6 Figure 4...
- Page 11 W i Fi name pas s word Figure 4 Figure 5 Figure 6 Remote control Recharge button Power button start/pause Arrow key edge buttons fixed point button Auto key...
- Page 12 4.2 App Control Operation Tips: App transmission distance depends on your WiFi signal 1.ON/OFF To start robot or to stop the robot 2.Automatic cleaning When press auto button, the robot will start automatic cleaning. 3. Edge cleaning When press Edge button, the robot will start edge cleaning/wall following cleaning. 4.
-
Page 13: Use
5.Use Please take out the foam strip and clean the area around the robot. foam foam foam foam Ground for use Scope of application products are applicable to the following ground environment: wood marble Inapplicable scope • Do not use in extremely hot (+60°C or higher) or extremely cold (-5°C or lower) environments. - Page 14 Working state 1.Power on/off 2.Standby The machine is in standby mode and both LEDs are on at the same time. State change: 1. A. lf the machine connected WiFi/app already, it will automatically shutdown after 5 mins without any operation of machine. B.
- Page 15 3.Automatic cleaning The machine is in the automatic cleaning state, and the automatic cleaning LED lights up. State change: 1.Press the automatic or spot button on the machine, the buzzer will soundand enter the standby mode. 2. Press the spot button, buzzer sounds 3 times, and enters the automatic spotcleaning mode.
- Page 16 5.Edging mode Robot will start cleaning along the wall. 6.Mopping mode Fill the water tank with water, place it at the rear of the machine, install a mop and mop plate to access the mopping function. 7.Charging mode Connect the adapter to the charging dock, making sure that the robot is properly placed on the dock. You'll hear a beep or voice prompt to confirm that the charging has started.
-
Page 17: Mop Install Manual
6. Mop Install Manual 1: Position the robot with its back facing upwards. 2: Tear apart the Velcro strip. 1: Ensure that the designated area is free from any water or dust. 2: Attach two Velcro strips onto the back of the robot, aligning them as shown in the accompanying picture. -
Page 18: Charging Operations
7. Charging Operation 7.1 Put docking station in right place In order to help the machine to find the docking station in time, it is recommended to place docking station smoothly on the side of the wall,and place any obstaclesaround the base within the area in front of 2 meters.and the left and right are within 1 meter. -
Page 19: Maintenance
8. Maintenance Recommended frequency Cleaning frequency Replacement time Accessories Dustbox+Water Tank Once a week Replace when damaged HEPA Filter Once every 3 weeks Every 6 months Side Brushes Once a month Every 3-6 months Ground sensor Once a month No replacement required Charging electrode Once a month No replacement required... - Page 20 8.3 Clean side brushes · Turn the main unit over, unplug the side brushes, clean the side brushes and put them back in. 8.5 Clean mop Take off the mop from robot, wash it and dry it.
- Page 21 8.6 Clean the ground sensor and charging electrocode Wipe the sensor and the charging electrocode with a soft cloth. Front ground sensor Charging electrocode Charging electrocode Right ground sensor Left ground sensor Charging electrocode Charging electrocode Tips: · Please disconnect the power supply when cleaning the charging pole piece.
-
Page 22: Common Errors
9. Common Errors Under the fault state, the machine will stop working. Automatic LED, LED light of fixed time will flash at the same time, the buzzer will make an alarm. The alarm instructions are as follows. Troubleshooting Fail mode Failure reminding Please put the machine on the flat ground and wipe the Left ground sensor fail... -
Page 23: Problem And Solution
10. Problem and solution Q1: Left/right bumper stuck A: Click the left and right bumper to check if with clicks sound, and check if they can spring back smoothly. Q2: Spin around A: Check the left and right wheels to confirm if they are stucked ornot.(e.g. papers,hairs...) Q3: Wheels stuck A: Turn the wheels manually to clean out the matters... - Page 24 11.FCC Caution. This device complies with part 15 of the FCC Rules. Operation is subject to the following two conditions: (1) This device may not cause harmful interference, and (2) this device must accept any interference received, including interference that may cause undesired operation.
Need help?
Do you have a question about the V3 and is the answer not in the manual?
Questions and answers