Table of Contents
Advertisement
Before troubleshooting or servicing equipment, review equipment installation guides and confırm ALL installation requirements
& specifıcations have been met. Including, but not limited to: wiring, clearance, ducting (where applicable), power, and line set
Cooling Only:
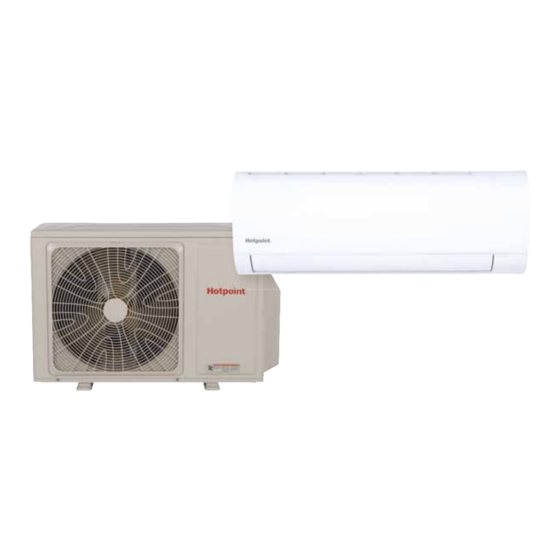
1H12HN2CAA1 / HW12HN2CAA1
1H18HN2CAA1 / HW18HN2CAA1
1H24HN2CAA1 / HW24HN2CAA1
Heat Pump:
1H09HN2DAA1 / HW09HN2DAA1
1H12HN2DAA1 / HW12HN2DAA1
1H18HN2DAA1 / HW18HN2DAA1
1H24HN2DAA1 / HW24HN2DAA1
requirements. Correct any installation issues before continuing.
SERVICE MANUAL
Single Zone
Ductless Split Systems
31-5000931 Rev. 0
Advertisement
Chapters
Table of Contents

Related Manuals for Hotpoint 1H12HN2CAA1


Summary of Contents for Hotpoint 1H12HN2CAA1
- Page 1 SERVICE MANUAL Single Zone Ductless Split Systems Cooling Only: 1H12HN2CAA1 / HW12HN2CAA1 1H18HN2CAA1 / HW18HN2CAA1 1H24HN2CAA1 / HW24HN2CAA1 Heat Pump: 1H09HN2DAA1 / HW09HN2DAA1 1H12HN2DAA1 / HW12HN2DAA1 1H18HN2DAA1 / HW18HN2DAA1 1H24HN2DAA1 / HW24HN2DAA1 Before troubleshooting or servicing equipment, review equipment installation guides and confırm ALL installation requirements &...
- Page 2 TABLE OF CONTENTS Introduction .....................A-1 Outdoor Units ....................B-1 Highwall Indoor Units ..................C-1 Troubleshooting & Reference ................D-1 Revision History 31-5000931 Rev. 0...
-
Page 3: Table Of Contents
INTRODUCTION TABLE OF CONTENTS SAFETY & PRECAUTIONS ................................A-2 SPECIFICATIONS ..................................A-3 OVERVIEW ....................................A-5 Introduction to System ................................................A-5 Specifıcations for Proper Operation ..........................................A-5 System Fundamentals................................................A-5 System Power ....................................................A-5 FUNCTIONS AND CONTROL..............................A-6 Cooling Operation Mode ..............................................A-6 Heating Operation Mode................................................A-7 Auto Mode....................................................... -
Page 4: Safety & Precautions
SAFETY & PRECAUTIONS FOLLOW ALL WARNINGS, CAUTIONS, AND PRECAUTIONS BELOW, AND INDUSTRY BEST SAFETY PRACTICES AND STANDARDS. FAILURE TO DO SO MAY RESULT IN EQUIPMENT DAMAGE OR FAILURE, AND SERIOUS PERSONAL INJURY OR DEATH. WARNINGS Service should be performed by the dealer or another professional. Improper service may cause water leakage, electrical shock, or fıre. -
Page 5: Specifications
SPECIFICATIONS NOTE Our continued commitment to quality products may mean a change in specifıcations without notice. Visit GEAppliancesAirandWater.com to access current specifıcation tables online. COOLING-ONLY MODELS Compressor Type: DC Inverter Driven Rotary Voltage/Cycle/Phase: Built-in WiFi 208-230/60/1 Outdoor Unit 1H12HN2CAA 1H18HN2CAA 1H24HN2CAA 084691949534 084691949558... - Page 6 SPECIFICATIONS NOTE Our continued commitment to quality products may mean a change in specifıcations without notice. Visit GEAppliancesAirandWater.com to access current specifıcation tables online. HEAT PUMP MODELS Compressor Type: DC Inverter Driven Rotary Voltage/Cycle/Phase: Built-in WiFi 208-230/60/1 Outdoor Unit 1H09HN2DAA 1H12HN2DAA 1H18HN2DAA 1H24HN2DAA...
-
Page 7: Overview
OVERVIEW Introduction to System Single Zone Ductless Split System Heat Pumps feature a wall mounted indoor fan/evaporator unit that receives refrigerant from an inverter driven variable speed outdoor condensing unit. The system operation is controlled with a remote control. The outdoor unit features a variable speed rotary compressor, EEV metering device and DC fan motor. These systems use R32 refrigerant and PVE oil. The outdoor units are 208/230 volt rated systems. -
Page 8: Functions And Control
FUNCTIONS AND CONTROL Cooling Operation Mode Communication Overview The indoor and outdoor unit main boards communicate via a digital signal on the wire connected to terminal 3 of each unit. A splice or break in this The temperature control range in cooling mode is 60°F - 86°F. The wire will cause a communication error. -
Page 9: Heating Operation Mode
FUNCTIONS AND CONTROL Heating Operation Mode Overview 4. Coil temperature is higher than 37°C/ 100°F, fan speed according to the set operation. The temperature control range in heating mode is 60°F - 86°F. The temperature set by the remote control and the indoor unit ambient 5. -
Page 10: Auto Mode
FUNCTIONS AND CONTROL unit and press the power button, then press the HEAT mode button if not equal to or higher than 2°F above the room set temperature. The indoor already set to heat mode. control board will communicate to the outdoor control board to de- energize the compressor. -
Page 11: Defrost Operation
FUNCTIONS AND CONTROL Temperature Sensors 3. 25 seconds later the 4-way valve will shift to the heating mode. 4. 30 seconds later the compressor will start, and the system resumes The indoor unit has two sensors that provide temperature information to normal operation. -
Page 12: Special Functions
FUNCTIONS AND CONTROL Indoor Coil Anti-Freeze Protection Special Functions The temperature sensed by the coil sensor is used to determine at what Auto Restart speed the compressor is to run to avoid the coil temperature being too When this is enabled, the following functions will automatically resumes cold. - Page 13 OUTDOOR UNITS 1H12HN2CAA1 1H18HN2CAA1 1H24HN2CAA1 1H09HN2DAA1 1H12HN2DAA1 1H18HN2DAA1 1H24HN2DAA1 TABLE OF CONTENTS COMPONENTS .................................... B-2 Outdoor Component Identifıcation ..........................................B-2 9K-12K Heat Pump Control Board.............................................B-3 9K-12K Cool Only Control Board............................................B-4 18K Control Board..................................................B-5 24K Control Board..................................................B-6 Terminal Block....................................................B-7 Power Factor Reactor................................................. B-7 Compressor .....................................................
-
Page 14: Components
COMPONENTS The outdoor unit has a PCB that integrates the control functions and power functions into one PCB. Sensors monitor key temperatures throughout the system to manage operational decisions. 4-Way Valve Accumulator Compressor Defrost Temperature Sensor Discharge Temperature Sensor Electronic Expansion Valve Refrigerant Strainers Ambient Temperature Sensor Fan Motor... -
Page 15: 9K-12K Heat Pump Control Board
COMPONENTS 9K-12K Heat Pump Control Board CN1, CN2: 230VAC power from terminal block connections 1(N) and 2(L) CN3: Connector for GND CN4: Communication connection between the indoor board and the outdoor board CN10: Connector for the fan motor CN7, CN8, CN9: Compressor U, V, W connections CN15: connections for temperature sensors... -
Page 16: 9K-12K Cool Only Control Board
COMPONENTS 9K-12K Cool Only Control Board CN1, CN2: 230VAC power from terminal block connections 1(N) and 2(L) CN3: Connector for GND CN4: Communication connection between the indoor board and the outdoor board CN10: Connector for the fan motor CN7, CN8,CN9: Compressor U, V, W connections CN15: Connections for temperature sensors... -
Page 17: 18K Control Board
COMPONENTS 18K Control Board CN1, CN2: 230VAC power from terminal block connections 1 (N) and 2(L) CN3: Connector for GND CN4: Communication connection between the indoor board and the outdoor board CN10: Connector for the fan motor CN7, CN8,CN9: Compressor U, V, W connections CN 15: Connections for temperature sensors CN16:... - Page 18 COMPONENTS 24K Control Board CN1, CN2: 230VAC power from terminal block connections 1(N) and 2(L) CN3: Connector for GND CN4: Communication connection between the indoor board and the outdoor board Connector for the fan motor CN10: CN7, CN8,CN9: Compressor U, V, W connections CN15: Connections for temperature sensors CN16:...
-
Page 19: Terminal Block
COMPONENTS Terminal Block Compressor The compressor is a three phase DC inverter driven rotary type, capable of variable speed operation. The compressor operating frequency will be determined by the temperature difference between set point and room The outdoor unit is powered by 208/230 volt single phase electricity temperature. -
Page 20: Temperature Sensors
COMPONENTS 4-Way Valve Temperature Sensors These 3 sensors are part of an assembly and will all be changed together. Discharge Temperature Sensor The Discharge Temperature Sensor is a negative coeffıcient thermistor that senses the temperature of the compressor hot gas. The PCB monitors the temperature of the compressor hot gas and will make inverter speed The 4-Way Valve redirects the flow of refrigerant in the piping circuit to changes in response to input from this device. -
Page 21: Accumulator
COMPONENTS Accumulator The Accumulator is located in the suction line circuit at the entrance to the compressor. The accumulator helps prevent liquid refrigerant from entering the compressor during run operation. Refrigerant Strainers The system has debris-catching strainers that protect internal system components from contaminants in the refrigerant. -
Page 22: Service Procedures
SERVICE PROCEDURES NOTE: Component resistance readings shown in this section are for reference only. Actual resistance values may vary based on model being tested. Testing of the following components requires the use of needle probes. Avoid testing the connector end of the plug, as damage to the internal sections of the plug can occur. -
Page 23: Wiring Diagrams
WIRING DIAGRAMS 09-12K 18-24K 31-5000931 Rev. 0 B-11 OUTDOOR UNITS... - Page 24 [This page intentionally left blank.] 31-5000931 Rev. 0...
- Page 25 HIGHWALL INDOOR UNITS HW12HN2CAA1 HW18HN2CAA1 HW24HN2CAA1 HW09HN2DAA1 HW12HN2DAA1 HW18HN2DAA1 HW24HN2DAA1 TABLE OF CONTENTS COMPONENTS .................................... C-2 Indoor Component Identifıcation ............................................ C-2 9K-12K PCB ...................................................... C-3 18K-24K PCB ....................................................C-4 Terminal Block....................................................C-5 Display......................................................... C-5 Ambient Temperature Sensor............................................. C-5 Piping Temperature Sensor..............................................C-5 Stepper Motor Louver................................................C-6 Fan Motor......................................................C-6 Emergency Button..................................................C-6...
- Page 26 COMPONENTS The indoor unit is mounted high on the wall to provide comfort and air movement within the conditioned space. Features of the system include: Variable speed blower operation that speeds up and slows down with changes in demand, moving louvers to direct air, indoor air temperature sensing, evaporator coil temperature sensing, a status display, evaporator coil with metering device located in outdoor unit, and an emergency operation button.
-
Page 27: Components
COMPONENTS 9K-12K PCB CN9: Connector for fan motor CN6: Connector for pipe temperature sensor and room temperature sensor CN11: Connector for UP/DOWN STEP motor CN35: Connector for WiFi module CN21: Connector for power N Connector for power L CN 17: CN23: Communication connection between the PCB and the outdoor unit CN7:... -
Page 28: 18K-24K Pcb
COMPONENTS 18K-24K PCB CN9: Connector for fan motor CN6: Connector for pipe temperature sensor and room temperature sensor CN11: Connector for UP/DOWN STEP motor CN35: Connector for WiFi module CN21: Connector for power N CN 17: Connector for power L CN23: Communication connection between the PCB and the outdoor unit CN7:... -
Page 29: Terminal Block
COMPONENTS Terminal Block Ambient Temperature Sensor The Ambient (room) Temperature Sensor is a negative The unit terminal block receives electrical power from the outdoor coeffıcient thermistor that will decrease in resistance with increases in unit. There are 4 connections for electrical wires. Terminals 1 and 2 are room air temperature. -
Page 30: Fan Motor
COMPONENTS Louver Stepper Motor Jumper Wire Settings The PCB has a set of jumper wires that must be checked when replacing the PCB. The replacement PCB is shipped with no jumper wires cut. The motor moves the louver side to side depending upon selections made at the remote control. -
Page 31: Service Procedures
SERVICE PROCEDURES Testing of the following components requires the use of an ohmmeter and k-type temperature probe. NOTE: When using the test probes, probe the back or side contacts of the plug to obtain the reading. Do not try to probe the connector end of the plug, as this may damage the contacts. -
Page 32: Wiring Diagrams
WIRING DIAGRAMS 09-12K 18-24K 31-5000931 Rev. 0 INDOOR UNITS... - Page 33 TROUBLESHOOTING & REFERENCE TABLE OF CONTENTS ERROR CODES .....................................D-2 TROUBLESHOOTING FLOWCHARTS............................D-3 E1/LED1: No Flash..................................................D-3 E2/LED1: No Flash..................................................D-3 LED1: 10 Flash....................................................D-3 LED1: 11 Flash....................................................D-3 LED1: 12 Flash....................................................D-3 LED1: 13 Flash....................................................D-3 LED1: 14 Flash....................................................D-3 E4 ........................................................D-3 F12/LED1: 1 Flash ...................................................D-3 E14 ........................................................D-4 F8/LED1: 9 Flash....................................................D-5 F1/LED1: 2 Flash .....................................................D-6 F2/LED1: 3 or 24 or 25 Flash..............................................D-6...
- Page 34 ERROR CODES OUTDOOR UNITS INDOOR UNIT FAULT DESCRIPTION LED DISPLAY DIGITAL DISPLAY OUTDOOR EEPROM FAILURE IPM OVERCURRENT OR SHORT CIRCUIT OUTDOOR ALTERNATING CURRENT, OVER CURRENT PROTECTION MODULE OPERATED OVERLOAD (COMPRESSOR OVERLOAD PROTECTION) MODULE LOW OR HIGH VOLTAGE COMPRESSOR CURRENT SAMPLING CIRCUIT FAULT OVERHEAT PROTECTION FOR DISCHARGE TEMPERATURE MALFUNCTION OF THE DC FAN MOTOR MALFUNCTION OF DEFROST TEMPERATURE SENSOR...
-
Page 35: Error Codes
TROUBLESHOOTING FLOWCHARTS Error Codes Start (Indoor/Outdoor) E1/LED1: No Flash Is connector plugged in and Room Temperature Sensor Failure seated securely? E2/LED1: No Flash Indoor Coil Temperature Sensor Failure LED1: 10 Flash Disconnect power and unplug senor Re-seat connector connector from the board. Defrost Temperature Sensor Failure Check resistance across the set of wires for the faulting sensor. -
Page 36: E14
TROUBLESHOOTING FLOWCHARTS Error Code Start (Indoor) Check the incoming voltage. Is it 208/230VAC (+/- Indoor Fan Motor Failure 10%) between L1/L2? 104/115VAC (+/- 10%) from L1 to GROUND and L2 to GROUND? Complete the “Check This First” Flow Chart before continuing. Detection Conditions: •... -
Page 37: F8/Led1: 9 Flash
TROUBLESHOOTING FLOWCHARTS Error Code Start (Indoor/Outdoor) F8/LED1: 9 Flash Check the incoming voltage. Is it 208/230VAC (+/- 10%) between L1/L2? Outdoor DC Fan Motor Fault 104/115VAC (+/- 10%) from L1 to GROUND and L2 to GROUND? Detection Conditions: • High temperature, high pressure Fix incoming power supply Possible Causes: •... -
Page 38: F1/Led1: 2 Flash
TROUBLESHOOTING FLOWCHARTS Error Code Start (Indoor/Outdoor) F1/LED1: 2 Flash Cycle power to the outdoor unit. IPM Power Module Fail Does LED1 flash 2 times before the (IPM power module protection) compressor starts? Detection Conditions: • The system leads to IPM protection due to over current Replace IPM DC voltage from P-U, P-V, P-W is 150-160VDC,... -
Page 39: Led1: 6 Flash
TROUBLESHOOTING FLOWCHARTS Error Code Start (Outdoor) LED1: 6 Flash Cycle power to the outdoor unit. Power supply is over voltage Turn system on via remote control. LED1: 7 Flash Did the compressor start normally? Power supply is under voltage Detection Conditions: Measure the outdoor There may be an intermittent •... -
Page 40: E7/Led1: 15 Flash
TROUBLESHOOTING FLOWCHARTS Error Code (Indoor/Outdoor) The control wire is 14/4 stranded copper on the correct terminals, with no splices E7/LED1: 15 Flash or loose connections? ID and OD Loss of Communication Detection Conditions: Reposition on correct Is the Indoor PCB LED flashing •... -
Page 41: F11/Led1: 18 Or 19 Flash
TROUBLESHOOTING FLOWCHARTS Error Code (Indoor/Outdoor) When power is off for 5 min. and turned back on, F11/LED1: 18 or 19 Flash the compressor runs? Loss of Compressor Synchronization Momentary loss of A windings or grounding check Detection Conditions: building power or shows issues with compressor? acceptable power •... - Page 42 RESISTANCE VALUES Abbr. Definition Type Abbr. Definition Type Temperature of indoor ambient Temperature of outdoor ambient Temperature of indoor condenser Temperature of outdoor condenser Toci Hot Gas Leaving the 4-Way Valve Temperature of outdoor discharge EEV Liquid Sensor Temperature of outdoor defrost EEV Gas Sensor Temperature of outdoor suction Module Temp Sensor...
- Page 43 [This page intentionally left blank.] 31-5000931 Rev. 0...
- Page 44 Ductless Technical Support Phone: 866.814.3633 Email: HVACSupport@GEAppliances.com Online: GEAppliancesAirAndWater.com ©Copyright 2024 GE Appliances, a Haier Company. Our continued commitment to quality products may mean a change in specifıcations without notice. 31-5000931 Rev. 0...
Need help?
Do you have a question about the 1H12HN2CAA1 and is the answer not in the manual?
Questions and answers