Burkert 8025 Operating Instructions Manual
Flowmeter - flow transmitter
Hide thumbs
Also See for 8025:
- Operating instructions manual (178 pages) ,
- Quick start manual (174 pages) ,
- Instruction manual (138 pages)

Related Manuals for Burkert 8025


Summary of Contents for Burkert 8025
- Page 1 Types 8025 - 8035 - SE35 Flowmeter - Flow Transmitter Durchflussmessgerät - Durchfluss-Transmitter Débitmètre - Transmetteur de débit Operating Instructions Bedienungsanleitung Manuel d‘utilisation...
- Page 2 We reserve the right to make technical changes without notice. Technische Änderungen vorbehalten. Sous réserve de modifications techniques. ©Bürkert SAS, 2013 - 2016 Operating Instructions 1606/03_EU-ML 00562780 / Original FR...
-
Page 3: Table Of Contents
Material data of a 8025 in panel version ....................... 19 6.2.4 Dimensions of a 8025 in panel version ......................20 6.2.5 Electrical data of a 8025 in panel version ..................... 20 6.2.6 Specifications of a flow sensor connected to a 8025 in panel version ..........21 English... - Page 4 Dimensions of a 8025 in wall-mounted version ................... 22 6.3.5 Electrical data of a 8025 in wall-mounted version ..................22 6.3.6 Specifications of a flow sensor connected to a 8025 in wall-mounted version ........23 technical data of the flow transmitter se35 .......................23 6.4 6.4.1 Conditions of use of a flow transmitter SE35 ....................
- Page 5 8.1 safety instructions ................................39 specifications of the connection cables .......................40 8.2 8.2.1 Flowmeter 8025 in compact version, flowmeter 8035 and flow transmitter SE35 ......40 8.2.2 Flow transmitter 8025 in panel version ......................40 8.2.3 Flow transmitter 8025 in wall-mounting version ..................41 making the installation equipotential ........................41 8.3...
- Page 6 Type 8025 - 8035 - SE35 8.7.3 Connecting the flow sensor to the flow transmitter 8025 in panel version or in wall- mounted version ..............................58 Wiring the flow transmitter 8025 in wall-mounted version, 115/230 V Ac, with or 8.8 without relays ..................................58 8.8.1 Wiring instructions for a wall-mounted version .................... 58 8.8.2 Wiring the power supply, the current output and the pulse output, 115/230 V AC, without relays 60 8.8.3...
- Page 7 Type 8025 - 8035 - SE35 11.3 spare parts of a flow transmitter 8025 in panel version ................84 11.4 spare parts of a flow transmitter 8025 in wall-mounted version ............85 pAckAGinG, trAnsport ................................85 storAGe ......................................85 DisposAl of the DeVice ..............................86 English...
-
Page 8: About This Manual
The word "device" used within these Operating Instructions always refers to: • the flowmeter type 8025 in compact version, • the flow transmitter type 8025 in panel version, • the flow transmitter type 8025 in wall-mounted version, • the flowmeter type 8035 or •... -
Page 9: Intended Use
The flow transmitter type SE35 must be mounted on a sensor-fitting type S030, S070 or S077. The flow transmitter type 8025 in panel or in wall-mounted version is a transmitter that must be connected to: - an 8020 flow sensor with a sinus or a pulse output, only in "Low Power" version, - an 8030 flow sensor with a sinus or a pulse output, only in "Low Power"... - Page 10 Type 8025 - 8035 - SE35 About This manual Various dangerous situations To avoid injury take care: ▶ not to use the device in explosive atmospheres. ▶ not to use the device in an environment incompatible with the materials it is made of.
-
Page 11: General Information
The condition governing the legal warranty is the conforming use of the device in observance of the operating conditions specified in this Operating Instructions. information on the internet You can find the Operating Instructions and Technical Data Sheets regarding the types 8025, 8035 and SE35 at: www.burkert.com English... -
Page 12: Description
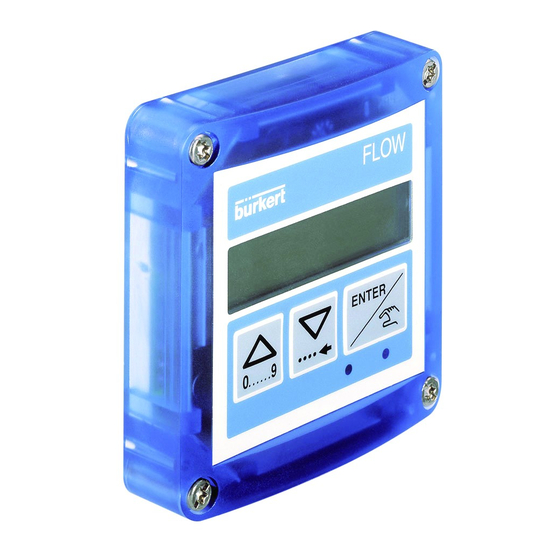
8025 in panel version The 8025 in panel version is a flow transmitter with display construction of the flow transmitter 8025 in wall- mounted version The 8025 in wall-mounted version is a flow transmitter with display and 3 cable glands English... -
Page 13: Construction Of The Flow Transmitter Se35
Type 8025 - 8035 - SE35 Description construction of the flow transmitter SE35 The SE35 is a flow transmitter with display and 2 cable glands construction of the flowmeter 8035 The flowmeter 8035 comprises: A: an S030 sensor-fitting including the paddle-wheel flow sensor. -
Page 14: Construction Of The Flow Transmitter Se35 With Sensor-Fitting S070 Or S077
Type 8025 - 8035 - SE35 Description construction of the flow transmitter SE35 with sensor-fitting S070 or S077 A: an S070 or S077 sensor-fitting including the flow sensor with oval gears. Set in rotation by the flow, the magnets integrated in the oval gears generate pulses, the frequency of which is proportional to the volume of fluid. -
Page 15: Technical Data
Type 8025 - 8035 - SE35 Technical data TEchnicAl DATA Technical data of the flowmeter 8025 in compact version 6.1.1 conditions of use of a 8025 in compact version Ambient temperature • 12...36 V DC version • –10...+60°C • 115/230 V AC version • –10...+50°C •... -
Page 16: Fluid Data Of A 8025 In Compact Version
PU01 Measuring Equipment UL-listed PU02 ® EXXXXXX 6.1.3 fluid data of a 8025 in compact version type of fluid neutral or slightly aggressive liquids fluid viscosity max. 300 cSt rate of solid particles max. 1% fluid temperature The fluid temperature may be restricted by the fluid pressure and the material the S020 fitting used is made of (see Fig. -
Page 17: Material Data Of A 8025 In Compact Version
• Fitting S020 • Refer to the Operating Instructions of the fitting 6.1.5 Dimensions of a 8025 in compact version → Please refer to the technical data sheets regarding the flowmeter type 8025 in compact version, available at: www.burkert.com English... -
Page 18: Electrical Data Of A 8025 In Compact Version
Type 8025 - 8035 - SE35 Technical data 6.1.6 Electrical data of a 8025 in compact version 12...36 V Dc power supply • filtered and regulated • SELV circuit (safety extra low voltage), with a safe energy level • oscillation rate: ±10% power source (not supplied) •... -
Page 19: Technical Data Of The Flow Transmitter 8025 In Panel Version
Technical data of the flow transmitter 8025 in panel version The following technical data are relevant for the flow transmitter 8025 in panel version, connected to a Bürkert flow sensor 8020, 8030 or SE30 in a "Low Power" version only. -
Page 20: Dimensions Of A 8025 In Panel Version
Technical data 6.2.4 Dimensions of a 8025 in panel version → Please refer to the technical data sheets regarding the flow transmitter type 8025 in panel version, available www.burkert.com 6.2.5 Electrical data of a 8025 in panel version • filtered and regulated 12...36 V Dc power supply... -
Page 21: Specifications Of A Flow Sensor Connected To A 8025 In Panel Version
Technical data of the flow transmitter 8025 in wall- mounted version The following technical data are relevant for the flow transmitter 8025 in wall-mounted version, connected to a Bürkert flow sensor 8020, 8030 or SE30 in a "Low Power" version only. -
Page 22: Material Data Of A 8025 In Wall-Mounted Version
Identification label Polyester 6.3.4 Dimensions of a 8025 in wall-mounted version → Please refer to the technical data sheets regarding the flow transmitter type 8025 in wall-mounted version, available at: www.burkert.com 6.3.5 Electrical data of a 8025 in wall-mounted version 12...36 V Dc power supply... -
Page 23: Specifications Of A Flow Sensor Connected To A 8025 In Wall-Mounted Version
• wiring, version without relays • 2-wire • wiring, version with relays • 3-wire Protection against polarity reversals 6.3.6 Specifications of a flow sensor connected to a 8025 in wall-mounted version sensor input • signal frequency • 2,5...400 Hz • pulse signal (Hall) •... -
Page 24: Conformity To Standards And Directives Of A Flow Transmitter Se35
Type 8025 - 8035 - SE35 Technical data 6.4.2 conformity to standards and directives of a flow transmitter SE35 The applied standards, which verify conformity with the EU Directives, can be found on the EU Type Examination Certificate and/or the EU Declaration of Conformity (if applicable). -
Page 25: Technical Data Of The Flowmeter 8035
Type 8025 - 8035 - SE35 Technical data maximum current consumption 125 mA version 12...36 V Dc without relais maximum current consumption 170 mA version 12...36 V Dc with relais maximum current consumption 125 mA max. at 27 V DC version 115/230 V Ac pulse output (transistor) polarized, potential-free • type • NPN/PNP (wiring dependant) • function • pulse output, adjustable pulse value •... -
Page 26: Conditions Of Use Of A Flowmeter 8035
Type 8025 - 8035 - SE35 Technical data 6.5.1 conditions of use of a flowmeter 8035 Ambient temperature • 12...36 V DC version • 0...+60°C • 115/230 V AC version • 0...+50°C • UL and CSA version • 0...+40°C Air humidity < 80%, non condensated... -
Page 27: Fluid Data Of A Flowmeter 8035
Type 8025 - 8035 - SE35 Technical data 6.5.3 fluid data of a flowmeter 8035 type of fluid neutral or slightly aggressive liquids fluid viscosity max. 300 cSt rate of solid particles max. 1% fluid temperature The fluid temperature may be restricted by the fluid pressure and the material the S030 sensor-fitting used is made of (see Fig. -
Page 28: Material Data Of A Flowmeter 8035
Type 8025 - 8035 - SE35 Technical data 6.5.4 material data of a flowmeter 8035 part material Housing / cover / lid / nut Frontfoil Polyester Screws Stainless steel Male fixed connector or cable glands Identification label Polyester Wetted parts • Sensor-fitting S030 •... -
Page 29: Fluid Data Of A Se35 With Sensor-Fitting S070 Or S077
Type 8025 - 8035 - SE35 Technical data type of fluid conditions Fluid group 1, art. 4 §1.c.i Forbidden DN ≤ 32 Fluid group 2, art. 4 §1.c.i or PNxDN ≤ 1000 DN ≤ 25 Fluid group 1, art. 4 §1.c.ii or PNxDN ≤ 2000 DN ≤... -
Page 30: Material Data Of A Se35 With Sensor-Fitting S070 Or S077
Type 8025 - 8035 - SE35 Technical data flow rate measurement • Measurement range - viscosity > 5 mPa.s - S070 : 2...1200 I/min - S077 : 2...1200 I/min - viscosity < 5 mPa.s - S070 : 3...616 I/min - S077 : 3...616 I/min •... -
Page 31: Installation
Type 8025 - 8035 - SE35 Installation inSTAllATion Safety instructions Danger risk of injury due to electrical voltage. ▶ Shut down the electrical power source of all the conductors and isolate it before carrying out work on the system. ▶ Observe all applicable accident protection and safety regulations for electrical equipment. -
Page 32: Fluid Installation Of The Compact Version Of The Flowmeter 8025
8025 The compact version of the flowmeter 8025 is inserted into an S020 fitting mounted on the pipes: 1. Install the S020 fitting on the pipes, 2. Install the compact version of the flowmeter 8025 in the S020 fitting, 3. -
Page 33: Installation Of The Flowmeter 8025 Into The Fitting S020
Correct Incorrect Fig. 5 : Filling of the pipe, flow direction of the fluid, Vertical mounting Air bubbles within the pipe 7.2.2 installation of the flowmeter 8025 into the fitting S020 → Install the fitting 5 onto the pipe following the instructions in chap. 7.2.1. → Check that there is a seal on the fitting and that it is not damaged. Replace the seal if necessary. -
Page 34: Installation Of The Flowmeter 8035
Type 8025 - 8035 - SE35 Installation installation of the flowmeter 8035 The flowmeter 8035 comprises a flow transmitter SE35 and a sensor-fitting S030. The flow transmitter SE35 is assembled on the sensor-fitting S030 by a quarter-turn rotation system: 1. Install the S030 sensor-fitting on the pipes, 2. -
Page 35: Installation Of The Flow Transmitter Se35 On The Sensor-Fitting S070 Or S077
Type 8025 - 8035 - SE35 Installation installation of the flow transmitter SE35 on the sensor-fitting S070 or S077 The flow transmitter SE35 is installed on the pipes using the sensor-fitting S070 or S077. The flow transmitter SE35 is assembled on the sensor-fitting S070 or S077 by a quarter-turn system: 1. -
Page 36: Install The Flow Transmitter Se35 On The Sensor-Fitting S070 Or S077
→ Set the K-factor or determine it with Teach-In (see chap. 9.6.3). installation of a flow transmitter 8025 in panel version Install the panel version of the device in a cabinet with a protection class at least IP54 to ensure a degree of pollution 2 inside the cabinet. -
Page 37: Installation Of A Flow Transmitter 8025 In Wall-Mounted Version
→ Wire according to the instructions in chap. 8.6, 8.6.3 or 8.7.3. → Set the K-factor or determine it with Teach-In (see chap. 9.6.3). installation of a flow transmitter 8025 in wall- mounted version note risk of material damage if the cable glands are not tightly screwed on the housing ▶ Before installing the wall-mounted housing on its support, tighten the nuts of the entry item of the cables glands at a torque of 1.5 Nm. - Page 38 Type 8025 - 8035 - SE35 Installation 106 mm CURRENT Without SOURCE SINK With Supply PULSE 12..36Vdc OUTPUT COIL SENSOR NPN SENSOR FLOW SENSOR 1 PULSE INPUT COIL SUPPLY 3 NC 4 NC 4 NC 4 PE 3A/230VAC FLOW SENSOR 5 6 7 8 9 10 Fig. 13 : Installation of a wall-mounted version ...
-
Page 39: Wiring
Type 8025 - 8035 - SE35 Wiring WirinG Safety instructions Danger risk of injury due to electrical voltage. ▶ If a 12...36 V DC powered version is installed either in a wet environment or outdoors, all the electrical volt- ages must be of max. 35 V DC. -
Page 40: Specifications Of The Connection Cables
• Protect the relays by means of a max. 3 A fuse and a circuit breaker (depending on the process). • Do not apply both a dangerous voltage and a safety extra-low voltage to the relays. Specifications of the connection cables 8.2.1 flowmeter 8025 in compact version, flowmeter 8035 and flow transmitter SE35 Version specifications of cables and conductors... -
Page 41: Flow Transmitter 8025 In Wall-Mounting Version
Type 8025 - 8035 - SE35 Wiring 8.2.3 flow transmitter 8025 in wall-mounting version Version specifications of cables and conductors With terminal strip, Shielded cable (not supplied): with cable glands • external diameter of the cable: 6...12 mm (4...6 mm when using a multiway seal) •... -
Page 42: Wiring Of Devices With A 4 Pin Male Fixed Connector
Type 8025 - 8035 - SE35 Wiring Power supply 8025 Panel or wall- mounted version 8030 Metal pipes 8025 Panel or wall- mounted version Power supply 8020 Valve, pump,... (or earth Plastic pipes rings, not provided, inserted into the pipe) *) If a direct earth connection is not possible, fit a 100 nF/50 V capacitor between the negative power supply terminal and the earth. - Page 43 Type 8025 - 8035 - SE35 Wiring → Assemble and wire the female connector type 2508 (supplied) according to Fig. 17. → Unscrew the nut 1 of the cable gland. → Remove the terminal block 3 from the housing 2.
-
Page 44: Configuring The Selectors
Type 8025 - 8035 - SE35 Wiring → Wire the transistor output using one of the wiring plans of Fig. 19. Wiring of the pulse output in npn mode Wiring of the pulse output in pnp mode Power supply Power supply 12-36 V DC 12-36 V DC 300 mA 300 mA 5-36 V DC... -
Page 45: Source/Sink Selector
Type 8025 - 8035 - SE35 Wiring 8.5.2 SourcE/SinK selector On a device with relays, the SOURCE/SINK selector enables to set the 4...20 mA current output, in sourcing or in sinking mode. → Set the selector depending on the type of wiring. -
Page 46: Wiring The Flowmeter 8025 In Compact Version, The Flowmeter 8035 And The Flow Transmitter Se35 With Or Without Relays, With Cable Glands
Type 8025 - 8035 - SE35 Wiring Wiring the flowmeter 8025 in compact version, the flowmeter 8035 and the flow transmitter SE35 with or without relays, with cable glands 8.6.1 Wiring instructions Seal the unused cable gland using the stopper gasket supplied to make sure the device is tight. -
Page 47: Wiring The Power Supply, The Current Output And The Pulse Output, Version 12
Type 8025 - 8035 - SE35 Wiring 8.6.3 Wiring the power supply, the current output and the pulse output, version 12...36 V Dc, without relays → Before wiring the device, configure the selectors on the electronic board (see chap. 8.5). -
Page 48: Wiring The Power Supply, The Current Output And The Pulse Output, Version 12
Type 8025 - 8035 - SE35 Wiring Wiring of the pulse output in npn mode Wiring of the pulse output in pnp mode Power supply Power supply 12-36 V DC 12-36 V DC 300 mA 300 mA 5-36 V DC 5-36 V DC Without Without With With Supply PULSE 12..36Vdc OUTPUT Supply PULSE 12..36Vdc... - Page 49 Type 8025 - 8035 - SE35 Wiring Wiring of the current output in sourcing mode Wiring of the current output in sinking mode 4...20 mA input at 4...20 mA input at Power supply external instrument external instrument Power supply 300 mA 300 mA 12-36 V DC 12-36 V DC Iout Iout Source/Sink selector Source/Sink selector (see chap.
-
Page 50: Wiring The Power Supply, The Current Output And The Pulse Output, Version 115/230 V Ac, Without Relays
Type 8025 - 8035 - SE35 Wiring 8.6.5 Wiring the power supply, the current output and the pulse output, version 115/230 V Ac, without relays → Before wiring the device, configure the selector on the electronic board (see chap. 8.5). - Page 51 Type 8025 - 8035 - SE35 Wiring 4...20 mA input at external instrument Without With Supply PULSE 12..36Vdc OUTPUT FLOW SENSOR COIL T 125 mA 115/230 V AC power supply If the current output is wired, remove the jumper wire between the terminals Iout and L+.
-
Page 52: Wiring The Power Supply, The Current Output And The Pulse Output, 115/230 V Ac, With Relays
Type 8025 - 8035 - SE35 Wiring 8.6.6 Wiring the power supply, the current output and the pulse output, 115/230 V Ac, with relays → Before wiring the device, configure the selectors on the electronic board (see chap. 8.5). terminal block 1 lout: 4...20 mA output... - Page 53 Type 8025 - 8035 - SE35 Wiring 4...20 mA input at external instrument Without SOURCE SINK With Supply PULSE 12..36Vdc OUTPUT FLOW SENSOR COIL T 125 mA 115/230 V AC power supply If the current output is wired, remove the jumper wire between the terminals Iout and L+.
- Page 54 Type 8025 - 8035 - SE35 Wiring Wiring of the pulse output in npn mode Wiring of the pulse output in pnp mode 5-36 V DC 5-36 V DC Jumper wire Jumper wire Without SOURCE SINK Without With SOURCE SINK With Supply PULSE 12..36Vdc OUTPUT Supply PULSE 12..36Vdc OUTPUT 8025: 8025: FLOW SENSOR COIL...
-
Page 55: Wiring The Flow Transmitter 8025 In Panel Or In Wall-Mounted Version, 12
Fig. 38 : Terminal assignment of a flow transmitter 8025 in panel or wall-mounted version, 12...36 V DC, without relays The wiring of the current output and the wiring of the pulse output of a flow transmitter 8025 in panel or in wall-mounted version, 12...36 V DC, without relays, are the same as for a flowmeter 8025 in compact version, 12...36 V DC, without relays, with cable glands. -
Page 56: Wiring The Power Supply, The Current Output And The Pulse Output, 12
Type 8025 - 8035 - SE35 Wiring → Wire the pulse output according to Fig. 40. Wiring of the pulse output in npn mode Wiring of the pulse output in pnp mode Power supply Power supply 12-36 V DC 12-36 V DC 300 mA 300 mA 5-36 V DC 5-36 V DC Without Without... - Page 57 Insert the cable clips: see Fig. 23. chap. 8.6.1. The wiring of the current output and the pulse output of a flow transmitter 8025 in panel or in wall-mounted version 12...36 V DC, without relays, are the same as for a flowmeter 8025 in compact version, 12...36 V DC, with relays, with cable glands.
-
Page 58: Connecting The Flow Sensor To The Flow Transmitter 8025 In Panel Version Or In Wall-Mounted Version
Insert the stopper gasket → Screw the nut back. → Connect the flow sensor to the flow transmitter 8025 according to chap. 8.7.3. → Configure the selectors on the electronic board: see chap. 8.5. → Loosen the nuts of the cable glands. - Page 59 Type 8025 - 8035 - SE35 Wiring → Remove the two terminal blocks (marked 4 and 6 in Fig. 46, chap. 8.8.2 and Fig. 50, chap. 8.8.3) from the housing. for versions without relays: → Wire the device according to chap. 8.8.2. for versions with relays: →...
-
Page 60: Wiring The Power Supply, The Current Output And The Pulse Output, 115/230 V Ac, Without Relays
Type 8025 - 8035 - SE35 Wiring 8.8.2 Wiring the power supply, the current output and the pulse output, 115/230 V Ac, without relays → Before wiring the device, follow the instructions of chap. 8.8.1. terminal block 2 pe Shield wiring (green/yellow wire, factory... - Page 61 Type 8025 - 8035 - SE35 Wiring Without With Supply PULSE 12..36Vdc OUTPUT COIL SENSOR NPN SENSOR FLOW SENSOR 1 PULSE INPUT COIL SUPPLY 3 NC 4 NC 4 NC 4 PE FLOW SENSOR 5 6 7 8 9 10 4...20 mA input at...
- Page 62 Type 8025 - 8035 - SE35 Wiring Without With Supply PULSE 12..36Vdc OUTPUT COIL SENSOR NPN SENSOR FLOW SENSOR 1 PULSE INPUT COIL SUPPLY 3 NC 4 NC 4 NC 4 PE FLOW SENSOR 5 6 7 8 9 10...
-
Page 63: Wiring The Power Supply, The Current Output And The Pulse Output, 115/230 V Ac, With Relays
Type 8025 - 8035 - SE35 Wiring 8.8.3 Wiring the power supply, the current output and the pulse output, 115/230 V Ac, with relays → Before wiring the device, follow the instructions of chap. 8.8.1. terminal block 2 pe Shield connection (green/yellow wire,... - Page 64 Type 8025 - 8035 - SE35 Wiring CURRENT Without SOURCE SINK With Supply PULSE 12..36Vdc OUTPUT COIL SENSOR NPN SENSOR FLOW SENSOR 1 PULSE INPUT COIL SUPPLY 3 NC 4 NC 4 NC 4 PE 3A/230VAC FLOW SENSOR 5 6 7 8 9 10 4...20 mA input at...
-
Page 65: Connecting The Flow Sensor To The Flow Transmitter 8025 Transmitter In Wall-Mounted Version
Type 8025 - 8035 - SE35 Wiring 8.8.4 connecting the flow sensor to the flow transmitter 8025 transmitter in wall-mounted version → Configure the FLOW SENSOR selector on the electronic board (see chap. 8.5). → Connect the remote flow sensor to the FLOW SENSOR terminal block of the electronic board by respecting the pin assignment depending on the output type of the remote sensor, either sinus (COIL) or pulse output (NPN). -
Page 66: Operating And Commissioning
Type 8025 - 8035 - SE35 Operating and commissioning opErATinG AnD commiSSioninG Safety instructions Warning risk of injury due to nonconforming operating. Non-conforming operating could lead to injuries and damage the device and its surroundings. ▶ The operators in charge of operating must have read and understood the contents of these Operating Instructions. - Page 67 Type 8025 - 8035 - SE35 Operating and commissioning function Default value 00.05 Value of a pulse (PU) Unit of the pulse output Relay 1- 40.0 Relay 1+ 50.0 Relay 1 inverted Relay 2- 80.0 Relay 2+ 90.0 Relay 2 inverted...
-
Page 68: Description Of The Navigation Keys And The Status Leds
Type 8025 - 8035 - SE35 Operating and commissioning Description of the navigation keys and the status lEDs • Selecting the displayed parameter • Scrolling up the parameters • Confirming the settings • Incrementing the figure selected LED indicating the status of the relay 2 (LED ON = contact closed) •... -
Page 69: Details Of The Process Level
Type 8025 - 8035 - SE35 Operating and commissioning Details of the process level This level is active by default when the device is energized. Value of the measured flow rate, displayed in the unit chosen in the "UNIT" parameter 12.6 L/MiN. -
Page 70: Choosing The Display Language
Type 8025 - 8035 - SE35 Operating and commissioning 9.6.1 choosing the display language When the device is energized for the first time, the display language is English. LANGUAGE ENGLiSh → ENTER The chosen language is active as soon as the DEUtSCh 0..9... - Page 71 Type 8025 - 8035 - SE35 Operating and commissioning → Choose the flow rate UNit FLOw RAtE Lit/SEC unit. → Confirm. Lit/MiN Lit/h M3/MiN M3/h 0..9 ENTER US GAL/S DEC Pt 3 → Choose the US GAL/M number of decimal DEC Pt 2 0..9...
-
Page 72: Entering The K-Factor Of The Fitting Used
Type 8025 - 8035 - SE35 Operating and commissioning 9.6.3 Entering the K-factor of the fitting used The device determines the flow rate in the pipe using the fitting K-factor. The K-factor of the fitting used can be entered here. The device may also determine the K-factor using a teach-in procedure: see Fig. -
Page 73: Configuring The Current Output
Type 8025 - 8035 - SE35 Operating and commissioning → If you do not want to adjust another parameter, go to the "END" parameter of the Parameters menu and press ENTER to save the settings and go back to the Process level. -
Page 74: Configuring The Relays
Type 8025 - 8035 - SE35 Operating and commissioning Example: a pulse is emitted every 5 m volume has passed through the device. ENTER → PULSE LitRE Choose the volume unit of a pulse. PU=000.00 0..9 US GAL → Enter the volume of a liquid related to a pulse. - Page 75 Type 8025 - 8035 - SE35 Operating and commissioning ENTER RELAy 1-= 0000 → Enter a flow rate value, associated to the low threshold of relays 1, in the unit chosen in the "UNIT" parameter. 0..9 → Confirm. ENTER 1-= 0008 1+ = 0000 →...
-
Page 76: Configuring The Filter Of The Measured Flow Rate
Type 8025 - 8035 - SE35 Operating and commissioning Sense of operation not inverted Sense of operation inverted Contact Contact Inverted YES Inverted NO 1- (2-) (2+) 1- (2-) (2+) Flow rate Flow rate Fig. 65 : Hysteresis operating 9.6.7 configuring the filter of the measured flow rate This parameter makes it possible to dampen the fluctuations: •... -
Page 77: Resetting Both Totalizers
Type 8025 - 8035 - SE35 Operating and commissioning 9.6.8 resetting both totalizers This parameter makes it possible to reset both totalizers. ENTER tOtAL RES NO 0..9 RES yES → Choose to reset the two totalizers or not. → Confirm. -
Page 78: Adjusting The Offset Of The Current Output
Type 8025 - 8035 - SE35 Operating and commissioning 9.7.1 Adjusting the offSET of the current output This parameter makes it possible to adjust the 4 mA current value transmitted on the 4...20 mA output. → Connect a multimeter into the measurement loop. -
Page 79: Reading The Rotational Frequency Of The Paddle Wheel
Type 8025 - 8035 - SE35 Operating and commissioning 9.7.3 reading the rotational frequency of the paddle wheel ENTER FREqUENC 195.3 hz ENTER FLOw Fig. 72 : Diagram of the "FREQUENC." parameter of the Test menu → ENTER If you do not want to adjust another parameter, go to the "END" parameter of the Test menu and press to save the settings and go back to the Process level. -
Page 80: Maintenance And Troubleshooting
Type 8025 - 8035 - SE35 Maintenance and troubleshooting mAinTEnAncE AnD TroublEShooTinG 10.1 Safety instructions Danger Danger due to electrical voltage. ▶ Shut down the electrical power source of all the conductors and isolate it before carrying out work on the system. ▶ Observe all applicable accident protection and safety regulations for electrical equipment. -
Page 81: Problem Solving
Type 8025 - 8035 - SE35 Maintenance and troubleshooting 10.3 problem solving message possible cause recommended action displayed → ERROR 3 Memory read error: the user set- Switch the device off. tings are lost. → Switch the device on. → If the message is still displayed, press the ENTER key to acknowledge the error: the device operates with the default settings. -
Page 82: Spare Parts And Accessories
▶ Use only original accessories and original replacement parts from Bürkert. The defective electronic board or housing of your device can be replaced. ▶ Contact the local Bürkert office. 11.1 Spare parts of the flowmeter 8025 in compact version Fig. 74 : E xploded view of the spare parts of a 8025, compact version English... -
Page 83: Spare Parts Of The Flowmeter 8035 Or Of The Flow Transmitter Se35
Type 8025 - 8035 - SE35 Spare parts and accessories position Designation order code Fig. 74 553 168 115/230 V AC supply voltage board + replacement instructions Female connector with cable gland (type 2508) 438 811 Female connector type 2509 with NPT 1/2 '' reduction... -
Page 84: Spare Parts Of A Flow Transmitter 8025 In Panel Version
425 247 Housing for 2 M20*1.5 cable glands, Hall function 425 248 Set with 8 FLOW foils 553 191 11.3 Spare parts of a flow transmitter 8025 in panel version Fig. 76 : Exploded view of the spare parts of a flow transmitter 8025 in panel version position Fig. 76 Designation order code Mounting set (screws, washers, nuts, cable clips) 554 807... -
Page 85: Spare Parts Of A Flow Transmitter 8025 In Wall-Mounted Version
Type 8025 - 8035 - SE35 Spare parts and accessories 11.4 Spare parts of a flow transmitter 8025 in wall- mounted version Designation order code 555 722 115/230 V AC supply voltage board + replacement instructions pAcKAGinG, TrAnSporT note Damage due to transport Transport may damage an insufficiently protected device. -
Page 86: Disposal Of The Device
Type 8025 - 8035 - SE35 Disposal of the device DiSpoSAl of ThE DEVicE → Dispose of the device and its packaging in an environmentally-friendly way. note Damage to the environment caused by parts contaminated by the fluid. ▶ Comply with the national and/or local regulations which concern the area of waste disposal. - Page 88 www.burkert.com...
Need help?
Do you have a question about the 8025 and is the answer not in the manual?
Questions and answers