Burkert 8025 Quick Start Manual
Flowmeter/flow transmitter
Hide thumbs
Also See for 8025:
- Operating instructions manual (178 pages) ,
- Quick start manual (174 pages) ,
- Instruction manual (138 pages)
Table of Contents
Advertisement
Quick Links
Advertisement
Table of Contents

Related Manuals for Burkert 8025


Summary of Contents for Burkert 8025
- Page 1 Type 8025 - 8035 - SE35 Flowmeter Flow Transmitter Quickstart English...
-
Page 2: Table Of Contents
1. About the QuickstArt.................3 2. intended use ....................4 3. bAsic sAfety informAtion ...............4 4. GenerAl informAtion ................6 5. description of the rAtinG plAte ..........6 6. technicAl dAtA ...................7 7. instAllAtion ....................21 8. WirinG ....................... 28 9. instAllAtion And commissioninG ........... 58 10. mAintenAnce And troubleshootinG ........ 64 11. pAckAGinG, trAnsport ..............64 12. storAGe ....................... 64 13. disposAl of the device . -
Page 3: About The Quickstart
The word "device" used within this Quickstart always refers to the Refers to information contained in this Quickstart or in other flowmeter type 8025 compact version, the flow transmitter type 8025 documents. panel version or wall-mounted version, the flowmeter type 8035 or the flow transmitter type SE35. -
Page 4: Intended Use
The flowmeter type 8025 compact version, the flowmeter type 8035 and The operating company is responsible for the respect of the local the flow transmitter SE35 associated with a sensor-fitting are designed safety regulations including for the staff safety. - Page 5 Type 8025 - 8035 - SE35 Basic safety information nOTiCE the device may be damaged by the fluid in contact with. risk of injury due to high pressure in the installation. ▶ Systematically check the chemical compatibility of the compo- ▶ Stop the circulation of fluid, cut off the pressure and drain the nent materials of the device and the fluids likely to come into pipe before loosening the process connections.
-
Page 6: General Information
Warning: Before using the device, take into account the tech- You can find the Operating Instructions and Technical Data Sheets nical specifications described in the Operating Instructions. regarding the type 8025, 8035 or SE35 at: www.burkert.com. Specification of the relay outputs Serial number Article number Fig. 1 : ... -
Page 7: Technical Data
Type 8025 - 8035 - SE35 Technical data TEchnicAl DATA 6.1.2. conformity to standards and directives 6.1. Technical data of the 8025 The applied standards, which verify conformity with the EU Direc- compact version tives, can be found on the EU Type Examination Certificate and/or the EU Declaration of Conformity (if applicable). - Page 8 Type 8025 - 8035 - SE35 Technical data Finished products with variable key PU01 or PU02 are UL-certified 6.1.3. fluid data products and comply also with the following standards: P (bar) • UL 61010-1 • CAN/CSA-C22.2 n°61010-1 Metal PVDF identification on the device...
- Page 9 Type 8025 - 8035 - SE35 Technical data 6.1.5. Electrical data fluid pressure PN10 The fluid pressure may be restricted by 12...36 v dc power supply • filtered and regulated the fluid temperature and the material the • oscillation rate: ±10% S020 fitting used is made of (see Fig. 2) •...
- Page 10 The following technical data are relevant for the flow transmitter To use the relay outputs in a wet 8025 panel version, connected to a Bürkert flow sensor 8020, 8030 location, observe the following or SE30 in a "Low Power" version only.
- Page 11 Type 8025 - 8035 - SE35 Technical data Indoor and outdoor identification on the device certification variable key (Protect the device against electroma- gnetic interference, ultraviolet rays and, UL-recognized PU01 when installed outdoors, against the effects of climatic conditions) Measuring Equipment UL-listed...
- Page 12 The following technical data are relevant for the flow transmitter DANGER safety instruction. 8025 wall-mounted version, connected to a Bürkert flow sensor current output 4...20 mA, sinking or sourcing 8020, 8030 or SE30 in a "Low Power" version only.
- Page 13 Type 8025 - 8035 - SE35 Technical data 6.3.1. conditions of use 6.3.3. materials Ambient temperature –10...+60°C part material Air humidity < 80%, non condensated Housing, cover Frontfoil Polyester height above see level max. 2000 m Screws (4) Stainless steel operating conditions Continuous operation Cable glands / Cable clips...
- Page 14 Type 8025 - 8035 - SE35 Technical data • integrated protection • 250 mA time-delay fuse current output 4...20 mA, sinking or sourcing mode (wiring dependant) • power • 6 VA maximum current 25 mA DangEr consumption version 12...36 v dc without relais danger due to the operation of the relay outputs of a ul maximum current 70 mA device in a wet location.
- Page 15 Type 8025 - 8035 - SE35 Technical data 6.4. Technical data of the flow protection class IP65 , device wired, cover lid screwed transmitter SE35 according to IEC/ tight and cable glands tightened or EN 60529 female connector plugged in and...
- Page 16 Type 8025 - 8035 - SE35 Technical data 6.4.3. materials • integrated protection • 125 mA time-delay fuse • power • 3 VA part material maximum current 25 mA Housing / cover / lid / nut consumption version Frontfoil / screws Polyester 12...36 v dc without relais...
- Page 17 Type 8025 - 8035 - SE35 Technical data DangEr operating conditions Continuous operation mobility of the device Fixed device danger due to the operation of the relay outputs of a ul Indoor and outdoor device in a wet location. (Protect the device against electroma- ▶ If a UL device is used in a wet location: gnetic interference, ultraviolet rays and, - energize the relay outputs with an alternating voltage of max.
- Page 18 Type 8025 - 8035 - SE35 Technical data • Device used on a piping (PS = maximum admissible pressure; 6.5.3. materials DN = nominal diameter of the pipe) part material type of fluid conditions Housing / cover / lid / nut Fluid group 1, Article 4, Paragraph 1.c.i DN ≤ 25...
- Page 19 Type 8025 - 8035 - SE35 Technical data 6.6. Technical data of the flow P (bar) transmitter SE35 associated with Metal a sensor-fitting S070 or S077 The technical data of the flow transmitter SE35 associated with a sensor-fitting S070 or S077 may be restricted by the S070 or S077 sensor-fitting used.
- Page 20 Type 8025 - 8035 - SE35 Technical data protection class IP65 , device wired, cover lid screwed type of fluid conditions according to IEC/ tight and cable glands tightened or female DN ≤ 200 EN 60529 connector plugged in and secured with Fluid group 2, Article 4, Paragraph 1.c.ii or PS ≤ 10...
-
Page 21: Installation
▶ All equipment connected to the wall-mounted or panel version of risk of injury due to unintentional switch on of power supply the flow transmitter 8025 must be double insulated in relation to or uncontrolled restarting of the installation. the mains in accordance with IEC standard 61010-1:2010 ▶... - Page 22 7.2. fluid installation of the compact version of the flowmeter 8025 The compact version of the flowmeter 8025 is inserted into an S020 fitting mounted on the pipe: 50 x DN 5 x DN 40 x DN 5 x DN...
- Page 23 Type 8025 - 8035 - SE35 Installation 7.2.2. installation of the flowmeter 8025 Filling of the pipe Filling of the pipe and fluid flow into the fitting S020 in horizontal mounting direction in vertical mounting → Install the fitting 5 onto the pipe following the instructions in chap.
- Page 24 Type 8025 - 8035 - SE35 Installation → 7.3. installation of the flowmeter 8035 If necessary, use a flow conditioner to improve measurement precision. The flowmeter 8035 comprises a flow transmitter SE35 and a → Install the sensor-fitting on the pipes according to the instruc- sensor-fitting S030.
- Page 25 Type 8025 - 8035 - SE35 Installation → 7.4. installation of the flow transmitter Install the sensor-fitting S070 or S077 on the pipes in such a way that: SE35 on the sensor-fitting S070 - the axis of the oval gears are set horizontally, as shown in or S077 Fig.
- Page 26 Type 8025 - 8035 - SE35 Installation 7.4.2. install the flow transmitter SE35 on 7.5. installation of a panel version of the sensor-fitting S070 or S077 the 8025 flowmeter Install the panel version of the device in an electrical cabinet with a protection class at least IP54 to ensure a degree of pollution 2 inside the electrical cabinet.
- Page 27 Type 8025 - 8035 - SE35 Installation 7.6. installation of a flow transmitter Screw 8025 wall-mounted version Washer nOTiCE risk of material damage if the cable glands are not tightly screwed on the housing Seal ▶ Before installing the wall-mounted housing on its support, tigh- Cable clip ten the nuts of the entry item of the cables glands at a torque of 1.5 N·m.
-
Page 28: Wiring
▶ All equipment connected to the wall-mounted or panel version of the flow transmitter 8025 must be double insulated in relation to the mains in accordance with IEC standard 61010-1:2010 ▶ Observe all applicable accident protection and safety regulati- Fig. 13 : ... - Page 29 Type 8025 - 8035 - SE35 Wiring Warning For a correct operation of the device, respect the following recommendations for the electrical installation: risk of injury due to non-conforming installation. (continued) • Make sure the installation is equipotential. See chap. 8.2. ▶ Install appropriate overload safety devices. For the versions fed •...
- Page 30 Type 8025 - 8035 - SE35 Wiring The device can be damaged if it is not tight. Power supply 12-36 V DC • Insert the supplied stopper gaskets into the unused cable glands to ensure the tightness of the device.
- Page 31 Type 8025 - 8035 - SE35 Wiring 8.3. Specifications of the connection Power 8025 cables supply Panel- or wall- mounted version 8.3.1. 8025 compact version, 8035 and SE35 8030 specification of the cables and the recommended value conductors (not supplied) Metal pipes Shielded cable Length of the cable max.
- Page 32 Type 8025 - 8035 - SE35 Wiring 8.3.3. 8025 in wall-mounting version specification of the cables and the recommended value conductors (not supplied) specification of the cables and the recommended value External diameter of a cable, if 2 cables 3...5 mm, using the conductors (not supplied) per cable gland supplied multi-way Shielded cable seal Length of the cable max.
- Page 33 Type 8025 - 8035 - SE35 Wiring → → Assemble and wire the female connector type 2508 (supplied) Wire the electrical supply and the current output using one of according to Fig. 17. the wiring plan of Fig. 18. →...
- Page 34 Type 8025 - 8035 - SE35 Wiring 8.5. configuring the selectors Wiring of the pulse output in npn mode 12-36 V DC 300 mA - 5-36 V DC Power supply Only move the selectors when the power supply is off. → Before wiring the device, configure the selectors on the elec- tronic board.
- Page 35 Type 8025 - 8035 - SE35 Wiring Table 5 : Positioning of the FLOW SENSOR selector depending Table 6 : Positioning of the Source / Sink selector depending on on the output signal of the flow sensor the wiring of the current output of a version with relays output signal of sensor position of the floW sensor selector Wiring the 4...20 mA output position of the source/sink Pulse, NPN (hall) selector on a version with relays Sinus (coil) COIL Not wired (jumper wire in place) SOURCE Sourcing mode SOURCE 8.5.2. SourcE/Sink selector Sinking mode SINK The SOURCE/SINK selector makes it possible to set the 4...20 mA...
- Page 36 Type 8025 - 8035 - SE35 Wiring → 8.6. Wiring the 8025 compact version, Before wiring the device insert the supplied cable clips into the slots of the 8035 and the SE35 with or - the electronic board without relays, with cable glands - the 115/230 V AC power supply board if the device has such a board.
- Page 37 Type 8025 - 8035 - SE35 Wiring • 1: relay 1 connection • 2: relay 2 connection Without SOURCE SINK With Supply PULSE 12..36Vdc OUTPUT • 3: fixation slots FLOW SENSOR COIL → Always secure the relays connection cables in the slots marked (see Fig.
- Page 38 Type 8025 - 8035 - SE35 Wiring 8.6.3. Wiring the power supply, the current output and the pulse output, version 12...36 V Dc, without relays → Before wiring the device, configure the selectors on the electronic board (see chap. 8.5).
- Page 39 Type 8025 - 8035 - SE35 Wiring 300 mA 300 mA 4...20 mA input at 4...20 mA input at Power supply Power supply external instrument external instrument 12-36 V DC 12-36 V DC Without Without SOURCE SINK SOURCE SINK With...
- Page 40 Type 8025 - 8035 - SE35 Wiring 8.6.4. Wiring the power supply, the current output and the pulse output, version 12...36 V Dc, with relays → Before wiring the device, configure the selectors on the electronic board (see chap. 8.5).
- Page 41 Type 8025 - 8035 - SE35 Wiring Wiring of the current output in sourcing mode Wiring of the current output in sinking mode 4...20 mA input at 4...20 mA input at external instrument Power supply external instrument Power supply 300 mA 300 mA 12-36 V DC 12-36 V DC Iout Iout SOURCE/SINK SOURCE/SINK selector...
- Page 42 Type 8025 - 8035 - SE35 Wiring Wiring of the pulse output in npn mode Wiring of the pulse output in pnp mode Power supply Power supply 12-36 V DC 12-36 V DC 300 mA 300 mA 5-36 V DC 5-36 V DC Jumper wire Jumper wire Without SOURCE SINK With Without SOURCE SINK...
- Page 43 Type 8025 - 8035 - SE35 Wiring 8.6.5. Wiring the power supply, the current output and the pulse output, version 115/230 V Ac, without relays → Before wiring the device, configure the selectors on the electronic board (see chap. 8.5).
- Page 44 Type 8025 - 8035 - SE35 Wiring 4...20 mA input at external instrument Without With Supply PULSE 12..36Vdc OUTPUT FLOW SENSOR COIL T 125 mA 115/230 V AC power supply If the current output is wired, remove the jumper wire between the terminals NC and L+.
- Page 45 Type 8025 - 8035 - SE35 Wiring Wiring of the pulse output in npn mode Wiring of the pulse output in pnp mode 5-36 V DC 5-36 V DC Jumper wire Jumper wire Without Without With With Supply PULSE Supply PULSE 12..36Vdc OUTPUT 12..36Vdc OUTPUT 8025: 8025: FLOW SENSOR FLOW SENSOR COIL COIL T 125 mA...
- Page 46 Type 8025 - 8035 - SE35 Wiring 8.6.6. Wiring the power supply, the current output and the pulse output, 115/230 V Ac, with relays → Before wiring the device, configure the selectors on the electronic board (see chap. 8.5). →...
- Page 47 Type 8025 - 8035 - SE35 Wiring → Connect the relays according to chap. 8.6.2. 4...20 mA input at external instrument 4...20 mA input at external instrument Without SOURCE SINK With Supply PULSE 12..36Vdc OUTPUT Without SOURCE SINK With FLOW SENSOR...
- Page 48 Type 8025 - 8035 - SE35 Wiring Wiring of the pulse output in npn mode Wiring of the pulse output in pnp mode 5-36 V DC 5-36 V DC Jumper wire Jumper wire Without SOURCE SINK Without With SOURCE SINK With Supply PULSE 12..36Vdc OUTPUT Supply PULSE 12..36Vdc OUTPUT 8025: 8025: FLOW SENSOR COIL...
- Page 49 Fig. 38 : Terminal assignment of a panel-mounted or wall-mounted version, 12...36 V DC, without relays The wiring of the current output and the wiring of the pulse output of a flow transmitter 8025 panel version or wall-mounted version, 12...36 V DC, without relays, are the same as for a flowmeter 8025 compact version, 12...36 V DC, without relays, with cable glands.
- Page 50 Connect the relays according to chap. 8.6.2. The wiring of the current output and the pulse output of a flow transmitter 8025 panel version or wall-mounted version 12...36 V DC, with relays, are the same as for a flowmeter 8025 compact version, 12...36 V DC, with relays, with cable glands.
- Page 51 Type 8025 - 8035 - SE35 Wiring 8.7.3. connecting the flow sensor to the flow transmitter 8025 panel version or wall- mounted version → Configure the FLOW SENSOR selector on the electronic board (see chap. 8.5). → Connect the remote flow sensor to the FLOW SENSOR terminal block of the electronic board by respecting the pin assignment depending on the output type of the remote sensor, either sinus (COIL) or pulse output (NPN).
- Page 52 → Screw the nut back. Secure: → Connect the flow sensor to the flow transmitter 8025 according - the power supply cable with a cable clip, to chap. 8.8.4. - the flow sensor connection cable with a cable clip →...
- Page 53 Type 8025 - 8035 - SE35 Wiring 8.8.2. Wiring the power supply, the current output and the pulse output, 115/230 V Ac, without relays → Before wiring the device, obey the instructions of chap. 8.8.1. terminal block 2 pe: Shield wiring (green/yellow wire, factory wired)
- Page 54 Type 8025 - 8035 - SE35 Wiring Without Without With With Supply PULSE 12..36Vdc OUTPUT Supply PULSE 12..36Vdc OUTPUT COIL SENSOR NPN SENSOR FLOW SENSOR COIL SENSOR NPN SENSOR 1 PULSE INPUT FLOW SENSOR COIL 1 PULSE INPUT SUPPLY COIL...
- Page 55 Type 8025 - 8035 - SE35 Wiring Without With Supply PULSE 12..36Vdc OUTPUT COIL SENSOR NPN SENSOR FLOW SENSOR 1 PULSE INPUT COIL SUPPLY 3 NC 4 NC 4 NC 4 PE FLOW SENSOR 5 6 7 8 9 10...
- Page 56 Type 8025 - 8035 - SE35 Wiring 8.8.3. Wiring the power supply, the current output and the pulse output, 115/230 V Ac, with relays → Before wiring the device, obey the instructions of chap. 8.8.1. terminal block 1 Iout: 4...20 mA output (green wire, factory wired) L+ (red wire, factory wired) L–...
- Page 57 Type 8025 - 8035 - SE35 Wiring The wiring of the pulse output of a wall-mounted version with relays is the same as the wiring of a version without relays. → Refer to Fig. 44 and Fig. 45, chap. 8.8.2.
-
Page 58: Installation And Commissioning
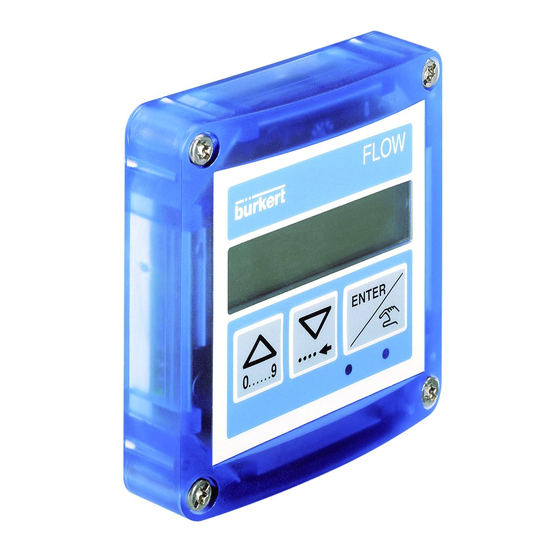
Type 8025 - 8035 - SE35 Installation and commissioning inST AllA Tion AnD commiSSioninG 9.2. operating levels of the device The device has two operating levels: the Process level and the Con- 9.1. Safety instructions figuration level. Table 7 : Default settings of the device Warning... - Page 59 Type 8025 - 8035 - SE35 Installation and commissioning Process level Configuration level 12.6 L/MiN. > 5 s ENTER 0..9 16.45 MA Parameters menu Test Menu 0..9 ENTER OFFSEt 87654 L LANGUAGE > 5 s UNit SPAN 231 L. K-FACtOR FREqUENC 0..9...
- Page 60 Type 8025 - 8035 - SE35 Installation and commissioning 9.3. Description of the navigation keys and the status lEDs • Selecting the displayed parameter • Confirming the settings • Scrolling up the parameters • Incrementing the figure selected LED indicating the status of the relay 2...
- Page 61 Type 8025 - 8035 - SE35 Installation and commissioning 9.4. using the navigation keys you want to... press... move between parameters within a level or a menu. • to go the next parameter. • to go to the previous parameter. 0..9 access the Parameters menu...
- Page 62 Type 8025 - 8035 - SE35 Installation and commissioning 9.5. choosing the display language 9.6. Entering the k-factor of the fitting used When the device is energized for the first time, the display language is English. The device determines the flow rate in the pipe using the fitting K-factor.
- Page 63 Type 8025 - 8035 - SE35 Installation and commissioning The display shows the K-factor of ENTER ENTER the fitting, last entered or determined K-FACtOR tEACh NO K=0000.00 using a Teach-In procedure. → Edit the parameter. 0..9 → Enter the K-factor (value between...
-
Page 64: Maintenance And Troubleshooting
Type 8025 - 8035 - SE35 Maintenance and troubleshooting mAinTEnAncE AnD pAckAGinG, TrAnSporT TroublEShooTinG nOTiCE damage due to transport 10.1. Safety instructions Transport may damage an insufficiently protected device. DangEr ▶ Transport the device in shock-resistant packaging and away from humidity and dirt. -
Page 65: Disposal Of The Device
Type 8025 - 8035 - SE35 Disposal of the device Table 8 : Storage temperature of the devices depending on the DiSpoSAl of ThE DEVicE version → Dispose of the device and its packaging in an environmentally- friendly way. device power supply storage temperature nOTiCE 12...36 V DC –10...+60°C Flowmeter 8025... - Page 66 www.burkert.com...
Need help?
Do you have a question about the 8025 and is the answer not in the manual?
Questions and answers