Advertisement
Quick Links
Advertisement

Related Manuals for Lefroy Brooks Connaught CH 1100


Summary of Contents for Lefroy Brooks Connaught CH 1100
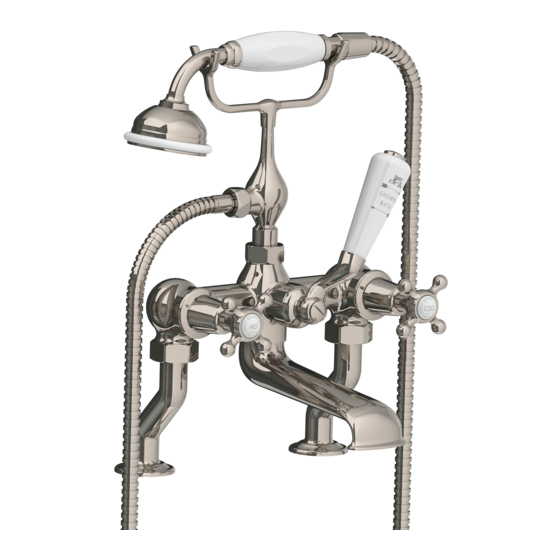
- Page 1 1100 / 1107 / 1151 / 1166 BATH SHOWER MIXERS & BATH FILLERS INSTALLATION GUIDE...
- Page 2 DIMENSIONS – WALL MOUNTED MODELS Wall mounted lever models 331mm G¾ Ø50mm (Ø26mm) 180mm 196mm 53mm max. Wall mounted cross handle/handwheel models 298mm G¾ Ø50mm (Ø26mm) 180mm 196mm 53mm max. All critical dimensions are same for Bath Shower Mixers & Bath Filler models Spout reach can be increased by 40mm using LB 2118 extended return bends.
- Page 3 DIMENSIONS – DECK MOUNTED MODELS Deck mounted lever models 396mm Ø50mm 40mm 53mm max. 78mm 35mm crs G¾ (Ø26mm) 100mm min. 250mm max. 185mm crs Deck mounted cross handle/handwheel models 365mm Ø50mm 140mm 40mm 53mm max. 78mm 35mm crs G¾ (Ø26mm) 100mm min.
- Page 4 TYPICAL FLOW RATES Hand shower Spout Flow (Litres/minute) Note: Balance pressures shown are applied directly to the hot and cold inlets; flow rates indicated are free flowing and may vary subject to restrictions created by installation, pipework, layout or application.
- Page 5 Suits all systems Water quality This Lefroy Brooks product is potentially suitable In hard water areas, a suitable water treatment for every possible application, type of boiler and system should be provided to prevent limescale water supply pressure.
- Page 6 ASSEMBLY The same procedure applies to bath shower mixers and bath fillers. Deck mounted Wall mounted 1 Unscrew and remove the backnuts and rubber 2 Tighten the elbow/deck leg nuts to secure. washers from the elbows/deck legs (A). Place Ensure that the jaws of the spanner are the elbow/deck leg washers in place then wrapped with suitable material such as tape screw the elbows/deck legs in place (B).
- Page 7 INSTALLATION – DECK MOUNTED MODELS The same procedure applies to all deck mounted models. Opening in mounting surface 1 Where required, drill Ø27–30mm holes in 6 Pressure test the installation to ensure that the mounting surface. all joints are tight and do not leak, especially 2 Place the threaded tails of the mixer/filler where pipework will be concealed.
- Page 8 INSTALLATION – WALL MOUNTED MODELS The same procedure applies to all wall mounted models. For European models please refer to the installation guide supplied with the eccentric fittings. Opening in mounting surface Mounting surface Backnut Wall connector Cavity Washer 1 Where required, drill Ø27–30mm holes in 6 Pressure test the installation to ensure that the mounting surface.
- Page 9 SERVICING – CARTRIDGE REPLACEMENT The same procedure applies to bath shower mixers and bath fillers. Before continuing please ensure that the 2 Unscrew and remove the ceramic cartridge(s) water supplies have been isolated and drained using a 17mm spanner (B). where necessary.
- Page 10 SERVICING - DIVERTER SHUTTLE REPLACEMENT The same procedure applies to lever models. Retaining nut Sealing ring Diverter lever Gland nut Diverter shuttle Retaining screw Spout To Replace To Remove Before continuing please ensure that the 5 Unscrew the retaining nut (C). The sealing ring water supplies have been isolated and drained should stay inside the retaining nut.
-
Page 11: Fault Finding
FAULT FINDING The hot/cold valves are turned off but the spout drips continuously. • Replace the ceramic cartridge(s). See below for spare part numbers and ‘Servicing – Cartridge Replacement’ section. The diverter lever is set to supply either the spout or hand shower, but water passes from the spout and hand shower simultaneously. - Page 12 20.065.069C / MAY 2021 CONTRACT ENQUIRIES +44 (0)1992 708 316 info@lefroybrooks.co.uk CUSTOMER SERVICE, SPARES & TECHNICAL ENQUIRIES +44 (0)1902 390 894 technical@lefroybrooks.co.uk L E F R O Y B R O O K S . C O . U K Whilst every effort is made to ensure the accuracy of these, they are subject to change without notice as part of the company’s product development process.
Need help?
Do you have a question about the Connaught CH 1100 and is the answer not in the manual?
Questions and answers