Associated Electrics RC10T Instruction Manual
Truck
Hide thumbs
Also See for RC10T:
- Instruction manual (16 pages) ,
- Instruction manual (45 pages) ,
- Instruction manual (18 pages)

Related Manuals for Associated Electrics RC10T


Summary of Contents for Associated Electrics RC10T
- Page 2 Thank you for purchasing this Team Associated product. This assembly manual contains instructions and tips for building and maintaining your new RC10T Kit. Please take a moment to read through this manual to help familiarize yourself with these steps. We are continually changing and improving our designs; therefore, actual parts may appear slightly different than in the illustrations.
- Page 3 :: Hardware - 1:1 Scale View :: Hardware - 1:1 Scale View Cap Head (shcs) Button Head (bhcs) Flat Head (fhcs) 4-40x1/4” 4-40x3/8” 4-40x3/16” 4-40x5/16” 4-40x1/2” 4-40x1/4” 4-40x3/8” 3x6mm (31531) 8-32x1/4” (6316) 4-40x1/2” 4-40x5/8” 8-32x1/2” (6316) 4-40x3/4” Diff Balls 8-32x7/8” (6316) 4-40x1”...
- Page 4 This symbols indicates a line up your hardare with the correct drawing special note or instruction until you find the exact size. in the manual. Associated Electrics, Inc. Customer Service 21062 Bake Parkway Tel: 949.544.7500 Lake Forest, CA 92630 Fax: 949.544.7501 http://www.AssociatedElectrics.com •...
- Page 5 Steering Build - Bag A - Bag A - - Step 2 Step 2 LEFT 6299 E-clip (small) 7813 RC10T king pin (.125 x .951) 4-40 set screw Build left and right sides! Build left and right sides! :: Nose Plate /...
- Page 6 Nose Plate / Steering Build Steering Build - Bag A - Bag A - - Step 4 Step 4 7813 Hinge pin (.125 x 1.675”) 6299 7805 E-clip RC10T (small) 7809 nose plate RC10T bulkhead brace 6316 8-32 x 1/2 steel...
- Page 7 :: Servo Saver Servo Saver Build Build - Bag B - Bag B - - Step 3 Step 3 5-40 locknut Servo saver screw, long FHCS Servo saver screw, short FHCS :: Servo Saver Servo Saver Build Build - Bag A / B / I - Bag A / B / I - - Step 4 Step 4 6279...
- Page 8 :: Servo Saver Servo Saver Build Build - Bag A / B / I - Bag A / B / I - - Step 6 Step 6 :: :: Bumper / Mounts Bumper / Mounts Build Build - Bag C / D - Bag C / D - - Step 1 Step 1 7809...
- Page 9 Rear End Build Build - Bag G - Bag G - - Step 1 Step 1 6271 6374 7810 Ballstud 1/4 rear RC10T rear .20 (silver) stub axle hub carrier, 0 degree (Left & Right) 4-40 nut 6374 Roll pins .1 dia x 3/8...
- Page 10 Build - Bag G - Bag G - - Step 5 Step 5 7809 4-40 x 3/4 Rear body SHCS mounts 7808 RC10T rear shock tower 4-40 nuts 4-40 x 5/16 SHCS 4-40 x 3/8 4-40 x 1/4 SHCS SHCS...
- Page 11 :: Shocks Build Shocks Build - Bag H - Bag H - Step 1 - Step 1 Remove spurs 6299 6299 Shock E-clip E-clip pistons (small) (small) (1, 2, 3) Piston 6421 Shock shaft, front (1.02) Piston number here Use #2 = front shocks 6420 Use #1 = rear shocks Shock shaft,...
- Page 12 :: Shocks Build Shocks Build - Bag H - Bag H - Step 4 - Step 4 6420 / 6421 * Shock Bleeding Steps: RC10 1. Pull shock shaft down. shock cap 2. Fill shock body 3/4 full with silicone fluid. Gold 3.
- Page 13 :: Shocks Build Shocks Build - Bag H - Step 7 RC10 shock #4 aluminum bushing washer 4-40 locknut 4-40 x 5/8 SHCS Build left and right sides! :: Transmission Build Transmission Build - Bag J / K - Bag J / K - Step 1 - Step 1 6581 6573...
- Page 14 3/16 x 5/16 :: Transmission Build Transmission Build - Bag J / K - Bag J / K - Step 5 - Step 5 7361 RC10T 4-40 x 1/4 Dogbone BHCS Build left and right sides! 4-40 x 3/8 FHCS...
- Page 15 :: Transmission Build Transmission Build - Bag J / K - Bag J / K - Step 6 - Step 6 Receiver not 6338 4-40 x 1/2 included! 4-40 x 5/16 Antenna tube SHCS SHCS and cap #4 aluminum washer 6360 Transmission brace...
- Page 16 Tires Build - Bag L - Bag L - Step 1 - Step 1 TIP: For faster motors, it is recommended to glue the tire bead to the wheels! 7807 7807 RC10T front RC10T front wheel, narrow, wheel, narrow, spacer inner 7871...
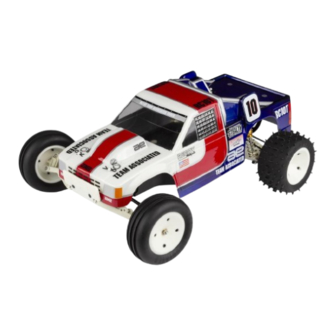
- Page 17 Body Build - Step 1 Painting Tips: Your RC10T Kit comes with a clear polycarbonate body and wing. You will need to prep the body and wing before you can paint them. Wash the inside thoroughly with warm water and liquid detergent. Dry the body and wing using a clean, soft, lint-free cloth.
Need help?
Do you have a question about the RC10T and is the answer not in the manual?
Questions and answers