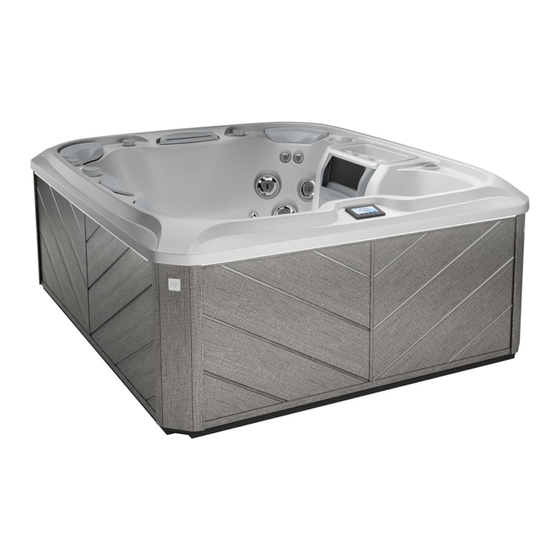
Sundance Spas 880 Series Owner's Manual

Sundance Spas 880 Series Owner's Manual

Hide thumbs Also See for 880 Series:
Table of Contents

Advertisement

880 ™ Series
Owner's Manual
Rev B
Aspen ®
Optima ®
Cameo ®
Marin ®
Altamar ®
Vistamar ™
Capri ®

Advertisement

Table of Contents
loading
Need help?

Need help?

Do you have a question about the 880 Series and is the answer not in the manual?

Questions and answers

Robert Krause
January 23, 2025

The radio works but there is no power to the display and no power to the jets or pumps. The display is dark.

1 comments:
Mr. Anderson
February 10, 2025

A dark display and no power to the jets or pumps in a Sundance Spas 880 Series could be caused by a tripped household circuit breaker. The recommended action is to check the circuit breaker and reset it if necessary. If the issue persists, contact a Sundance Spas dealer or a qualified service technician.

This answer is automatically generated

Carol Warner
April 10, 2025

I have a 2006 Marin Sundance 880 series. At the bottom, underneath the control panel, and closest to the filter. air bubbles come out of a blower. The plastic piece through which they come is broken and too much streams out. Do you have a replacement part.

Joan Herrington
March 10, 2025

My spa is somehow set to a foreign language. How do I get back to english

gary myers
February 25, 2025

its a marin serial number mr229729

Subscribe to Our Youtube Channel

Summary of Contents for Sundance Spas 880 Series

  • Page 1 880 ™ Series Owner’s Manual Rev B Aspen ® Optima ® Cameo ® Marin ® Altamar ® Vistamar ™ Capri ®...
  • Page 2 Attention New Hot Tub Owner! Congratulations on the purchase of your new Sundance ® Spas hot tub! The following is a list of automated functions performed by your hot tub. These functions are listed below in an attempt to suppress any operational concerns you may have during the 昀椀rst 24 hours of ownership! Also listed below are important maintenance recommendations you should observe on a regular basis to protect your new investment.
  • Page 3: Table Of Contents

    Capri Massage/Waterfall Selector Diagram ....... 41 9.21 Capri Air Controls Diagram ............42 10.0 Registration and Start-up ..........43 10.1 Start-up Sequence ..............43 10.2 Register Your New Spa .............. 43 10.3 iTouch™ Control Panel Main Menu ........... 44 © Sundance Spas, Inc. All Rights Reserved...
  • Page 4 11.0 Operating Instructions ...........46 11.1 Activating the Jets Pumps and Blower........46 11.2 Lights Menu ................47 11.3 Music Menu................48 11.4 Connecting the BLUEWAVE® System with your Bluetooth® device ..............49 11.5 Audio Settings ................50 11.6 CLEARRAY on Demand ............50 11.7 Ozone Operation ...............
  • Page 5 14.0 Water Quality Maintenance ..........75 14.1 pH Control .................. 75 14.2 Sanitizing ................... 75 14.3 CLEARRAY Active Oxygen™ System ........76 14.4 CLEARRAY® Bulb Replacement and Quartz Tube Maintenance ..............77 14.5 Other Additives................79 14.6 Stainless Steel Handrail Maintenance (if equipped) ....79 15.0 Troubleshooting - Display Messages ......80 16.0...
  • Page 7: Important Hot Tub Owner Information

    Section 4.0 titled, “Locating Your Sundance Hot Tub” (page 9) or as prescribed by your authorized Sundance Spas dealer. Sundance hot tubs constantly strives to offer the 昀椀nest hot tubs available, therefore, modi昀椀cations and enhancements may be made...
  • Page 8: Important Safety Instructions For All Spa Owners

    880™ Series Important Safety Instructions for all Spa Owners READ AND FOLLOW ALL INSTRUCTIONS CAREFULLY! This spa was manufactured to meet the standards and speci昀椀cations outlined in the “Virginia Graeme Baker Pool and Spa Safety Act” (VGB Safety Act). Visit www.nspf.org for more information. When installing and using this spa, basic safety precautions should always be followed, including: DANGER:...
  • Page 9 880™ Series A grounding wire connector is provided on this unit to connect a • minimum No. 8 AWG (8.4 mm²) solid copper conductor between this unit and any metal equipment, metal enclosures of electrical equipment, metal water pipe, or conduit within 5 feet (1.5m) of the unit.
  • Page 10 880™ Series WARNING: RISK OF SEVERE INJURY OR DEATH! Since excessive water temperatures have a high potential for • causing fetal damage during the early months of pregnancy, if pregnant or possibly pregnant, consult your physician before using a spa. •...
  • Page 11 880™ Series In addition to maintenance of 昀椀lters and water WARNING: chemistry, proper ventilation is recommended to reduce the risk of contracting a waterborne illness (e.g. an infection, bacteria or virus) and/or respiratory ailments that could be present in the air or water. Consult a licensed architect or building contractor to determine your speci昀椀c needs if installing your hot tub indoors.
  • Page 12: Entrapment Risk

    880™ Series Entrapment Risk The Consumer Products Safety Commission/USA has reported that users of pools and spas have become entrapped (stuck) to drain and/or suction 昀椀ttings causing death, drowning, or serious injury (see diagram below). This spa was manufactured to meet the standards and speci昀椀ca- tions outlined in the “Virginia Graeme Baker Pool and Spa Safety Act”...
  • Page 13: Hyperthermia

    A Warning Sign is provided in your warranty packet. Please install at a location near your spa, where it is visible to users of the spa. For additional or replacement Warning Signs please contact your local Sundance spas dealer and reference item number #6530-082.
  • Page 14: Important Additional Safety Instructions

    880™ Series Important Additional Safety Instructions When using this electrical equipment, basic safety precautions should always be followed, including the following: 1. READ AND FOLLOW ALL INSTRUCTIONS. 2. A green colored terminal or a terminal marked G, Gr, Ground, Grounding or the symbol* is located inside the supply termi- nal box or compartment.
  • Page 15: Locating Your Sundance Hot Tub

    880™ Series Locating Your Sundance Hot Tub IMPORTANT: Because of the combined weight of the spa, water and users, it is extremely important that the base upon which the spa rests be smooth, 昀氀at, level and capable of uniformly support- ing this weight, without shifting or settling, for the entire time the spa is in place.
  • Page 16: Outdoor Location

    880™ Series Outdoor Location In selecting the ideal outdoor location for your hot tub, we suggest that you take into consideration the following: The proximity to changing area and shelter (especially in regions • subject to cold weather). The pathway to and from your hot tub (this should be free of debris •...
  • Page 17: General Electrical Safety Instructions

    Nonetheless, this hot tub must be installed properly to ensure dependable usage. Please contact your local Sundance Spas dealer or local building department should you have any questions regarding your installation. Proper grounding is extremely important. Sundance hot tubs are equipped with a current collector system.
  • Page 18: Electrical Installation Instructions (240V Service)

    880™ Series Electrical Installation Instructions (240V Service) IMPORTANT NOTICE: The electrical wiring of this hot tub must meet the requirements of the National Electrical Code (NEC) and/or any applicable state, local or country codes. The electrical circuit must be installed by a quali昀椀ed electrician and approved by a local building/electrical inspection authority in your state or country.
  • Page 19 880™ Series 7. Select the power supply entrance you want to use (Figures A-B, page 14) and feed cable through the large opening provided on the bottom of the control box. 8. Connect wires, color to color, on terminal blocks TB1 (Figure D). TIGHTEN SECURELY! All wires must be hooked up securely or damage could result.
  • Page 20 880™ Series Figure A 12:00 AM °F Note: Equipment location (such as pumps, CLEARRAY®, drain, heater etc.) varies by model. Control Box Pump Drain Plug(s) Power Supply Entrance(s) 10. Filter/Circulation Pump Jets Pump 11. CLEARRAY® Jets Pump 12. Control Panel Jets Pump 13.
  • Page 21 880™ Series Figure C Control Box 240V J25=HTR1 F8 30A 250VAC J26=HTR2 J26 J31 1 2 3 4 5 6 7 8 9 10 120V 120V J27=HTR3 J30=TEST J31=CE J25 J27 J111 LIGHT MAIN MAIN J198 F4 2A SLO-BLOW Terminal Block Unfused F5 3.15A SLO-BLOW Fused...
  • Page 22: Power Requirements

    880™ Series Power Requirements ® Sundance hot tubs are designed to provide optimum performance and 昀氀exibility of use when connected to their maximum electrical service. However, they are shipped factory con昀椀gured for their most common preferred electrical connection. If you prefer, a qualified technician can perform a minor circuit board modi昀椀cation that allows the hot tub to operate on a different electrical service.
  • Page 23 880™ Series IMPORTANT: In most cases, 昀椀lling the spa by placing the hose in the footwell will not create an airlock. If you experience an airlock we recommend 昀椀lling by placing the end of your garden hose into the primary 昀椀lter inlet, page 68. 2.
  • Page 24 880™ Series 4. Activate Jets Pumps Turn on all jet(s) pumps and blower (page 44) to ensure proper mixing when adding start up chemical in step 5. 5. Add Start-Up Chemicals Add the hot tub water chemicals as recommended by your Sundance Spas dealer.
  • Page 25 880™ Series DANGER: RISK OF PERSONAL INJURY. Check water temperature carefully before entering hot tub! Excessive water temperature can cause burns, welts and body temperature to rise, hyperthermia (over-heating). Decontamination Procedure (Steps 9-15) Steps 9-15 below are only required when sanitizer levels are unstable after performing steps 1-6 above.
  • Page 26 880™ Series WARNING: RISK OF PERSONAL INJURY! To decrease the risk of injury, drowning or entrapment, • never leave your hot tub unattended for any reason while the cover is open and accessible, especially to small children and animals! Precautions should be taken to minimize your exposure •...
  • Page 27 880™ Series 15. Establish a sanitizer reading no less than 1.0 ppm free chlorine or 2.0 ppm bromine, then allow the hot tub to set undisturbed for 8 hours. Retest water after 8 hours to determine if sanitizer levels are stable.
  • Page 28: Aspen® Hot Tub Features

    880™ Series Hot Tub Features Aspen® Hot Tub Features 12:00 AM °F 16. Waterfall Control Valve Main Control Panel 17. Waterfall Filtration Return Handrail with LED Light 18. Fluidix ST™ Jets (16 ea.) Lights (2 ea.) 19. Waterfall Pillows (4 ea.) 20.
  • Page 29: Aspen Massage/Waterfall Selector Diagram

    880™ Series Aspen Massage/Waterfall Selector Diagram Massage Selector Operation Rotate Massage Selectors 1 and 2 to divert water between designated jet groups. 12:00 AM °F Massage Selectors (1-2) • Massage Selector #1 controls pump #2. • Massage Selector #2 controls pump #1. Waterfall Selector (3) •...
  • Page 30: Aspen Air Controls Diagram

    880™ Series Aspen Air Controls Diagram Air Control Operation Rotate Air Controls 1-7 to add air to designated jet groups. Turn the Blower on to add air to jets group 8. 12:00 AM °F Spa operation subject to change without notice.
  • Page 31: Optima® Hot Tub Features

    880™ Series Optima® Hot Tub Features 12:00 AM °F Main Control Panel 16. Waterfall Control Valve Handrail with LED Light 17. Waterfall Filtration Return Light 18. Fluidix ST™ Jets (16 ea.) Pillows (4 ea.) 19. Waterfall 20. Optional BLUEWAVE® 2.0 Fluidix Nex™...
  • Page 32: Optima Massage/Waterfall Selector Diagram

    880™ Series Optima Massage/Waterfall Selector Diagram Massage Selector Operation Rotate Massage Selectors 1 and 2 to divert water between designated jet groups. 12:00 AM °F Massage Selectors (1-2) • Massage Selector #1 controls pump #1. • Massage Selector #2 controls pump #2. Waterfall Selector (3) •...
  • Page 33: Optima Air Controls Diagram

    880™ Series Optima Air Controls Diagram Air Control Operation Rotate Air Controls 1-5 to add air to designated jet groups. Turn the Blower on to add air to jets group 6. 12:00 AM °F Spa operation subject to change without notice.
  • Page 34: Cameo® Hot Tub Features

    880™ Series Cameo® Hot Tub Features 12:00 AM °F Control Panel 17. Waterfall Filtration Return Handrail with LED Light 18. Fluidix ST™ Jets (12 ea.) Lights 19. Waterfall Pillows (3 ea.) 20. Optional BLUEWAVE® 2.0 Fluidix Nex™ Jets (6 ea.) Wireless Spa Stereo (behind Fluidix Intelli-Jet™...
  • Page 35: Cameo Massage/Waterfall Selector Diagram

    880™ Series Cameo Massage/Waterfall Selector Diagram Massage Selector Operation Rotate Massage Selectors 1 and 2 to divert water between designated jet groups. 12:00 AM °F Massage Selectors (1-2) • Massage Selector #1 controls pump #2. • Massage Selector #2 controls pump #1. Waterfall Selector (3) •...
  • Page 36: Cameo Air Controls Diagram

    880™ Series Cameo Air Controls Diagram Air Control Operation Rotate Air Controls 1-5 to add air to designated jet groups. Turn the Blower on to add air to jets group 6. 12:00 AM °F Spa operation subject to change without notice.
  • Page 37: Altamar® Hot Tub Features

    880™ Series 9.10 Altamar® Hot Tub Features 12:00 AM °F Main Control Panel 15. Filter Lid Handrail with LED Light 16. Waterfall Control Valve Light 17. Waterfall Filtration Return Pillows (3 ea.) 18. Fluidix ST™ Jets (12 ea.) Fluidix Nex™ (6 ea.) 19.
  • Page 38: Altamar Massage/Waterfall Selector Diagram

    880™ Series 9.11 Altamar Massage/Waterfall Selector Diagram Massage Selector Operation Rotate Massage Selector 1 to divert water between designated jet groups. 12:00 AM °F Massage Selectors (1) • Massage Selector #1 controls pump #2. Waterfall Selector (2) • Waterfall Selector #2 controls circulation pump output to waterfall. Continuously Powered Jets Jets #3 are always on when jets pump #1 is running.
  • Page 39: Altamar Air Controls Diagram

    880™ Series 9.12 Altamar Air Controls Diagram Air Control Operation Rotate Air Controls 1-5 to add air to designated jet groups. Turn the Blower on to add air to jets group 6. 12:00 AM °F Spa operation subject to change without notice.
  • Page 40: Vistamar® Hot Tub Features

    880™ Series 9.13 Vistamar® Hot Tub Features 12:00 AM °F Main Control Panel 15. Waterfall Control Valve Handrail with LED Light 16. Waterfall Filtration Return Light 17. Fluidix ST™ Jets (12 ea.) Pillows (4 ea.) 18. Waterfall Fluidix Nex™ (4 ea.) 19.
  • Page 41: Vistamar Massage/Waterfall Selector Diagram

    880™ Series 9.14 Vistamar Massage/Waterfall Selector Diagram Massage Selector Operation Rotate Massage Selector 1 to divert water between designated jet groups. 12:00 AM °F Massage Selectors (1) • Massage Selector #1 controls pump #2. Waterfall Selector (2) • Waterfall Selector #2 controls circulation pump output to waterfall. Continuously Powered Jets Jets #3 are always on when jets pump #1 is running.
  • Page 42: Vistamar Air Controls Diagram

    880™ Series 9.15 Vistamar Air Controls Diagram Air Control Operation Rotate Air Controls 1-5 to add air to designated jet groups. Turn the Blower on to add air to jets group 6. 12:00 AM °F Spa operation subject to change without notice. Spa operation subject to change without notice.
  • Page 43: Marin® Hot Tub Features

    880™ Series 9.16 Marin® Hot Tub Features 12:00 AM °F Main Control Panel 15. Filter Lid Air Controls w/LED Light (4 ea.) 16. Waterfall Control Valve Light 17. Waterfall Pillows (4 ea.) 18. Fluidix ST™ Jets (12 ea.) Fluidix Nex™ (6 ea.) 19.
  • Page 44: Marin Massage/Waterfall Selector Diagram

    880™ Series 9.17 Marin Massage/Waterfall Selector Diagram Massage Selector Operation Rotate Massage Selector 1 to divert water between designated jet groups. 12:00 AM °F Massage Selectors (1) • Massage Selector #1 controls pump #1. Waterfall Selector (2) • Waterfall Selector #2 controls circulation pump output to waterfall. Continuously Powered Jets •...
  • Page 45: Marin Air Controls Diagram

    880™ Series 9.18 Marin Air Controls Diagram Air Control Operation Rotate Air Controls 1-4 to add air to designated jet groups. Turn the Blower on to add air to jets group 5. 12:00 AM °F Spa operation subject to change without notice.
  • Page 46: Capri® Hot Tub Features

    880™ Series 9.19 Capri® Hot Tub Features Control Panel 14. Filter Lid Integrated Handrail (2) 15. Weir Gate/Skimmer Gravity Drain 16. Waterfall Pillows (3 ea.) 17. SunScents Dispenser Fluidix Nex™ Jets (4 ea.) 18. Footwell Suction Cover (2 ea. one is not shown) Fluidix ST™...
  • Page 47: Capri Massage/Waterfall Selector Diagram

    880™ Series 9.20 Capri Massage/Waterfall Selector Diagram Massage Selector Operation Rotate Massage Selector 1 to divert water between designated jet groups. Massage Selectors (1) • Massage Selector #1 controls pump #1. Waterfall Selector (2) • Waterfall Selector #2 controls circulation pump output to waterfall. Spa operation subject to change without notice.
  • Page 48: Capri Air Controls Diagram

    880™ Series 9.21 Capri Air Controls Diagram Air Control Operation Rotate Air Controls 1-2 to add air to designated jet groups. Turn the Blower on to add air to jets group 3. Spa operation subject to change without notice.
  • Page 49: Start-Up Sequence

    880™ Series 10.0 Registration and Start-up 10.1 Start-up Sequence When power is 昀椀rst applied, the iTouch™ control panel will screens be- low will be displayed, Figures A. Then you will need to active the Priming Cycle, page 17. Note: The start-up sequence will time out after approximately 20 seconds.
  • Page 50: Itouch™ Control Panel Main Menu

    880™ Series 10.3 iTouch™ Control Panel Main Menu The new iTouch™ system makes operating your spa a breeze. The Home Menu, Figure A, provides access to spa functions and programming. You can navigate through the menus and sub-menus with ease. Simply touch the icons on the LCD display to begin operating your new Sundance spa.
  • Page 51 880™ Series Error/ Reminder Indicator Icon: Displays when there is an error or reminder message that needs to be addressed. The icon will also appear at the Home Menu as a reminder. Tap to view the condition that requires attention. Information Icon: Tap to display the information message.
  • Page 52: Activating The Jets Pumps And Blower

    880™ Series 11.0 Operating Instructions Your Sundance ® Spas hot tub has a touch-sensitive control panel, massage selector valves and air control knobs located on the top rim of the hot tub (Sections 9.1-9.19, pages 22-40). These controls let you operate many of the special functions of your Sundance hot tub. By familiarizing yourself with the following information, you will be able to gain the full bene昀椀ts afforded by the various functions of your hot tub.
  • Page 53: Lights Menu

    880™ Series 11.2 Lights Menu From the Home Menu, (Figure A), tap to enter the Light Submenu. The LCD screen will display the Light Submenu (Figure B). From this menu you can control the hot tub lighting. Note: The lights automatically turn off after 2 hours. They can be reactivated if needed.
  • Page 54: Music Menu

    880™ Series 11.3 Music Menu Models equipped with the optional Audio System offer an enhanced spa experience. The BLUEWAVE® 2.0 Wireless Audio System works with most Bluetooth® wireless devices. An auxiliary device can be connected, via a 3.5 mm plug cable, located behind the front cabinet panel, if a Bluetooth device is not available.
  • Page 55: Connecting The Bluewave® System With Your Bluetooth® Device

    880™ Series Pause/Play: Tap to pause and play tracks. = Song Title: Will display the song title information, if it is Song Title available. If the information is not available this part will be blank. If the information provided is too long, the maximum number of characters will be displayed follow by dots (“...”).
  • Page 56: Audio Settings

    880™ Series 11.5 Audio Settings To enter the Audio Settings, tap from the Bluetooth® submenu, Figure A. The display will change to Figure B. The Audio Settings offer an enhanced audio experience by providing a custom or preset listening settings. Music Audio Bass...
  • Page 57: Selecting The Desired Massage Action

    880™ Series 11.8 Selecting The Desired Massage Action Your Sundance ® Spas hot tub is equipped to allow you to customize the massage action you desire. Each model incorporates a massage selector(s) that allows you to customize the massage and performance by diverting water between various jet systems.
  • Page 58: Air Controls

    On the rim of your hot tub is a screw-off cap labeled “SunScents™ Fragrance Dispenser” (pages 22-40). It is designed to contain pack- ages of a specially made fragrance available from your Sundance Spas dealer. The fragrance is carried into the hot tub water by the air coming through the injector system when the air blower is on.
  • Page 59: Microclean® Plus Versatile Filter Lid

    880™ Series 11.13 MicroClean® Plus Versatile Filter Lid The multi-purpose 昀椀lter lid can be used as cooler or as a seat (with the optional aftermarket seat cushion; maximum weight capacity of 300 lbs). IMPORTANT! If liquids (other than water) spill, take all precau- tions to prevent contaminants from entering and affecting the hot tub water.
  • Page 60 880™ Series B. Indicator Lights There are indicator lights on the SmartTub® controller Status Cloud that relay the status of the system. Below are meanings of the lights. 1. Cloud: Blue light on - connected to cloud. Cellular Signal • Blue light off - not connected to cloud.
  • Page 61: Programming And Operation Instructions

    880™ Series 12.0 Programming and Operation Instructions Your Sundance spa is equipped with setting menus that allow you to program and activate different components of the spa. With our iTouch™ control panel, programming your spa has never been easier. In the sections that follow, we will guide you through the process of program- ming the spa to 昀椀t your personal comfort.
  • Page 62: Programming The Heat Settings

    880™ Series 12.1 Programming the Heat Settings Your Sundance spa is equipped with 3 modes of heating. An automatic mode called “Auto” where the spa’s temperature is always maintained. An energy saving heating cycle called “Economy.” A mode that will only activate the heater during the daytime called “Day”...
  • Page 63: Programming The Primary Filter

    880™ Series Temp Range: 1:00 PM to switch between a High Range Temp Range: High Temp Range High HEATING or Low Range temperature setting. The default °F setting is High Range. When you tap the temp range icon, on the Main Menu, it will display the current range setting, Figure D.
  • Page 64: Programming The Secondary Filter

    880™ Series A. To change the default cycle: Filtration to the enter the menu. When you Primary Start Primary Start 12:00 AM Start Duration enter the menu, certain icons will be highlighted, 8:00 PM 12:00 AM 4:00 Figure C. 12 00 8:00 PM 2:00 PM 2:00...
  • Page 65: Cleanup Cycle

    880™ Series During a secondary 昀椀ltration, the Jets Pump 1 is activated. There are 3 cycles you can select from, Figure B. The factory default cycle is “Away Mode.” If you elect to keep this setting, then you can skip this section. A.
  • Page 66: Programming The Time And Date

    880™ Series 12.5 Programming the Time and Date From the Settings Menu, tap to enter the programming options, Figures A and B. Time Settings Time & Date Time 12:00 AM Filter Time Heat Date 11/2/2023 Locks Units Water Care Figure B Figure A A.
  • Page 67: Water Care Programming

    880™ Series 12.6 Water Care Programming Water care is crucial to maintaining a clean spa. The CLEARRAY Active Oxygen™ system leads the way to a clean* spa by using a UV light bulb and ozone. Your spa can be programmed to remind you when to check and replace certain components.
  • Page 68 880™ Series 5. When the timer expires, a message will appear on the control panel display. The CLEARRAY UV bulb must be replaced (page 76) and the timer must be reset. Tap and follow the instructions above to reset the timer. If you tap the message will clear but the reminder will display and the message will reappear in 10 days.
  • Page 69 880™ Series 3. Tap to accept and save the change. The display will revert to the Water Care Menu. 4. Tap to return to the Water Care Menu. Tap again to return to the Settings Menu. 5. When the timer expires, a message will appear on the control panel display.
  • Page 70: Locking The Spa

    880™ Series 12.7 Locking the Spa From the Settings Menu (Figure A), tap to enter the programming Locks options, Figure B. You can prevent users from changing certain features of the spa. When a lock feature is active, the lock icon will appear on the Main Menu.
  • Page 71: Unit Display

    880™ Series 5. Tap to return to the Settings Menu. Tap again to return to the Main Menu. Note: This mode has a time out of 2 hours. The spa should not be left in this lock mode for an extended period. Especially in colder climate or when freezing conditions exist.
  • Page 72: Programming The Language

    880™ Series 12.9 Programming the Language From the Settings Menu (Figure A), tap to enter the selection options, Language Figure B. Settings Language Filter Time Heat Language English Locks Units Water Care Figure B Figure A 1. There are 10 languages to select from: English, French, Spanish, German, Italian, Czech, Swedish, Norwegian, Finnish, and Polish.
  • Page 73: Diagnostic Information

    880™ Series Wake: 1. Tap to select the Wake feature, Figure B. Tap to wake 2. If you select No, when the display is asleep, Figure D will brie昀氀y appear and then switch to the Main Menu. 3. If you select Yes, when the display is asleep, Figure E will appear. You must tap each of the numbers to go to the Main Menu.
  • Page 74: Cleaning/Replacing The Filter Cartridge

    13.0 Hot Tub Maintenance Proper and regular maintenance of your hot tub will help it retain its beauty and performance. Your authorized Sundance Spas dealer can supply you with all the information, supplies, and accessory products you will need to accomplish this.
  • Page 75 880™ Series TO DECREASE RISK OF DEATH, DROWNING, OR ENTRAPMENT, ALWAYS TURN POWER TO THE HOT TUB OFF BEFORE REMOVING THE MICROCLEAN ULTRA II FILTER ASSEMBLY! Note: Make sure to remove the SmartChlor holder prior to removing the 昀椀lter. Filter Cleaning/Replacement Procedure: DANGER: TURN POWER TO SPA OFF! TO DECREASE RISK OF DEATH, DROWNING, OR ENTRAPMENT,...
  • Page 76: Removing The Cabinet Panels

    880™ Series Procedure: 1. Grasp center 昀椀lter insert end cap (2) in hand and pull outward from pleated cartridge (1). If 昀椀lter insert (2) is 6 months old, throw it away and purchase new one. DO NOT install new insert at this time. 2.
  • Page 77: Draining And Re昀椀Lling

    880™ Series 3. If equipped, fold the Vapor barrier out of the way, and remove any EPS insulation boards. 4. To reinstall the panel just follow the steps above in reverse order. Note: Exposure of the cabinet to heat could cause the cabinet to warp. Should the cabinet warp, once it is installed, the warping is not visible.
  • Page 78: Cleaning The Hot Tub Interior

    13.7 Cover Care And Maintenance Hot tub covers distributed by Sundance Spas, Inc., have a SUNSTRONG™/SUNSTRONG™ Extreme encasement. The SUNSTRONG/SUNSTRONG Extreme encasement also referred to as the cover “skin” is attractive and durable. Regular monthly cleaning is strongly recommended and may increase the longevity of your cover.
  • Page 79: Winterizing

    6. Use only recommended cover lift systems. 7. Use only chemicals and cleaners recommended by Sundance Spas. 8. Remember to keep spa covered when not in use. Maintaining proper water levels assures ef昀椀cient operation and ef昀椀cient electrical usage.
  • Page 80: Restarting Your Hot Tub In Cold Weather

    9. Re-install cabinet side panels and cover hot tub so that no moisture can enter into it. Consult your Sundance Spas dealer if you have any questions regarding winter use or winterizing.
  • Page 81: Ph Control

    For speci昀椀c guidance on maintaining water quality, consult your Authorized Sundance Spas dealer who can recommend appropriate chemical products for sanitizing and maintaining your hot tub. WARNING:...
  • Page 82: Clearray Active Oxygen™ System

    880™ Series utes. By doing this you will allow excess chemical vapors to exit the spa, protecting pillows and plastic knobs from chemical attack. WARNING: RISK OF PERSONAL INJURY, DROWNING OR ENTRAPMENT! Never leave your hot tub unattended for any reason while the cover is open and accessible, especially to small children and animals! CAUTION: RISK OF PERSONAL INJURY OR SPA DAMAGE!
  • Page 83: Clearray® Bulb Replacement And Quartz Tube Maintenance

    880™ Series 14.4 CLEARRAY® Bulb Replacement and Quartz Tube Maintenance Important: It is MANDATORY that the UV bulb is replaced and the quartz tube be cleaned every 12 months to maintain optimum performance. 9 10 FIGURE 1 DANGER: TURN THE SPA BREAKER TO THE OFF POSITION! DANGER: DRAIN THE SPA IF YOU ARE REPLACING OR...
  • Page 84 880™ Series FIGURE 5 FIGURE 3 FIGURE 4 FIGURE 6 3. Disconnect UV bulb socket (7) from the power cord socket (11), Figure 3. 4. Slowly remove the UV bulb (3) out of the quartz tube, Figure 4. 5. Remove the quartz seal compression nut (5) by turning it counterclockwise, Figure 5.
  • Page 85: Other Additives

    Your Authorized Sundance Spas dealer can advise you on the use of these additives. 14.6 Stainless Steel Handrail Maintenance (if equipped) The handrails in your Sundance hot tub are manufactured from a high quality 316 stainless steel alloy.
  • Page 86: Troubleshooting - Display Messages

    880™ Series If your stainless handrails shows signs of rusting you should: Wash with fresh water (a good detergent won’t hurt). • • Clean with a good car chrome polish. Wax with an automotive or 昀椀berglass wax. • You should never: •...
  • Page 87 880™ Series 13. Heater Overheat (Code 30): DO NOT ENTER THE WATER! heater is too hot. WARNING: RISK OF HYPERTHERMIA (OVER-HEATING) CAUSING SEVERE INJURY, BURNS, OR WELTS. 14. Sensor Fault A (Code 31): Sensor A fault. Contact your dealer or service organization.
  • Page 88 880™ Series 31. CLEARRAY Replacement Reminder: This message Replace CLEARRAY bulb It’s time to replace your CLEARRAY bulb. will appear when the CLEARRAY bulb reminder time Contact your authorized dealer for replacement parts. has expired (Figure A). The CLEARRAY bulb must be replaced.
  • Page 89: Troubleshooting - Procedures

    2. If nothing appears on the screen: A. Check the household circuit breaker. B. Contact you Sundance Spas dealer or quali昀椀ed service technician. Depress JETS Button. Pump does not If no sound is detected or if a buzzing sound...
  • Page 90 3. If “heater on” indicator is lit but no temperature rise is experienced after a reasonable period of time, contact your Sundance Spas dealer or quali昀椀ed service technician. Should checking the above steps fail to correct the problem, please call your authorized dealer so that he may arrange service.
  • Page 91: Typical Hot Tub Wiring Diagrams A-B (North American 60 Hz Models Only)

    880™ Series 17.0 Typical Hot Tub Wiring Diagrams A-B (North American 60 Hz Models Only) 2-Pole Circuit Breaker with 2-Wire Grounded Load Connection (3 Wires to Hot Tub, 2-Hot (L1-L2), 1-Ground) 240 VAC White (N) Black (L1) 2-Pole GFCI Red (L2) Ground/Bonding Lug** Breaker 240V...
  • Page 92: North American 60 Hz Electrical Wiring Diagram

    880™ Series 18.0 North American 60 Hz Electrical Wiring Diagram 18.1 North American 60 Hz Models Electrical Wiring Diagram DANGER RISK OF SHOCK OR ELECTROCUTION! Turn power off before servicing. This task should only be performed by a quali- fied technician.
  • Page 93: Dip Switch Settings

    880™ Series 18.2 Dip Switch Settings The dip switches are at the S1 location on the board. A. Switch settings for Domestic 60Hz Models OFF Position ON Position SWITCH TEST MODE OFF TEST MODE ON MUST BE OFF SEE TABLE SEE TABLE SEE TABLE SEE TABLE...
  • Page 94 880™ Series...
  • Page 95 880™ Series...
  • Page 96 880™ Series...

This manual is also suitable for:

AspenCameoOptimaMarinAltamarCapri ... Show all

Table of Contents

Save PDF