Advertisement
Quick Links
Advertisement

Subscribe to Our Youtube Channel
Related Manuals for Circuitmess Wacky Robot Marv


Summary of Contents for Circuitmess Wacky Robot Marv
- Page 1 CREATOR’S BOOKLET...
- Page 2 Enhance your STEM knowledge with the CircuitMess toy collection! Wacky Robots are a quirky group of mini-robots that will help you master the basics of robotics and electronics. Collect all the Wacky Robots and unlock new games for the BIT!
- Page 3 Connect your robots to Sparkly, a robot car that follows the source of light. Sparkly, BIT, and Wacky Robots are sold separately.
-
Page 4: How Does It Work
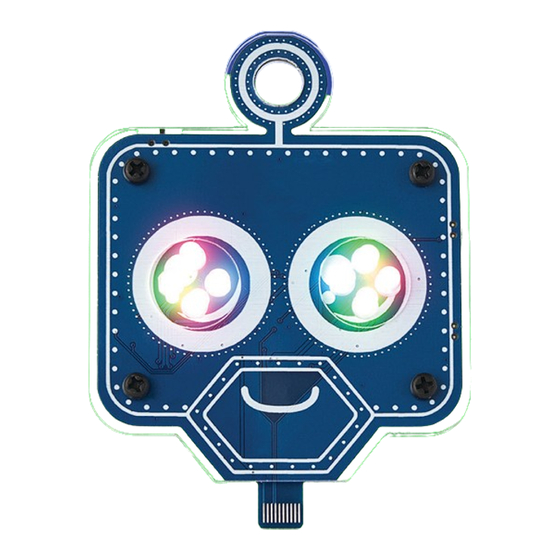
Meet Marv Introducing Marv, a DIY Wacky Robot that will introduce you to the exciting world of robotics and STEM. With Marv, you’ll learn about different electronic components and how the decade counter and pushbuttons work. Finally, you’ll have a cool robot that lights up. - Page 5 DIY game console. People liked the idea, so he launched it on Kickstarter, which raised $100,745! After that, CircuitMess was born. We are a small and fast–growing team of tech lovers who wish to share our love of creating new technology...
- Page 6 The mission Everybody knows how important technology is, but less than 1% of the population knows HOW TO MAKE new technology. We’re here to change that! With our kits, we want to inspire people to be CREATORS instead of just consumers.
-
Page 8: What's Inside The Box
What’s inside the box? LEDs Screwdriver Plastic bolts Coin battery Plastic standoffs Acrylic casings You’ll learn about: Electronics and LEDs Capacitors different electronic components... - Page 10 From click to the current Join Marv on a journey of discovery as you learn about Join Marv on a journey of discovery as you learn about the difference between pushbuttons and switches difference between pushbuttons and switches. . When you assemble the robot and turn it on using When you assemble the robot and turn it on using the switch, you’ll see that the LEDs are turned on.
- Page 11 Because the internal contact within the pushbutton connects Because the internal contact within the pushbutton connects while the button is pressed, the electrical circuit is closed, while the button is pressed, the electrical circuit is closed, and current can flow. When we release the pushbutton, the and current can flow.
- Page 12 From the invisible spectrum to the Eiffel Tower LEDs are semiconductor electronic components that convert an electrical signal into light. LEDs are polarized, so we must be cautious about how we place them. Current flows in only one direction, so if you place them in the opposite direction, the diode won’t function.
- Page 13 The first practical micro LED was created in 1962 by American engineer Nicholas Holonyak. Before that, LEDs didn’t have practical use as they produced unreliable light or infrared light that is not visible to us. The LED made by Holonyak was the first one that operated in the visible spectrum and was red.
- Page 14 What is a decade counter? A decade counter is a chip whose A decade counter is a chip whose main task is counting impulses main task is counting impulses in the decimal system in the decimal system. . The voltage at which the counter The voltage at which the counter operates is between 3 and 15V operates is between 3 and 15V.
-
Page 17: Safety First
If you have never used a screwdriver, carefully follow the assembly instructions on our website and, if necessary, ask someone more experienced or older than you to help you. If you are having problems with our kit, contact our customer support via email at contact@circuitmess.com. - Page 18 MARV BUILD GUIDE To get two smaller casings from the kit, you’ll need to break one large acrylic piece. But please, be super careful when doing this to make sure you don’t damage the parts you need. After breaking it, you’ll end up with two separate pieces of acrylic casings.
- Page 19 Remove the protective foil from both sides of the casings now.
- Page 20 Your casings should be all nice and transparent now.
- Page 21 Now, let’s dive into the exciting assembly part! Start by grabbing the casing that matches the one in the photo below and gently place it onto the PCB.
- Page 22 Now, for the next step, put the second casing on the backside.
- Page 23 To make sure everything stays in place, we’ll need to secure these casings with bolts and standoffs. Here’s how you do it: put the bolts in from the front and add the standoffs onto the back. Fasten the standoffs with your fingers – no need for fancy tools!
- Page 24 Grab the coin battery and carefully place it on the backside (make sure the + symbol on the battery matches the + sign on the board - front and up). When it comes to Marv’s LEDs, it’s super easy. You’ll find the polarity indicated by plus and minus marks.
- Page 25 So, when you turn on Marv and start adding LEDs, just be sure to pay attention to their polarity as you connect them. Look for the cut-off (-) and rounded (+) parts marked on the LED – they’ll tell you all you need to know. And hey, if you flip Marv around, you’ll spot those + and - signs next to each connector.
- Page 26 Now, here’s where the magic happens: When you turn Marv on, the LEDs in the circle will light up one after the other. On/off switch Ever wonder how Marv’s decade counter works? Well, here’s how: If you press the pushbutton on the bottom right side, the LEDs will stop in the start position (left eye).
- Page 27 But if you press the pushbutton on the upper right side, the LEDs will pause right where they are.
- Page 28 Need to change the speed of the counter? No problem! Marv’s got a handy potentiometer on its back. Grab a screwdriver, and with a simple twist of the potentiometer, you can adjust the speed to your liking.
- Page 29 And hey, here’s a bonus: And hey, here’s a bonus: Connect it to the CircuitMess Connect it to the CircuitMess BIT and unlock a new game! BIT and unlock a new game!
- Page 30 If you • Do not use the device or the battery suspect that any part of your CircuitMess in high–temperature conditions. Wacky Robots kit (especially the batteries) Overheating may cause an explosion.
- Page 31 • In the case of deformation, stop using the Exposure of CircuitMess Wacky Robots to battery immediately and dispose of it properly. environments with high concentrations of industrial chemicals, including liquefied gases If you are not sure whether your device...
- Page 32 Member States. Check all the national suitable for the child’s age and abilities. and local regulations about using the 3. Check from time to time if CircuitMess device. These devices may be restricted Wacky Robots are damaged or worn for use, depending on local laws.
- Page 33 Proper disposal of this product in the CircuitMess Wacky Robots DIY educational kits, CircuitMess d.o.o. will WEEE markings on the product indicate that repair the product or send an equivalent this product may not be disposed of with the replacement product at their own expense.
- Page 34 Malfunctions due to improper handling, faults due to wear of the device and/or CircuitMess d.o.o. as the warranty provider its parts (in you need help with assembly and/or its authorized partners will not or if you have difficulty using the device...
- Page 35 WARRANTY SHEET CircuitMess Wacky Robots Product name: do-it-yourself educational solder kit Warranty on components and 24 months parts contained in this set is: Date of purchase: Seller and point of sale stamp: Invoice number: Information on interventions during warranty period is entered by a repair shop technician at an authorized repair shop.
- Page 36 Scan and find more fun games and lessons:...
Need help?
Do you have a question about the Wacky Robot Marv and is the answer not in the manual?
Questions and answers