Advertisement
Perfecta
Q36
®
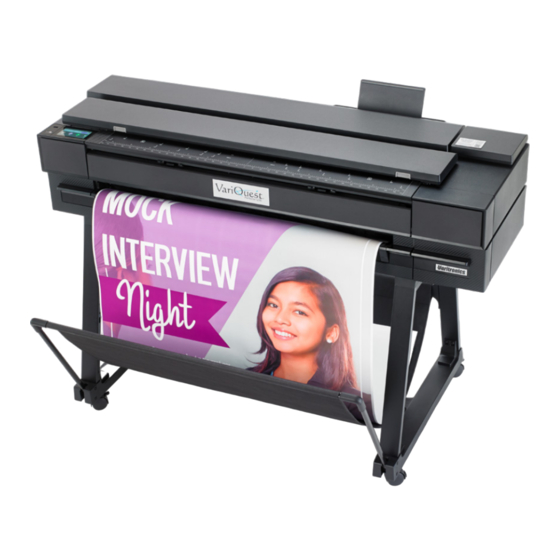
Poster Design System
Assembly Instructions
3 people are required to perform
certain tasks.
Time required for assembly of the
printer is approximately 90 minutes.
Tools required:
• T25 screwdriver (included)
• Utility Knife
Please read these instructions carefully.
These assembly instructions explain
how to assemble the printer. Notice that
the icons used in this document are
also located on the printer packaging.
The icons help you locate the parts
needed at each stage of the assembly.
Because spare screws are supplied,
some screws may remain unused after
assembly of the printer.
Product working area
Before you start unpacking, consider where you
are going to put the assembled product. You
should allow some clear space on all sides of the
product box. The recommended clearances are
shown in the illustration.
To assemble the product you will need at least
3 x 3 m (118 x 118 in) of empty floor space.
1
To ensure an accessible operating area for printer
use, it is recommended to leave a minimum clear
space of 760 mm (30 inches) by 1220 mm (48
inches) with an even level around the sides of the
printer.
Light reflection (glare) could affect the readability of
the control panel, to improve the visibility, select the
most suitable theme (dark-light) in the Control Panel.
Crate Contents
Documentation:
• Quick Start Guide
• Assembly Instructions
Stand Pieces:
• Left bottom cross-connector (A)
• Right bottom cross-connector (B)
• Left front-leg (C)
• Left rear-leg (D)
• Right rear-leg (D)
• Right front-leg (E)
• Bottom cross-tube (F)
• Basket fabric and tube (G)
• Rear cross-tube (H)
• Brackets (I)
• Top cross-beam (J)
Miscellaneous:
• Screwdriver
• Black screws ×24
• Silver screws ×12
• Ink cartridges
• Cable cover
• Refeed preventers ×2
• Power cable
• Maintenence reminder cable tag
Note: LAN cable not included.
Important: Printhead is preinstalled.
Note: Some bags of parts in the box have a label
that shows a letter and part number. Please don't
remove the bag of each part before you reach to
the corresponding assembly step.
Advertisement
Table of Contents

Related Manuals for Variquest Perfecta Q36


Summary of Contents for Variquest Perfecta Q36
- Page 1 Product working area Please read these instructions carefully. To ensure an accessible operating area for printer These assembly instructions explain use, it is recommended to leave a minimum clear Before you start unpacking, consider where you how to assemble the printer. Notice that space of 760 mm (30 inches) by 1220 mm (48 are going to put the assembled product.
-
Page 2: Remove The Packaging
Assemble the stand Dispose of the protective top sheet and open the Locate the screwdriver and screws included in VariQuest recommends completing the box labeled 1. bag Z. printer stand assembly on a table. Remove... - Page 3 Assemble the Left Side: Slot the left rear-leg (D) onto the rear of the left Fix the legs in place with two black screws on Assemble the Right Side: bottom cross-connector (A). each side. Slot the left front-leg (C) onto the front of the left Slot the right front-leg (E) onto the front of the bottom cross-connector (A).
- Page 4 Fix the bottom cross-tube (F) to the left bottom Insert the bottom cross-tube (F) into the right Fix the bottom cross-tube (F) to the right Place the stand upright and check the four cross-connector (A) with two silver screws. bottom connector (B). connector (B) with two silver screws.
- Page 5 Note: Two people recommended for the Slot the two tubes into the basket frame (G). Insert the tubes into the slots at the front of both Remove the top cross-beam (J) from the box. assembly. bottom cross-connectors. Push them firmly into place until you hear a click.
- Page 6 Remove the tapes from the encaps. Uncover the printer by tearing open and pulling Important: Two people are required. Important: Two people are required. down the bag. Pull the endcaps up a little (1) and remove them (2). Move the stand close to the printer, then with two Caution: Take care not to catch your fingers.
- Page 7 Remove printer packaging Remove the orange tape from the top and front Open the main door. Carefully, rotate and Open the printhead carriage door and and of the printer. remove the two pins from inside of the printer. remove the foam. Close the door when finished. Note: For more information about how to refill the inks, please refer to the User’s Guide.
-
Page 8: Set Up The Printer
Additional information can be found in the Perfecta Q36 Quick Start & Installation Guide ® or the User’s Guide located at resources.variquest.com. Note: Make sure all the covers all closed before powering on the printer. Wrap the adhesive tag around the...
Need help?
Do you have a question about the Perfecta Q36 and is the answer not in the manual?
Questions and answers