
Related Manuals for Variquest Perfecta 2400STP


Summary of Contents for Variquest Perfecta 2400STP
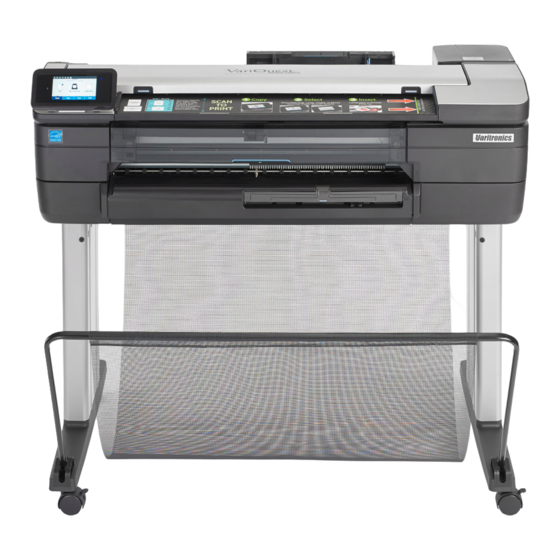
- Page 1 ® Perfecta 2400STP Poster Design System ® Perfecta 2400STP Assembly Instructions Poster Design System Assembly Instructions...
-
Page 2: Package Contents
Package Contents Unpack Printer Stand The following items are included in the shipping container: 1. Cut the straps and open the box. Important To avoid scratches, install a blanket on the floor. 2. Remove the documentation and carton tray on top of the printer. Notes: •... - Page 3 Assemble Printer Stand 6. Slide foam to the opposite side and place the other leg into the slot on the cross brace. 1. Fix one foot to a leg with 4 screws. Important 2. Repeat the process for the other foot and leg. Make sure the 2 basket supports are on the same side.
- Page 4 9. Attach the outside of leg to the cross-brace with 2 screws. Repeat 13. Locate and unpack the basket frame. with the other leg. Important Do not omit this step or the printer will not be stabilized correctly. 14. Remove tape and unfold the fabric. 10.
- Page 5 Attach Printer to Stand Remove Printer Packaging 1. Open the printer box. 1. Make sure the stand and printer are in the correct position for 2. Remove tape from film, then remove tray and box. assembly. 2. Look for the marks on the printer for correct installation. 3.
- Page 6 4. Check metal stoppers on back of the stand to ensure printer is in 7. Locate the 4 screw-in black knobs. the correct position. 8. Attach the printer to the stand from underneath with the 4 screw-in black knobs. 5. Check alignment of lateral marks on printer for correct positioning. 9.
- Page 7 2. Remove all transparent tape from the printer. Install the Re-feed Preventer 3. Remove the desiccant bag. 1. Slide re-feed preventer into the bracket slot of the scanner input platen. Repeat the process on the other side of the input platen. Note: Use the mark on the scanner input platen for use as a reference position.
- Page 8 6. Open printhead cover and remove protective foam. 9. Open the front window. Important Do not touch the printhead or blue latch. No printhead installation is required. 7. Close printhead door. 10. Rotate and remove the 2 pins. 8. Install the multi-sheet tray that was previously unpacked. ®...
- Page 9 11. If all protective foams are removed, close all open covers and 14. After all cables are connected, power on the printer. windows. 15. Select and confirm your Language and Country/Region. 12. Connect power cable to the printer and an outlet. 13.
- Page 10 18. Extend the input and output trays. 16. At the prompt to add ink cartridges, open the ink cartridge cover and insert the 4 ink cartridges, clicking them into place. When done, close the cover. 19. When prompted, load an A4/Letter sheet into the multi-sheet tray (1) and adjust tray (2).
-
Page 11: Load Paper Roll
Technical Support Load Paper Roll For technical assistance, please contact your authorized VariQuest 1. Load the paper roll onto the spindle. Be sure paper winds over (in dealer or the VariQuest Technical Support team: front of) the roll. • Email: techsupport@variquest.com •... - Page 12 Y2900702 Rev A 01/18 ©2018 Varitronics, LLC. All rights reserved.
Need help?
Do you have a question about the Perfecta 2400STP and is the answer not in the manual?
Questions and answers