
Subscribe to Our Youtube Channel
Related Manuals for Lamona LAM1804


Summary of Contents for Lamona LAM1804
- Page 1 Induction Hob LAM1804 User Instructions ISSUE v1.0 160224 www.howdens.com/appliance-registration...
- Page 2 www.howdens.com...
- Page 3 Welcome Dear Customer Congratulations on your choice of a Lamona induction hob. • This Lamona appliance complies with all current local and national safety requirements. However, inappropriate use could lead to personal injury and damage to property. • Please read these instructions carefully before using your appliance. They contain important information on safety, use and maintenance.
-
Page 4: Table Of Contents
Boost Function ....... . p.20 LAM1804 Hob Overview ......p.9 Recommended Power Settings . -
Page 5: Correct Application
User Instructions Correct Application This Lamona induction hob is intended for built-in domestic kitchen use and similar environments. Outdoor use is strictly prohibited. Its primary purpose is to cook food and keep it warm. • Commercial use of this appliance will void the guarantee. Any other use is not supported by the manufacturer and could be dangerous. - Page 6 User Instructions Safety Instructions (Continued) Safety During Cooking kitchen appliances e.g. Mixer. Power cables must • Never use the appliance when your judgement not come into contact with hot cooking zones. or coordination is impaired by the use of alcohol •...
- Page 7 • If the mains cable is damaged, it must be replaced switched OFF due to a defect with the touch keys, by the manufacturer, LAMONA Service Agent or by immediately disconnect or isolate the hob from a qualified person to avoid danger.
-
Page 8: Waste Regulation, Caring For The Environment
(Lamona). Appropriate disposal of used appliances helps prevent potential negative consequences for the Before disposal, make sure to delete any personal environment and human health. -
Page 9: Lam1804 Hob Overview
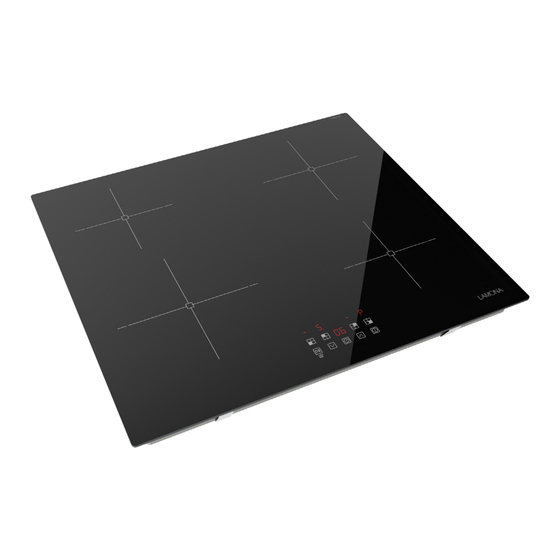
User Instructions LAM1804 Hob Overview Your hob features induction heating, micro-computerised control, and multi-power selection features, giving you precise and consistent cooking at the touch of a button. The smooth and flat surface is easy to clean and maintain and the hob is safe and highly reliable. Functions include, child lock, Minute Minder and Zone Cut Off Timer and full zone power control including zone boost. -
Page 10: Using The Touch Controls
User Instructions Using the touch controls Ensure that the hob touch controls are clean and dry. Check there are no objects e.g. utensils or plates etc. covering them. Even a thin film of water will make the controls difficult to operate. •... -
Page 11: How Does It Work? (Induction Hob Technology)
User Instructions How does it work? Induction Hob Technology Iron cookware Your Lamona hob is equipped with an induction coil underneath the ceramic glass. Induction • This generates electromagnetic vibrations that penetrate the glass ceramic surface and induces this heat-generating current into the pan. -
Page 12: Condensation
User Instructions Condensation When cooking using a large amount of water, significant vapour and steam can be produced very quickly. This may condense onto cold metallic surfaces and splash backs if tiled of glazed. This is especially prevalent when using an induction hob. Energy efficient technology means that no heat is lost to surround surfaces. -
Page 13: Power Management
User Instructions Power Management - What does it mean? Induction hobs use a lot of electrical power. Power management reduces or shares zone power output so that the internal components of the hob are not overworked, preventing them from overheating. •... -
Page 14: Suitable Cookware Test
User Instructions Power Cycling PWM Control at Low/Medium Settings: Induction hobs use pulse-width modulation (PWM) to adjust power output by rapidly cycling the power on and off, particularly at low and medium power settings on all zones. Temperature Regulation: PWM enables precise temperature control at these lower settings without continuous high power, similar to the way a ceramic hob adjusts heat output. -
Page 15: Cleaning And Care
User Instructions Cleaning and Care Removing light marks, finger prints and food stains (non-sugary spillovers) Always clean the entire hob when it has become Never use any of the following for soiled. We recommend doing this after each use. cleaning your hob! Clean the hob thoroughly once a week. - Page 16 User Instructions Boil-overs, melts and hot sugary spills Melts and sugary food spillovers should be removed immediately. If left to cool, they may be difficult to remove and may permanently damage the glass surface. WARNING: These types of stains require removal when the cooking zones are still hot.
-
Page 17: Operating The Hob
User Instructions Operating the Hob Placing and moving cookware During the preparation of food, grains of sand or grit might fall onto worktops and your hob, especially when preparing vegetables. • Make sure that there are no abrasive materials on the hob surface or beneath any pans. The hob’s glass surface might be scratched. -
Page 18: Switching On The Hob
User Instructions Switch on at the mains. Switching on the hob The display lights, and Standy Mode a single tone sounds. The hob then enters Switch on at the mains. standby mode. “ “ All display LEDs light. A single tone sounds, then the hob enters Touch the ON/OFF touch key to exit standby mode. -
Page 19: Turning A Zone Off After Cooking
User Instructions Once you have set the power level for the zone, it will stop flashing after 5 seconds. The zone will begin to heat the pan. In this example, power level 9 is set. “ Turning a zone off after cooking When you have finished cooking, turn the zone off. -
Page 20: Boost Function
User Instructions Boost Function • The Boost function can be used to provides a zone with maximum possible power. The function will last for 5 minutes before automatically dropping to power level 9. • After selecting one more zones and setting power to them; Boost is achieved by exceeding power level 9. Activate Boost: Select a zone touch key, e.g. -
Page 21: Recommended Power Settings
User Instructions Recommended BOOST Stir frying Bringing soup to the boil • • Power Settings Searing • • Sauteing • Cooking pasta • Pancakes Rapid simmering • • Reheating Cooking rice • • Delicate warming of small Gentle simmering • amounts of food Slow warming •... -
Page 22: Dual Function Timer
User Instructions Dual Function Timer TIMER MODES Minute Minder Alarm Simple kitchen timer with 30 second audible alarm (up to 99 minutes). Zone Cut-Off Timer Use to turn one or more cooking zones off after a set time (up to 99 minutes). Minute Minder Alarm Select a zone and set power. -
Page 23: Zone Cut-Off Timer
User Instructions Cancelling the timer With a minute minder timer running, press and hold for 5 seconds. The timer shows Zone Cut-Off Timer This function does not sound an alarm when the timer expires. It switches off the zone(s) to which it is has been assigned. - Page 24 User Instructions Setting a cut-off timer for multiple zones. • Select and set power to the first zone as described in steps 1 - 3 from the previous section: (Setting a cut- off zone timer for one zone), then follow these steps used in this example. Timer dot flashes Example: Setting cut-off timers for Zones 2 and 3 •...
- Page 25 User Instructions Setting a cut-off timer for multiple zones (continued). Two timers are now running Zone 2 (8 minutes) . Zone 3 (30 minutes). • Both zones will have a red dot. • A flashing dot indicates that the zone has the least time “...
-
Page 26: Auto Shutdown
Error Codes Problem Reason Solution E4 / E5 Temperature sensor failure Contact Lamona Service Line Temperature sensor of the IGBT E7 / E8 Please contact the supplier. failure Check the mains power supply is working correctly. Power on after the mains power supply is working. -
Page 27: Problem Solving
OFF at the mains electrical supply. tone sounds and an error Technical fault. code is displayed (typically Contact the Lamona Service Line. alternating with one or two digits in the cooking timer display). •... -
Page 28: Guarantee
• Your full contact details. Call the Depot number on your Proof of Purchase Document supplied with the product/kitchen. Call the LAMONA Service Line on: Within UK 0344 460 0006 Within Republic of Ireland 01525 5703 * Product installed within a domestic kitchen or a non-domestic kitchen where 8 or fewer people are using the appliance. - Page 29 User Instructions Notes Exclusive to Howdens...
- Page 30 User Instructions Notes www.howdens.com...
- Page 31 User Instructions Notes Exclusive to Howdens...
- Page 32 Product serial number (Place sticker here) REPRISE À DÉPOSER À DÉPOSER À LA LIVRAISON EN MAGASIN EN DÉCHÈTERIE Cet appareil se recycle Points de collecte sur www.quefairedemesdechets.fr Privilégiez la répara�on ou le don de votre appareil! Product information correct at the time of publication in February 2024. The company has a policy of continuous product development and Howden Joinery Ltd.
Need help?
Do you have a question about the LAM1804 and is the answer not in the manual?
Questions and answers