
Subscribe to Our Youtube Channel
Related Manuals for FS CA-JB005


Summary of Contents for FS CA-JB005
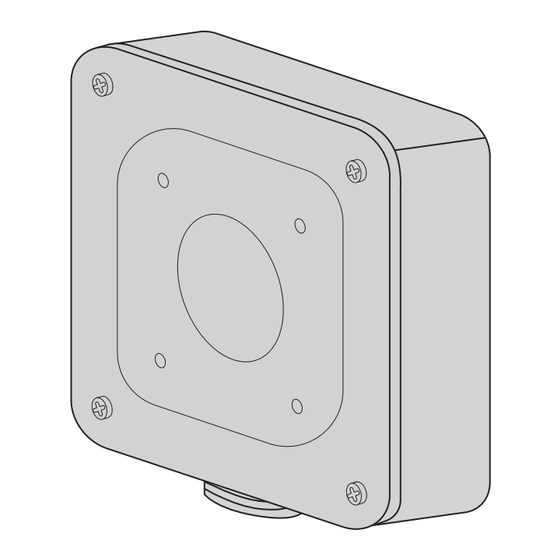
- Page 1 CA-JB005 MINI BULLET CAMERA JUNCTION BOX ANSCHLUSSDOSE FÜR MINI-BULLET-KAMERA MINI-BORNE DE CONNEXION POUR CAMÉRA BULLET ミニバレッ ト型カメラジャンクションボックス Quick Start Guide V1.0 Quick Start Anleitung Guide de Démarrage Rapide クイックスタートガイド...
- Page 2 MOUNTING HOLE DRILL DIAMETER(4-Φ6)
- Page 3 Pull the cable through the wall hole to connect the device. Paste the positioning sticker on the wall. Ziehen Sie das Kabel durch das Wandloch, um das Gerät anzuschließen. Kleben Sie die Bohrschablone an die Wand. Faites passer le câble à travers le trou du mur pour brancher la caméra. Placez l'autocollant de positionnement sur le mur.
- Page 4 Use a drill of 6mm or 6.5mm in diameter, and drill the holes with a depth of 30mm according to the sticker indication. Verwenden Sie einen Bohrer mit einem Durchmesser von 6 mm oder 6,5 mm und bohren Sie die Löcher mit einer Tiefe von 30 mm gemäß den Angaben auf der Bohrschablone. Utilisez une perceuse avec une mèche de 6mm ou 6,5mm de diamètre et percez les trous à...
- Page 5 Knock the plastic rivets into the holes and make sure they are tight. Schlagen Sie die Kunststo dübel in die Löcher und stellen Sie sicher, dass sie fest sitzen. Enfoncez les rivets en plastique dans les trous et assurez-vous qu'ils sont bien xés. プラスチックリベットを穴に打ち込み、しっかりと固定されていることを確認します。...
- Page 6 Pull the cable from the outlet of the junction box and attach the junction box to the expansion bolts with the at washers, the spring washers, and the nuts screwing. Ziehen Sie das Kabel aus dem Ausgang der Anschlussdose und befestigen Sie die Anschlussdose mit den Unterlegscheiben, den Federringen und den Muttern an den Spreizschrauben.
- Page 7 Make the tapping screws pass through the hole on the base, x them on the junction box with the screwdriver, and connect all the cables. Führen Sie die Schneidschrauben durch das Loch am Sockel, drehen Sie sie mit dem Schraubendreher an der Anschlussdose fest und schließen Sie alle Kabel an. Faites passer les vis taraudeuses par le trou de la base, puis xez-les sur la borne de connexion à...
-
Page 8: Compliance Information
(EU)2015/863 konform ist. Eine Kopie der EU-Konformitätserklärung nden Sie unter www.fs.com/de/company/quality_control.html. FS.COM GmbH déclare par la présente que ce dispositif est conforme à la Directive 2011/65/EU et (EU)2015/863. Une copie de la Déclaration de Conformité de l'UE est disponible à l'adresse suivante https://www.fs.com/fr/company/quality_control.html. - Page 9 UKCA Hereby, FS.COM Innovation Ltd declares that this device is in compliance with the Directive SI 2012 NO. 3032. FS.COM INNOVATION LTD Unit 8, Urban Express Park, Union Way, Aston, Birmingham, B6 7FH, United Kingdom Q.C. PASSED Copyright © 2023 FS.COM All Rights Reserved.
Need help?
Do you have a question about the CA-JB005 and is the answer not in the manual?
Questions and answers