
Related Manuals for UNI-T UTG2000A Series


Summary of Contents for UNI-T UTG2000A Series
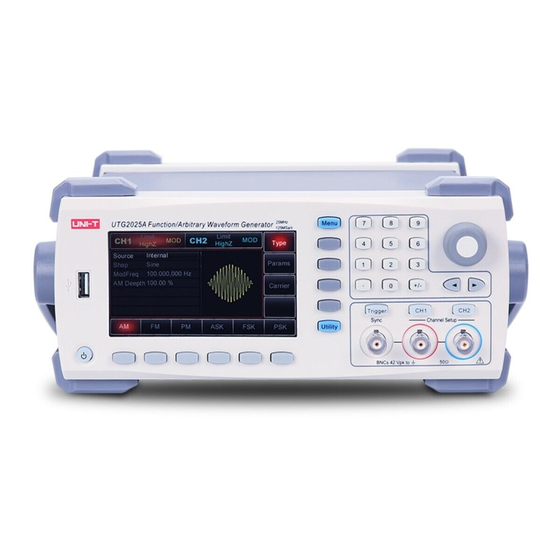
- Page 1 Programming Manual UTG2000A Series Programming Manual UTG2000A Series Function/Arbitrary Waveform Generator January 5th, 2023 Uni-Trend Technology (China) Co., Ltd. 1 / 44 UTG2000A Series Programmable Signal Source – Programming Manual...
- Page 2 Programming Manual UTG2000A Series Warranty and Statement Copyright 2017 UNI-TREND TECHNOLOGY (CHINA) CO., LTD. Trademark UNI-T is a registered trademark owned by UNI-TREND TECHNOLOGY (CHINA) CO., LTD. File Number 20230105 Software Version V1.23.07 Product functions may be changed or supplemented if software upgrade occurs. Please go to...
-
Page 3: Introduction To Scpi
Programming Manual UTG2000A Series Introduction to SCPI SCPI (Standard Commands for Programmable Instruments) is a standardized programming language formed based on current IEEE 488.1 and IEEE 488.2 standards and following multiple standards such as the rule of floating point arithmetic in IEEE754 standard, 7-digit numbering symbols (equivalent to ASCII programming) of information exchange in ISO646, and more. - Page 4 command. Float Unless otherwise specified, any value in the valid scope can be taken as the parameter. Example: For CH1, the value taken as the parameter <offset> in CHANnel1:OFFSet <offset> command is float. Discrete Only several specified values or characters can be taken as the parameters. Example: The parameters of :DISPlay:GRID:MODE { FULL | GRID | CROSS | NONE} command can be taken as FULL, GRID, CROSS and NONE only.
- Page 5 Manufacturer name, product model, serial number, and software version number separated by period. Note: The model number returned shall be consistent with the information of nameplate. Example: UNI-T Technologies, UTG2000A, 000000001, 00.00.01 *RST Command format: *RST Functional description: ...
- Page 6 Used to read and write the configuration file. Send the command first and then the configuration file data to signal source. <File> represents the configuration file. Return format: Query returning the current configuration file data of signal source. Example: ...
- Page 7 :SYSTem:BEEP Command format: :SYSTem:BEEP {{1 | ON} | {0 | OFF}} :SYSTem:BEEP? Functional description: Control the switch of the buzzer of system. Return format: Query returning the state of the switch of buzzer. Example: :SYSTem:BEEP ON Turn on buzzer :SYSTem:BEEP? Query returning 1...
- Page 8 :SYSTem:CYMometer:PERiod? Command format: :SYSTem:CYMometer:PERiod? Function description: Acquire the current period measured by cymometer. Return format: Query returning the acquisition of the current period (unit: s) measured by cymometer. Returning data by scientific notation. Example: :SYSTem:CYMometer:PERiod? Query returning 2e-3 :SYSTem:CYMometer:DUTY? Command format: ...
- Page 9 Return format: Query returning the output state of designated channel. 0 denotes OFF; 1 denotes ON. Example: :CHANnel1:OUTPut ON Set turning on the output of channel 1 :CHANnel1:OUTPut? Query returning 1 :CHANnel<n>:INVersion Command format: :CHANnel<n>:INVersion {{1 | ON} | {0 | OFF}} :CHANnel<n>:INVersion? Functional description: ...
- Page 10 :CHANnel1:LIMit:ENABle? Query returning 1 :CHANnel<n>:LIMit:LOWer Command format: :CHANnel<n>:LIMit:LOWer {<voltage>} :CHANnel<n>:LIMit:LOWer? Functional description: Set the lower limit of the amplitude limit of designated channel. <voltage> represents voltage, and the unit is the designated unit of current channel. <n>: Channel number. The value of n is taken as 1 and 2. Return format:...
- Page 11 :CHANnel<n>:LOAD Command format: :CHANnel<n>:LOAD <resistance> :CHANnel<n>:LOAD? Functional description: Set the output load of designated channel. <resistance> represents the load resistance (unit: Ω) <n>: Channel number. The value of n is taken as 1 and 2. Note: The resistance range is 1~1000000, and 1000000 corresponds to high resistance. Return format: ...
- Page 12 :CHANnel<n>:TRIGger:OUTEdge? Functional description: Set designated channel to trigger output edge. The command is valid for sweep frequency and burst function only. <n>: Channel number. The value of n is taken as 1 and 2. Return format: Query returning the triggering of output edge of designated channel. Example:...
- Page 13 Functional description: Set the output period of designated channel. <period> represents the period (unit: S) For sine wave, the range is (4ns ~ 1000s) <n>: Channel number. The value of n is taken as 1 and 2. Return format: ...
- Page 14 :CHANnel<n>:BASE:OFFSet Command format: :CHANnel<n>:BASE:OFFSet { <voltage>} :CHANnel<n>:BASE:OFFSet? Functional description: Set the output DC offset of designated channel. <Voltage> represent voltage (unit: V). The range is: 0~±Maximum DC under current load. Maximum DC under current load = Current load * 10/(50 + Current load) – Current AC minimum/2; AC minimum is 2mVpp.
- Page 15 :CHANnel<n>:BASE:PWIDth Command format: :CHANnel<n>:BASE:PWIDth { <pulsewidth>} :CHANnel<n>:BASE:PWIDth? Functional description: Set the pulse width of the signal output of designated channel. < pulsewidth > represents pulse width (unit: s). <n>: Channel number. The value of n is taken as 1 and 2. Return format: ...
- Page 16 :CHANnel<n>:RAMP:SYMMetry { < symmetry >} :CHANnel<n>:RAMP:SYMMetry? Functional description: Set the symmetry of the ramp signal output of designated channel. < Symmetry > represents symmetry (unit: %). The range is 0~100. <n>: Channel number. The value of n is taken as 1 and 2. Return format: ...
- Page 17 Modulation :CHANnel<n>:MODulate:TYPe Command format: :CHANnel<n>:MODulate:TYPe <type> :CHANnel<n>:MODulate:TYPe? Functional description: Set the modulation type of the signal of designated channel <Type>: { AM|FM|PM|ASK|FSK|PSK| PWM } Amplitude modulation, frequency modulation, phase modulation, amplitude-shift keying, frequency-shift keying, phase-shift keying, and pulse width modulation. <n>: Channel number.
- Page 18 :CHANnel<n>:MODulate:FREQuency Command format: :CHANnel<n>:MODulate:FREQuency {<freq>} :CHANnel<n>:MODulate:FREQuency? Functional description: Set the modulation frequency of the signal of designated channel. <freq> represents frequency (unit: Hz). <n>: Channel number. The value of n is taken as 1 and 2. Return format: ...
- Page 19 :CHANnel<n>:FM:FREQuency:DEV Command format: :CHANnel<n>:FM:FREQuency:DEV { <freq>} :CHANnel<n>:FM:FREQuency:DEV? Functional description: Set the frequency deviation of designated channel. <freq> represents frequency deviation (unit: Hz). 0Hz ~ Current fundamental frequency <n>: Channel number. The value of n is taken as 1 and 2. Return format: ...
- Page 20 Functional description: Set the designated channel to output the frequency hopping of MFSK. The command is valid only when the modulation mode is designated in advance. < freq > represents frequency (unit: Hz). <n>: Channel number. The value of n is taken as 1 and 2. Return format: ...
- Page 21 < freq > represents frequency (unit: Hz). <n>: Channel number. The value of n is taken as 1 and 2. Return format: Query returning the start frequency of the sweep of designated channel. Returning data by scientific notation. Example: ...
- Page 22 Trigger the sweep output of designated channel. The parameter is valid only when set as manual trigger in triggering mode. Example: :CHANnel1:SWEep:TRIGger Trigger the output of sweep signal once Burst :CHANnel<n>:BURSt:TYPe Command format: :CHANnel<n>:BURSt:TYPe {NCYC|GATe|INFinit} :CHANnel<n>:BURSt:TYPe? Functional description: ...
- Page 23 :CHANnel<n>:BURSt:PERiod Command format: :CHANnel<n>:BURSt:PERiod <period > :CHANnel<n>:BURSt:PERiod? Functional description: Set the burst period of designated channel. < Period > represents time (unit: S). <n>: Channel number. The value of n is taken as 1 and 2. Return format: ...
- Page 24 Functional description: Set the trigger edge of designated channel in burst mode. The command is valid for sweep and burst function only. <n>: Channel number. The value of n is taken as 1 and 2. Return format: Query returning the trigger output mode of designated channel. Example:...
- Page 25 :WARB<n>:CARRier Command format: :WARB<n>:CARRier <arb file> Functional description: Used to write fundamental arbitrary waveform. Send the command and then send the file data of arbitrary waveform to signal source. <arb file> represents the file name of arbitrary waveform. Supporting bsv file format only. Example:...
-
Page 26: Programming Instructions
Programming Instructions This section describes some problems and solutions that occur during programming. If problems below occur, please handle with that according to the corresponding instructions. Programming preparation The programming preparation only applies to those programming that using developing tools “Visual Studio” and “LabVIEW”... - Page 27 VISA programming Some programming examples are described in this section. Through these examples, you will learn how to use VISA and control the instrument by the command of programming manual. More applications can be developed through the examples below: VC++ Environment:Window system, Visual Studio.
- Page 28 Select "Linker-Command Line" on the left side of the properties dialog box, then set the value of the option "Additional" as visa32.lib, As shown in the Figure below. Add visa.h file on the projectname.cpp file: #include <visa.h> Source code USBTMC usbtmc_test() /** This code demonstrates sending synchronous read &...
- Page 29 * Open Resource Manager * Open VISA Session to an Instrument * Write the Identification Query Using viPrintf * Try to Read a Response With viScanf * Close the VISA Session*/ ViSession defaultRM; ViSession instr; ViUInt32 numInstrs; ViFindList findList; ViStatus status;...
- Page 30 printf("Cannot open a session to the device %d. \n", + 1); continue; /** At this point we now have a session open to the USB TMC instrument. *We will now use the viPrintf function to send the device the string "*IDN?\n", *asking for the device’s identification.
- Page 31 char outputBuffer[VI_FIND_BUFLEN]; ViSession defaultRM, instr; ViStatus status; /* First we will need to open the default resource manager. */ status = viOpenDefaultRM(&defaultRM); (status < VI_SUCCESS) printf("Could not open a session to the VISA Resource Manager!\n"); /* Now we will open a session via TCP/IP device */ char head[256] = "TCPIP0::";...
- Page 32 Programming Manual UTG2000A Series Environment: Window system, Visual Studio. Description: Access to the instrument via USBTMC and TCP/IP, and query the device information by sending "*IDN?" command in NI-VISA. Steps Open the Visual Studio software and create a C# console project.
- Page 33 resource string.Format("TCPIP0::{0}::inst0::INSTR", ip); mbSession (MessageBasedSession)rmSession.Open(resource); mbSession.RawIO.Write("*IDN?\n"); System.Console.WriteLine(mbSession.RawIO.ReadString()); catch (Exception System.Console.WriteLine(ex.Message); void Main(string[] args) tcp_ip_test("192.168.20.11"); Environment: Window system, Microsoft Visual Basic 6.0 Description: Access to the instrument via USBTMC and TCP/IP, and query the device information by sending "*IDN?" command in NI-VISA. Steps ...
- Page 34 ' This code demonstrates sending synchronous read & write commands ' to an USB Test & Measurement Class (USBTMC) instrument using NI-VISA ' The example writes the "*IDN?\n" string to all the USBTMC ' devices connected to the system and attempts to read back ' results using the write and read functions.
- Page 35 ' device, we will get a handle to the instrument which we ' will use in later VISA functions. The AccessMode and Timeout ' parameters in this function are reserved for future ' functionality. These two parameters are given the value VI_NULL. i = 0 numInstrs (i >...
- Page 36 status AsLong count AsLong ' First we will need to open the default resource manager. status = viOpenDefaultRM(defaultRM) (status < VI_SUCCESS) Then resultTxt.Text = "Could not open a session to the VISA Resource Manager!" tcp_ip_test = status ExitFunction EndIf ' Now we will open a session via TCP/IP device status = viOpen(defaultRM, "TCPIP0::"...
- Page 37 shown in the Figure below. Communicating with the device via TCP/IP resembles USBTMC, but the VISA Write and VISA READ functions shall be set as synchronous I/O. The default setting of LabVIEW is asynchronous IO. Right-click the node, then select "Synchronous I/O Mode>>Synchronous" form the shortcut menu, so as to achieve writing or reading data synchronously.
- Page 38 function usbtmc_test() % This code demonstrates sending synchronous read & write commands % to an USB Test & Measurement Class (USBTMC) instrument using % NI-VISA %Create a VISA-USB object connected to a USB instrument vu = visa('ni','USB0::0x5345::0x1234::SN20220718::INSTR'); %Open the VISA object created fopen(vu);...
- Page 39 clear vt; Python Environment: Window system, Python3.8, PyVISA 1.11.0 Description: Access to the instrument via USBTMC and TCP/IP, and query the device information by sending "*IDN?" command in NI-VISA. Steps Install python, open the Python batch compiler, and create an empty test.py file. Install PyVISA by using the pip install PyVISA command.
-
Page 40: Examples Of Programming
Examples of programming Configuring sine wave This section introduces how to configure sine wave function. Description There are amplitude, offset, and phase relative to synchronous pulse for sine wave. The amplitude and offset of a sine wave can be set by using high and low voltage values. Examples The waveform below can be set by SCIP command series, and the high and low levels can be used to replace :CHANnel1:BASE:AMPLitude and :CHANnel1:BASE:OFFSet. - Page 41 The commands below can generate the square wave as shown above. :CHANnel1:MODe CONTinue :CHANnel1:BASE:WAVe SQUare :CHANnel1:BASE:FREQuency 40000 :CHANnel1:BASE:AMPLitude 2 :CHANnel1:BASE:OFFSet 0 :CHANnel1:BASE:PHAse 90 :CHANnel1:BASE:DUTY 20 :CHANnel1:OUTPut ON Configuring sawtooth wave Description For sawtooth wave, there are amplitude, offset, phase relative to synchronous pulse, and symmetry used to create triangular waveform and other similar waveforms.
- Page 42 The commands below can generate the sawtooth wave as shown above. :CHANnel1:MODe CONTinue :CHANnel1:BASE:WAVe RAMP :CHANnel1:BASE:FREQuency 30000 :CHANnel1:BASE:HIGH 2 :CHANnel1:BASE:LOW 0 :CHANnel1:BASE:PHAse 90 :CHANnel1:RAMP:SYMMetry 20 :CHANnel1:OUTPut ON Configuring pulse wave Description For pulse width, there are amplitude, offset, and phase relative to synchronous pulse. It also adds edge slope and duty cycle (or pulse width).
- Page 43 Configuring arbitrary wave This section introduces how to configure arbitrary wave. Description For harmonic wave, there are frequency, amplitude, offset, and phase. It also adds mode and waveform file. Examples The codes below can load and modify built-in arbitrary waveforms. :CHANnel1:MODe CONTinue :CHANnel1:BASE:WAVe ARB :CHANnel1:ARB:MODe DDS...
-
Page 44: Appendix 1: List
Appendix 1: <key> list Keyword of Key Command Functional descriptions LED Light √ Channel 1 Key √ Channel 2 key RIGHT Direction Key (Right) LEFT Direction Key (Left) Confirmation Key SYMBOL Symbol (Numeric Key) NUM0 Numeric Key (Number: 0) NUM1 Numeric Key (Number: 1) NUM2 Numeric Key (Number: 2)
Need help?
Do you have a question about the UTG2000A Series and is the answer not in the manual?
Questions and answers