Advertisement
Quick Links
4321-E05
The warranty period extension method 1 year
The warranty period will be extended from 1 year to 2 years when you register customer
information. ATAGO Logger NFC can also be downloaded at the same time.
https://www.atago.net/ur/index.php?l=en
Trouble scanning the code? Access this link
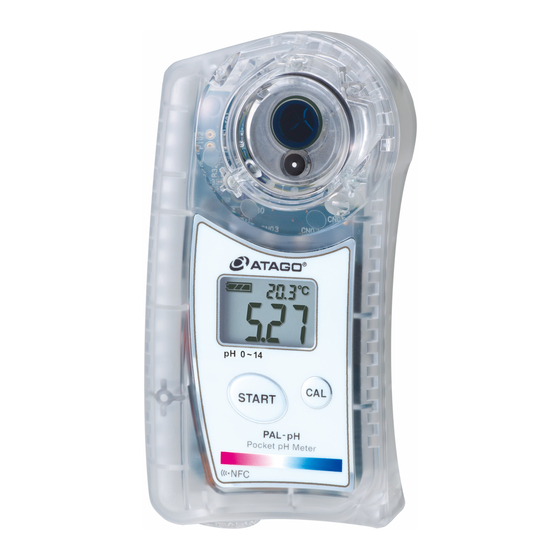
Digital Hand-held "Pocket" pH Meter
PAL-pH
Cat.No. 4321
Parts
Sample stage
Apply samples on the electrode in
the center of the sample stage.
LCD
Measurement results and remaining
battery charge are displayed.
START button (Power button)
Press to take measurements and hold
down to turn off the display.
Battery compartment
Place and remove batteries from here.
Contents
Contents
Main unit with Silicone Cover...1 Calibration Report...1 AAA batteries...2
pH Meter Solution pH4.01 10mL
pH Meter Solution pH6.86 10mL
ATAGO instruments are rigorously inspected to ensure each unit meets the highest standards of quality assurance.
Introduction
Thank you for purchasing the instrument. Carefully read and follow all instructions. Keep this manual for future reference.
A small amount of solution may leak from the reference electrode. In addition, air bubbles may be present inside the
electrodes due to manufacturing processes. These are normal and do not affect the unit's performance.
Important:
Please Read and Follow Instructions Carefully Before Initial Use.
Place plenty of tap water and leave more than 30 minutes.
Safety Instructions
●
Read and follow all safety instructions before operating the instrument. Failure to comply with the following instructions may
result in personal injury or property damage.
WARNING
◇Ensure safety when handling hazardous materials. Observe precautionary measures and use protective equipment, Be
aware of the hazards of such chemicals and emergency response guidelines.
◇ATAGO may not be held liable for any injury or damage arising in connection with handling of hazardous materials during
the use of the instrument.
◇Do not drop the instrument or subject it to strong physical shock.
◇Do not attempt to repair, modify, or disassemble the instrument.
CAUTION
◇Do not use metal tools, such as a spoon, as they may scratch
the glass electrode, resulting in erroneous measurements.
◇Carefully read this manual to have basic knowledge of
◇Do not measure organic solvents, oils, adhesives, cement,
the function of each component.
alcohol, surfactants,, polymer solvents or hydrogen flouride.
◇ATAGO is not liable for any loss and damage caused by
◇Do not use water above 50℃ to rinse the instrument.
the measurement and use of this instrument.
◇Only use the specified battery type. Observe proper polarities,
◇ATAGO shall not be held responsible for any or all
properly aligning the anodes and cathodes.
damages that may result from using the instrument for
◇Store the instrument away from direct sunlight/heat sources
those other than its intended purpose (measurement of
and excessive amounts of dust/debris.
pH level of a liquid sample).
◇Do not expose the instrument to a rapid change in ambient
◇If the pH meter solution for calibration comes in contact
temperature.
with hands or skin, immediately rinse with plenty of
◇Do not subject the instrument to strong vibration.
water.
◇Do not subject the instrument to extreme cold temperature.
◇The glass electrode is fragile; be careful not to damage
◇Do not place the instrument under anything heavy.
it. Glass shards may cause injury.
◇Loosen the battery compartment cover for air transportation.
〈International Protection Classification IP65〉
◇The instrument is water-resistant, not waterproof, and should not be submerged.
〈Chemical Resistance of Body Case〉
◇The body case is made of PBT resin. Do not expose it to water vapor or solvents.
Calibration point can be changed according to the type of pH Meter Solutions thet are pH standard solutions sold by ATAGO.
2 years
The factory default setting is "-1-".
Change the calibration point to "-2-" only if you wish to calibrate with pH Meter Solutions of pH 4.01, pH 7.00, or pH 10.01.
Do not need the operation if the calibration point is not changed.
Calibration point
-1-
-1-
QR code
Calibration point
-2-
-2-
R
1.
Instruction Manual
Press and hold the
CAL button for 5 seconds
(while the unit is powered on).
-1-
CAL
5s
Glass electrode
The instrument automatically detects and calibrates according to the pH of the pH Meter Solution that are
pH standard solutions sold by ATAGO.
Reference electrode
1.
Place enough pH
Meter Solution
to cover the entire
CAL button
electrode section.
Press to perform calibration.
START button & CAL button
Press to set date, time,
and delete data history.
Lanyard hole
At least 0.6mL
of pH Meter Solution
Calibrate at another point.
pH Meter Solution pH9.18 10mL
【Caution】
◇Perform calibration before initial use and at least once a month to maintain precision and accuracy.
◇Measure a
pH Meter Solution
◇When the time lapsed since last measurement is more than 2 weeks, it is recommended to calibrate the instrument.
◇If the ambient temperature changes during the daily work with this instrument, it needs the calibration again.
Additional refills of
pH Meter Solutions
Contact ATAGO for recommended
[Part No.]
pH Meter Solution
RE-99210 pH4.01 500mL
RE-99211 pH6.86 500mL
Tap water
RE-99212 pH7.00 500mL
RE-99213 pH9.18 500mL
RE-99214 pH10.01 500mL
*If the power is not turned on, press the START button to turn on the power, then perform the following procedure.
1.
Place enough sample
to cover the entire
electrode section.
At least 0.6mL of sample
【Caution】
◇Do not splash water above 50℃. The plastic may warp, which may compromise the water resistance.
・When measuring hot samples, place only the necessary amount and do not let it overflow from the sample stage well.
・When hot water is necessary to clean off hardened samples, use water-soaked gauze around the sample stage and keep
hot water away from the body case.
◇In rare cases, a measurement value may be displayed even if there is not sample placed on the electrode section. In such
instances, simply place some sample on the electrode section and press the START button. Measurements will be taken normally.
◇When measuring samples such as strong acids and high alkaline, take a quick measurement and rinse off any remaining
sample with tap water.
<LCD Auto Shut-off>
The instrument will turn itself off after 5 minutes of inactivity. To manually turn it off, hold down the START button for more
than 2 seconds.
How to Select a Calibration Option
Calibration can be done at 3 points of pH 4.01, pH 6.86, and pH 9.18.
If the sample is above pH 6.86, calibration can be done at 2 points of pH 6.86 and pH 9.18.
If the sample is less than pH 6.86, calibration can be done at 2 points of pH 4.01 and pH 6.86.
Calibration can be done at 3 points of pH 4.01, pH 7.00, and pH 10.01.
If the sample is above pH 6.86, calibration can be done at 2 points of pH 7.00 and pH 10.01.
If the sample is less than pH 6.86, calibration can be done at 2 points of pH 4.01 and pH 7.00.
2.
3.
Press the START button to select
Press the CAL button
a calibration point.
to confirm the selection.
-2-
End
CAL
Display the calibration
END display
point you want to use.
Calibration
2.
3.
<When performing more accurate calibration>
Press
After the display flashes "---",the
standard calibration solution value will
the CAL
Perform the following procedure (a) and
flash approx 10 times, then change to
button.
(b) before step 2.
a fixed display of the value.
a.
b.
Wipe away the
Calibration is complete
pH Meter
Solution.
6.86
CAL
7.00
Flash Light up
(The displayed value is an example.)
At least 0.6mL
of pH Meter Solution
*After calibration is completed, press START
button to confirm if the measured value is the
same with the solution.
If not, perform calibration again.
. When the measurement value falls outside of the expected range, perform calibration.
can be purchased from ATAGO (sold separately).
pH Meter Solutions
.
RE-99221 pH4.01 100mL
RE-99230 pH Meter Solution Set pH4.01/pH6.86/pH9.18 10mL
RE-99222 pH6.86 100mL
RE-99231 pH Meter Solution Set pH4.01/pH7.00/pH10.01 10mL
RE-99224 pH9.18 100mL
RE-99223 pH7.00 100mL
RE-99225 pH10.01 100mL
Measurement
Repeat until measurement
values are stabilized.
2.
3.
Press the
After the display
<When measuring with higher precision>
START button.
flashes "---",
Perform the following procedure (a) and
the measurement
(b) before step 2.
value is displayed.
a.
b.
Wipe away the
sample.
At least 0.6mL of sample
Calibration and Measurement Guidelines
◇When the measured values are off...
Tap water
〈Coping Method 1〉
Place plenty of tap water
and leave more than 30 minutes.
At least
0.6mL
〈Coping Method 2〉
Place enough sample
to cover the entire
electrode section.
4.
Calibration.
The insufficient amount of
Now you can
sample will result in abnormal
proceed to
measurement or calibration.
calibration.
Replacing the Batteries
【Caution】
◇ Please remove the tape in the battery compartment before first use.
◇ Fasten the battery compartment cover tightly to prevent water ingress or poor connection,
which will cause erroneous measurements. Push the cover in firmly and turn.
◇ When the O-ring on the cover is dirty or damaged, the water resistance may be compromised.
◇ When the battery icon indicates the low power level (
brand new set of AAA alkaline batteries (1.5V).
◇ Static images may occasionally appear on LCD. Such retained pixel charges do not indicate a
faulty display, consume the battery power, or affect the instrument's performance in any way.
◇ Check the expiration dates on batteries before purchase.
Place the
pH Meter
◇Calibrate the instrument after the batteries are replaced.
Solution
so as to cover
the entire electrode
1.
2.
section again and leave
Insert a coin in the
Insert batteries,
it for approx. 30 seconds.
groove on the battery
observing the correct
compartment cover. Turn
polarity.
the coin counterclockwise
to remove the cover.
m Do not scratch the electrode.
2.Apply tap water and wipe off. Repeat several times.
1.Wipe off the sample.
(Remove the sample
with a plastic pipette.)
or
Place the sample so
as to cover the entire
electrode section again.
1. Wipe off the sample.
2. Rinse with tap water.
(Remove the sample
with a plastic pipette.)
The following messages alert the user when an operation has failed.
The battery is low.
Display will turn off after 10 seconds.
The sample measured is outside the
measurement range.
The START button was pressed with nothing
on the electrode section.
The sample measured is outside the
measurement range.
The START button was pressed with nothing
on the electrode section.
◇Do not damage the electrodes!
Do not use metal tools.
Be careful not to
scratch the electrodes.
◇
Initial measurements may fluctuate with hot or cold samples.
Wait for the instrument to acclimate to the sample
temperature, then press the START button. Alternatively,
press the START button multiple times until measurements
become stable.
), replace both batteries with a
O-ring
3.
4.
Align the cover and push
Close the battery
compartment cover by
it down.
pushing the cover in with
a coin in the groove and
turning it clockwise until
it stops.
*Turning excessively may
cause malfunction.
Groove
Open
Close
Cleaning
For samples containing oils or fats:
Clean oily residues on the electrode section with ethyl alcohol.
Ethyl
Then rinse the electrode section with tap water throughly.
alcohol
Wash under
Do not submerge
running water
in water.
(<50℃).
*Remove the
Silicone Cover .
3. Wipe off the tap water.
Error Messages
Error Messages
The START button was pressed with nothing
on the electrode section.
The CAL button was pressed with nothing
on the electrode section.
The detection temperature was over 45℃. A
pH value was displayed (accuracy is not
guaranteed).
The detection temperature was less than
5℃. A pH value was displayed (accuracy is
not guaranteed).
Advertisement

Related Manuals for ATAGO PAL-pH


Summary of Contents for ATAGO PAL-pH
- Page 1 How to Select a Calibration Option Calibration and Measurement Guidelines 4321-E05 Calibration point can be changed according to the type of pH Meter Solutions thet are pH standard solutions sold by ATAGO. ◇Do not damage the electrodes! ◇When the measured values are off...
- Page 2 LLL : Lower limit error. 2019/01/17 09:30:45 20.4 【Caution】 Bring PAL and Android devices, PAL and iPhone or PAL and USB NFC Reader/writer as close to each Contact an ATAGO authorized service center for service and support. 2019/01/17 09:31:50 8.31 20.5 HHH : Upper limit error.
Need help?
Do you have a question about the PAL-pH and is the answer not in the manual?
Questions and answers