Table of Contents
Advertisement
Available languages
Available languages
Quick Links
Technical Support and E-Warranty Certificate www.vevor.com/support
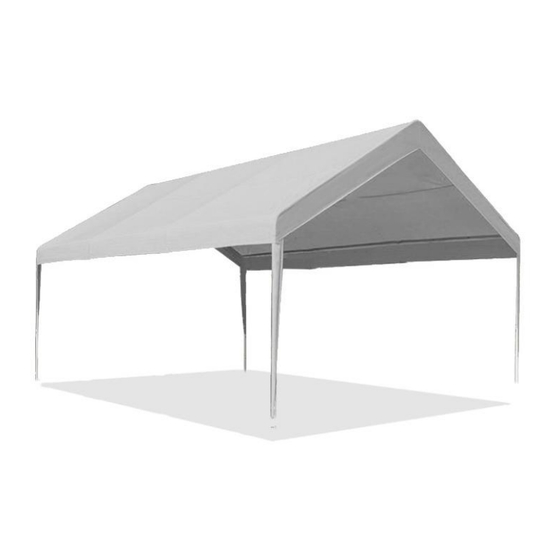
CARPORT REPLACEMENT COVER
We continue to be committed to provide you tools with competitive price.
"Save Half", "Half Price" or any other similar expressions used by us only represents an
estimate of savings you might benefit from buying certain tools with us compared to the major
top brands and does not necessarily mean to cover all categories of tools offered by us. You
are kindly reminded to verify carefully when you are placing an order with us if you are
actually saving half in comparison with the top major brands.
Advertisement
Table of Contents

Subscribe to Our Youtube Channel
Related Manuals for VEVOR SXYQCPBB10X20


Summary of Contents for VEVOR SXYQCPBB10X20
- Page 1 Technical Support and E-Warranty Certificate www.vevor.com/support CARPORT REPLACEMENT COVER We continue to be committed to provide you tools with competitive price. "Save Half", "Half Price" or any other similar expressions used by us only represents an estimate of savings you might benefit from buying certain tools with us compared to the major top brands and does not necessarily mean to cover all categories of tools offered by us.
- Page 3 CARPORT REPLACEMENT COVER MODEL: SXYQCPBB10X20、SXYQCPBM10X20、SXYQCPBH10X20、 SXYQCPBH12X20、SXYQCPBH13X20 MODEL: SXYQCPBBW10X20 - 1 -...
- Page 4 This is the original instruction, please read all manual instructions carefully before operating. VEVOR reserves a clear interpretation of our user manual. The appearance of the product shall be subject to the product you received. Please forgive us that we won't inform you again if there are any technology or software updates on our product.
-
Page 5: Warning And Precautions
Warning-To reduce the risk of injury, user must read instructions manual carefully. WARNING & PRECAUTIONS WARNING: 1、Avoid contact with sharp objects to prevent scratches. 2、Keep all flame and heat sources away from the tarpaulin materials. Under no circumstance should any naked flame sources, fuel burning devices or heating devices be used under or nearby. -
Page 6: Product Description
Material: waterproof UV woven polyethylene cover Technological innovation: Hot Air and Extrusion Welding Applicable Packing Size Model Color N.W. G.W. carport sizes (mm) SXYQCPBB10X20 White 10’ L x 20’ W, SXYQCPBM10X20 Beige canopy 6.15 kg 450*360*195 6.8 kg With Edge... - Page 7 COMPONENTS Model Color Product Accessories SXYQCPBB10X20 White SXYQCPBM10X20 Beige SXYQCPBH10X20 Grey SXYQCPBBW10X20 White SXYQCPBBCP10X20 White SXYQCPBHDC10X20 Grey SXYQCPBH12X20 Grey SXYQCPBHC12X20 Grey SXYQCPBH13X20 Grey SXYQCPBHC13X20 Grey - 5 -...
- Page 8 ASSEMBLY INSTRUCTIONS Canopy Assembly 1、Unpack and take out tarpaulin and a bundle of bouncy balls. 2、Unfold the product and lay it flat on top of the stand. 3、Pass the bouncy tether balls through the reserved hole in the tarpaulin and connect it to the metal bracket. And install the hooks on the leg wraps in the appropriate holes on the feet of the stand - 6 -...
- Page 9 Side Canopy Assembly 1、Unpack and take out tarpaulin and a bundle of bouncy tether balls. 2、Unfold the tarpaulin around the bracket and insert bouncy tether balls through the metal holes to secure it to the bracket. 3、 The tarpaulin that serves as the door is fastened to the bracket with Velcro.
- Page 10 Manufacturer: Shanghaimuxinmuyeyouxiangongsi Address: Baoshanqu Shuangchenglu 803long 11hao 1602A-1609shi Shanghai Imported to AUS: SIHAO PTY LTD, 1 ROKEVA STREETEASTWOOD NSW 2122 Australia Imported to USA: Sanven Technology Ltd. Suite 250,9166 Anaheim Place, Rancho Cucamonga, CA 91730 SHUNSHUN GmbH Römeräcker 9 Z2021,76351 Linkenheim-Hochstetten,Germany euvertreter@gmail.com +49 1727041930...
- Page 12 Technical Support and E-Warranty Certificate www.vevor.com/support...
- Page 13 Tecnico Supporto e certificato di garanzia elettronica www.vevor.com/support COPERTURA SOSTITUTIVA PER POSTO AUTO COPERTO We continue to be committed to provide you tools with competitive price. "Save Half", "Half Price" or any other similar expressions used by us only represents an estimate of savings you might benefit from buying certain tools with us compared to the major top brands and does not necessarily mean to cover all categories of tools offered by us.
- Page 16 CARPORT REPLACEMENT COVER MODELLO: SXYQCPBB10X20 、 SXYQCPBM10X20 、 SXYQCPBH10X20 、 SXYQCPBH12X20 、 SXYQCPBH13X20 MODELLO: SXYQCPBBW10X20 - 1 -...
- Page 17 MODELLO: SXYQCPBBCP10X20 、 SXYQCPBHC12X20 、 SXYQCPBHC13X20 MODELLO: SXYQCPBHDC10X20 NEED HELP? CONTACT US! Have product questions? Need technical support? Please feel free to contact us: Technical Support and E-Warranty Certificate www.vevor.com/support - 2 -...
-
Page 18: Warning And Precautions
This is the original instruction, please read all manual instructions carefully before operating. VEVOR reserves a clear interpretation of our user manual. The appearance of the product shall be subject to the product you received. Please forgive us that we won't inform you again if there are any technology or software updates on our product. -
Page 19: Product Description
Materiale: copertura in polietilene tessuto impermeabile UV Innovazione tecnologica: Saldatura ad Aria Calda ed Estrusione Dimensioni Dimensioni Color applicabili del Modello dell'imballaggio posto auto (mm) coperto SXYQCPBB10X20 Bianco 10' L x 20' L, 6,15 SXYQCPBM10X20 Beige baldacchino chilogra 450*360*195 chilogra Con Bordo... - Page 20 baldacchino tettoia laterale 12' L x 20' L baldacchino SXYQCPBH12X20 Grigio 7,2kg 450*360*195 chilogra Con Bordo 12' L x 20' L SXYQCPBHC12X20 Grigio tettoia laterale chilogra 450*360*195 chilogra 13' L x 20' L baldacchino SXYQCPBH13X20 Grigio chilogra 450*360*195 chilogra Con Bordo 13' L x 20' L SXYQCPBHC13X20 Grigio...
- Page 21 COMPONENTS Modello Colore Prodotto Accessori SXYQCPBB10X20 Bianco SXYQCPBM10X20 Beige SXYQCPBH10X20 Grigio _ SXYQCPBBW10X20 Bianco SXYQCPBBCP10X20 Bianco SXYQCPBHDC10X20 Grigio _ SXYQCPBH12X20 Grigio _ SXYQCPBHC12X20 Grigio _ SXYQCPBH13X20 Grigio _ - 6 -...
- Page 22 SXYQCPBHC13X20 Grigio _ ASSEMBLY INSTRUCTIONS Assemblaggio della tettoia 1 、Disimballare ed estrarre il telone e un fascio di materiale gonfiabile palle. 2、Aprire il prodotto e adagiarlo piatto sopra il supporto. 3、Passa le palline rimbalzanti attraverso il foro riservato nel telone e collegarlo alla staffa metallica.
- Page 23 Assemblaggio della tettoia laterale 1、Disimballare ed estrarre il telone e un fascio di palline rimbalzanti . 2、Aprire il telone attorno alla staffa e inserire le palline rimbalzanti attraverso i fori metallici per fissarlo alla staffa. 3、Il telone che funge da porta è fissato alla staffa con Velcro. - 8 -...
- Page 24 - 9 -...
- Page 25 Produttore: Shanghaimuxinmuyeyouxiangongsi Indirizzo: Baoshanqu Shuangchenglu 803long 11hao 1602A-1609shi Shanghai Importato in AUS: SIHAO PTY LTD, 1 ROKEVA STREETEASTWOOD NSW 2122 Australia Importato negli Stati Uniti: Sanven Technology Ltd. Suite 250 , 9166 Anaheim Place, Rancho Cucamonga, CA 91730 SHUNSHUN GmbH Römeräcker 9 Z2021,76351 Linkenheim-Hochstetten,Germany euvertreter@gmail.com...
- Page 27 Tecnico Supporto e certificato di garanzia elettronica www.vevor.com/support...
- Page 28 Técnico Soporte y certificado de garantía electrónica www.vevor.com/support CUBIERTA DE REPUESTO PARA COCHERA We continue to be committed to provide you tools with competitive price. "Save Half", "Half Price" or any other similar expressions used by us only represents an estimate of savings you might benefit from buying certain tools with us compared to the major top brands and does not necessarily mean to cover all categories of tools offered by us.
- Page 31 CARPORT REPLACEMENT COVER MODELO: SXYQCPBB10X20 , SXYQCPBM10X20 , SXYQCPBH10X20 , SXYQCPBH12X20 , SXYQCPBH13X20 MODELO: SXYQCPBBW10X20 - 1 -...
- Page 32 MODELO: SXYQCPBBCP10X20 、 SXYQCPBHC12X20 、 SXYQCPBHC13X20 MODELO: SXYQCPBHDC10X20 NEED HELP? CONTACT US! Have product questions? Need technical support? Please feel free to contact us: Technical Support and E-Warranty Certificate www.vevor.com/support - 2 -...
-
Page 33: Warning And Precautions
This is the original instruction, please read all manual instructions carefully before operating. VEVOR reserves a clear interpretation of our user manual. The appearance of the product shall be subject to the product you received. Please forgive us that we won't inform you again if there are any technology or software updates on our product. -
Page 34: Product Description
Innovación tecnológica: Soldadura por Aire Caliente y Extrusión Tamaños de Tamaño de noroest Modelo Color cochera embalaje G.W. aplicables (mm) 10' de largo x SXYQCPBB10X20 Blanco 20' de ancho, 6,15 SXYQCPBM10X20 Beige 450*360*195 kilogram pabellón kilos SXYQCPBH10X20 Gris Con borde... - Page 35 12' de largo x 20' de ancho SXYQCPBH12X20 Gris 7,2 kilos 450*360*195 7,8 kilos pabellón Con borde 12' de largo x SXYQCPBHC12X20 Gris 20' de ancho 7,4 kilos 450*360*195 8 kilos dosel lateral 13' de largo x 20' de ancho SXYQCPBH13X20 Gris 7,4 kilos...
- Page 36 COMPONENTS Modelo Color Producto Accesorios SXYQCPBB10X20 Blanco SXYQCPBM10X20 Beige SXYQCPBH10X20 Gris _ SXYQCPBBW10X20 Blanco SXYQCPBBCP10X20 Blanco SXYQCPBHDC10X20 Gris _ SXYQCPBH12X20 Gris _ SXYQCPBHC12X20 Gris _ SXYQCPBH13X20 Gris _ - 6 -...
- Page 37 SXYQCPBHC13X20 Gris _ ASSEMBLY INSTRUCTIONS Asamblea del dosel 1. Desempaque y saque la lona y un paquete de material inflable. pelotas. 2 、 Despliegue el producto y colóquelo plano sobre el soporte. 3 、Pase las bolas saltarinas a través del orificio reservado en la lona y conéctelo al soporte metálico.
- Page 38 Montaje del dosel lateral 1. Desempaque y saque la lona y un paquete de pelotas saltarinas . 2. Despliegue la lona alrededor del soporte e inserte bolas de sujeción rebotantes a través de los orificios metálicos para asegurarla al soporte. 3.
- Page 39 - 9 -...
- Page 40 Fabricante: Shanghaimuxinmuyeyouxiangongsi Dirección: Baoshanqu Shuangchenglu 803long 11hao 1602A-1609shi Shanghai Importado a AUS: SIHAO PTY LTD, 1 ROKEVA STREETEASTWOOD NSW 2122 Australia Importado a EE. UU.: Sanven Technology Ltd. Suite 250 , 9166 Anaheim Place, Rancho Cucamonga, CA 91730 SHUNSHUN GmbH Römeräcker 9 Z2021,76351 Linkenheim-Hochstetten,Germany euvertreter@gmail.com...
- Page 42 Técnico Certificado de soporte y garantía electrónica www.vevor.com/support...
- Page 43 Teknisk Support och e-garanticertifikat www.vevor.com/support CARPORTBYTESKÅPA We continue to be committed to provide you tools with competitive price. "Save Half", "Half Price" or any other similar expressions used by us only represents an estimate of savings you might benefit from buying certain tools with us compared to the major top brands and does not necessarily mean to cover all categories of tools offered by us.
- Page 45 CARPORT REPLACEMENT COVER MODELL: SXYQCPBB10X20 、 SXYQCPBM10X20 、 SXYQCPBH10X20 , SXYQCPBH12X20 、 SXYQCPBH13X20 MODELL: SXYQCPBBW10X20 - 1 -...
- Page 46 MODELL: SXYQCPBBCP10X20 、 SXYQCPBHC12X20 、 SXYQCPBHC13X20 MODELL: SXYQCPBHDC10X20 NEED HELP? CONTACT US! Have product questions? Need technical support? Please feel free to contact us: Technical Support and E-Warranty Certificate www.vevor.com/support - 2 -...
-
Page 47: Warning And Precautions
This is the original instruction, please read all manual instructions carefully before operating. VEVOR reserves a clear interpretation of our user manual. The appearance of the product shall be subject to the product you received. Please forgive us that we won't inform you again if there are any technology or software updates on our product. -
Page 48: Product Description
PRODUCT DESCRIPTION Material: vattentätt UV-vävt polyetenhölje Teknisk innovation: Varmluft och extruderingssvetsning Tillämpliga Förpackningsstorl Modell Färg carportstorle (mm) SXYQCPBB10X20 10' L x 20' W, SXYQCPBM10X20 Beige 6,15 kg 450*360*195 6,8 kg Med Edge SXYQCPBH10X20 Grå 10' L x 20' W, SXYQCPBBW10X20... - Page 49 12' L x 20' W SXYQCPBHC12X20 Grå 7,4 kg 450*360*195 8 kg sidotak 13' L x 20' W SXYQCPBH13X20 Grå 7,4 kg 450*360*195 8 kg Med Edge 13' L x 20' W SXYQCPBHC13X20 Grå 7,7 kg 450*360*195 8,4 kg sidotak - 5 -...
- Page 50 COMPONENTS Modell Färg Produkt Tillbehör SXYQCPBB10X20 SXYQCPBM10X20 Beige SXYQCPBH10X20 Grå _ SXYQCPBBW10X20 SXYQCPBBCP10X20 SXYQCPBHDC10X20 Grå _ SXYQCPBH12X20 Grå _ SXYQCPBHC12X20 Grå _ SXYQCPBH13X20 Grå _ - 6 -...
- Page 51 SXYQCPBHC13X20 Grå _ ASSEMBLY INSTRUCTIONS Baldakin A- montage 1 、 Packa upp och ta ut presenning och en bunt studs bollar. 2、Vik ut produkten och lägg den platt ovanpå stativet. 3、 Passa på de studsande tjurbollarna genom det reserverade hålet i presenningen och anslut den till metallfästet.
- Page 52 Sidokapell A- montage 1、 Packa upp och ta ut presenning och en bunt studsande tjuderbollar . 2、Vik ut presenningen runt fästet och för in studsande tjuderkulor genom metallhålen för att fästa den vid fästet. 3、Presenningen som fungerar som dörr fästs i fästet med kardborreband.
- Page 53 - 9 -...
- Page 54 Tillverkare: Shanghaimuxinmuyeyouxiangongsi Adress: Baoshanqu Shuangchenglu 803long 11hao 1602A-1609shi Shanghai Importerad till AUS: SIHAO PTY LTD, 1 ROKEVA STREETEASTWOOD NSW 2122 Australien Importerad till USA: Sanven Technology Ltd. Suite 250 , 9166 Anaheim Place, Rancho Cucamonga, CA 91730 SHUNSHUN GmbH Römeräcker 9 Z2021,76351 Linkenheim-Hochstetten,Germany euvertreter@gmail.com +49 1727041930...
- Page 56 Teknisk Support och e-garanticertifikat www.vevor.com/support...
- Page 57 Technisch Ondersteuning en e-garantiecertificaat www.vevor.com/support VERVANGENDE HOES VOOR CARPORT We continue to be committed to provide you tools with competitive price. "Save Half", "Half Price" or any other similar expressions used by us only represents an estimate of savings you might benefit from buying certain tools with us compared to the major top brands and does not necessarily mean to cover all categories of tools offered by us.
- Page 59 CARPORT REPLACEMENT COVER MODEL: SXYQCPBB10X20 , SXYQCPBM10X20 , SXYQCPBH10X20 , SXYQCPBH12X20 , SXYQCPBH13X20 MODEL: SXYQCPBBW10X20 - 1 -...
- Page 60 This is the original instruction, please read all manual instructions carefully before operating. VEVOR reserves a clear interpretation of our user manual. The appearance of the product shall be subject to the product you received. Please forgive us that we won't inform you again if there are any technology or software updates on our product.
-
Page 61: Warning And Precautions
Waarschuwing-Om het risico op letsel te verminderen, moet de gebruiker de handleiding zorgvuldig lezen. WARNING & PRECAUTIONS WAARSCHUWING : 1. Vermijd contact met scherpe voorwerpen om krassen te voorkomen . 2. Houd alle vlammen en warmtebronnen uit de buurt van de dekzeilmaterialen. - Page 62 Materiaal: waterdichte UV-geweven polyethyleen hoes Technologische innovatie: hetelucht- en extrusielassen Verpakkingsgroott Toepasselijke Model Kleur carportmaten (mm) SXYQCPBB10X20 10' L x 20' B, SXYQCPBM10X20 Beige overkapping 6,15 kg 450*360*195 6,8 kg Met Rand SXYQCPBH10X20 Grijs 10' L x 20' B, SXYQCPBBW10X20...
- Page 63 COMPONENTS Model Kleur Product Accessoires SXYQCPBB10X20 SXYQCPBM10X20 Beige SXYQCPBH10X20 Grijs _ SXYQCPBBW10X20 SXYQCPBBCP10X20 SXYQCPBHDC10X20 Grijs _ SXYQCPBH12X20 Grijs _ SXYQCPBHC12X20 Grijs _ SXYQCPBH13X20 Grijs _ - 5 -...
- Page 64 SXYQCPBHC13X20 Grijs _ ASSEMBLY INSTRUCTIONS Luifel Een montage 1. Pak het zeildoek en een bundel springkussen uit en verwijder het ballen. 2. Vouw het product open en leg het neer plat op de standaard. 3. Geef de springerige kettingballen door door het gereserveerde gat in het zeildoek en sluit deze aan op de metalen beugel.
- Page 65 Zijluifel A- montage 1. Pak het zeildoek en een bundel springkussenballen uit en verwijder het . 2. Vouw het zeildoek rond de beugel open en steek de veerkrachtige kettingballen door de metalen gaten om het aan de beugel te bevestigen. 3.
- Page 66 - 8 -...
- Page 67 Fabrikant: Shanghaimuxinmuyeyouxiangongsi Adres: Baoshanqu Shuangchenglu 803long 11hao 1602A-1609shi Shanghai Geïmporteerd naar AUS: SIHAO PTY LTD, 1 ROKEVA STREETEASTWOOD NSW 2122 Australië Geïmporteerd naar de VS: Sanven Technology Ltd. Suite 250 , 9166 Anaheim Place, Rancho Cucamonga, CA 91730 SHUNSHUN GmbH Römeräcker 9 Z2021,76351 Linkenheim-Hochstetten,Germany euvertreter@gmail.com...
- Page 69 Technisch Ondersteuning en e-garantiecertificaat www.vevor.com/support...
- Page 70 Technique Assistance et certificat de garantie électronique www.vevor.com/support HOUSSE DE REMPLACEMENT POUR ABRI D'AUTO...
- Page 71 We continue to be committed to provide you tools with competitive price. "Save Half", "Half Price" or any other similar expressions used by us only represents an estimate of savings you might benefit from buying certain tools with us compared to the major top brands and does not necessarily mean to cover all categories of tools offered by us.
- Page 73 CARPORT REPLACEMENT COVER MODÈLE: SXYQCPBB10X20 , SXYQCPBM10X20 , SXYQCPBH10X20 , SXYQCPBH12X20 , SXYQCPBH13X20 MODÈLE : SXYQCPBBW10X20 - 1 -...
- Page 74 This is the original instruction, please read all manual instructions carefully before operating. VEVOR reserves a clear interpretation of our user manual. The appearance of the product shall be subject to the product you received. Please forgive us that we won't inform you again if there are any technology or software updates on our product.
-
Page 75: Warning And Precautions
Avertissement : Pour réduire le risque de blessure, l'utilisateur doit lire attentivement le manuel d'instructions. WARNING & PRECAUTIONS AVERTISSEMENT : 1 、 Évitez tout contact avec des objets pointus pour éviter les rayures . 2 、 Gardez toutes les sources de flammes et de chaleur éloignées des matériaux de la bâche. -
Page 76: Product Description
Matériau : housse en polyéthylène tissé UV imperméable. Innovation technologique : Soudage à air chaud et par extrusion Tailles d'abri Coule Taille d'emballage Modèle d'auto (mm) applicables 10' de SXYQCPBB10X20 Blanc longueur x 20' SXYQCPBM10X20 Beige de largeur, 6,15kg 450*360*195 6,8kg canopée... - Page 77 auvent latéral 12' de longueur x 20' SXYQCPBH12X20 Gris de largeur 7,2 kg 450*360*195 7,8kg canopée Avec bord 12' de longueur x 20' SXYQCPBHC12X20 Gris 7,4 kg 450*360*195 8 kg de largeur auvent latéral 13' de longueur x 20' SXYQCPBH13X20 Gris de largeur 7,4 kg...
- Page 78 COMPONENTS Modèle Couleur Produit Accessoires SXYQCPBB10X20 Blanc SXYQCPBM10X20 Beige SXYQCPBH10X20 Gris _ SXYQCPBBW10X20 Blanc SXYQCPBBCP10X20 Blanc SXYQCPBHDC10X20 Gris _ SXYQCPBH12X20 Gris _ SXYQCPBHC12X20 Gris _ SXYQCPBH13X20 Gris _ - 6 -...
- Page 79 SXYQCPBHC13X20 Gris _ ASSEMBLY INSTRUCTIONS Assemblage de la verrière 1 、 Déballez et sortez la bâche et un paquet de jouets gonflables des balles. 2. Dépliez le produit et posez-le à plat sur le support. 3. Passez les balles d'attache rebondissantes à travers le trou réservé dans la bâche et connectez-le au support métallique.
- Page 80 Assemblage de l'auvent latéral 1. Déballez et sortez la bâche et un paquet de balles d'attache rebondissantes . 2. Dépliez la bâche autour du support et insérez des boules d'attache rebondissantes dans les trous métalliques pour la fixer au support. 3.
- Page 81 - 9 -...
- Page 82 Fabricant : Shanghaimuxinmuyeyouxiangongsi Adresse : Baoshanqu Shuangchenglu 803long 11hao 1602A-1609shi Shanghai Importé en Australie : SIHAO PTY LTD, 1 ROKEVA STREETASTWOOD NSW 2122 Australie Importé aux États-Unis : Sanven Technology Ltd. Suite 250 , 9166 Anaheim Place, Rancho Cucamonga, CA 91730 SHUNSHUN GmbH Römeräcker 9 Z2021,76351 Linkenheim-Hochstetten,Germany...
- Page 84 Technique Assistance et certificat de garantie électronique www.vevor.com/support...
- Page 85 Technisch Support- und E-Garantie-Zertifikat www.vevor.com/support CARPORT-ERSATZABDECKUNG We continue to be committed to provide you tools with competitive price. "Save Half", "Half Price" or any other similar expressions used by us only represents an estimate of savings you might benefit from buying certain tools with us compared to the major top brands and does not necessarily mean to cover all categories of tools offered by us.
- Page 87 CARPORT REPLACEMENT COVER MODELL: SXYQCPBB10X20 , SXYQCPBM10X20 , SXYQCPBH10X20 , SXYQCPBH12X20 , SXYQCPBH13X20 MODELL: SXYQCPBBW10X20 - 1 -...
- Page 88 This is the original instruction, please read all manual instructions carefully before operating. VEVOR reserves a clear interpretation of our user manual. The appearance of the product shall be subject to the product you received. Please forgive us that we won't inform you again if there are any technology or software updates on our product.
-
Page 89: Warning And Precautions
Warnung: Um das Verletzungsrisiko zu verringern, muss der Benutzer die Bedienungsanleitung sorgfältig lesen. WARNING & PRECAUTIONS WARNUNG : 1. Vermeiden Sie den Kontakt mit scharfen Gegenständen, um Kratzer zu vermeiden . 2 、 Halten Sie alle Flammen- und Wärmequellen von den Planenmaterialien fern. -
Page 90: Product Description
PRODUCT DESCRIPTION Material: wasserdichter, UV-gewebter Polyethylenbezug Technologische Innovation: Heißluft- und Extrusionsschweißen Anwendbare Packungsgröße Modell Farbe Carportgröße (mm) SXYQCPBB10X20 Weiß 10' L x 20' B, SXYQCPBM10X20 Beige Überdachung 6,15 kg 450*360*195 6,8 kg Mit Edge SXYQCPBH10X20 Grau 10' L x 20' B, SXYQCPBBW10X20 Weiß... - Page 91 12' L x 20' B SXYQCPBHC12X20 Grau 7,4 kg 450*360*195 8 kg Seitendach 13' L x 20' B Überdachung SXYQCPBH13X20 Grau 7,4 kg 450*360*195 8 kg Mit Edge 13' L x 20' B SXYQCPBHC13X20 Grau 7,7 kg 450*360*195 8,4 kg Seitendach - 5 -...
- Page 92 COMPONENTS Modell Farbe Produkt Zubehör SXYQCPBB10X20 Weiß SXYQCPBM10X20 Beige SXYQCPBH10X20 Grau _ SXYQCPBBW10X20 Weiß SXYQCPBBCP10X20 Weiß SXYQCPBHDC10X20 Grau _ SXYQCPBH12X20 Grau _ SXYQCPBHC12X20 Grau _ SXYQCPBH13X20 Grau _ - 6 -...
- Page 93 SXYQCPBHC13X20 Grau _ ASSEMBLY INSTRUCTIONS Montage des Baldachins 1 、 Packen Sie die Plane und ein Bündel Hüpfburg aus und nehmen Sie sie heraus Bälle. 2. Falten Sie das Produkt auseinander und legen Sie es hin flach auf den Ständer legen. 3.
- Page 94 Montage des Seitendachs 1、Packen Sie die Plane und ein Bündel Hüpfbälle aus und nehmen Sie sie heraus . 2、Falten Sie die Plane um die Halterung herum auf und stecken Sie Hüpfbälle durch die Metalllöcher, um sie an der Halterung zu befestigen.
- Page 95 - 9 -...
- Page 96 Hersteller: Shanghaimuxinmuyeyouxiangongsi Adresse: Baoshanqu Shuangchenglu 803long 11hao 1602A-1609shi Shanghai Importiert nach AUS: SIHAO PTY LTD, 1 ROKEVA STREETEASTWOOD NSW 2122 Australien Importiert in die USA: Sanven Technology Ltd. Suite 250 , 9166 Anaheim Place, Rancho Cucamonga, CA 91730 SHUNSHUN GmbH Römeräcker 9 Z2021,76351 Linkenheim-Hochstetten,Germany euvertreter@gmail.com...
- Page 98 Technisch Support- und E-Garantiezertifikat www.vevor.com/support...
- Page 99 Techniczny Certyfikat wsparcia i e-gwarancji www.vevor.com/support POKRYWA ZASTĘPCZA WIATY SAMOCHODOWEJ We continue to be committed to provide you tools with competitive price. "Save Half", "Half Price" or any other similar expressions used by us only represents an estimate of savings you might benefit from buying certain tools with us compared to the major top brands and does not necessarily mean to cover all categories of tools offered by us.
- Page 102 CARPORT REPLACEMENT COVER MODEL: SXYQCPBB10X20 , SXYQCPBM10X20 , SXYQCPBH10X20 , SXYQCPBH12X20 , SXYQCPBH13X20 MODEL: SXYQCPBBW10X20 - 1 -...
- Page 103 This is the original instruction, please read all manual instructions carefully before operating. VEVOR reserves a clear interpretation of our user manual. The appearance of the product shall be subject to the product you received. Please forgive us that we won't inform you again if there are any technology or software updates on our product.
- Page 104 Ostrzeżenie — aby zmniejszyć ryzyko obrażeń, użytkownik musi uważnie przeczytać instrukcję obsługi. WARNING & PRECAUTIONS OSTRZEŻENIE : 1. Unikaj kontaktu z ostrymi przedmiotami, aby zapobiec zadrapaniom . 2 、 Trzymaj wszystkie źródła płomieni i ciepła z dala od materiałów plandekowych. W żadnym wypadku nie należy używać pod lub w pobliżu źródeł...
- Page 105 Zgrzewanie gorącym powietrzem wytłaczanie Obowiązując północn Wielkość e rozmiary Model Kolor opakowania wiaty zachód (mm) garażowej SXYQCPBB10X20 Biały 10' dł. x 20' Beżow szer., SXYQCPBM10X20 6,15 kg 450*360*195 6,8 kg daszek Z Edgem SXYQCPBH10X20 Szary 10' dł. x 20' SXYQCPBBW10X20 Biały...
- Page 106 13' dł. x 20' szer SXYQCPBH13X20 Szary 7,4 kg 450*360*195 8 kg daszek Z Edgem 13' dł. x 20' szer SXYQCPBHC13X20 Szary 7,7 kg 450*360*195 8,4 kg baldachim boczny - 5 -...
- Page 107 COMPONENTS Model Kolor Produkt Akcesoria SXYQCPBB10X20 Biały SXYQCPBM10X20 Beżowy SXYQCPBH10X20 Szary _ SXYQCPBBW10X20 Biały SXYQCPBBCP10X20 Biały SXYQCPBHDC10X20 Szary _ SXYQCPBH12X20 Szary _ SXYQCPBHC12X20 Szary _ SXYQCPBH13X20 Szary _ - 6 -...
- Page 108 SXYQCPBHC13X20 Szary _ ASSEMBLY INSTRUCTIONS Montaż baldachimu 1 、 Rozpakuj i wyjmij plandekę oraz wiązkę dmuchanych rzeczy kulki. 2、Rozłóż produkt i połóż go płasko na górze stojaka. 3、Podaj sprężyste kulki uwięzi przez zarezerwowany otwór w plandece i przymocuj go do metalowego wspornika. Następnie zamontuj haczyki opasek na nogi w odpowiednich otworach w stopach stojaka - 7 -...
- Page 109 Zadaszenie boczne A 1、Rozpakuj i wyjmij plandekę oraz wiązkę sprężystych piłeczek . 2. Rozłóż plandekę wokół wspornika i włóż sprężyste kulki linki przez metalowe otwory, aby przymocować ją do wspornika. 3. Plandeka służąca za drzwi mocowana jest do wspornika za pomocą rzepów.
- Page 110 - 9 -...
- Page 111 Producent: Shanghaimuxinmuyeyouxiangongsi Adres: Baoshanqu Shuangchenglu 803long 11hao 1602A-1609shi Szanghaj Import do AUS: SIHAO PTY LTD, 1 ROKEVA STREETEASTWOOD NSW 2122 Australia Import do USA: Sanven Technology Ltd. Apartament 250 , 9166 Anaheim Place, Rancho Cucamonga, Kalifornia 91730 SHUNSHUN GmbH Römeräcker 9 Z2021,76351 Linkenheim-Hochstetten,Germany euvertreter@gmail.com +49 1727041930...
- Page 113 Techniczny Certyfikat wsparcia i e-gwarancji www.vevor.com/support...
Need help?
Do you have a question about the SXYQCPBB10X20 and is the answer not in the manual?
Questions and answers