
Subscribe to Our Youtube Channel
Related Manuals for Lincoln Electric FlexCut 125


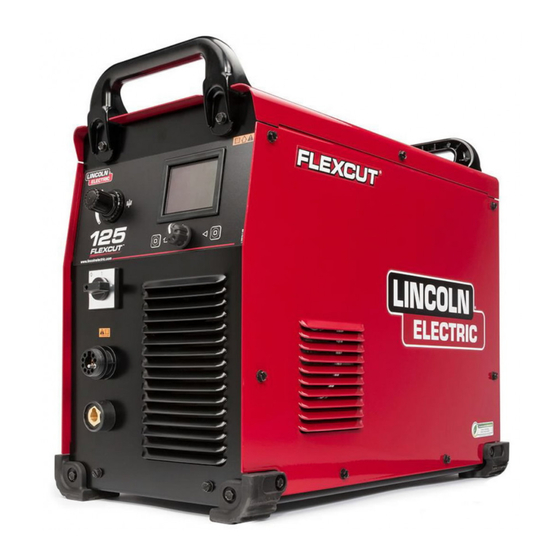
Summary of Contents for Lincoln Electric FlexCut 125
- Page 1 FlexCut ™ 125 For use with machines having Code Numbers: FlexCut 125: 12478 SERVICE MANUAL SVM276 | Issue Date 18-Oct © Lincoln Global, Inc. All Rights Reserved.
- Page 2 THANK YOU FOR SELECTING A QUALITY PRODUCT BY KEEP YOUR HEAD OUT OF THE FUMES. DON’T get too close to the arc. LINCOLN ELEC TRIC. Use corrective lenses if necessary to stay a reasonable distance away from the arc. READ and obey the Safety Data PLEASE EXAMINE CARTON AND EQUIPMENT FOR Sheet (SDS) and the warning label DAMAGE IMMEDIATELY...
- Page 3 W117.2-1974. A Free copy of “Arc Welding Safety” booklet E205 is available from the Lincoln Electric Company, 2.d. All welders should use the following procedures in order to 22801 St. Clair Avenue, Cleveland, Ohio 44117-1199.
- Page 4 SAFETY ELECTRIC SHOCK ARC RAYS CAN BURN. CAN KILL. 3.a. The electrode and work (or ground) circuits are 4.a. Use a shield with the proper filter and cover plates to protect your electrically “hot” when the welder is on. Do eyes from sparks and the rays of the arc when welding or not touch these “hot”...
- Page 5 SAFETY WELDING AND CUTTING CYLINDER MAY EXPLODE IF SPARKS CAN CAUSE DAMAGED. FIRE OR EXPLOSION. 7.a. Use only compressed gas cylinders containing the correct shielding gas for the process used 6.a. Remove fire hazards from the welding area. If and properly operating regulators designed for this is not possible, cover them to prevent the welding sparks the gas and pressure used.
-
Page 6: Table Of Contents
LINCOLN ELECTRIC FlexCut™ 125 Service Manual FlexCut™ 125 Service Manual Last update: 2018/10/01 FLEXCUT™ 125 ............................1 Service Manual................................1 Theory of Operation ..............................3 INPUT SECTION ............................3 SWITCH BOARD AND MAIN TRANSFORMER ..................... 4 USER INTERFACE BOARD, VOLTAGE DIVIDER BOARD AND CNC CONNECTOR ..........5 OUTPUT BOARD AND TORCH CONNECTOR .................... - Page 7 LINCOLN ELECTRIC FlexCut™ 125 Service Manual THERMOSTAT CIRCUIT TEST PROCEDURE ....................38 AUXILIARY RECTIFIER (D4) TEST PROCEDURE ..................41 USER INTERFACE BOARD TEST PROCEDURE.................... 43 SWITCH BOARD TEST PROCEDURE ......................46 INPUT SWITCH TEST PROCEDURE ......................52 SOLENOID 1 & 2 TEST PROCEDURE ......................56 MAIN TRANSFORMER TEST PROCEDURE ....................
-
Page 8: Theory Of Operation
Figure E.1 – Input section Input Section When the correct three-phase input voltage is applied to the FlexCut 125, via the input line switch, the AC voltage is applied to the input rectifier and the T2 auxiliary transformer. The single phase input voltage is applied to the auxiliary transformer primary winding via the reconnect panel. -
Page 9: Switch Board And Main Transformer
The switch board also utilizes the 40VDC received from the D4 rectifier to create several regulated DC supplies for the CAN communications and the internal circuitry of the FlexCut 125. LED 1 indicates the status of the digital signal processer (DSP) LED 2 indicates the +5VDC is present for the CAN communications LED 3 Indicates Micro Status –... -
Page 10: User Interface Board, Voltage Divider Board And Cnc Connector
LINCOLN ELECTRIC FlexCut™ 125 Service Manual Figure E.3 – User interface board, voltage divider board and CNC connector User Interface Board, Voltage Divider Board And CNC Connector The user interface board and associated user controls allow the operator to communicate to the switch board the desired process and cutting parameters via CAN communication. -
Page 11: Output Board And Torch Connector
LINCOLN ELECTRIC FlexCut™ 125 Service Manual Figure E.4 – Output board and torch connector Output Board And Torch Connector The secondary winding of the T1 main transformer is coupled to the output board. The output of the secondary winding is a 270VAC square wave at 20Khz. All of the outputs (both pilot and cutting) go through the output board. -
Page 12: Insulated Gate Bipolar Transistor (Igbt) Operation
LINCOLN ELECTRIC FlexCut™ 125 Service Manual Figure E.5 – Insulated gate bipolar transistor (IGBT) operation Insulated Gate Bipolar Transistor (IGBT) Operation The IGBT is a type of transistor. IGBTs are semiconductors well suited for high frequency switching and high current applications. -
Page 13: Pulse Width Modulation
LINCOLN ELECTRIC FlexCut™ 125 Service Manual Figure E.6 – Pulse width modulation Pulse Width Modulation The term PULSE WIDTH MODULATION is used to describe how much time is devoted to conduction in the cycle. Changing the pulse width is known as MODULATION. Pulse Width Modulation (PWM) is the varying of the pulse width over the allowed range of a cycle to affect the output of the machine. -
Page 14: Troubleshooting & Repair
Troubleshooting & Repair HOW TO USE TROUBLESHOOTING GUIDE Service and repair should be performed by only Lincoln Electric Factory Trained Personnel. Unauthorized repairs performed on this equipment may result in danger to the technician and machine operator and will invalidate your factory warranty. For your safety and to avoid Electrical Shock, please observe all safety notes and precautions detailed throughout this manual. -
Page 15: Pc Board Troubleshooting Procedures
ELECTRIC SHOCK can kill. remove them until installation is complete. • If you return a PC board to The Lincoln Electric Company • Have an electrician install and service this for credit, it must be in the static-shielding bag. This will equipment. -
Page 16: Troubleshooting Guide
Rectifier (D4) Test Procedure. located in the reconnect panel. If for any reason you do not understand the test procedures or are unable to perform the test/repairs safely, contact the Lincoln Electric Service Department for electrical troubleshooting assistance before you proceed. Call 1-888-935-3877. - Page 17 If for any reason you do not understand the test procedures or are unable to perform the test/repairs safely, contact the Lincoln Electric Service Department for electrical troubleshooting assistance before you proceed. Call 1-888-935-3877.
- Page 18 5. Perform the Main Transformer Test Procedure. If for any reason you do not understand the test procedures or are unable to perform the test/repairs safely, contact the Lincoln Electric Service Department for electrical troubleshooting assistance before you proceed. Call 1-888-935-3877.
-
Page 19: Error Codes
LINCOLN ELECTRIC FlexCut™ 125 Service Manual Error codes Observe Safety Guidelines ERROR CODES detailed in the beginning of this manual. ERROR CODE POSSIBLE CAUSE RECOMMENDED COURSE OF ACTION Gas input line is disconnected Check the gas line feeding the or input is too low. - Page 20 LINCOLN ELECTRIC FlexCut™ 125 Service Manual Observe Safety Guidelines ERROR CODES detailed in the beginning of this manual. ERROR CODE POSSIBLE CAUSE RECOMMENDED COURSE OF ACTION Pilot stuck open. Nozzle could be missing or debris could be stuck between the torch consumables.
- Page 21 LINCOLN ELECTRIC FlexCut™ 125 Service Manual Observe Safety Guidelines ERROR CODES detailed in the beginning of this manual. ERROR DESCRIPTION RECOMMENDED CODE COURSE OF ACTION User interface not connected 1. Check the physical wiring and connections to switch board. between the user interface board and the switch CAN communication between board.
-
Page 22: Test Procedures
If for any reason you do not understand the test procedures or are unable to perform the test/repairs safely, contact the Lincoln Electric Service Department for electrical troubleshooting assistance before you proceed. Call 1-888-935-3877. - Page 23 LINCOLN ELECTRIC FlexCut™ 125 Service Manual Figure F.1 – Roof panel mounting screw locations Figure F.2 – Left case side panel mounting screw locations...
- Page 24 LINCOLN ELECTRIC FlexCut™ 125 Service Manual Figure F.3 – Right case side mounting screw locations...
-
Page 25: Capacitor Discharge Procedure
If for any reason you do not understand the test procedures or are unable to perform the test/repairs safely, contact the Lincoln Electric Service Department for electrical troubleshooting assistance before you proceed. Call 1-888-935-3877. - Page 26 LINCOLN ELECTRIC FlexCut™ 125 Service Manual Figure F.4 – Switch board connections 207 and 209 location...
-
Page 27: Input Rectifier Test Procedure
If for any reason you do not understand the test procedures or are unable to perform the test/repairs safely, contact the Lincoln Electric Service Department for electrical troubleshooting assistance before you proceed. Call 1-888-935-3877. - Page 28 LINCOLN ELECTRIC FlexCut™ 125 Service Manual Figure F.5 – Input rectifier location Figure F.6 – Input rectifier detail...
-
Page 29: Auxiliary Transformer (T1) Test Procedure
If for any reason you do not understand the test procedures or are unable to perform the test/repairs safely, contact the Lincoln Electric Service Department for electrical troubleshooting assistance before you proceed. Call 1-888-935-3877. - Page 30 LINCOLN ELECTRIC FlexCut™ 125 Service Manual Table F. 2 – Primary and secondary voltage tests DESCRIPTION TEST POINT TEST POINT EXPECTED READING PRIMARY VOLTAGE 0 VAC (460 VAC H1 to H5) PRIMARY VOLTAGE 120 VAC (460 VAC H1 to H5)
- Page 31 LINCOLN ELECTRIC FlexCut™ 125 Service Manual Figure F.8 – Auxiliary transformer lead locations Figure F.9 – Auxiliary rectifier lead locations...
-
Page 32: Fan And F.a.n. Circuit Test Procedure
If for any reason you do not understand the test procedures or are unable to perform the test/repairs safely, contact the Lincoln Electric Service Department for electrical troubleshooting assistance before you proceed. Call 1-888-935-3877. - Page 33 LINCOLN ELECTRIC FlexCut™ 125 Service Manual If no error 36 flashes and the thermo LED does not turn on, the user interface board may be faulty. Perform the User Interface Board Test Procedure. If any component tests faulty, replace the suspect component.
- Page 34 LINCOLN ELECTRIC FlexCut™ 125 Service Manual Figure F.12 – Thermostat location...
-
Page 35: Output Board Test Procedure
If for any reason you do not understand the test procedures or are unable to perform the test/repairs safely, contact the Lincoln Electric Service Department for electrical troubleshooting assistance before you proceed. Call 1-888-935-3877. - Page 36 LINCOLN ELECTRIC FlexCut™ 125 Service Manual Table F. 3 – Output board diode tests TEST POINT (POS) TEST POINT (NEG) EXPECTED READING MACHINE CONDITION .325 VDC MACHINE OFF. NO INPUT POWER APPLIED. .325 VDC MACHINE OFF. NO INPUT POWER APPLIED.
- Page 37 LINCOLN ELECTRIC FlexCut™ 125 Service Manual Table F. 5 – Output board voltage tests TEST POINT TEST POINT EXPECTED DESCRIPTION CONDITION (POS) (NEG) READING INPUT POWER PLUG J4 PIN 3 PLUG J4 PIN 6 SUPPPLY FROM THE -15 VDC MACHINE ON.
- Page 38 LINCOLN ELECTRIC FlexCut™ 125 Service Manual Figure F.14 – Output board plug and LED locations Figure F.15 – Output board lead locations...
- Page 39 LINCOLN ELECTRIC FlexCut™ 125 Service Manual Figure F.16 – Electrode stud pin location...
-
Page 40: Choke Test Procedure
If for any reason you do not understand the test procedures or are unable to perform the test/repairs safely, contact the Lincoln Electric Service Department for electrical troubleshooting assistance before you proceed. Call 1-888-935-3877. - Page 41 LINCOLN ELECTRIC FlexCut™ 125 Service Manual Figure F.17 – Choke location Figure F.18 – Output board terminal B9 location...
- Page 42 LINCOLN ELECTRIC FlexCut™ 125 Service Manual Figure F.19 – Electrode terminal location Figure F.20 – Choke detail...
-
Page 43: Thermostat Circuit Test Procedure
If for any reason you do not understand the test procedures or are unable to perform the test/repairs safely, contact the Lincoln Electric Service Department for electrical troubleshooting assistance before you proceed. Call 1-888-935-3877. - Page 44 LINCOLN ELECTRIC FlexCut™ 125 Service Manual Figure F.21 – Thermostat location Figure F.22 – Switch board and plug J20 locations...
- Page 45 LINCOLN ELECTRIC FlexCut™ 125 Service Manual Figure F.23 – Plug J20 thermostat lead locations...
-
Page 46: Auxiliary Rectifier (D4) Test Procedure
If for any reason you do not understand the test procedures or are unable to perform the test/repairs safely, contact the Lincoln Electric Service Department for electrical troubleshooting assistance before you proceed. Call 1-888-935-3877. - Page 47 LINCOLN ELECTRIC FlexCut™ 125 Service Manual Figure F.24 – Auxiliary rectifier test points...
-
Page 48: User Interface Board Test Procedure
If for any reason you do not understand the test procedures or are unable to perform the test/repairs safely, contact the Lincoln Electric Service Department for electrical troubleshooting assistance before you proceed. Call 1-888-935-3877. - Page 49 LINCOLN ELECTRIC FlexCut™ 125 Service Manual Table F. 8 – User interface board LED functions LED # COLOR FUNCTION GREEN INPUT POWER CONNECTED GREEN +3.3V POWER SUPPLY “OK” GREEN +5V CAN POWER SUPPLY “OK” GREEN STATUS “OK” STATUS “ERROR” (CHECK CODE FOR SPECIFIC ERROR) GREEN +5V USB POWER “OK”...
- Page 50 LINCOLN ELECTRIC FlexCut™ 125 Service Manual Figure F.26 – User interface board LED and plug J1 locations...
-
Page 51: Switch Board Test Procedure
If for any reason you do not understand the test procedures or are unable to perform the test/repairs safely, contact the Lincoln Electric Service Department for electrical troubleshooting assistance before you proceed. Call 1-888-935-3877. - Page 52 LINCOLN ELECTRIC FlexCut™ 125 Service Manual Table F. 10 – Switch board resistance tests DESCRIPTION TEST POINT TEST POINT EXPECTED READING CONDITION (POS) (NEG) MACHINE “OFF” NO DIODE DROP TEST B209 (+) B204 (–) INPUT POWER APPLIED MACHINE “OFF” NO...
- Page 53 LINCOLN ELECTRIC FlexCut™ 125 Service Manual Table F. 12 – Switch board LED light conditions LIGHT CONDITION MEANING STEADY GREEN SYSTEM OK. BLINKING GGREEN OCCURS DURING STARTUP OR RESET AND INDICATES THAT THE SWITCH BOARD STATUS IS WAITING FOR COMMUICATION FROM THE CONTROL BOARD. NORMAL FOR THE FIRST 1-10 SECONDS AFTER POWER IS TURNED ON.
- Page 54 LINCOLN ELECTRIC FlexCut™ 125 Service Manual (LEAD R2) (LEAD B2) PURGE, POST FLOW AND WHEN OUTPUT IS ON. POWER SUPPLY TO PLUG J21 PIN 2 PLUG J21 PIN 5 USER INTERFACE 40 VDC MACHINE ON. (LEAD 82A) (LEAD 83A) BOARD...
- Page 55 LINCOLN ELECTRIC FlexCut™ 125 Service Manual Figure F.28 – Switch board plug and LED locations Figure F.29 – Electrode stud and work stud locations...
- Page 56 LINCOLN ELECTRIC FlexCut™ 125 Service Manual Figure F.30 – Output board terminal B11 location Figure F.31 – Switch board lead locations...
-
Page 57: Input Switch Test Procedure
If for any reason you do not understand the test procedures or are unable to perform the test/repairs safely, contact the Lincoln Electric Service Department for electrical troubleshooting assistance before you proceed. Call 1-888-935-3877. - Page 58 LINCOLN ELECTRIC FlexCut™ 125 Service Manual Table F. 14 – Input switch resistance tests TEST POINT TEST POINT EXPECTED READING SWITCH POSITION VERY LOW RESISTANCE “ON” POSITION (LESS THAN ONE OHM) VERY LOW RESISTANCE “ON” POSITION (LESS THAN ONE OHM) VERY LOW RESISTANCE “ON”...
- Page 59 LINCOLN ELECTRIC FlexCut™ 125 Service Manual Figure F.33 – Input switch lead location Figure F.34 – Input switch terminal locations...
- Page 60 LINCOLN ELECTRIC FlexCut™ 125 Service Manual Figure F.35 – Input switch positions...
-
Page 61: Solenoid 1 & 2 Test Procedure
If for any reason you do not understand the test procedures or are unable to perform the test/repairs safely, contact the Lincoln Electric Service Department for electrical troubleshooting assistance before you proceed. Call 1-888-935-3877. - Page 62 LINCOLN ELECTRIC FlexCut™ 125 Service Manual Figure F.36 – Solenoid 1 & 2 and switch board plug J20 locations Figure F.37 – Switch board plug J20 lead locations...
-
Page 63: Main Transformer Test Procedure
If for any reason you do not understand the test procedures or are unable to perform the test/repairs safely, contact the Lincoln Electric Service Department for electrical troubleshooting assistance before you proceed. Call 1-888-935-3877. - Page 64 LINCOLN ELECTRIC FlexCut™ 125 Service Manual Table F. 16 – Main transformer resistance tests DESCRIPTION TEST POINT TEST POINT EXPECTED READING SECONDARY WINDING SECONDARY WINDING LEAD (DISCONNECTED LEAD (DISCONNECTED VERY LOW RESISTANCE SECONDARY WINDING FROM OUTPUT BOARD FROM OUTPUT BOARD...
- Page 65 LINCOLN ELECTRIC FlexCut™ 125 Service Manual Figure F.39 – Main transformer secondary lead locations...
-
Page 66: Removal And Replacement Procedures
If for any reason you do not understand the test procedures or are unable to perform the test/repairs safely, contact the Lincoln Electric Service Department for electrical troubleshooting assistance before you proceed. Call 1-888-935-3877. - Page 67 LINCOLN ELECTRIC FlexCut™ 125 Service Manual 4. Connect leads 207, 209, L1A, L1B, L2A, L3A and L3B from the input rectifier. See Wiring Diagram. 5. Using a 5/16” nutdriver, attach the five screws, lock washers and flat washers securing the leads to the input rectifier.
- Page 68 LINCOLN ELECTRIC FlexCut™ 125 Service Manual Figure F.41 – Mounting hardware location...
-
Page 69: Auxiliary Transformer Removal And Replacement Procedure
If for any reason you do not understand the test procedures or are unable to perform the test/repairs safely, contact the Lincoln Electric Service Department for electrical troubleshooting assistance before you proceed. Call 1-888-935-3877. - Page 70 LINCOLN ELECTRIC FlexCut™ 125 Service Manual 8. Perform the Retest After Repair Procedure. Figure F.42 – Auxiliary transformer (T1), auxiliary rectifier (D4) and reconnect panel locations Figure F.43 – Lead X3 and X4 connection locations...
- Page 71 LINCOLN ELECTRIC FlexCut™ 125 Service Manual Figure F.44 – Auxiliary transformer mounting screw locations...
-
Page 72: Output Board Removal And Replacement Procedure
If for any reason you do not understand the test procedures or are unable to perform the test/repairs safely, contact the Lincoln Electric Service Department for electrical troubleshooting assistance before you proceed. Call 1-888-935-3877. - Page 73 LINCOLN ELECTRIC FlexCut™ 125 Service Manual REPLACEMENT PROCEDURE 1. Apply a coating of Dow Corning 340 heat sink compound to the mating surfaces of the diode modules, IGBT module and heat sink. 2. Carefully position new diode modules and IGBT module onto the heat sink. See Figure F.47, for slot location.
- Page 74 LINCOLN ELECTRIC FlexCut™ 125 Service Manual Figure F.45 – Output board plug and terminal locations Figure F.46 – Output board mounting screw location...
- Page 75 LINCOLN ELECTRIC FlexCut™ 125 Service Manual Figure F.47 – Diode module and IGBT module orientation and mounting screw location...
-
Page 76: Choke Removal And Replacement Procedure
If for any reason you do not understand the test procedures or are unable to perform the test/repairs safely, contact the Lincoln Electric Service Department for electrical troubleshooting assistance before you proceed. Call 1-888-935-3877. - Page 77 LINCOLN ELECTRIC FlexCut™ 125 Service Manual 6. Perform the Case Cover Replacement Procedure. 7. Perform the Retest After Repair Procedure. Figure F.48 – Choke lead connection locations Figure F.49 – Choke mounting screw locations...
-
Page 78: Thermostat Removal And Replacement Procedure
If for any reason you do not understand the test procedures or are unable to perform the test/repairs safely, contact the Lincoln Electric Service Department for electrical troubleshooting assistance before you proceed. Call 1-888-935-3877. - Page 79 LINCOLN ELECTRIC FlexCut™ 125 Service Manual Figure F.50 – Thermostat lead locations Figure F.51 – Thermostat mounting screw locations...
-
Page 80: Auxiliary Rectifier Removal And Replacement Procedure
If for any reason you do not understand the test procedures or are unable to perform the test/repairs safely, contact the Lincoln Electric Service Department for electrical troubleshooting assistance before you proceed. Call 1-888-935-3877. - Page 81 LINCOLN ELECTRIC FlexCut™ 125 Service Manual Figure F.52 – Auxiliary rectifier lead locations Figure F.53 – Auxiliary rectifier mounting hardware locations...
-
Page 82: User Interface Board Removal And Replacement Procedure
If for any reason you do not understand the test procedures or are unable to perform the test/repairs safely, contact the Lincoln Electric Service Department for electrical troubleshooting assistance before you proceed. Call 1-888-935-3877. - Page 83 LINCOLN ELECTRIC FlexCut™ 125 Service Manual Figure F.54 – User interface board plug J1 location Figure F.55 – User interface board mounting hardware locations...
-
Page 84: Switch Board Removal And Replacement Procedure
If for any reason you do not understand the test procedures or are unable to perform the test/repairs safely, contact the Lincoln Electric Service Department for electrical troubleshooting assistance before you proceed. Call 1-888-935-3877. - Page 85 LINCOLN ELECTRIC FlexCut™ 125 Service Manual 4. Using a 7/16” nutdriver, attach the four screws, lock washers and flat washers securing leads 201, 204, 207 and 209 to terminals B201, B204, B207 and B209 on the switch board. See Wiring Diagram.
- Page 86 LINCOLN ELECTRIC FlexCut™ 125 Service Manual Figure F.57 – Switch board mounting screw locations...
-
Page 87: Input Switch Removal And Replacement Procedure
If for any reason you do not understand the test procedures or are unable to perform the test/repairs safely, contact the Lincoln Electric Service Department for electrical troubleshooting assistance before you proceed. Call 1-888-935-3877. - Page 88 LINCOLN ELECTRIC FlexCut™ 125 Service Manual Figure F.58 – Input switch lead locations Figure F.59 – input switch mounting hardware location...
-
Page 89: Solenoid 1 & 2 Removal And Replacement Procedure
If for any reason you do not understand the test procedures or are unable to perform the test/repairs safely, contact the Lincoln Electric Service Department for electrical troubleshooting assistance before you proceed. Call 1-888-935-3877. - Page 90 LINCOLN ELECTRIC FlexCut™ 125 Service Manual 5. Using a 1/4” nutdriver and Phillips screwdriver, attach the two nuts, lock washers and flat washers securing the solenoids to the top shelf. 6. Using a Molex extraction tool, connect the solenoid leads to plug J20. See Wiring Diagram.
- Page 91 LINCOLN ELECTRIC FlexCut™ 125 Service Manual Figure F.61 – Solenoid mounting hardware locations Figure F.62 – Solenoid lead locations...
-
Page 92: Main Transformer Removal And Replacement Procedure
If for any reason you do not understand the test procedures or are unable to perform the test/repairs safely, contact the Lincoln Electric Service Department for electrical troubleshooting assistance before you proceed. Call 1-888-935-3877. - Page 93 LINCOLN ELECTRIC FlexCut™ 125 Service Manual REPLACEMENT PROCEDURE 1. Carefully position new main transformer (T1) into the machine. 2. Route leads thru the air deflector. 3. Using a 3/8” nutdriver, attach the four screws securing the main transformer to the base of the machine.
- Page 94 LINCOLN ELECTRIC FlexCut™ 125 Service Manual Figure F.64 – Switch board assembly mounting hardware locations Figure F.65 – Output board lead and main transformer mounting screw locations...
-
Page 95: Retest After Repair
2. Turn on the machine and verify the following: • The fan is functional. • The user interface screen is illuminated. Test cut with FlexCut 125 at its maximum recommended cut thickness with 1.5” steel max. Turn current dial to maximum. 4. Turn the machine off. Test complete.
Need help?
Do you have a question about the FlexCut 125 and is the answer not in the manual?
Questions and answers