Table of Contents
Advertisement
Quick Links
Advertisement
Table of Contents

Related Manuals for Boulder 866 Integrated


Summary of Contents for Boulder 866 Integrated
- Page 1 255 South Taylor Avenue Louisville, Co 80027 U.S.A Tel: 303-4952260x116 E-mail: sales@boulderamp.com Web: www.boulderamp.com 866 Integrated Boulder Ampli ers, Inc. 255 S. Taylor Avenue Louisville, CO 80027 (303) 449-8220, x110 www.boulderamp.com BoulderAmpli ersInc @boulderampli ers @BoulderAmps...
- Page 2 About Boulder Ampli ers, Inc. Boulder was founded in 1984 and is the last high-performance audio manufacturer operating in North America to still perform all of its own design, engineering and manufacturing in- house. While this form of production may be more costly than outsourcing, the resulting quality control and reliability of the nished products are never compromised.
- Page 3 Congratulations and thank you for selecting the Boulder 866 Integrated for your high- performance sound system. We are certain it will provide you with many years of listening pleasure. e 866 represents the concerted e orts of numerous Boulder designers, engineers, and technicians working to bring you the best audio playback components in the world.
-
Page 4: Table Of Contents
Table of Contents About - - - - - - - - - - - - - - - - - - - - - - - - 1-1 ank You - - - - - - - - - - - - - - - - - - - - - - 2-2 Introduction - - - - - - - - - - - - - - - - - - - - - - 3-6 Analog Features: . - Page 5 Operation - - - - - - - - - - - - - - - - - - - - - - 5-19 Front Panel Controls and Screen Modes ... 5-19 Front Panel Buttons .
- Page 6 Web Based Programming ....6-39 Boulder Net ..... 6-40 Appendix - - - - - - - - - - - - - - - - - - - - - - 7-41 Technical Speci cations .
-
Page 7: Analog Features
866 Integrated embodies years of development and is one of the most advanced integrated ampli ers available. Here are some of the features that set the 866 apart from the competition: Analog Features: • Boulder volume attenuator. • ree pairs of balanced inputs on XLR connectors. -
Page 8: Unpacking And Care
Unpacking and Care e 866 Integrated is heavy and features nely nished casework. Please use care when unpacking, li ing, and installing the integrated ampli er to avoid personal injury or damage to the casework and furniture. e 866 weighs 54 lbs. (25 kg). If possible, two people should unpack and place it into position. -
Page 9: How To Clean The Casework
How to Clean the Casework If the 866 must be cleaned, use only a so , lint-free cloth moistened with plain water. Never use any type of chemical cleaner unless recommended by your dealer or the Boulder factory. Do not use bleach! Bleach will remove the anodized surface of the casework. -
Page 10: Placement And Installation
Placement and Installation Your Boulder 866 Integrated is designed to reduce the e ects that external magnetic elds and radio frequencies (RF) have on its circuitry. While placement is not critical, known magnetic elds should be avoided whenever possible. Because it is heavy, the 866 must be placed on a sturdy, stable surface. -
Page 11: Connecting The Analog Inputs
866 can be connected to many di erent types of analog sources and will provide excellent sound quality for each. To fully realize the sonic potential of your 866 Integrated, use balanced cable connections whenever possible. Balanced cables minimize interference from magnetic and RF sources. -
Page 12: Connecting To An Unbalanced Analog Source
RCA type connector on the source end and a 3-pin XLR connector for the input on the 866 Integrated end. e negative input (pin 3) should be wired to ground only at the RCA type connector. -
Page 13: Connecting The Digital Inputs
Connecting the Digital Inputs: e analog + Digital version of the 866 includes digital inputs. Please take note of the following: e 866 can be connected to many di erent types of digital sources and will provide excellent sound quality for each. e 866 includes digital input connections for Toslink (optical), AES3 via 3-pin XLR (convertible to S/PDIF on RCA), USB Memory Devices and Ethernet/ Network audio. -
Page 14: Connection To Ac Mains
(If you are uncomfortable with hooking up your ampli er to AC mains, reach out to your local dealer) e 866 Integrated is supplied with an AC mains power cord appropriate for the location where it was purchased. - Page 15 When connecting various sources, make a list of what component is connected to each input so that you do not forget the order in which they are connected. You will then be able to name the inputs on the front panel display with the Boulder Control app. is list will be very helpful at that time.
-
Page 16: Connecting The 866 To A Home Network
Once out of standby, your home network is now connected to your 866 and ready to be controlled by the Boulder Control app, Roon app or UPnP apps. If you are having problems with your network setup, please contact your authorized Boulder dealer. 4-15... -
Page 17: Connecting An Apple Or Android Mobile Device To The 866
If you are having problems connecting to your internal wi , please contact your authorized Boulder dealer. On the Boulder Controller app, if you are wishing to use Wi and not ethernet in your phone settings location while using the app MUST be ON. Steps to get an 866 on a wireless network with no ethernet is on page 4-17. -
Page 18: Connecting The 866 Internal Network To Home Network (Wireless)
Boulder Ampli ers-(*Serial number of unit*). en, on your mobile device open up the Boulder controller app, near the bottom there is a button for “Setup wireless network. ” Select that. Location while using app must be on. - Page 19 4-18...
-
Page 20: Front Panel Controls And Screen Modes
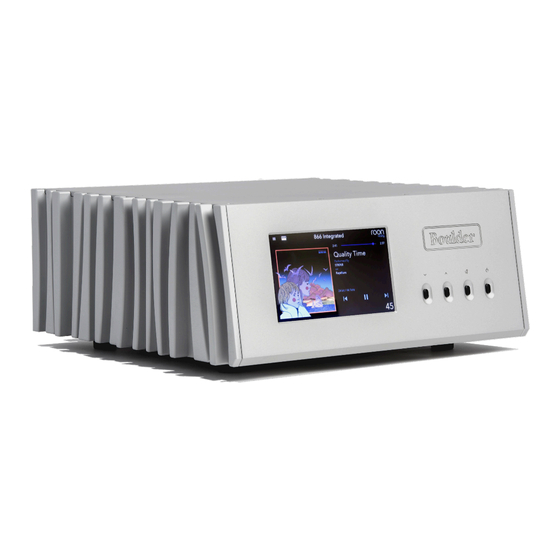
Front Panel Controls and Screen Modes e 866 features a full-color touch-screen LCD display and four buttons on the right-hand side of the front panel. e display and buttons will control or adjust di erent functions of the 866. e four buttons on the front panel of the 866 are (L to R) Volume Down, Volume Up, Mute, and Standby. -
Page 21: Front Panel Buttons
Front Panel Buttons When the display is showing the Home Screen, the buttons will control the Volume, Mute and Standby modes of the 866 and the touch screen will be used to select inputs. When the 866 is in the Setup mode, the touch screen will be used to adjust programmable features of the 866’s operation. -
Page 22: Volume
e 866 has a large, full-color display located on the le -hand side of the front panel. ere are four buttons to control Volume Up, Volume Down, Mute, and Standby located on the right- hand side of the front panel. Volume Pressing the Volume Up or Volume Down button will change the output volume level of the 866. -
Page 23: Mute
Mute It is possible to Mute the 866’s outputs so that they are reduced by a preprogrammed level. e Mute feature allows for temporary volume reduction without losing the original volume setting. For example, engaging the Mute function will attenuate the output to a level suitable for conversation. -
Page 24: Standby
Standby Pressing the Standby button will put the 866 into Standby mode. is will turn OFF all circuits except for the logic necessary to wake it up again. NOTE: Because the 866 greatly reduces power consumption when in Standby mode, it is only necessary to place the unit in Standby when not in use. -
Page 25: Touch-Screen Functions: Home Screen
Touch-Screen Functions: Home Screen Input Selection e Analog + digital 866 has three analog inputs and multiple optional digital inputs. Each of these inputs can be selected by pressing the display icon that corresponds with the input you wish to select. You can scroll through the available inputs by swiping your ngertip le or right across the input icons. -
Page 26: Setup
Setup Pressing the Setup icon will change the display from the Home Screen to the Setup Screen. When the Setup Screen is shown, the setup menu will be shown and additional features can be accessed by touching each item in the menu. To access Setup options that may not be visible when options are open, use the up and down arrows on the front panel touch screen. -
Page 27: Max Volume
Max Volume e Max Volume setting allows you to limit the maximum volume output setting. is is useful if you have children who may press the volume buttons or if you wish to set a maximum level so that it is not possible to damage your audio system by accidentally raising the volume to high. To set the Max Volume level, touch the point on the Max Volume slider where you wish to set the maximum allowable volume. -
Page 28: Mute Level
Mute Level e volume of the 866 can be temporarily reduced when pressing the mute button or icon. Mute Level setting allows you to set the level of attenuation when the 866 is placed in Mute mode, from a minimum of 6 dB of attenuation to a maximum of 80 dB of attenuation. For example, you may prefer to have the volume set just low enough to carry on a conversation but still have the music audible when the Mute function is engaged, or you may wish to have the output nearly silenced when the Mute function is engaged. -
Page 29: Input Settings
Input Settings e Input Settings drop-down menu for the 866 can be accessed by touching the Input Settings button on the front panel display. Setup variables for three or six inputs can be programmed, depending on whether your 866 has analog-only or analog and digital inputs: Network, Optical, AES, and Analog 1, 2, and 3. -
Page 30: Eater Mode
eater Mode WARNING: eater Mode should be used with extreme caution, as there is no way to control the volume of the 866 while in eater Mode! If it is programmed for an input that does not have externally controlled volume, damage to speakers or other components may occur! Any of the 866’s inputs can be programmed to the equvilant unity gain. -
Page 31: Input Image
Input Image indicator will show this image if it has been loaded from the Boulder Control app. If no image has been loaded, a generic icon will be shown. Directly below the input image is the Clear Image button. To clear the input image, press this button. -
Page 32: Display Settings
“75” indicates the display’s brightness is 75% of maximum. When the brightness is set to low levels, the screen will temporarily go to a slightly brighter setting for ve seconds when any button on the front panel or the Boulder Control app is pressed. -
Page 33: System Settings
System Settings e System Settings drop-down menu for the 866 can be accessed by touching the System Settings button on the front panel display. e System Settings are used to adjust or monitor all of the internal functions of the 866. e following settings can be checked or adjusted from the System Settings menu: Network Settings, App Version, Firmware Version, Update Firmware, Serial Number, Reset Factory Defaults, and Reset Input Defaults. - Page 34 App Version: e App Version indicator shows the revision of the 866’s front panel control so ware. Firmware Version: e Firmware Version indicator shows the revision of the 866’s main operating so ware. Serial Number: e 866’s serial number will be displayed here. 5-33...
-
Page 35: Factory Defaults
Factory Defaults e Factory Defaults button will restore all parameters of the 866 to the original factory settings, including all custom settings and programmed functions. When the Factory Defaults button is pressed, a pop-up window will appear on the 866’s front panel display that will ask, “Are you sure you wish to set Factory Defaults (the unit will reset)?”... -
Page 36: Input Defaults
Input Defaults e Input Defaults button will return all input option settings, including input icon photos, to their original factory settings only but will not change any of the other optional settings for the unit. If you wish to restore the Input Defaults, press the Yes button. A new pop-up window will appear on the front panel display that will ask, “Are you sure you wish to set the Input Defaults?”... -
Page 37: Updating The Firmware Of The 866
Updating the Firmware of the 866 You can update the rmware of the 866 Via ethernet on input homescreen. To update the 866 using ethernet rst you must make sure the ethernet cable is connected and the unit is turned o or in standby. Once the unit is on and out of standby and there is an update available, a green clock logo will appear in the top right corner of the 866’s display. -
Page 38: Roon
Connecting your device to the Boulder Control app while using Roon means you have full control of the functions of the 866 from your mobile device and allowing you to navigate Roon as a control point. (See page 5-15 /5-16 on how to connect to Boulder Control app) 5-37... -
Page 39: What Is Upnp
How to Use UPnP with the 866 On your network or NAS, where your music resides you can use the Boulder Control app or a 3rd party UPnP app such as M-Connect, Bubble UPnP, JRiver to stream music through the 866. -
Page 40: Web Based Programming
Web Based Programming ough it is not necessary to use any of the web based programming functions, you may nd them helpful in setting up and personalizing your 866. All web based programming is accomplished by accessing the 866 HTML page while the unit is powered up and connected to a live computer network. -
Page 41: Boulder Net
Boulder Net is is helpful to system integrators who are using Boulder products in integrated systems. Boulder Net is a control system unique to modern Boulder products. For detailed information about Boulder Net, please consult your authorized Boulder dealer or see the Boulder Net manual. -
Page 42: Technical Speci Cations
Technical Speci cations Continuous Power, 8 Ohms 200W Peak Power, 8 Ohms 250W Continuous Power, 4 Ohms 400W Peak Power, 4 Ohms 400W Peak Power, 2 Ohms 700W Balanced Analog Inputs 3 pairs balanced analog via 3-pin XLR Optional Digital Inputs Ethernet, USB-A x 4, Toslink, AES3 Outputs 0.25”... -
Page 43: Weights And Dimensions
Weights and Dimensions 866 Integrated Chassis: 17” W x 15.4” D x 7.25” H (54 lbs.) 44 cm W x 39 cm D x 19 cm H (24.5 kg) Shipping: 24” W x 23” D x 14” H (64 lbs.) -
Page 44: 866 Integrated Dimensions
866 Integrated Dimensions BOULDER 16.670 866 INTEGRATED 15.313 DIMENSIONS 17.000 7.250 .750 1.112 2.500 12.000 3.313 9.500 2.500 7-43... -
Page 45: Troubleshooting
Troubleshooting Sympton Cause Remedy Master AC Power Switch on rear Turn on Master AC Power Switch panel is not ON Ampli er is not plugged in Connect power cord to AC mains outlet Ampli er circuit breaker is tripped Reset ampli er circuit breaker No Power Indication Home circuit breaker is tripped Reset home circuit breaker... -
Page 46: Notes
Notes: 7-45...
Need help?
Do you have a question about the 866 Integrated and is the answer not in the manual?
Questions and answers