Table of Contents
Advertisement
Quick Links
At the heart of the kitchen
60cm / 90cm
LAM2379
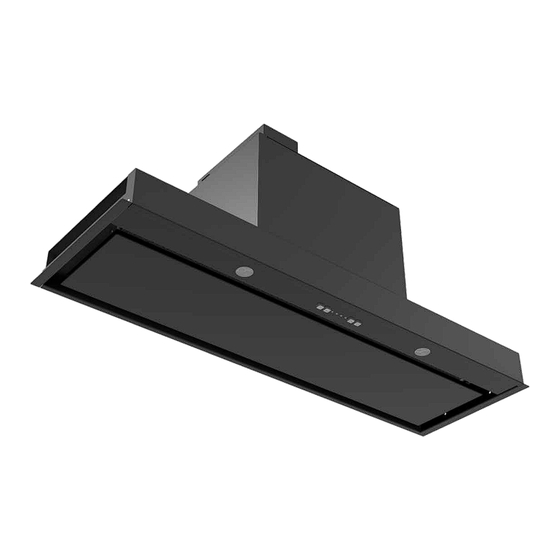
Premium Canopy Cooker Hood
LAM2380
l Please read the Installation instructions to ensure safe fitting and use of the appliance.
l The appliance should be fitted by a suitably competent and qualified person.
l Please keep these instructions in a safe place for future reference.
l Danger of suffocation, keep packaging material away from children.
Installation Instructions
ISSUE v1.0 01042024
www.howdens.com/appliance-registration
Advertisement
Table of Contents

Related Manuals for Lamona LAM2379


Summary of Contents for Lamona LAM2379
- Page 1 At the heart of the kitchen 60cm / 90cm LAM2379 Premium Canopy Cooker Hood LAM2380 l Please read the Installation instructions to ensure safe fitting and use of the appliance. l The appliance should be fitted by a suitably competent and qualified person.
- Page 2 Installation Instructions www.howdens.com...
-
Page 3: Table Of Contents
Installation Instructions Contents Warning and Safety Information ....p.4 Half height cabinet preparation ....p.10 Installing the cooker hood . -
Page 4: Warning And Safety Information
Installation Instructions Warning and Safety Information Ensure packaging 2 Person lift Beware of sharp metal Be aware of the instability & transit protectors edges. Use gloves when handling. of the appliance prior to have been removed being fitted into position. before installing. - Page 5 Installation Instructions Warning and Safety Information Please read these instructions carefully. The manufacturer is not responsible if an incorrect installation and use causes injuries and/or damage. Always keep these instructions with the appliance for future reference. Please take appropriate care when installing, maintaining, cleaning and operating this appliance. Correct application Safety for children and vulnerable people •...
-
Page 6: Caring For The Environment
If in any doubt, please have the wiring system `The electrical socket must of the building tested by a qualified electrician. be easily accessible after LAMONA cannot be held liable for the installation so that the machine consequences of an inadequate earthing system can be disconnected from the (e.g. -
Page 7: Installation Considerations
Installation Instructions Installation considerations Methods of extraction The very best method of clearing the kitchen of unwanted odours is by connecting the appliance to an exhaust duct and venting to the outside atmosphere via the ceiling or an exterior wall. Suitable ducting kits may be purchased from your local Howdens depot or online. -
Page 8: Components
Installation Instructions Components Part identification • On opening the packaging, remove and identify each component part. • Carefully place each part on a clean, scratch-free surface. Outlet • Do not scratch the finished surfaces. Extractor body Power cable Fascia panel x4 Screw (4x16mm FHD) Use only screws and small parts in support of the cooker hood. -
Page 9: External Dimensions
Installation Instructions Product dimensions and minimum dimensions External dimensions 30mm 226mm 150mm 317mm 67mm 564mm - 864mm 280mm Minimum dimensions Please check these minimum distances. These are necessary for correct installation of the appliance. 150mm between the top of the cabinet and the ceiling when in recirculation mode to allow air flow and stop noise. -
Page 10: Half Height Cabinet Preparation
Installation Instructions 90cm cabinet illustrated, Half height cabinet preparation 60cm cabinet similar. Remove back panel Remove staples Remove support rail www.howdens.com... - Page 11 Installation Instructions Half height cabinet preparation , (continued) Remove bottom panel Take care when removing the bottom panel. Sand any rough edges to avoid damaging the cooker hood Create a cut-out to accept the cooker hood Cut out the top panel to accept the cooker hood Exclusive to Howdens...
-
Page 12: Installing The Cooker Hood
Installation Instructions 90cm cooker hood illustrated, Install the cooker hood 60cm cooker hood similar. With the cabinet mounted on the wall install the cooker hood Take care not to damage the cooker hood or cabinetry. Two people are needed to install/secure the cooker hood. - Page 13 Installation Instructions Install the cooker hood , (continued) Extraction via exhaust ducting (vented outside) The cooker hood fills the half height cabinet. Ducting needs to be considered on top of the cabinet. Tips for optimal air extraction: • Keep duct-work short and straight. •...
-
Page 14: Full Height Cabinet Preparation
Installation Instructions 90cm cabinet illustrated, Full height cabinet preparation 60cm cabinet similar. Remove centre upright Take care not to damage cabinet. Remove bottom panel Remove the staples from bottom of the back panel. Take care when removing the bottom panel. Sand any rough edges to avoid damaging the cooker hood www.howdens.com... - Page 15 Installation Instructions Full height cabinet preparation , (continued) Cut holes in the top panel and shelf for 150mm ducting 165mm 170mm 165mm 170mm Locate the shelf and secure using screws through the back panel Locate shelf 3 pegs down Secure shelf through the back panel using screws Exclusive to Howdens...
-
Page 16: Installing The Cooker Hood
Installation Instructions Full height cabinet preparation , (continued) Relocate the bottom hinges to accommodate the cooker hood 32mm 120mm Re-drill hinge holes 120mm up from base of side panel. 90cm cooker hood illustrated, Install the cooker hood 60cm cooker hood similar. With the cabinet mounted on the wall install the cooker hood Take care not to damage the cooker hood or cabinetry. - Page 17 Installation Instructions Install the cooker hood , (continued) Secure with 4 flange head screws x4 Screws (4x16mm FHD) Two people are needed to install/secure the cooker hood. Extraction via exhaust ducting (vented outside) Ducting needs to be considered on top of the cabinet. Tips for optimal air extraction: •...
- Page 18 Installation Instructions Install the cooker hood , (continued) Extraction via recirculation (vented internally) Grille used from separate ducting kit. Fitted to stop any debris falling in to the fan motor and causing damage. CAUTION: A carbon filter must be fitted when venting internally, see page 20.
- Page 19 Installation Instructions Install the cooker hood , (continued) Decorative cover to conceal cooker hood, (optional) Attach the door hinges Notch out the decorative panel to accommodate the door hinges Fit decorative panel, (optional) Secure the decorative panel depending on fittings available The decorative panel must be removable for access to the cooker hood.
-
Page 20: Install Carbon Filter - Recirculation Mode
Installation Instructions Install carbon filter - recirculation mode (vented internally) Carbon filters - supplied separately Carbon filters are only required when appliance is installed in recirculation mode. Before attempting to install the carbon filter, ensure power to the cooker hood is switched off. •... -
Page 21: Electrical Connections
Installation Instructions Electrical connections IMPORTANT: The wires in the mains lead are Important: Ensure that the electricity supply is coloured in accordance with the following code: switched off before connecting. When fitting in recirculation mode (with carbon filters), ensure the cable is shortened and Blue - Neutral securely held in place;... -
Page 22: Trouble Shooting
Installation Instructions Trouble shooting What might be the cause of...? Check that the grease filters and carbon filters (if vented internally) are fitted correctly. Excessive noise: Airflow noises in the extractor ducting have a stronger impact on noise levels than the cooker hood itself. - Page 23 Installation Instructions Notes Exclusive to Howdens...
- Page 24 Product serial number (Place sticker here) REPRISE À DÉPOSER À DÉPOSER À LA LIVRAISON EN MAGASIN EN DÉCHÈTERIE Cet appareil se recycle Points de collecte sur www.quefairedemesdechets.fr Privilégiez la répara�on ou le don de votre appareil! Product information correct at the time of publication in March 2024. The company has a policy of continuous product development and Howden Joinery Ltd.
Need help?
Do you have a question about the LAM2379 and is the answer not in the manual?
Questions and answers