Table of Contents
Advertisement
Quick Links
Advertisement
Table of Contents

Related Manuals for Komfovent KLASIK


Summary of Contents for Komfovent KLASIK
- Page 1 KLASIK INSTALLATION MANUAL...
-
Page 3: Table Of Contents
5.2. Starting the Unit With a Computer ..........................63 5.3. Calibration of Clean Filters ..............................65 5.4. Quick Inspection ..................................67 ANNEX NO. 1. ADJUSTMENT OF THE ROTARY HEAT EXCHANGER WHEEL............68 UAB KOMFOVENT we reserve the right to make changes without prior notice KLASIK_installation manual_24-03... -
Page 4: Introduction
1. INTRODUCTION This Installation Manual is intended for professionals, qualified to install KLASIK air handling units. Quali- fied professionals are people with sufficient professional experience and knowledge of ventilation systems and installation thereof, knowledge of electrical safety requirements and having ability to perform works without endangering themselves or others. -
Page 5: Unit Types And Sizes
The unit may fail to reach a user-defined supply air temperature when the actual temperature in the premises differs significantly from the temperature set point, since this will lead to inefficient operation of a heat exchanger. UAB KOMFOVENT we reserve the right to make changes without prior notice KLASIK_installation manual_24-03... - Page 6 All KLASIK air handling units are divided into 3 groups according to the type of recuperator (heat ex- changer) used: KLASIK R – air handling units with rotary heat exchangers. Rotating wheel (rotor) of a rotary heat ex- changer collects heat or cold from the indoor air and transfers it to the fresh supply air. Recovered heat/ cold capacity is changed by adjusting the rotor speed.
- Page 7 KLASIK RA – air handling units with a liquid coupled heat exchanger that uses a liquid heat carrier for heat exchange. The heat exchanger consists of two coils (in the supply and extract air flows) connected via a circulation pipework unit (sold separately) and filled with a non-freezing heat carrier, usually a mixture of water and glycol.
-
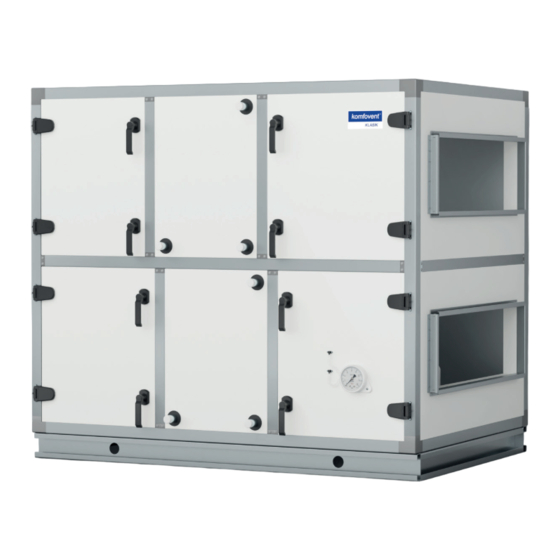
Page 8: Unit Components And Sections
Air filters are intended for removing dust, bacteria and other fine particles from the supplied and ex- tracted air. KLASIK air handling units may be fitted with various types of filters (bag, compact, Hepa). Also, filters can have different filtration classes , i.e. - Page 9 Fig. 2. Hepa or compact filter clamping device example Fig. 3. Filter section labels 1 – section with one row of filters, 2 – section with additional pre-filters UAB KOMFOVENT we reserve the right to make changes without prior notice KLASIK_installation manual_24-03...
-
Page 10: Fan Section
1.3.2. Fan section KLASIK R, CF and RA air handling units have two fan sections. In KLASIK S air handling units there is one fan section. Depending on the unit size, it may be several fans integrated into one fan section. Fans are con- nected to an electronic circuit board fitted in the same section. -
Page 11: Counter-Flow Heat Exchanger (Cf) Section
4 – drop eliminator, 5 – condensate trays, 6 – air bypass control board (C5_PM or C5_MDS), 7 – automatic switch, 8 – CF section label UAB KOMFOVENT we reserve the right to make changes without prior notice KLASIK_installation manual_24-03... -
Page 12: Rotary Heat Exchanger (R) Section
1 – rotor wheel, 2 – automation box, 3 – automatic switch, 4 – rotor wheel brush seals, 5 – rotor belt, 6 – rotor gear motor, 7 – rotor section label UAB KOMFOVENT we reserve the right to make changes without prior notice KLASIK_installation manual_24-03... -
Page 13: Liquid Coupled Heat Exchanger
1 – coil sections of the supply airflow, 2 – coil sections of the extract airflow, 3 – drop eliminator, 4 – exchanger coil, 5 – condensate drip pan, 6 – marking label of liquid coupled heat exchanger section KLASIK RA units can be designed as a single (mono-block) unit, or divided into two separate assemblies (for supply and exhaust airflows). -
Page 14: Recirculation Section
Recirculation section is intended for mixing extract and supply air for heating or cooling thereof by reducing energy consumption of heaters/coolers. Fig. 8. Recirculation section 1 – air mixing damper, 2 – damper actuator, 3 – recirculation section label UAB KOMFOVENT we reserve the right to make changes without prior notice KLASIK_installation manual_24-03... -
Page 15: Cooler And Heater Sections
Also, there is integrated two-stage protection against overheating. A water heater is fitted with a return water temperature sensor, which protects the heat exchanger against freezing. Sensor installation procedure is described in Chapter “Installation of External Heating/Cooling Devices”. UAB KOMFOVENT we reserve the right to make changes without prior notice KLASIK_installation manual_24-03... -
Page 16: Air Dampers
In such case the ducts must be connected to a flange of the insulated cover and not directly to the air damper. UAB KOMFOVENT we reserve the right to make changes without prior notice KLASIK_installation manual_24-03... -
Page 17: Silencers
Fig. 12. Noise suppressor section 1 – removable noise absorbing partitions, 2 – silencer section label UAB KOMFOVENT we reserve the right to make changes without prior notice KLASIK_installation manual_24-03... -
Page 18: Humidifier Section
In order for the humidifier to operate correctly, humidity sensors must be installed and connected to the C5 controller board (See “Electrical installation”). Humidity control function (HUM) can maintain humidity of the supply or of the indoor air – more information about this function you can find in the “KLASIK user manual”. -
Page 19: Inspection Sides
1.4. Inspection Sides Depending on the installation position and connection of air ducts, KLASIK air handling units are avail- able in four inspection sides. Inspection side is determined by a supply air duct (SUP) position: L1 Air duct for supply air connected on the left bottom side of the unit. - Page 20 R2 Air duct for supply air connected on the right upper side of the unit KLASIK R KLASIK CF – outdoor air – supply air – extract air – exhaust air UAB KOMFOVENT we reserve the right to make changes without prior notice KLASIK_installation manual_24-03...
-
Page 21: Unit Transportation And Storage
Lifting equipment (lifting tubes, belts, cables, traverses) is not included. KOMFOVENT UAB shall not be held liable for any damages caused by the carrier during transportation or unloading. UAB KOMFOVENT we reserve the right to make changes without prior notice... - Page 22 Max. 60° >L Max. 60° Max. 60° Min. 60° Lifting equipment (lifting tubes, belts, cables, traverses) is not included. UAB KOMFOVENT we reserve the right to make changes without prior notice KLASIK_installation manual_24-03...
- Page 23 Unloading or lifting works should be performed only by qualified person, who has a right to work with forklift or crane and with sufficient professional knowledge about lifting principles and safety requirements. UAB KOMFOVENT we reserve the right to make changes without prior notice KLASIK_installation manual_24-03...
- Page 24 Place lifting straps under the section with a long bar or a crowbar to place wooden battens (10–15 mm) between hook. the sections. When sections are in large dimensions, battens shall also be placed under every strut. UAB KOMFOVENT we reserve the right to make changes without prior notice KLASIK_installation manual_24-03...
- Page 25 Observe all lifting rules and ensure battens. that straps do not slip or move when using a crane for lifting operations. Lifting traverses are recommended. UAB KOMFOVENT we reserve the right to make changes without prior notice KLASIK_installation manual_24-03...
-
Page 26: Mechanical Installation
3.1. Requirements for Mounting Location and Installation Base KLASIK air handling units are designed for ventilation of medium or large commercial or industrial prem- ises (e.g., stores, offices, hotels, etc.) where standard air temperature and humidity is maintained. These units are not intended for transporting solid particles within air flows. -
Page 27: Inspection Area
The unit must be installed in a way to allow partial or full disassembly and removal of assemblies out of the sections, if needed (e.g., in case of complex repairs). ≥300 ≥300 ≥B Fig. 14. Device inspection area UAB KOMFOVENT we reserve the right to make changes without prior notice KLASIK_installation manual_24-03... - Page 28 1150 2350 1350 2850 1350 2660 1350 2350 1350 2350 1350 3120 1350 2960 1350 2590 1350 2590 1500 3220 1500 3350 1500 2890 1500 2890 UAB KOMFOVENT we reserve the right to make changes without prior notice KLASIK_installation manual_24-03...
-
Page 29: Door Handles And Hinges
3.3. Door Handles and Hinges KLASIK door handles are designed in such a way that the unit door does not swing open due to the pres- sure accumulated inside the unit and does not injure the person opening the door. By pressing the handle, the door slightly opens and locks to release air pressure inside the unit. -
Page 30: Connection Of Sections
(see Appendix No.1). • On units for hygienic or medical applications, all internal connections must be addi- tionally sealed with neutral sealant corresponding to sanitary requirements. UAB KOMFOVENT we reserve the right to make changes without prior notice KLASIK_installation manual_24-03... - Page 31 1 – nut M10, 2 – washer, 3 – screw M10, 4 – adhesive gasket, 5 – gasket on a shelf between different air flows, 6 – external tightening elements UAB KOMFOVENT we reserve the right to make changes without prior notice KLASIK_installation manual_24-03...
-
Page 32: Installation Of Heating/Cooling Devices
Electrical heater sections require a separate power supply. All connections to the heating or cooling system piping and mains must be performed by a qualified specialist. Fig. 19. Connection of sleeves UAB KOMFOVENT we reserve the right to make changes without prior notice KLASIK_installation manual_24-03... - Page 33 Depending on the order. Depending on the order. Depending on the order. It is recommended to use PPU made by Komfovent. UAB KOMFOVENT we reserve the right to make changes without prior notice KLASIK_installation manual_24-03...
- Page 34 Do not over-tighten this screw if used (tightening force 5Nm), since it can lead to pipe damage and leakage. UAB KOMFOVENT we reserve the right to make changes without prior notice KLASIK_installation manual_24-03...
-
Page 35: Connection Of A Condensate Drain
H [mm] = 25 + p [mm H O] = 25 + 0.1 x p [Pa] Fig. 24. Example of a siphon with a one-way valve UAB KOMFOVENT we reserve the right to make changes without prior notice KLASIK_installation manual_24-03... -
Page 36: Connection To Air Ducts
Flanges in the corners are fastened with M8x20 screws and a C profile is pressed on edges to connect the flanges. UAB KOMFOVENT we reserve the right to make changes without prior notice KLASIK_installation manual_24-03... - Page 37 (ducts, flexible connectors, duct heaters/coolers, silencers and etc.) directly to the air damper, they should also have an L-20 flange connection for easier installation. UAB KOMFOVENT we reserve the right to make changes without prior notice KLASIK_installation manual_24-03...
-
Page 38: Outdoor Units
3.8. Outdoor Units KLASIK air handling units for outdoor installation must be additionally protected against environmen- tal effects by installing a protective roof and exhaust air hoods. Units shall be mounted on an installation frame which is attached to an installation base. Ventilation devices, when possible, should be installed near the walls for protection against wind loads. - Page 39 ~ 350 mm ~ 350 mm Fig. 28. Installation of a separately ordered protective roof for KLASIK 1–7 size Part count and measurements may differ depending on the unit type or project requirements. UAB KOMFOVENT we reserve the right to make changes without prior notice...
- Page 40 ~ 350 mm ~ 350 mm Fig. 29. Installation of a separately ordered protective roof for KLASIK 8–14 size Part count and measurements may differ depending on the unit type or project requirements. UAB KOMFOVENT we reserve the right to make changes without prior notice...
-
Page 41: Electrical Installation
(QS1 in wiring diagrams). The main circuit breaker comes with a universal bracket that allows fixing it on the top or side of the AHU. UAB KOMFOVENT we reserve the right to make changes without prior notice KLASIK_installation manual_24-03... - Page 42 If circuit breaker bracket is used, it must be mounted on the edge of the unit casing, oth- erwise self-tapping screws may damage wires or tubing that is routed inside. UAB KOMFOVENT we reserve the right to make changes without prior notice KLASIK_installation manual_24-03...
- Page 43 (Cu) 5 × 10,0 mm (Cu) 5 × 16,0 mm (Cu) 5 × 25,0 mm (Cu) 5 × 35,0 mm (Cu) 5 × 50,0 mm (Cu) UAB KOMFOVENT we reserve the right to make changes without prior notice KLASIK_installation manual_24-03...
-
Page 44: Connection Of Electrical Components
C5 controller and/or other electronics can be installed in an external or internal metal automation box, custom-fitted for exact needs. Refer to the technical printout and wiring diagrams of the exact unit for ad- ditional information. UAB KOMFOVENT we reserve the right to make changes without prior notice KLASIK_installation manual_24-03... - Page 45 Water pump for cooling 230V AC, 1A Common Water pump for heating 230V AC, 1A Fig. 34. Connection terminals for external components on the C5 main board UAB KOMFOVENT we reserve the right to make changes without prior notice KLASIK_installation manual_24-03...
- Page 46 Fig. 35. Surface-mounted return water temperature sensor Sold separately. Depending on the order. UAB KOMFOVENT we reserve the right to make changes without prior notice KLASIK_installation manual_24-03...
- Page 47 >2D Fig. 38. Installation of a supply air temperature sensor Depending on the order. UAB KOMFOVENT we reserve the right to make changes without prior notice KLASIK_installation manual_24-03...
- Page 48 If the DX device was not predefined in the controller software, these outputs will be inactive. UAB KOMFOVENT we reserve the right to make changes without prior notice KLASIK_installation manual_24-03...
- Page 49 Grommets are fastened to ensure tightness. Depending on whether the wires will be pulled up or down, break a tab at the top or bottom edge of the box cover. Fig. 40. Automation box cover UAB KOMFOVENT we reserve the right to make changes without prior notice KLASIK_installation manual_24-03...
-
Page 50: Connection Terminals Of Klasik Ra Air Handling Units
4.2.1. Connection terminals of KLASIK RA air handling units KLASIK RA units can be designed as a single (mono-block) unit, or divided into two separate assemblies (for supply and exhaust airflows). If divided, each block will have a separate automation or connection box with terminals inside. -
Page 51: Control Panel Installation
Fig. 42. Example of KLASIK RA connection terminal numbering • Follow the wiring diagram for the specific KLASIK RA unit to ensure which terminals must be connected. • Do not use external connection terminals of the C5 mainboard for the supply and exhaust air assemblies interconnection. - Page 52 Fig. 44. Control panel cable wiring Do not use sharp tools for pinning contacts in the control panel (e.g., screwdriver). Please use a pencil or a ballpoint pen. UAB KOMFOVENT we reserve the right to make changes without prior notice KLASIK_installation manual_24-03...
-
Page 53: Connection Of Cables And Wires Between Sections
1 – power supply cable, 2 – communication cables between circuit boards 3 – labels with connection numbers KLASIK RA units can be designed as a single (mono-block) unit, or divided into two separate assemblies (for supply and exhaust airflows). If divided, each block will have a separate automation or connection box with terminals inside (see section “Connection terminals of KLASIK RA air handling units”). - Page 54 (fans, valves, rotor wheel). If necessary, use special ties to attach the wires to the unit housing. UAB KOMFOVENT we reserve the right to make changes without prior notice KLASIK_installation manual_24-03...
-
Page 55: Connecting The Unit To The Internal Computer Network Or The Internet
(Wi-Fi). The unit may also be controlled wirelessly in a local network using a smart phone with the Komfovent app. Once the unit is connected to the network router, you should assign a free IP address on the local network. - Page 56 Internet. Follow the router manual to configure port forwarding to the unit IP address. Depending on whether you will use your computer or smart phone with the Komfovent app to control your AHU, you will also need to enter a corresponding port number to the router. For control via your computer use the port 80, and for control via your smart phone use the port 502.
- Page 57 Connection to the local computer network „Komfovent“ app Connection via the Internet INTERNET Fig. 49. Examples for the AHU connection to the Internet or the local network UAB KOMFOVENT we reserve the right to make changes without prior notice KLASIK_installation manual_24-03...
-
Page 58: Commissioning And Inspection Of The Unit
ECONOMY 2 – minimum ventilation intensity (20%), desired air temperature – 19°C. • SPECIAL – maximum ventilation intensity (100%), desired air temperature – 21°C. This mode may also be used to disable heating/cooling and other functions. UAB KOMFOVENT we reserve the right to make changes without prior notice KLASIK_installation manual_24-03... -
Page 59: Control Panel C5.1
If the unit is connected to the mains, the control panel will display a home screen or a screen saver that you can switch off with a single tap. Sold separately. UAB KOMFOVENT we reserve the right to make changes without prior notice KLASIK_installation manual_24-03... - Page 60 CF calibration. If you wish to stop calibration – turn off the unit from the control panel. 16:30 21,9 °C Start CF exchanger calibration? 21,3 °C Temperature STARTING UAB KOMFOVENT we reserve the right to make changes without prior notice KLASIK_installation manual_24-03...
- Page 61 Without calibration, CF heat exchanger may get frozen and will be damaged during low outdoor temperatures. To change the ventilation mode settings: select a desired mode and set a desired air volume or tem- perature with the arrows. UAB KOMFOVENT we reserve the right to make changes without prior notice KLASIK_installation manual_24-03...
- Page 62 To turn of the AHU and return to a home screen: UAB KOMFOVENT we reserve the right to make changes without prior notice KLASIK_installation manual_24-03...
-
Page 63: Starting The Unit With A Computer
2000 m³/h 26.5 °C 100% AHU control ĮOn/Off Operation mode Economy2 Active functions No alarms Alarm status If the password was changed, use the changed password. UAB KOMFOVENT we reserve the right to make changes without prior notice KLASIK_installation manual_24-03... - Page 64 2. Select a desired ventilation mode from the list. 3. Enter desired air flow and temperature in the selected mode settings. 4. Press “Save” button at the bottom of the screen. UAB KOMFOVENT we reserve the right to make changes without prior notice KLASIK_installation manual_24-03...
-
Page 65: Calibration Of Clean Filters
You can stop the unit by pressing ON/OFF button in the “Overview” window. 5.3. Calibration of Clean Filters KLASIK control automation continuously monitors filter contamination. Pressure drop of clean filters is preset in the factory. If filters are from another manufacturer or of different filtering class, we recommend performing initial calibration of clean filters before commissioning of the unit. - Page 66 Calibration of filters with a computer: Select Point “Warnings/States”: If filters ordered with the unit are used (same manufacturer and filtration class), calibra- tion of clean filters is not required. UAB KOMFOVENT we reserve the right to make changes without prior notice KLASIK_installation manual_24-03...
-
Page 67: Quick Inspection
The condensate easily flows from the unit and the drainage piping is watertight CF heat exchanger calibration performed (only in CF units) Other comments: Installer Company Tel. No. Date Signature UAB KOMFOVENT we reserve the right to make changes without prior notice KLASIK_installation manual_24-03... -
Page 68: Annex No. 1. Adjustment Of The Rotary Heat Exchanger Wheel
ANNEX NO. 1. ADJUSTMENT OF THE ROTARY HEAT EXCHANGER WHEEL In the KLASIK 8 and larger units, a large-diameter rotary heat exchanger is used. Since, during the op- eration, the airflow constantly pushes the rotor wheel, due to its dimensions, to one side, it can eventually distort, causing the rotor sealing brushes and axle bearings to wear out faster or even may jam after time. - Page 69 After adjusting the wheel tilt, loosen the adjusting screw Tighten the fixing screw. so that the rotor shaft presses firmly against the adjusting plates. UAB KOMFOVENT we reserve the right to make changes without prior notice KLASIK_installation manual_24-03...
- Page 72 SERVICE AND SUPPORT PARTNERS LITHUANIA J. PICHLER Gesellschaft m. b. H. www.pichlerluft.at UAB KOMFOVENT Phone: +370 5 200 8000 Ventilair group www.ventilairgroup.com service@komfovent.com ACB Airconditioning www.acbairco.be www.komfovent.com REKUVENT s.r.o. www.rekuvent.cz FINLAND Komfovent Oy WESCO AG www.wesco.ch Muuntotie 1 C1 FI-01 510 Vantaa, Finland SUDCLIMATAIR SA www.sudclimatair.ch...
Need help?
Do you have a question about the KLASIK and is the answer not in the manual?
Questions and answers