Table of Contents
Advertisement
Quick Links
Advertisement
Table of Contents

Related Manuals for Dataton WATCHPAX 30


Summary of Contents for Dataton WATCHPAX 30
- Page 1 USER’S GUIDE DATATON WATCHPAX 30...
-
Page 2: Table Of Contents
First Power On assumes no responsibility for any inaccuracies or errors in this manual or the products described. Power Off In no event will Dataton be liable for direct, Quick Start indirect, special, incidental, or consequential Reset WATCHPAX 30 damages resulting from any defect or omission... -
Page 3: Introduction
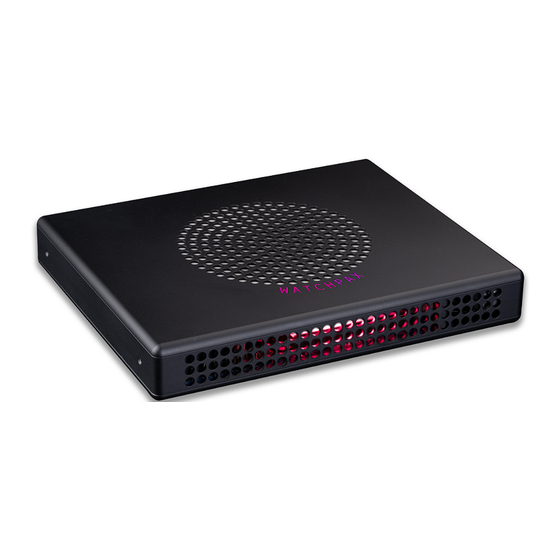
1. INTRODUCTION WATCHPAX 30 is a dedicated media server with four HDMI video outputs and a built-in Dataton WATCHOUT 6 and 7 license. WATCHPAX 30 is a locked-down unit, preconfigured for playback of WATCHOUT shows only. WATCHPAX 30 has a handy compact format making it easy to transport. Other practical details include rubber bumpers and Kensington security slot. -
Page 4: Start Up Screen
This screen (Fig.2) is shown on all display devices connected to the WATCHPAX 30 at start-up with WATCHOUT 7. Figure 2 This screen below (Fig. 3) is shown on all display devices connected to the WATCHPAX 30 at start-up with WATCHOUT 6. Figure 3... -
Page 5: Switching Between Watchout Versions
SWITCHING BETWEEN WATCHOUT VERSIONS By default, WATCHPAX 30 starts in version 7 mode but you can switch to version 6, and vice versa. FROM WATCHOUT 7 TO WATCHOUT 6 You can switch from WATCHOUT version 7 to version 6 using the Producer interface in WATCHOUT version 7. - Page 6 • Connect a keyboard and mouse to the USB ports and a display to a HDMI output • Power up the server • When you see the WATCHOUT 6 splash screen, press Ctrl+W • On the File Menu, select “Restart in WATCHOUT 7” This will cause WATCHPAX to reboot and it then starts WATCHOUT 7.
-
Page 7: Environmental
Operating, maximum 2000 meters above sea level MEDIA SERVER OPERATING SYSTEM The operating system in WATCHPAX 30 has been optimized and licensed for this specific media server configuration. Do not install or attempt to install any software on the locked-down media server (such as drivers, software updates, security updates, virus protection, etc). -
Page 8: Connectors
CONNECTORS Ethernet port × 2 Audio × 2 Power connector USB 2.0 × 2, USB 3.2 × 2 HDMI × 4 Kensington lock On/off switch is located immediately behind the middle hole. Use a pencil or plastic tip to press. Do not use a metal implement! INTRODUCTION... -
Page 9: Installation And Operation
IMportant: the WatCHpaX 30 is a plug-and-play unit. do not open, modify or repair the unit your- self. opening, modifying (software or hardware) or repairing the unit yourself willl invalidate the war- ranty and presents a risk for the user. -
Page 10: Ventilation
IMportant: only use the power cord supplied with the WatCHpaX 30 unit, otherwise dataton aB cannot guarantee full functionality. STANDALONE INSTALLATION place the unit flat on its base. the base is the side of the unit showing the serial number and dataton logo. InstallatIon and operatIon... -
Page 11: Power On
FIRST POWER ON the first time you power up a WatCHpaX 30 (after delivery or after a reset) the system will finalize installation and reboot several times. this procedure will typically take about 5 minutes to complete. IMportant: do not interrupt this procedure. -
Page 12: Reset Watchpax 30
RESET WATCHPAX 30 there are occasions when you may want to reset a WatCHpaX 30, for example, if the unit has been corrupted, or if it is a rental unit and user-specific info has to be removed between rentals. there are two levels of reset: •... -
Page 13: Reset Procedure
RESET PROCEDURE the reset menu is hidden by design in order to avoid accidental resets or misuse. to reset your WatCHpaX 30 device, follow these steps: 1. power off the WatCHpaX 30. 2. disconnect any UsB devices. 3. now connect a keyboard to one of the UsB ports. - Page 14 9. the WatCHpaX 30 will restart several times in order to configure the operating system and hardware. IMportant: do not power off the unit during the configuration process! 10. WatCHoUt will start when the process is complete. the system image version will be appended after the serial number.
-
Page 15: Edid Emulators
INSTALLATION Plug the emulator directly to the HDMI outputs on the back of the WATCHPAX 30. Connect the display’s cable to the emulator. The emulator will be in default mode. Please note: If you change the resolution to one supported by the emulator, but not by the display, the display will not work. - Page 16 VESA BLOCK - MANUFACTURER’S TIMINGS 1152 x 870 @ 75Hz (Apple, Mac II) VESA BLOCK - STANDARD TIMINGS 1152x864 @ 75 Hz (4:3) 1280x1024 @ 60 Hz (5:4) 1280x960 @ 60 Hz (4:3) 1440x900 @ 60 Hz (16:10) 1600x1200 @ 60 Hz (4:3) 1680x1050 @ 60 Hz (16:10) 1920x1080 @ 60 Hz (16:9) 1920x1200 @ 60 Hz (16:10)
-
Page 17: Warranty, Conformity And Disposal
If you discover a defect, Dataton will, at its option, repair, replace, or refund the purchase price of this product at no charge to you, provided you return it during the warranty period, in the original pack-... -
Page 18: Declaration Of Conformity
Responsible manufacturer: Dataton AB Address: Teknikringen 22, SE-583 30 Linköping, Sweden Dataton AB hereby declares that the product listed above, to which this Declaration of Conformity relates, adheres to the directives below and is in conformity with the standards listed below: FCC –... -
Page 19: Disposal
DISPOSAL Only for European Union and EEA (Norway, Iceland and Liechtenstein) This symbol indicates that this product is not to be disposed of with your household waste, according to the WEEE Directive (2012/19/EU), the Battery Directive (2006/66/EC) and/ or national legislation implementing those Directives. If a chemical symbol is printed beneath the symbol shown above, in accordance with the Battery Directive, this indicates that a heavy metal (Hg = Mercury, Cd = Cadmium, Pb = Lead) is present in this battery or accumulator at a concentration above an applicable threshold specified in the Battery...
Need help?
Do you have a question about the WATCHPAX 30 and is the answer not in the manual?
Questions and answers