Table of Contents
Advertisement
Quick Links
Advertisement
Table of Contents

Related Manuals for Dataton WATCHPAX 40


Summary of Contents for Dataton WATCHPAX 40
- Page 1 WATCHPAX 40 USER’S GUIDE...
-
Page 2: Table Of Contents
Reset and Keep User Data In no event will Dataton be liable for direct, Reset to Factory Settings indirect, special, incidental, or consequential Reset Procedure... -
Page 3: Introduction
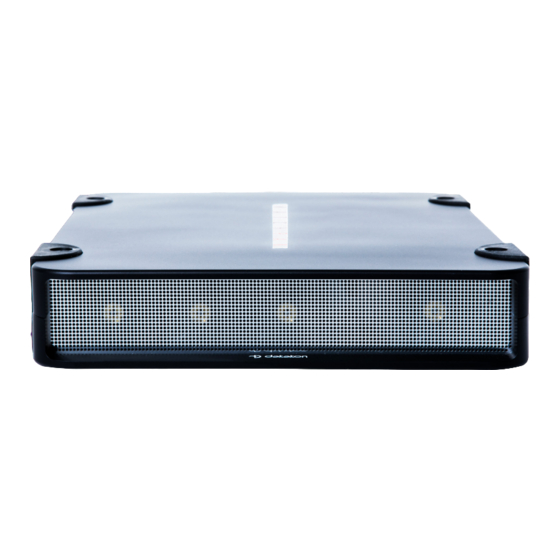
Multiple units can be installed together in a rig or combined with dataton’s other media servers. WAtcHPAX 40 weighs just under 3 kg and is a handy lettersize format making it easy to transport. other practical details include rubber bumpers, Kensington security slot and a strap handle for carrying. -
Page 4: System Overview
Lcd panels, LEd walls etc). START UP SCREEN this is shown on all display devices connected to the WAtcHPAX 40 at start-up, or if WAtcHout has been re-launched. there are three lines of information: First line: computer and cluster name (if this has been set in the WAtcHout Production software network window –... -
Page 5: Accessories
Second line: Version number of the WAtcHout display software that is currently installed on the media server. third line: Media server model type, serial number, firmware version WATCHOUT start-up screen ACCESSORIES Power cord included with media server. AVAILABLE SEPARATELY rack kit for mounting two units in a 19” rack displayPort to HdMI 2.0 adapters CONNECTORS Ethernet port... -
Page 6: Dimensions
2000 meters above sea level MEDIA SERVER OPERATING SYSTEM the operating system in WAtcHPAX 40 has been optimized and licensed for this specific media server configuration. do not install or attempt to install any software on the locked-down media server (such as drivers, software updates, security updates, virus protection, etc). -
Page 7: Installation And Operation
IMportant: the WatCHpaX 40 is a plug-and-play unit. do not open, modify or repair the unit your- self. opening, modifying (software or hardware) or repairing the unit yourself willl invalidate the war- ranty and presents a risk for the user. -
Page 8: Ventilation
• the serial number is located on the base of the unit. IMportant: only use the power cord supplied with the WatCHpaX 40 unit, otherwise dataton aB cannot guarantee full functionality. InstallatIon and operatIon... -
Page 9: Standalone Installation
STANDALONE INSTALLATION place the unit flat on its base. the base is the side of the unit showing the serial number and dataton logo. INSTALLATION IN 19-INCH RACK the WatCHpaX 40 unit may be mounted in a 19-inch rack by using the rack kit, “Rack Mounting Kit”... -
Page 10: Reset Watchpax 40
If you need to perform a forced shutdown, unplug the power cord to turn off the unit. RESET WATCHPAX 40 there are occasions when you may want to reset a WatCHpaX 40, for example, if the unit has been corrupted, or if it’s a rental unit and user-specific info has to be removed between rentals. - Page 11 7. select the desired reset option in the menu that appears, and press enter. 8. IMportant: there will be no confirmation: the reset process starts immediately, providing some visual feedback. 9. the WatCHpaX 40 will restart several times in order to configure the operating system and hardware. InstallatIon and operatIon...
- Page 12 IMportant: do not power off the device during the configuration process! 10. WatCHoUt will start when the process is complete. the system image version will be appended after the serial number (r14 in this example). InstallatIon and operatIon...
-
Page 13: Delete Files
WatCHpaX 40 reflect the latest version of the show. If the files on the WatCHpaX 40 have been corrupted in some way, you may want to force the show cache to rebuild. -
Page 14: Quickstart Guide
3. QUICKSTART GUIDE THE BASICS • connect displays to the WatcHPaX 40 using the displayPort outputs and adapters. • connect the WatcHPaX 40 to the network using the ethernet port. • Power up the WatcHPaX 40 (see “Power On”). • start WatcHOut software on the production computer which is on the same network. Make sure you are using WatcHOut version 6.4 or higher. -
Page 15: Set Native Resolution
WatcHPaX 40 may also be addressed by name and/or cluster. Please see the “Network Win- dow” section in chapter 3: Windows, “WatcHOut user’s guide” for more information about this feature. SET NATIVE RESOLUTION double-click the display in the stage window and set the native resolution of your screen or projector, see screenshot. -
Page 16: Edid Management
WatCHPaX 40). the information exchanged in an EDID handshake includes the resolution, refresh rates and timings available in the display. this section is a walkthrough on how to manage EDID on a WatCHPaX 40 using nVIDIa’s control panel. the following functionality is provided: •... -
Page 17: Export Edid
2. navigate to the Workstation >View System Topology (figure 2). 3. all outputs are listed within the Quadro P3000/P4000 section. Open the “Manage EDID” window by clicking the EDID link (figure 3). It’s possible to export EDID files to external USB devices or to store them locally on the W:\ drive. Files stored on the system (C:\) will not be persistent. -
Page 18: Load Edid
LOAD EDID to emulate an EDID on selected display(s) from file (figure 4): 1. Select the “Load” tab. 2. Check the outputs to override. 3. Press the “Load EDID” button. UNLOAD EDID to remove the EDID emulation on selected displays (figure 5): 1. -
Page 19: Supported Formats
+ alpha HARDWARE ACCELERATED VIDEO FORMATS WatCHpaX 40 supports Gpu-accelerated video decoding. Hardware acceleration is enabled by default in WatCHout and this property can be changed by the user per media item. the codecs supported are listed below. -
Page 20: Warranty, Conformity And Disposal
If you discover a defect, Dataton will, at its option, repair, replace, or refund the purchase price of this product at no charge to you, provided you return it during the warranty period, in the original pack-... -
Page 21: Fcc Notice
FCC NOTICE This device complies with Part 15 of the FCC Rules. Operation is subject to the following conditions: (1) This device may not cause harmful interference, and (2) this device must accept any interference received, including interference that may cause undesired operation. -
Page 22: Declaration Of Conformity
Responsible manufacturer: Dataton AB Address: Teknikringen 22, SE-583 30 Linköping, Sweden Dataton AB hereby declares that the product listed above, to which this Declaration of Conformity relates, adheres to the directives below: RoHS 2011/64/EU, with exception of a non rechargeable lithium battery (ML2430HJ) powering... -
Page 23: Disposal
DISPOSAL Only for European Union and EEA (Norway, Iceland and Liechtenstein) This symbol indicates that this product is not to be disposed of with your household waste, according to the WEEE Directive (2012/19/EU), the Battery Directive (2006/66/EC) and/ or national legislation implementing those Directives. If a chemical symbol is printed beneath the symbol shown above, in accordance with the Battery Directive, this indicates that a heavy metal (Hg = Mercury, Cd = Cadmium, Pb = Lead) is present in this battery or accumulator at a concentration above an applicable threshold specified in the Battery...
Need help?
Do you have a question about the WATCHPAX 40 and is the answer not in the manual?
Questions and answers