Table of Contents
Advertisement
Quick Links
Advertisement
Table of Contents

Related Manuals for thomann ignition Isolde 1020


Summary of Contents for thomann ignition Isolde 1020
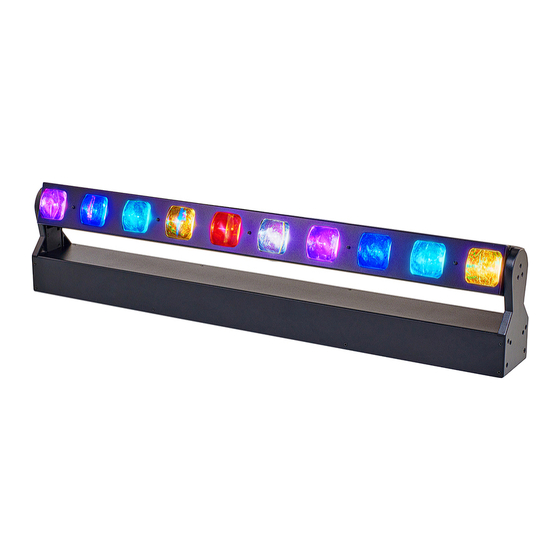
- Page 1 Isolde 1020 LED Bar...
- Page 2 Thomann GmbH Hans-Thomann-Straße 1 96138 Burgebrach Germany Telephone: +49 (0) 9546 9223-0 Internet: www.thomann.de 16.01.2024, ID: 561665 (V2)
-
Page 3: Table Of Contents
Table of contents Table of contents General information......................5 1.1 Symbols and signal words................... 5 Safety instructions......................... 6 Features............................8 Installation..........................9 Starting up..........................11 Connections and controls....................12 Operation..........................13 7.1 Starting the device....................... 13 7.2 Main menu........................13 7.3 Menu overview...................... - Page 4 Isolde 1020 LED Bar...
-
Page 5: General Information
Our products and documentation are subject to a process of continuous develop‐ ment. They are therefore subject to change. Please refer to the latest version of the documentation, which is ready for download under www.thomann.de. 1.1 Symbols and signal words In this section you will find an overview of the meaning of symbols and signal words that are used in this document. -
Page 6: Safety Instructions
Safety instructions Safety instructions Intended use This device is intended for use as an electronic lighting effect by means of LED tech‐ nology. The device is designed for professional use only and is not suitable for use in households. Use the device only as described in this user manual. Any other use or use under other operating conditions is considered to be improper and may result in personal injury or property damage. - Page 7 Safety instructions CAUTION! Risk of injury due to unexpected movements of the device! The device head may perform fast movements and generate very bright light. This is the case immediately after the device is switched on, in automatic or remote operation, and when a connected DMX controller is switched off. Persons who are in the immediate vicinity of the device may be injured or frightened by this.
-
Page 8: Features
Features Features The LED bar is particularly suitable for professional lighting tasks, for example at events, on rock stages, in theatres and musicals. It has low power consumption and a long service life. Special features of the device: 10 individually controllable RGBW LEDs at 20 W each Extremely sharp beam 220 °... -
Page 9: Installation
Installation Installation Unpack and check carefully there is no transportation damage before using the unit. Keep the equipment packaging. To fully protect the product against vibration, dust and moisture during transportation or storage use the original packaging or your own packaging material suitable for transport or storage, respectively. WARNING! Risk of injury from falling devices that were inadequately secured! If devices are not properly secured during assembly, they can cause... - Page 10 Installation Mounting options You can install the unit in hanging or standing position. When in use, the device must always be attached to a solid surface or an approved mount. Use the designated openings on the underside of the device to attach it. Always work from a stable platform whenever installing, moving or servicing the unit.
-
Page 11: Starting Up
Starting up Starting up Create all connections while the device is off. Use the shortest possible high-quality cables for all connections. Take care when running the cables to prevent tripping hazards. Connections in ‘DMX’ mode Connect the DMX input of the device to the DMX output of a DMX controller or another DMX device. -
Page 12: Connections And Controls
Connections and controls Connections and controls ö PUSH MENU ENTER & 1 10 × RGBW LEDs 2 [100-240V~50/60Hz] | Lockable Power Twist TR1 input socket for the power supply 3 [DMX IN] | DMX input, designed as XLR panel plug, 5-pin 4 Operating elements [MENU] | Activates the main menu and toggles between menu items. -
Page 13: Operation
Operation Operation 7.1 Starting the device CAUTION! Risk of injury due to unexpected movements of the device! The device head may perform fast movements and generate very bright light. This is the case immediately after the device is switched on, in automatic or remote operation, and when a connected DMX controller is switched off. - Page 14 Operation Mode Highest possible DMX address 9 channels 14 channels 46 channels Specifying the DMX mode The device can be controlled in 46, 14 or 9-channel mode. To specify the desired mode, proceed as follows: Open the main menu. Navigate to ‘DMX Settings è Channel Mode’. Use [UP] and [DOWN] to switch between ‘Mode 1 (46)’...
- Page 15 Operation Activating or deactivating tilt inver‐ sion Open the main menu. Navigate to ‘Fixture Settings è Tilt Invert’. Use [UP] and [DOWN] to select ‘No’ (Tilt Invert deactivated) or ‘Yes’ (Tilt Invert activated). Confirm your selection with [ENTER]. ð Tilt inversion is activated or deactivated. To exit the menu, press [MENU], or wait 30 seconds.
- Page 16 Operation Specifying the white balance You can specify the white balance for all LEDs, or make individual settings for each of the 10 LEDs. Open the main menu. Navigate to ‘Fixture Settings è White Balance’. Use [UP] and [DOWN] to select one of the following settings: ‘Red’...
- Page 17 Operation Performing an automatic self test Open the main menu. Navigate to ‘Fixture Test è Auto Test’. ð The device immediately performs an automatic self test. The following functions are tested: Tilt, strobe, dimmer, all colours and pixel control. To end the automatic self test and exit the menu, press [MENU], or wait 30 sec‐ onds.
- Page 18 Operation Displaying and resetting LED informa‐ tion Open the main menu. Navigate to ‘Information è LED Use Hour’. Use [UP] and [DOWN] to select the ‘Total LED Hour’ (total time) or ‘LED On Hour’ (current switch-on time) submenu. Confirm your selection with [ENTER]. ð...
- Page 19 Operation Resetting to factory defaults Open the main menu. Navigate to ‘Factory Restore’. Confirm your selection with [ENTER]. If you wish to reset the device to the factory settings, select ‘Yes’ and confirm with [ENTER]. Use [UP] and [DOWN] to enter the digits ‘011’ . Confirm your input with [ENTER].
- Page 20 Operation RDM functions Certain menus of the device and functions can be called up via the RDM protocol. RDM-Code RDM Device ID Model ID RDM Personality ID 0074h Random, based on 0x527(1319) 0x0103(46CH) the respective 0x0203(14CH) device ID 0x0303(9CH) The parameter IDs are implemented as follows for different commands: Parameter ID Command Command...
-
Page 21: Menu Overview
Operation 7.3 Menu overview DMX Address Mode 1 (46) Channel Mode Mode 2 (14) DMX Settings Mode 3 (9) Hold No DMX Status BlackOut View DMX Value Manual Tilt invert Tilt Feedback Linear Square Law Dimmer Curve Inv. SQ Law S Curve Fast Fixture Settings... -
Page 22: Settings Menu
Operation 7.4 Settings menu The following basic settings can be adjusted in the settings menu: Tilt zero position setting (tilt offset) Colour zero position setting (color offset RGBW) How to access the settings menu Press [MENU]. Press and hold [ENTER] for 3 seconds. ð... -
Page 23: Led Layout
Operation 7.5 LED layout The device is equipped with 10 RGBW LEDs. They are set up as follows and assigned to the corresponding DMX functions. ö & 7.6 Functions in 9-channel DMX mode Channel Value Function 0…255 Inclination (tilt) (0° up to the maximum value of the tilt range of 220°) 0…255 Inclination (tilt), fine adjustment 0…255... -
Page 24: Functions In 14-Channel Dmx Mode
Operation 7.7 Functions in 14-channel DMX mode Channel Value Function 0…255 Inclination (tilt) (0° up to the maximum value of the tilt range of 220°) 0…255 Inclination (tilt), fine adjustment 0…255 Decreasing tilt speed 0…255 Red intensity, 0 % … 100 % 0…255 Green intensity, 0 % …... - Page 25 Operation Channel Value Function 120…127 Colour 15 128…135 Colour 16 136…143 Colour 17 144…151 Colour 18 152…159 Colour 19 160…167 Colour 20 168…175 Colour 21 176…183 Colour 22 184…191 Colour 23 192…199 Colour 24 200…207 Colour 25 208…215 Colour 26 216…223 Colour 27 224…231...
- Page 26 Operation Channel Value Function 128…255 Increasing with transition Reset 0…127 No function 128…255 Reset after 5 seconds Isolde 1020 LED Bar...
-
Page 27: Functions In 46-Channel Dmx Mode
Operation 7.8 Functions in 46-channel DMX mode Channel Value Function 0…255 Inclination (tilt) (0° up to the maximum value of the tilt range of 220°) 0…255 Inclination (tilt), fine adjustment 0…255 Decreasing tilt speed 0…255 Red intensity 1, 0 % … 100 % 0…255 Green intensity 1, 0 % …... -
Page 28: Technical Specifications
Technical specifications Technical specifications 1000 mm 113 mm PUSH MENU ENTER Light source 10 × RGBW LED, each 20 W Optical properties Beam angle 2° Inclination angle (tilt), max. 220° Control DMX or via buttons and display on the unit Number of DMX channels 9, 14, 46 Input connections... - Page 29 Technical specifications Further information Gobo wheel Prism Motorised focus Motorised zoom Suitable for outdoor use Colour mix RGBW LED type x-in-1 fanless Remote control Not possible Wireless DMX Separately controllable LEDs Housing colour black Isolde 1020 LED Bar...
-
Page 30: Plug And Connection Assignment
Plug and connection assignment Plug and connection assignment Introduction This chapter will help you select the right cables and plugs to connect your valuable equipment so that a perfect light experience is guaranteed. Please take our tips, because especially in ‘Sound & Light’ caution is indicated: Even if a plug fits into a socket, the result of an incorrect connection may be a destroyed DMX controller, a short circuit or ‘just’... -
Page 31: Troubleshooting
DMX interface circuit. If the procedures recommended above do not succeed, please contact our Service Center. You can find the contact information at www.thomann.de. Isolde 1020 LED Bar... -
Page 32: Cleaning
Cleaning Cleaning Optical lenses Clean the optical lenses, that are accessible from the outside, regularly in order to optimize the light output. The frequency of cleaning depends on the operating envi‐ ronment: wet, smoky or particularly dirty surroundings can cause more accumulation of dirt on the optics of the device. -
Page 33: Protecting The Environment
Repairing a device or passing it on to another user is an ecologically valuable alternative to disposal. You can return your old device to Thomann GmbH at no charge. Check the current conditions on www.thomann.de. If your old device contains personal data, delete those data before disposing of it. - Page 34 Notes Isolde 1020 LED Bar...
- Page 36 Musikhaus Thomann · Hans-Thomann-Straße 1 · 96138 Burgebrach · Germany · www.thomann.de...
Need help?
Do you have a question about the ignition Isolde 1020 and is the answer not in the manual?
Questions and answers