Table of Contents
Advertisement
Quick Links
CASA Climate CCF a
Installation - Commissioning - Maintenance
Contents
Application area.......................................................... 2
General....................................................................... 2
Safety equipment ........................................................ 2
Handling ..................................................................... 2
Installation .................................................................. 2
Cleaning ..................................................................... 2
Service/maintenance ................................................... 2
Environment and waste disposal ................................. 2
Product warranty ........................................................ 2
Dimensions and weight...................................... 3
Weight ....................................................................... 3
Dimensions ................................................................. 3
Installation .......................................................... 4
Size of needed cutout ................................................. 4
Anchoring, ceiling ....................................................... 4
Anchoring, wall .......................................................... 7
Mounting on top of tall cabinet .................................. 9
Floor mounting ......................................................... 10
Connections ....................................................... 11
Connection - Air........................................................11
Connection - Water ...................................................11
Before commissioning ............................................... 12
Water quality ............................................................ 12
Control equipment .................................................... 12
LUNAd RE-S-MB ....................................................... 12
LUNAd RE-S-CO-MB ................................................. 12
Commissioning .................................................. 13
Maintenance ...................................................... 14
The document was originally written in Swedish
18/09/2023
Art. 942428064
Advertisement
Table of Contents

Related Manuals for Swegon CASA Climate CCF a


Summary of Contents for Swegon CASA Climate CCF a
-
Page 1: Table Of Contents
CASA Climate CCF a Installation - Commissioning - Maintenance 18/09/2023 Art. 942428064 Contents Application area............2 General............... 2 Safety equipment ............2 Handling ..............2 Installation ..............2 Cleaning ..............2 Service/maintenance ........... 2 Environment and waste disposal ......... 2 Product warranty ............ -
Page 2: Application Area
(1) the product is repaired, modified or changed, unless such repair, modification or change has been approved by Swegon AB; or (2) the serial number on the product has been made illegible or is missing. -
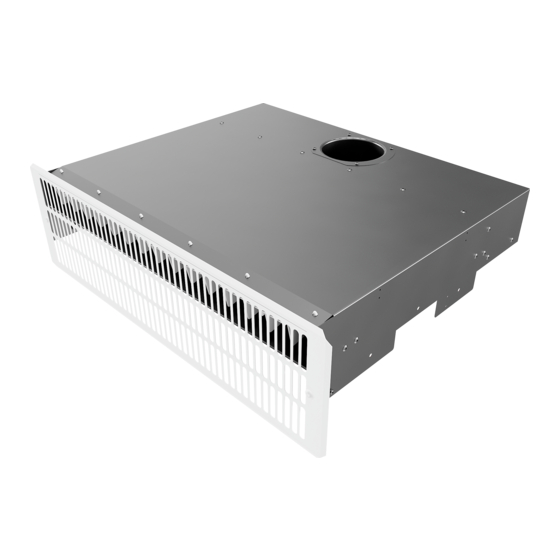
Page 3: Dimensions And Weight
Dimensional drawing excl. grille & leakage indicator, sleeve connection side 5. 4 7 7 5 6 2 Dimensional drawing grille 166. 5 7 8 Dimensional drawing excl. grille & leakage indicator, sleeve con- nection side 2. 09/03/2023 Swegon reserves the right to make design changes. -
Page 4: Installation
> 2 0 1 7 2 ( + 0 - 3 ) + 5 - 0 5 6 6 ( Anchoring, ceiling 1) Push the product through the wall from the front. Swegon reserves the right to make design changes. 09/03/2023... - Page 5 3) Screw the brackets into the overlying ceiling with 2) Screw the 4 brackets onto the product with the suitable screws. included hexagonal screws, in the pre-punched holes on the sides of the product. 09/03/2023 Swegon reserves the right to make design changes.
- Page 6 6) Hang the leakage indicator at the front edge with the keyholes and the spacer rivets on the inside of the product. 7) Finally install the grille with the 2 included screws (PH2). Swegon reserves the right to make design changes. 09/03/2023...
-
Page 7: Anchoring, Wall
3) Screw the brackets and the product into place in the their upper edge is level with the upper edge of the wall. Use a spirit level to get the product horizontal. product. 09/03/2023 Swegon reserves the right to make design changes. - Page 8 6) Hang the leakage indicator at the front edge with the keyholes and the spacer rivets on the inside of the product. 7) Finally install the grille with the 2 included screws (PH2). Swegon reserves the right to make design changes. 09/03/2023...
-
Page 9: Mounting On Top Of Tall Cabinet
Also cut out a suitable front panel that the product is pushed through, and that the grille lies against. 09/03/2023 Swegon reserves the right to make design changes. -
Page 10: Floor Mounting
When installing in a cabinet base, cut out the bottom cabinet panel for access to the product, and place a new panel on top of the cut out panel (double bottom). Swegon reserves the right to make design changes. 09/03/2023... -
Page 11: Connections
Figure 24. Dimensions CASA Climate CCF, air connection side 5. Plastic pipes up to and including DN20 Copper pipes and thin-walled steel pipes up to and including DN12 Figure 25. Dimensions CASA Climate CCF, air connection side 2. 09/03/2023 Swegon reserves the right to make design changes. -
Page 12: Before Commissioning
900 kPa. In the event of a leakage due to defects in the prod- ucts, Swegon covers the cost of replacement or repair of the product. Any other costs or consequent damage that arises prior to pressure testing or due to pressure testing being neglected or occurred too late will not be reimbursed by Swegon. -
Page 13: Commissioning
The measuring tube is inserted through the front of the product into a nozzle, and the gauge pressure could be read with a manometer. Each open nozzle has a k-factor of 0.039. 09/03/2023 Swegon reserves the right to make design changes. -
Page 14: Maintenance
The grille is mounted on the product with two screws (PH2), which need to be unscrewed in order to clean the coil heat exchanger, marked in blue in the images below. Swegon reserves the right to make design changes. 09/03/2023...
Need help?
Do you have a question about the CASA Climate CCF a and is the answer not in the manual?
Questions and answers