Table of Contents
Advertisement
DPL950-EN
receiver new
5/7/03
Safety Information
Thomson Information
CAUTION!
Invisible laser radiation when open. Avoid exposure to
beam. Class 1 laser product. This system must be opened
only by qualified technicians to prevent accidents caused
by the laser beam.
LASER λ = 780 nm, P max = 5 mW
Rating Information: At bottom of the unit
this unit comply with the existing requirements
In accordance with the rating plate of the
unit, this unit complies with current
standards concerning electrical safety and
electromagnetic compatibility.
Please respect the environment Before
throwing any batteries away, consult your
distributor who may be able to take them
back for specific recycling.
Have a Blast- Just Not in Your Eardrums
Make sure you turn down the volume on
the unit before you put on headphones.
Increase the volume to the desired level
only after headphone are in place.
For UK Only
CONNECT THE MAIN LEAD INTO AC MAINS POWER
SOCKET
POWER SUPPLY 230V. It must not be connected to D.C.
mains.
Note; The mains lead of the set is fitted with a molded
plug. If the mains socket are not compatible or if for any
reason the plug is removed please follow the directions
below. The molded plug cannot be rewired and if
removed must be disposed of safely.
DO NOT under any circumstances plug the severed plug
into any mains socket as this could result in electric shock.
Important: If the plug is removed, rewire the new plug
as follow:
The wires in the mains plug are coloured in accordance
to the following code:
BLUE = NEUTRAL/BROWN = LIVE
10:35 AM
Page 1
ADVARSEL!
USYNLIG LASERSTRÅLNING VED ÅBNING NAR
SIKKERHEDSAFBRYDERE ER UDE AF FUNKTION.
UNGDÅ UDSAETTELSE FOR STRÅLNING.
VORSICHT!
UNSICHTBARE LASERSTRALUNG
WENN ABDECKUNG GEÖFFNET UND SICHERHEITS–
VERRIEGELUNG ÜBERBRÜCKT.
NICHT DEM LASERSTRAHL AUSSETZEN!
CAUTION – INVISIBLE LASER RADIATION
WHEN OPEN AND INTERLOCKS FAILED OR
DEFEATED. AVOID EXPOSURE TO BEAM.
ATTENTION – RAYONNEMENT LASER INVISIBLE
DANGEREUX EN CAS D'OUVERTURE ET LORSQUE
LA SECURITE EST NEUTRALISEE.
EXPOSITION DANGEREUSE AU FAISCEAU.
CLASS 1 LASER PRODUCT
LASER KLASSE 1
APPAREIL A LASER DE CLASSE 1
LUOKAN 1 LASERLAITE
KLASS 1 LASERAPP ARAT
VARNING–
OSYNLIG LASERSTRÅLNING NÄR DENNA DEL
ÄR ÖPPNAD OCH SPÄRRAN ÄR URKOPPLADE.
BETRAKTA EJ STRÅLEN.
VARO!
AVATTAESSA JA SOUJALUKITUS OHITETTAESSA
OLET ALTTIINA NÄKYMÄTTÖMÄLLE.
LASERSÄTEILYLLE ÄLÄ KATSO SÄTEESEEN.
If the colours of the wires in the mains lead of this
apparatus may not correspond with the coloured
markings identifying the terminals in your plug, proceed
as follows:
BLUE wire to the terminal coded N (Neutral) or coloured
black.
BROWN wire to the terminal coded L (Live) or coloured
red.
DO NOT make any connection to the
terminal in the plug which is marked by
the letter E or by the earth symbol or
13A
coloured green or green and yellow.
A fused plug must be fitted with a 13A fuse approved by
ASTA or BS1362 and fuse covers must be always be
securely replaced. If you set does not work, the fuse may
be blown.
CAUTION
RISK OF ELECTRIC SHOCK
DO NOT OPEN
T H E
L I G H T N I N G
CAUTION: TO REDUCE THE
FLASH AND ARROW-
RISK OF ELECTRIC SHOCK,
HEAD WITHIN THE
D O N O T R E M O V E C O V E R
T R I A N G L E I S
A
( O R B A C K ) . N O U S E R -
W A R N I N G
S I G N
S E RV I C E A B L E PA R T S I N -
ALERTING YOU OF
S I D E . R E F E R S E RV I C I N G
" D A N G E R O U S
T O Q U A L I F I E D S E R V I C E
VOLTAGE" INSIDE
PERSONNEL.
THE PRODUCT.
SEE MARKING ON BOTTOM / BACK OF PRODUCT
WARNING:
TO PREVENT FIRE OR ELECTRICAL
SHOCK HAZARD, DO NOT EXPOSE THIS PRODUCT
TO RAIN OR MOISTURE.
THE EXCLAMATION
POINT WITHIN THE
T R I A N G L E I S A
WARNING
SIGN
ALERTING YOU OF
I M P O R T A N T
I N S T R U C T I O N S
A C C O M PA N Y I N G
T H E
P R O D U C T.
Advertisement
Table of Contents

Related Manuals for THOMSON DPL950 - RECEIVER


Summary of Contents for THOMSON DPL950 - RECEIVER
-
Page 1: Safety Information
ALERTING YOU OF I M P O R T A N T S I D E . R E F E R S E RV I C I N G " D A N G E R O U S... -
Page 2: Thomson Multimedia Pack
• Use .mp3 as the extension when converting audio files into mp3 for saving onto CD-R(W) or CD-ROM, e.g. Rocky08.mp3. Do not use any other extension e.g. .doc, .pdf. • Do not use the .mp3 extension for other text or non-audio data files as this may result in serious malfunction and harmful noise inter- ference. -
Page 3: Table Of Contents
Operating the Radio ....37 Receiver ......3 Troubleshooting Tips . -
Page 4: Getting Started
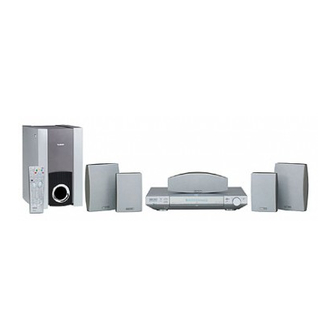
SCART cable; Control Unpacking The Speakers • one set of speakers including 1 set of left and right front speakers, 1 centre speaker, 1 subwoofer and 1 set of left and right rear speakers. 1 X red/black wire for... -
Page 5: Inserting Batteries Into Remote Control
• If the disc is dirty, clean it with a damp cloth and wipe CD-RW disc and the recorder used to create from the center out. Wipe in straight line and not in circu- the disc. -
Page 6: Connecting To Audio-Visual Components
SCART output If no SCART socket is available on your TV set, check whether your TV has another Video socket (Components, S-Video or composite) that you can use to connect your player using the corresponding socket. Do not forget to connect the Audio cable to your TV set. -
Page 7: Digital Connection
10:35 AM Page 9 Getting Started Digital Connections Connecting the Antennas If you have a SAT receiver DVD player or CD player with a digital output, you can make use of an optical digital con- DVD ONLY MONITOR FRONT (8Ω) REAR (8Ω) -
Page 8: Connecting The Speakers
Adding a Subwoofer will increase bass response. If you want to enjoy full range of sound effects, it is a must to use the subwoofer with the speakers to maintain ade- quate bass signal. -
Page 9: Positioning Your Speaker
Placing the left and right speakers to form a 45-degree angle with your favorite viewing position will duplicate the Speakers placed less than two feet from the TV set must be soundtrack mixer's perspective. magnetically shielded in order to prevent picture distor- tion. -
Page 10: Preferred Surround Placement
If possible, place surround speakers to either side of the lis- Rear wall tening area, not behind it. If rear wall mounting is the only choice, aim the speakers at each other (A), towards the front (B) or even towards the sidewalls (C, D). Experiment with placement until surround sounds seem to envelop you, rather than coming from behind you. -
Page 11: Test Tone / Channel Balance
Even though you adjust the surround channel to be as loud Restore to Factory Settings as the others on the test signal, you'll find that on actual program material the surround channel is usually much You can always restore all settings back to its original state. -
Page 12: Operating Your Receiver
• To go to the next preset memory location in tuner mode. • When in protection mode, the blue led will blink continuously, • To skip to the next track in CD mode and the next chapter in • During panel up/down and power up, the led will blink for a DVD mode (only while playing). -
Page 13: Remote Control
PLAY clear To adjust the volume. 10. pr + / pr - To select programmed stations in TUNER mode. To skip to the next or previous chapter or track in DVD, CD & mp3 mode. PAUSE ZOOM REC vcr 11. MUTE STOP To mute all audio outputs. -
Page 14: Display
TUNED PRO.LOGIC II • Tuner station detected. • Audio output is in Dolby PL II Movie, Dolby PL II Music or Dolby Prologic mode. • Tuner stereo signal detected. • Audio output is in DTS mode. (For DVD and SAT optical... -
Page 15: Switching On/Off
RANDOM SURROUND tuner up level digital If you connect a VCR player to the VCR input (audio + tape sat/cab video) on the receiver and press the SOURCE button video until VCR shows on the display. You will be able to have... -
Page 16: Using The Remote To Control Additional Components
/ vcr D I G I T A L PRO.LOGIC 5. If this does not work, repeat steps 3 and 4 by trying to INTRORANDOM LS LFE RS use the next code (if available) listed for the brand of your component until the component responds to the remote command. -
Page 17: Advanced Sound Control
Dolby Pro Logic II powerful presence than conventional Dolby Surround. The Pro Logic II mode uses the built-in circuit to steer the This unit is equipped with Dolby Digital 5.1-channel so Left, Center, Right and Surround left and right channel audio signals and uses all five speakers to play both stereo that you can enjoy enhanced full digital surround sound. -
Page 18: Fine Setting Of Components
SOURCE Digital Input: Optical (OPT) Buttons (like DVD/CD, SAT) directly. The default surround Select this setting to play digital signals from a DVD, CD, LD modes for different components are as tabled below. player, or SAT. (SAT mode only) -
Page 19: Fine Setting Of The Speakers
Rear speaker (SUR) press up/down buttons to adjust speaker size. Size selection is to let you adjusting the unit to work with larger size speaker, like floor stand speaker. To change the speaker distance... - Page 20 When a digital source is playing, the receiver will automati- cally switch to the proper surround mode and indicates on the speaker icons on the right-hand side of the display. (See diagram) It is important to note, however, that not all Dolby Digital sources are encoded with the full complement of five chan- nels plus LFE*.
Need help?
Do you have a question about the DPL950 - RECEIVER and is the answer not in the manual?
Questions and answers