Table of Contents
Advertisement
Quick Links
Advertisement
Table of Contents

Related Manuals for Bosch HGVDF0V52S


Summary of Contents for Bosch HGVDF0V52S
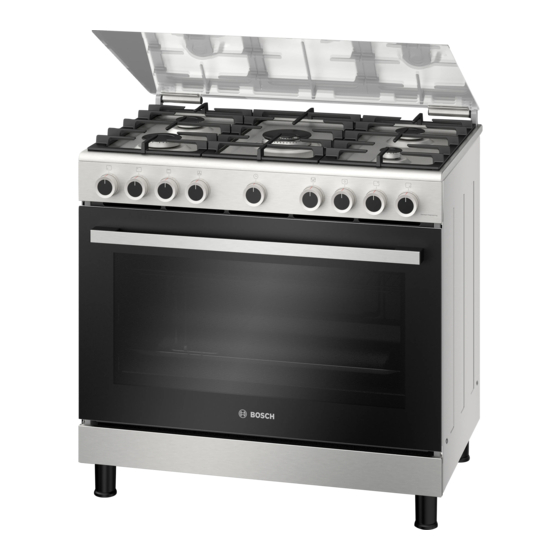
- Page 1 Free standing cooker HGVDF0V52S User manual and installation instructions [en]...
-
Page 2: Table Of Contents
en Safety Table of contents Warning: The appliance is only used for cook- ing. Do not use the appliance for other pur- poses, e.g. for heating up rooms. INFORMATION FOR USE Only allow a trained professional to connect Safety .............. 2 the appliance and to convert the appliance to a different type of gas. - Page 3 Safety en Children must not perform cleaning or user WARNING ‒ Risk of poisoning! maintenance unless they are at least 15 years Using the gas cooking appliance leads to a old and are being supervised. build-up of heat, moisture and combustion Keep children under the age of 8 years away products in the room where the appliance is from the appliance and power cable.
-
Page 4: Safety
en Safety Opening the appliance door creates a Accessible points may be hot when using the draught. Greaseproof paper may come into grill. contact with the heating element and catch ▶ Keep small children away from the appli- fire. ance. ▶ Never place greaseproof paper loosely WARNING ‒ Risk of electric shock! over accessories when preheating the ap- Improper repairs are dangerous. -
Page 5: Preventing Material Damage
Preventing material damage en WARNING ‒ Risk of injury! WARNING ‒ Risk of scalding! Faults or damage to the appliance and re- The accessible parts of the appliance become pairs that have not been carried out correctly hot during operation. are dangerous. ▶ Never touch these hot parts. ▶... - Page 6 en Preventing material damage The prolonged presence of moisture in the cooking ATTENTION! compartment leads to corrosion. A build-up of heat may damage the appliance. Allow the cooking compartment to dry after use. ▶ Never cover the stainless steel hob, for example ▶...
-
Page 7: Environmental Protection And Saving En- Ergy
Environmental protection and saving energy en If you are cleaning food remnants or residue liquids ATTENTION! that are penetrating below the hotplates into the the Do not place hot objects in the plinth drawer. The plinth burner seat using lyes or similar chemicals, this may drawer may be damaged. - Page 8 en Installation and connection ¡ Remove any accessories from the oven. ¡ The manufacturer is not responsible for results, per- formance or any risk caused by operating the appli- ¡ Lift one side of the appliance off the floor and tilt it ance at different values.
-
Page 9: Installation And Connection
Installation and connection en Starting up Start up the appliance in accordance with the in- struction manual. Ignite all of the burners. Check the stability of the flames at a high and ‒ low setting. Moving or transporting the appliance by the gas pipe (collector) or by the door handle Do not move the appliance by pulling on the gas pipe (collector). - Page 10 en Installation and connection 4.5 Setting up the appliance Place the appliance on a smooth surface. Never set up the appliance behind a decorative door or the door of a kitchen unit. There is a risk of overheat- ing. ¡ Install the appliance in accordance with the spe- cified dimensions.
-
Page 11: Familiarising Yourself With Your Appliance
Familiarising yourself with your appliance en Familiarising yourself with your appliance 5 Familiarising yourself with your appliance 5.1 Your appliance Explanation Control panel You can find an overview of the parts of your appliance here. Appliance door Note: On certain models, specific details such as col- Plinth drawer our and shape may differ from those pictured. - Page 12 en Familiarising yourself with your appliance Symbol Type of heating What it's used for and how it works Bottom heating Final baking or cooking food in a bain marie. 140-255 °C The heat is emitted from below. Gas grill Grill flat items such as steak, sausages, or toast. The whole area below the grill element becomes hot.
-
Page 13: Accessories
Familiarising yourself with your appliance en Position Function Explanation Ignition position All the igniters ignite at the same time. Settings range Large flame = highest setting Small flame = lowest setting There is a limit stop at the end of the settings range. Do not turn the gas hotplate selector beyond the end stop. -
Page 14: Before Using For The First Time
Slide the tray in with the sloping edge your appliance in our brochures and online: E.g. univer- facing the appliance cover. www.bosch-home.com sal pan or Accessories vary from one appliance to another. When baking tray purchasing accessories, always quote the exact product number (E no.) of your appliance. -
Page 15: Cookware
Cookware en Remove the accessory and the leftover packaging, Cooking time 30 minutes such as polystyrene pellets, from the cooking com- Ventilate the room while the appliance is heating. partment. Switch off the appliance after the specified cooking Before heating, wipe the smooth surfaces in the time. -
Page 16: 9.3 Operating The Hotplate
en Operating the hotplate 8.2 Tips for using a wok ¡ When cooking with a wok, use the wok ring. Note the following information to ensure the safe use of ¡ Place the wok ring a wok. over the wok burner onto the pan support. WARNING ‒ Risk of injury! ¡... -
Page 17: Basic Operation
Basic operation en Place suitable cookware on the pan support. WARNING ‒ Risk of fire! Press and hold the selector for the required burner Escaping gas may ignite. and set it to the ignition position . If the burner does not ignite after 15 seconds, turn ▶... - Page 18 en Rotary spit 10.2 Setting the oven gas grill WARNING ‒ Risk of fire! Escaping gas may ignite. If the gas burner for the gas grill is lit, you can grill in If the burner does not ignite after 15 seconds, turn ▶ the oven. the control knob to the "Off"...
- Page 19 Rotary spit en Place the rotary spit support onto the baking tray. 11.3 Switching the rotisserie spit and grill To switch on the rotary spit, follow the instructions be- low. To grill with the rotary spit, insert this before you follow the instructions below. WARNING ‒ Risk of fire! Escaping gas may ignite.
- Page 20 en Time-setting options Time-setting options 12 Time-setting options Your appliance is equipped with a time-setting option Setting the short-term timer that can be used to set the timer. You can set the timer up to 60 minutes when the appli- ance is switched on or off. 12.1 Timer Turn the timer clockwise as far as it goes without turning it beyond this point.
-
Page 21: Rotary Spit
Cleaning and servicing en Appliance cover Area Suitable cleaning agents Information Door panels ¡ Hot soapy water Do not use a glass scraper or steel wool. Tip: Remove the door panels in order to clean them thoroughly. → "Appliance door", Page 23 Door cover ¡... - Page 22 en Rails Dry with a soft cloth. Clean using a sponge cloth and hot soapy water in the direction of the finish. Dry with a soft cloth. 13.4 Discoloration of the burners Apply a thin layer of the stainless steel cleaning After long use, the brass burner parts become darker product with a soft cloth.
- Page 23 Appliance door en Pull the entire shelf support downwards first and ATTENTION! then pull it forwards and remove it. Incorrect assembly Never move the rail before the two hooks are se- ▶ cured fully in the upper holes. Otherwise the enamelled coating may be damaged and break. 14.2 Attaching the rails Place the two hooks at the top of the rail into the up- Both hooks must be inserted fully into the upper...
- Page 24 en Appliance door The oven door hinges each have a locking lever. Close the oven door as far as the limit stop. Grip When the locking levers are closed, the oven door the left and right hand sides of the door with both is secured in place.
-
Page 25: Troubleshooting
Troubleshooting en When attaching the oven door, ensure that both 15.4 Fitting the door panes hinges are inserted in the opening direction. Hold the top pane firmly on both sides and insert it at an angle towards the back. The notch on the hinge must engage on both sides. Push the pane into both openings on the underside. - Page 26 en Troubleshooting 16.1 Malfunctions Fault Cause and troubleshooting Burner goes out The control knob was not held down for long enough. straight after being ig- Keep the control knob pressed in for a few seconds after ignition. nited. Push the control knob in firmly. Openings on the burner are soiled.
-
Page 27: Transportation And Disposal
Transportation and disposal en 16.2 Replacing the oven light bulb Requirements ¡ The appliance is disconnected from the power sup- If the lighting in the cooking compartment fails, change ply. the oven lamp. ¡ The cooking compartment has cooled down. Note: Heat-resistant, 25-watt lamps are available from ¡... - Page 28 en How it works The contact details for Customer Service can be found 18.1 Product number (E-Nr.) and production in the enclosed Customer Service directory or on our number (FD) website. You can find the product number (E-Nr.) and the pro- This product contains light sources from energy effi- duction number (FD) on the appliance's rating plate.
-
Page 29: How It Works
How it works en Topic Topic You want your cake to ¡ Only grease the base Determine whether the Push a cocktail stick into rise evenly. of the springform cake cake is ready. the highest point on the tin. cake. If the cocktail stick ¡... - Page 30 en How it works Biscuits Meal Accessory/cookware Shelf posi- Type of Temperature Cooking tion heating in °C time, minutes Biscuits Universal pan 15-20 and Sesame pretzels Universal pan 20-25 and Preheat the appliance for 10 minutes. Never use the rapid heating function for preheating. 19.5 Bread and bread rolls ATTENTION! When the cooking compartment is hot, any water in-...
- Page 31 How it works en ¡ Universal pan: Shelf position 2 19.7 Bakes and gratins You can cut energy use by cooking different items at How well cooked the bake is will depend on the size of the same time. Position baking tins next to one another the ovenware and the thickness of the bake.
- Page 32 en How it works Fish Dish Accessory/cookware Shelf position Type of Cooking time, heating mins Whole fish, x 2, 0.5 kg Wire rack 20-30 Fish pieces, x 8, 0.5 kg Wire rack 20-30 Slide the universal pan underneath the wire rack. Toast Dish Accessory/cookware Shelf position Type of...
-
Page 33: Installation Instructions
Installation instructions en Installation instructions 20 Installation instructions The installation instructions contain instructions for ¡ After converting the appliance from one the gas connection and for the gas conversion's as- gas type to another, the new gas type must sembly . be labelled on the rating plate. - Page 34 en Installation instructions 20.3 Selecting the gas connection side Connection in accordance with EN ISO 228-1 G½ (TS EN ISO 228-1 G½) On many appliances, you can carry out the gas con- Insert the new seal in the connecting piece. Ensure nection on the right- or left-hand side. If necessary, you that the seal is seated correctly.
- Page 35 Installation instructions en Secure the connecting piece using a 24 mm span- Fit the safety gas hose and use a pipe union or ner. Use a 24 mm spanner to place the threaded fit- cable clamp to tighten it securely. ting of the gas pipe or safety gas hose on the con- necting piece and tighten it firmly.
- Page 36 en Installation instructions If your appliance features a wok burner with side ac- Note: The accessories supplied may differ depending on the cess, remove the burner nozzle as shown below. appliance model. ¡ The gas connecting piece may vary depending on the gas type and the country-specific regulations.
- Page 37 Installation instructions en For ovens – converting the appliance from If burner connection screws are present on the hob, remove all of these. natural gas to liquid gas If the appliance was set to natural gas at the time of delivery (factory setting) (NG: G20, G25) and is now being converted to liquid gas for the first time (LPG: G30, G31): Tighten all of the bypass nozzles in the appliance...
- Page 38 en Installation instructions Setting the bypass nozzles Remove the screws on the rear cover and take ‒ the cover off. Use a flat-head screwdriver (no. 2) to set the bypass Remove the two screws on the nozzle holder for the nozzles in accordance with the gas type that is to lower oven burner and carefully take the nozzle be set.
- Page 39 Installation instructions en Apply suitable foam around the gas connection. Press the function control knob for the oven and turn the knob anti-clockwise. Gas therefore comes a If dispersions and bubbles occur on the foamy sur- to the nozzle. face and these indicate that gas is escaping, follow the instructions in the section entitled "What to do if a If dispersions and bubbles occur on the foamy sur- there is a gas leak"...
- Page 40 en Installation instructions Nozzle (mm) Bypass Burner type Power (kW) Min. Max. consump- power (kW) tion G20 (l/h) 1.48/0.70 0.92/0.57 Dual-flame wok burner ≤ 2.6 399 (l/h) 1.47 0.76 Oven burner 399 (l/h) 1.30 Grill burner 295 (l/h) Liquid gas, butane, propane, G30/28-30 mbar Nozzle (mm) Bypass Burner type...
- Page 44 Expert advice for your Bosch home appliances, help with problems or a repair from Bosch experts. Find out everything about the many ways Bosch can support you: www.bosch-home.com/service Contact data of all countries are listed in the attached service directory.
Need help?
Do you have a question about the HGVDF0V52S and is the answer not in the manual?
Questions and answers