Table of Contents
Advertisement
Quick Links
Owner's Manual
Owner's Manual (this document)
Read this first. It explains the basic things you need to know in order to use the RD-08.
PDF Manual (download from the Web)
¹
Parameter Guide
This explains all parameters of the RD-08.
¹
Sound List
This is a list of the sounds built into the RD-08.
¹
MIDI Implementation
This is detailed information about MIDI messages.
Before using this unit, carefully read "USING THE UNIT SAFELY" and "IMPORTANT NOTES" (the leaflet
"USING THE UNIT SAFELY" and the Owner's Manual (p. 25)). After reading, keep the document(s) where
it will be available for immediate reference.
© 2024 Roland Corporation
To obtain the PDF manual
1.
Enter the following URL in your
computer.
http://www.roland.com/manuals/
2.
Choose "RD-08" as the product name.
á
Advertisement
Table of Contents

Related Manuals for Roland RD-08


Summary of Contents for Roland RD-08
- Page 1 © 2024 Roland Corporation Owner’s Manual (this document) Read this first. It explains the basic things you need to know in order to use the RD-08. PDF Manual (download from the Web) To obtain the PDF manual ¹...
-
Page 2: Table Of Contents
Overview of the RD-08 ........ -
Page 3: Introduction
Be careful not to pinch your fingers when setting up the stand. Beware of overturning! To prevent the RD-08 from overturning, do not apply excessive force to it, and never sit or stand on it. Turning the power on and off * The power to this unit will be turned off automatically after a Press the [Ā] (power) button to turn the power on. -
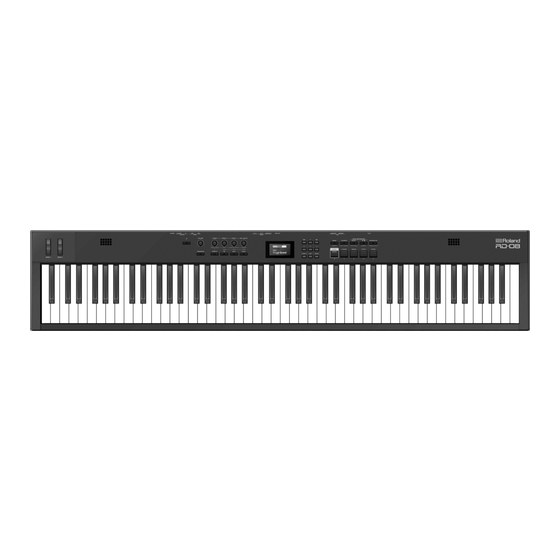
Page 4: Panel Descriptions
Turn this on to adjust the EQ. [VOLUME] knob When the button is on (lit), you can adjust the EQ with the three Adjust the overall volume of the RD-08. knobs listed above (p. 16). LEVEL [LOWER] knob [SPLIT] button Adjusts the volume of the LOWER zone. -
Page 5: List Of Shortcut Keys
Panel descriptions [SHIFT] button List of shortcut keys You can easily call up Edit screens for related parameters by holding down this button while pressing buttons, turning knobs, * “ [A] + [B] ” indicates the operation of “holding down the [A] button or operating other controllers (refer to “List of Shortcut Keys”... -
Page 6: Rear Panel (Connecting The External Equipment)
PEDAL jack (DAMPER/R, FC2/C, FC1/L) You can connect a USB flash drive here. Connecting the pedal switch provided with the RD-08 to the * Never turn off the power or remove the USB flash drives while the DAMPER jack allows you to use the switch as a damper pedal. - Page 7 MEMO ¹ Use the LEVEL [MIC/LINE IN] knob to adjust the volume. ¹ The RD-08 supports dynamic mics. Condenser mics are not supported. ¹ You can apply EQ and reverb to the input audio. Hold down the [SHIFT] button and SONG/METRONOME [SELECT] (MIC/ LINE SETTING) button to access the setting screen.
-
Page 8: Overview Of The
Overview of the RD-08 Basic organization of the RD-08 Controller Section RD-08 can be divided into two sections: a controller section and a sound generator section. This section includes the keyboard, the modulation wheels, the panel knobs, the sliders, and any pedal connected to the rear panel. Actions... -
Page 9: Basic Operation
Overview of the RD-08 Basic operation About the cursor buttons The cursor buttons are used for switching screens, and for moving to an item whose setting you want to change (by moving the cursor). Main screens Scene screen (Basic Screen) The currently selected Scene is displayed (p. -
Page 10: Performance
Here’s how to listen to the demo songs. Now, try performing with the piano. The RD-08 lets you call up the ideal settings for piano performance at any NOTE time simply by pressing a button. You can also select your preferred tones ¹... -
Page 11: Performing With A Variety Of Scenes
While in Split mode, a sound played in the right side is called an “UPPER The RD-08 features three Internal zones (UPPER 1, UPPER 2, and LOWER), part”, and the sound played in the left side is called a “LOWER part”. The and one tone can be assigned to each of these zones. -
Page 12: Changing The Tone For A Zone
Performance Changing the Keyboard’s Split Point Changing the tone for a ZONE You can change the point at which the keyboard is divided (the Split Point) in Split mode. Hold down the [SPLIT] button for several seconds. Current value of the setting is displayed. In the Scene screen, use the cursor buttons to select the zone whose tone you want to change. -
Page 13: Adjusting The Volume Level For Individual Zones
Performance Adjusting the volume level for individual Parameter Value Explanation The key touch settings specified by zones SCENE the Scene are enabled. The key touch settings specified for the system are enabled. You can use the LEVEL [LOWER], [UPPER2], and [UPPER1] knobs to adjust the volume of each zone. -
Page 14: Transposing The Key Of The Keyboard (Transpose)
You can adjust the transpose setting in semitone steps over a range of -5–0–+6 relative to C4. The Transpose has been set at the factory to “0”. The RD-08 can apply a reverb effect to the notes you play on the keyboard. -
Page 15: Adding Breadth To The Sound (Chorus/Delay)
For details, refer to “Making detailed settings for tones” (p. 20). In addition to chorus (p. 15) and reverb (p. 14), the RD-08 lets you Modifying the sound in real time apply a “multi-effect”. -
Page 16: Adjusting The Levels Of Each Frequency Range (Equalizer)
The RD-08 is equipped with an equalizer. You can use the EQ [LOW] knob, [MID] knob, and [HIGH] knob to adjust the level of each frequency range. -
Page 17: Using The Convenient Functions In Performances
Using the convenient functions in performances Registering frequently-used sounds Switching the favorite bank (scenes) to buttons (FAVORITE) Press the [FAVORITE] button, getting the indicator to light. “Favorite” is a function that lets you register frequently-used sounds (Scenes) so that they can be recalled by a single button. The button ([0]–[4]) corresponding to the currently selected bank The Favorite registers the number of the Scene. -
Page 18: Using The Metronome
Playing songs You can copy an audio file (MP3 or WAV) from your computer to a USB flash drive, and perform on the RD-08 while that audio file plays back. Press the [ò] button so it’s lit. Format your USB flash drive on the RD-08. -
Page 19: Assigning The Function Of Each Controller
UPDATE port of the RD-08. MIDI messages are transmitted from these connectors to external MIDI devices. The RD-08’s MIDI OUT connectors are used for sending the performance data of the controller section. Press the [SELECT] button, getting the indicator to light. -
Page 20: Making Detailed Settings For Tones
Making detailed settings for tones The RD-08 has two types of sound-related editing. NOTE When you save, the Scene of the selected save-destination is overwritten, and the previous data is lost. Scene edit Here you can edit parameters for a Scene. These parameters include the To execute, use the cursor [æ] button to select... -
Page 21: Other Functions
Restoring backup data (RESTORE) Here’s how user data that you backed-up on a USB flash drive can be Here you can back up the RD-08’s data to a USB flash drive, or restore data returned to the RD-08. This operation is called “restore”. -
Page 22: Adding The Sounds (Import Tone)
Tones that you download or tones that you exported from another unit can be imported into the RD-08 as added tones. Instead of using the [ENTER] button, you can also use the [INC] [DEC] buttons to assign check marks. To select or de-select all * Here explain how to import user tones. -
Page 23: Returning To The Factory Settings (Factory Reset)
Returning to the factory settings (FACTORY RESET) In the Scene screen, use the cursor buttons to select Here’s how the settings that you edited and saved on the RD-08 can be the zone whose tone you want to change. returned to their factory-set condition. -
Page 24: Formatting A Usb Flash Drive (Format Usb Memory)
(INFORMATION) “OK”, and then press the [ENTER] button. When formatting is complete, the screen indicates “Completed!” Here’s how to view the version of the RD-08’s system program. The folder structure of a USB flash drive Press the [MENU] button. Use the cursor [ä] [å] buttons to select “INFORMATION”, and then press the [ENTER]... -
Page 25: Using The Unit Safely
“License”; You may obtain a copy of the License at https://opensource.org/licenses/BSD-3-Clause ¹ Roland is either a registered trademark or a trademark of Roland Corporation in the United States and/or other countries. ¹ Company names and product names appearing in this document are registered trademarks or trademarks of their respective owners.
Need help?
Do you have a question about the RD-08 and is the answer not in the manual?
Questions and answers