Inseego Wavemaker FW2000e Installation Manual
5g outdoor cpe
Hide thumbs
Also See for Wavemaker FW2000e:
- Installation manual (117 pages) ,
- User manual (68 pages) ,
- Installation manual (56 pages)
Table of Contents
Advertisement
Quick Links
Advertisement
Table of Contents

Related Manuals for Inseego Wavemaker FW2000e


Summary of Contents for Inseego Wavemaker FW2000e
- Page 1 INSTALLATION GUIDE Inseego Wavemaker ™ 5G outdoor CPE FW2000e...
- Page 2 “Trademarks”) used in this user manual are the property of Inseego Corp. or their respective owners. Nothing contained in this user manual should be construed as granting by implication, estoppel, or otherwise, a license or right of use of Inseego Corp.
-
Page 3: Table Of Contents
Step one: check the LED on the device ........................30 Step two: connect a device ............................30 Step three: monitor and manage your FW2000e ....................31 Important information ............................... 32 Inseego Mobile app requirements ..........................33 System requirements ................................ 33 Approved firmware versions ............................33 5G ......................................33 Information about safeguarding devices ........................ -
Page 4: Preparing To Install
Preparing to install Overview Gather tools and materials Install SIM cards Install the PoE cable Review installation considerations and requirements Select a location 5G OUTDOOR CPE FW2000e INSTALLATION GUIDE... -
Page 5: About The Fw2000E
Appropriate equipment to safely install the device at optimum height, e.g. ladder, scissor lift, bucket truck • Round 4.5mm to 6.5mm Cat6A PoE (Power over Ethernet) cable (RJ45 fittings attached) • Smartphone/device for Inseego Mobile™ app with Bluetooth® enabled • SIM card (4FF Nano) • Phillips-head screwdriver •... -
Page 6: Step Two: Install Sim Cards
Step two: install SIM cards • Unscrew the protective shield over the SIM slots using a Phillips-head screwdriver. • Ensure that the SIM card is in the correct orientation before inserting it. The notch side of the SIM card should be inserted first with the metal contacts facing the front of the device. Use the included SIM tool to insert a Nano 4FF SIM card into the appropriate SIM slot. -
Page 7: Step Three: Install The Poe Cable
Step three: install the PoE cable • If necessary, make sure your PoE cable wiring is correct. The recommended PoE cable is Cat6A with T568B on both ends. • Unscrew the PoE gland cap assembly. • Thread the PoE cable through the sealing cap, clip, and body of the gland assembly. 5G OUTDOOR CPE FW2000e INSTALLATION GUIDE... - Page 8 • Insert the connector into the FW2000e and screw the body of the gland to the FW2000e. NOTE: When removing the cable from the FW2000e, use a thin tool such as a flathead screwdriver or pen to release the tab on the Ethernet plug. •...
- Page 9 • Insert the other end of the cable into the PoE injector Data & Power Out port. Plug the PoE injector into an earthed AC outlet. Consider using a surge protector when warranted. NOTE: The PoE injector status LED does not indicate data transmission. The LED is when the when the FW2000e is NOT connected and there is no FW2000e is connected.
-
Page 10: Step Four: Review Installation Considerations And Requirements
Step four: review installation considerations and requirements Electrical considerations • The FW2000e must be three feet from any electrical light or standard electrical panel and at least twenty feet from overhead power lines. • The FW2000e must be bonded to the utility ground. •... -
Page 11: Wall Mounting Considerations
Wall mounting considerations • Mounting on a wall requires a structurally sound surface that can support the weight of the mount and the FW2000e. Recommended surfaces include: wood or wood-composite panel/lap siding, hollow cinder block, poured concrete, and brick. Other material: vinyl/steel/aluminum siding, covered brick, or stucco may require extra support for secure mounting. -
Page 12: Grounding Requirements
Grounding requirements • The FW2000e must be properly bonded to an appropriate location such as the utility ground. • The ground connection must be unique and not shared with another ground run. • It is recommended to use #10 solid copper wire for the ground run from the FW2000e. Ensure the ground run is as short and straight as possible. -
Page 13: Step Five: Select A Location
Contact your service provider to get details on the direction of potential towers relative to the installation site. • Scan the QR code to download the Inseego Mobile app from Apple Store or Google Play Store, or visit https://inseego.com/products/cloud-management/inseego-mobile-app/#available- https://inseego.com/products/cloud-management/inseego-mobile-app/#available-now to download the app. -
Page 14: Installing
Installing J-Arm mount installation Pole mount installation Wall mount installation 5G OUTDOOR CPE FW2000e INSTALLATION GUIDE... - Page 15 Ensure you are using the correct mount for the appropriate installation of the FW2000e to ensure stable and safe long-term operation. Always use appropriate fasteners for the material to which you are attaching. Click on the appropriate mount below to jump instructions for that installation: •...
-
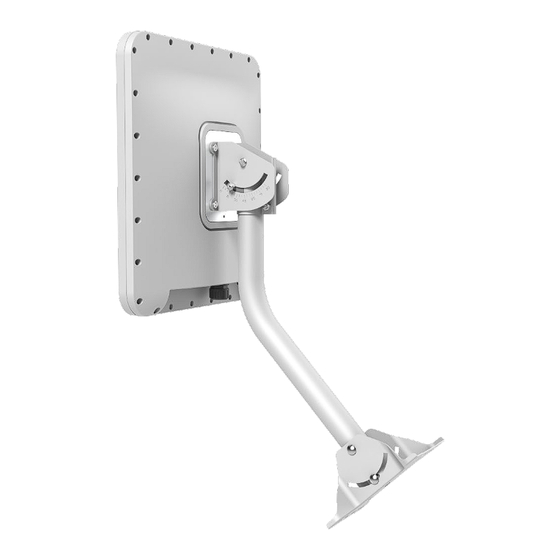
Page 16: J-Arm Mount Installation
J-Arm mount installation 5G OUTDOOR CPE FW2000e INSTALLATION GUIDE... - Page 17 Step one: attach the FW2000e to the device elevation bracket • Attach a ground wire to the back of the device with the ground screw. • Place the M6 external locking washers on the M6 21mm bracket mount bolts. • Mount the device to the device elevation bracket using a hex driver to tighten the bolts to 2.0 Nm (1.48 ft/lb).
- Page 18 Step two: secure the J-arm mount The J-arm mount is adjustable and can be mounted on vertical, horizontal, and slanted exterior surfaces. The mount is attached using the four-roof mount lag screw in the corners of the base. • Pre-drill holes in the surveyed location. •...
- Page 19 Step three: attach the device to the J-arm mount • Attach the device elevation bracket to the J-arm mount and tighten the square neck bolts along the back to 2.0 Nm (1.48 ft/lb) using a ratcheting socket wrench. • Secure the ground wire to an appropriate earth ground. 5G OUTDOOR CPE FW2000e INSTALLATION GUIDE...
- Page 20 Take a ratcheting socket wrench and device/smartphone with the Inseego Mobile app to the FW2000e location. • Use the Inseego Mobile app and the positioning bolts on the device elevation bracket and bottom of the mount to fine tune the horizontal and vertical angle of the FW2000e for the best signal.
-
Page 21: Pole Mount Installation
Pole mount installation Step one: assemble the pole mount bracket NOTE: The pole mount bracket can accommodate a maximum pole diameter of 4 inches. • Attach the azimuth bracket to the zenith bracket using the four hex flange head bolts and PEM nuts. - Page 22 Step two: attach the FW2000e to the pole mount bracket • Attach a ground wire to the back of the device with the ground screw. • Place the M6 external locking washers on the four M6 21mm bracket mount bolts. •...
- Page 23 Step three: secure the device to the pole • Place the device against the pole. • Slide the U-bracket onto the M10 carriage bolts and secure with external locking washers, washers, and M10 hex nuts tightened to 4.0 Nm (2.95 ft/lb). •...
- Page 24 Take a ratcheting socket wrench and device/smartphone with the Inseego Mobile app to the FW2000e location. • Use the Inseego Mobile app and the positioning bolts on the pole mount bracket to fine tune the angle of the FW2000e for the best signal. •...
-
Page 25: Wall Mount Installation
Wall mount installation Step one: assemble the wall mount bracket • Attach the azimuth bracket to the zenith bracket using four flange head bolts and PEM nuts. • Attach the azimuth bracket to the wall bracket using four flange head bolts and PEM nuts. 5G OUTDOOR CPE FW2000e INSTALLATION GUIDE... - Page 26 Step two: attach the FW2000e to the wall mount bracket • Attach a ground wire to the back of the device with the ground screw. • Place the M6 external locking washers on the four M6 21mm bracket mount bolts. •...
- Page 27 Step three: secure the device to the wall • Use four hex flange head lag bolts to attach the wall bracket to the wall. • Secure the ground wire to an appropriate earth ground. 5G OUTDOOR CPE FW2000e INSTALLATION GUIDE...
- Page 28 Take a ratcheting socket wrench and device/smartphone with the Inseego Mobile app to the FW2000e location. • Use the Inseego Mobile app and the positioning bolts on the wall mount bracket to fine tune the horizontal and vertical angle of the FW2000e for the best signal. •...
-
Page 29: Testing The Connection
Testing the connection Check the LED on the device Connect a device Monitor and manage your FW2000e 5G OUTDOOR CPE FW2000e INSTALLATION GUIDE... -
Page 30: Step One: Check The Led On The Device
Step one: check the LED on the device The LED is located in the SIM compartment and is visible through the protective shield. LED Color Operation Meaning Blue* Solid Strong 5G connection (3 – 5 bars) Blinking Weak 5G connection (1 – 2 bars) Green* Solid Strong 4G connection (3 –... -
Page 31: Step Three: Monitor And Manage Your Fw2000E
You can sign up for a free Inseego Connect account at connect.inseego.com. Inseego Mobile app - Use the same mobile app you used to install your FW2000e for routine device monitoring and management. * This local address relies on having IPv6 enabled on your connecting device. -
Page 32: Important Information
Important information Inseego Mobile app requirements System requirements Approved firmware versions Information about safeguarding devices Customer service 5G OUTDOOR CPE FW2000e INSTALLATION GUIDE... -
Page 33: Inseego Mobile App Requirements
Inseego Mobile app requirements Smartphone or device on iOS 13 or above, or Android 9.0 or above. System requirements Any device with Ethernet capability and an internet browser. The FW2000e is compatible with the latest major operating systems and versions of web browsers.
Need help?
Do you have a question about the Wavemaker FW2000e and is the answer not in the manual?
Questions and answers