
Related Manuals for DeerValley DV-1S0019-V3


Summary of Contents for DeerValley DV-1S0019-V3
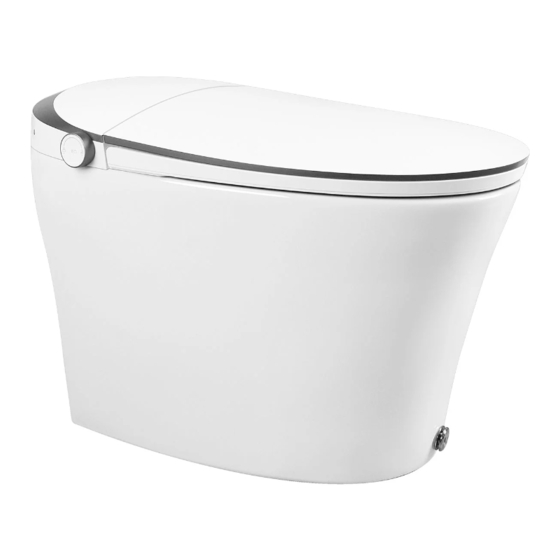
- Page 1 Installation and Owner’s Manual Smart Toilet (DV-1S0019-V3) NOTE: Drawings may not exactly define contour of the product. www.deervalleybath.com | (+1) 312-626-9466 | service@ deervalleybath.com...
- Page 2 (+1) 312-626-9466 service@deervalleybath.com...
-
Page 3: Table Of Contents
Important Safe Guards Explanation of Terms and Symbols WARNING & Attention Product Installation Tools needed Parts included Parts Diagram Smart Toilet overall view Remote Control Precautions before Installation Installation The Smart Toilet Install the Remote Control Install the Remote Control Test before Use Remote Control Operation Knob and Other Operation... -
Page 4: Important Safeguards
Grounding pin *WARNING: Risk of electric shock Connect only to a circuit that is protected by a ground-fault circuit-interrupter (GFCI). AA200 NOTE: Specialized tools may be necessary to install DeerValley Smart Toilet, plumbing not included. (+1) 312-626-9466 www.deervalleybath.com... -
Page 5: Explanation Of Terms And Symbols
Installation and Owner’s Manual 2. Explanation of Terms and Symbols Thank you for purchasing our product. Please read this User Manual before installation and use and save it for future reference. The hazards and warnings listed herein are important to our users' safety. Significant consequences may result from failure to heed warnings. -
Page 6: Warning & Attention
Installation and Owner’s Manual 3. WARNING & Attention WARNING This product needs to be properly grounded. Risk of electric shock. If unsure, contact an electrician. Do not place a lit cigarette along with other burning objects into the unit. Risk of fire. Do not touch, insert or pull out the power plug with a wet hand. - Page 7 Installation and Owner’s Manual WARNING Regularly unplug the unit from power and wipe off any dust on the plug using a dry cloth. Risk of fire. Young children, the aged and the physically disabled should be given supervision by a person responsible for their safety while using the unit. Otherwise, prolonged use may cause low temperature burns.
- Page 8 Installation and Owner’s Manual WARNING Do not disassemble, repair or alter this product on your own. Call in a professional or contact service center for future advise. Risk of fire, electric shock, and/or other accident that may lead to injury. Do not use industrial or polluted water.
- Page 9 Installation and Owner’s Manual BATTERY WARNING Read the following for proper battery usage: so may result in interrupted signals. leakage that may cause fire and / or other damages. If battery is swallowed, contact a doctor immediately. Do not do the following with the batteries: Battery fluids may cause a fire.
- Page 10 Installation and Owner’s Manual ATTENTION To avoid danger from false reset of the thermal breaker, do not supply power through an external switching device, such as a timer, or connect to a circuit that is periodically turned on and off by a general-purpose component.
- Page 11 Installation and Owner’s Manual ATTENTION Unplug the unit when the product is in disuse for a long time. Make sure to shut off the water supply and drain the water inside the product. Risk of fire, leakage and product damage. Do not use old hose to connect to unit.
-
Page 12: Product Installation
Installation and Owner’s Manual 4. Product Installation (1) Tools needed Drill(with 6mm Bit) Raw Tape Utility Knife Marker 23-26mm(Adjustable Wrench) Screwdriver Tape Measure Measuring Cup (2) Parts included Smart Toilet Water Filter Wax Ring Remote Control Assembly Operating Instruction Connector and Other Prints Floor Bolts Please confirm that all articles in the package are complete. -
Page 13: Parts Diagram
Installation and Owner’s Manual 3. Parts Diagram (1) Smart toilet overall view Safety Instruction Cover Power Plug Dryer Nozzle knob (Rear Wash and Front Wash) Seat Sensor Toilet Water Supply Hose Heated Seat Water Filter Toilet Water Supply Angle Valve Foot Touch Intelligent Toilet Water Supply Hose... -
Page 14: Remote Control
Installation and Owner’s Manual (2) Remote Control Flush Dryer Bidet Posterior Stop Dry washed part Flush after use Used for wash of Used for posterior Stop washing with warm air female's wash Stop drying Hot/Cold Nozzle Clean Position Night Light Adjustment of 5 levels Alternate wash with Key for nozzle clean... -
Page 15: Precautions Before Installation
Installation and Owner’s Manual (3) Precautions before Installation Water Pressure Requirements The minimum dynamic operating water pressure is 25 Psi, and the maximum static water pressure is 80 Psi. 16.61" 16" Rough-in 12" NOTE: Drawings may not exactly define contour of the product. (+1) 312-626-9466 -13- www.deervalleybath.com... -
Page 16: Installation The Smart Toilet
Installation and Owner’s Manual 4. Installation The Smart Toilet (1) Draw a cross marker on the drain outlet on the ground. Clean the floor and wipe off any excess dust or dirt . Failure to install on an cleaned surface will affect the quality of installation. - Page 17 Installation and Owner’s Manual (4) Install the wax ring and brass floor bolts onto floor flange. Insert the 2 brass oor bolts at head thru the appropriate slot in the oor ange. Use the provided plastic oor bolt washer to secure the oor bolts on the oor ange. Brass bolts should remain verticle FIGURE 5A.
- Page 18 Installation and Owner’s Manual (7) Connecting the water filter to shut off valve and connecting braided water supply hoses. adapter (supplied). FIGURE 9B FIGURE 9A Connect braided supply tubes to tee valve male connections. - 1/2" seat water supply hose to bottom of tee valve - 1/2"...
- Page 19 Installation and Owner’s Manual (9) Connect the power supply. Connect the ground wire. Power plug into the AC 120V socket. Confirm whether the power is connected. Note: Confirm indicator light on the power plug. A lit-up power indicator light will confirm that the smart toilet is powered-on. When powered on, press and hold the knob for 3 seconds to enter standby mode.
-
Page 20: Install The Remote Control
Installation and Owner’s Manual 5. Install the Remote Control (1) Install the Remote Control 1. According to the location of the screw holes of the remote control holder, drill two holes with a 6mm-diameter drill bit on the wall with a depth greater than 45mm. 2. - Page 21 Installation and Owner’s Manual (2) Test before use Test run (test all function buttons on the remote control and the knob on toilet body.) Is each function of the product normal? Are the rear wash and front wash (including spray strength adjustment, nozzle position adjustment), dryer, air temperature, water temperature and seat temperature, nozzle clean working normally? Seat sensor point...
-
Page 22: Remote Control Operation
Installation and Owner’s Manual 6. Remote Control Operation The product has a built-in sensor in the seat. If user is not seated properly, the rear wash, front wash and dryer functions cannot be operated. Bidet Posterior Press "Bidet" key. Press "Posterior" key. Water flow for wash is jetted out of the front Water flow for wash is jetted out of the front end of the nozzle, and the private part of female is... - Page 23 Installation and Owner’s Manual Night light Hot/Cold Press "Hot/Cold" key, and Hot/Cold Press "Night light" key. function will be enabled or disabled. In wash mode, press Hot/Cold key to realize cold Night light will be on or off. and warm water wash alternately. This function can only be used in wash mode.
- Page 24 Installation and Owner’s Manual Water Temp. 《 Seat Temp. Press "Water Temp." key to adjust Press "Seat Temp." key to adjust water temperature for wash. seat ring temperature. Current temperature level will be displayed Current temperature level will be displayed when the key is pressed for the first time.
- Page 25 Installation and Owner’s Manual Open/close cover Open/close ring 《 《 Press "Open/close cover" key to open/ Press the "Open/Close seat" button- close the seat cover. briefly to open/close the seat ring. When the seat ring and cover are closed, When the seat ring and cover are closed, press the "Open/Close cover"...
-
Page 26: Knob And Other Operation
Installation and Owner’s Manual 7. Knob and other operation Posterior Bidet Powered on and seated, with front wash, Powered on and seated, with front wash, rear wash and dryer functions off. rear wash and dryer functions off. Turn the knob counterclockwise for auto front Turn the knob clockwise for auto rear wash wash with default oscillating function. - Page 27 Installation and Owner’s Manual Deodorization The function will operate automatically. Deodorizing fan automatically turns on after seating and turns off 3 minutes after leaving the seat. Auto Flush Human body leaves the seat sensor area after seating. When the human body leaves the seat after seating, it will automatically flush once.
-
Page 28: Battery Backup Installation
Installation and Owner’s Manual 8. Battery Backup Installation Take out the battery box, pry open the two sides of the clasp with a screwdriver, take out the battery box cover; Align the positive and negative terminals of the battery with the positive and negative terminals inside the battery box, and then install it into the battery box base.Cover the battery compartment cover tightly and lock the clips. -
Page 29: Specifications
Installation and Owner’s Manual 9. Specifications (1) Product specifications Power rating 110V Frequency 60Hz Rated power input 1050W(When inlet water temp in 15 ) Seat and dryer temperature range 39.4 °F~104 °F Source water temperature range 39.4 °F~95 °F Water supply type DN15(G1/2") Minimum pressure 25psi , ensuring a flow of water at least 18L/min... - Page 30 Installation and Owner’s Manual (2) Function Table Function Category Posterior (Rear cleaning) Bidet (Front cleaning) Instant heating Oscillating cleaning Cleaning Hot & cold massage cleaning Water pressure adjustment Water temperature adjustment Nozzle position adjustment Self-cleaning nozzle Antibacterial nozzle & seat cover Instant heating Seat heating Seat ring temperature adjustment...
- Page 31 Installation and Owner’s Manual (3) Regular maintenance Regular maintenance is required to ensure normal use Cut off the power and water supply before maintenance. Direct water wash to the entire product is prohibited. WARNING Do not spray water or During winter season, the water inside may freeze detergents on the toilet, after long periods of storage and non-usage.
- Page 32 Installation and Owner’s Manual (4) Problems & Solutions Problems Problems Check whether the water supply cuts off or not Check whether the angle valve switches off or not Check whether the water filter is blocked or not Check whether the inlet pipe is flexed or not Check whether the water pressure of cleaning switch to low level or not...
- Page 33 Installation and Owner’s Manual Problems Check whether the dryer switches off or not Check whether the heating element of dryer is damaged or not Problems Check whether the temp of toilet seat is on the "off" position or not Problems Check whether there is any water on the remote control or not Problems...
- Page 34 This war- uct shipping/delivery charges may apply and are in DeerVal- ranty is void if the DeerValley is subject to alteration, or if re- ley sole discretion. pairs are attempted by anyone other than an authorized agent of DeerValley.
Need help?
Do you have a question about the DV-1S0019-V3 and is the answer not in the manual?
Questions and answers
Is there a way to turn off the beeping on my bidet?