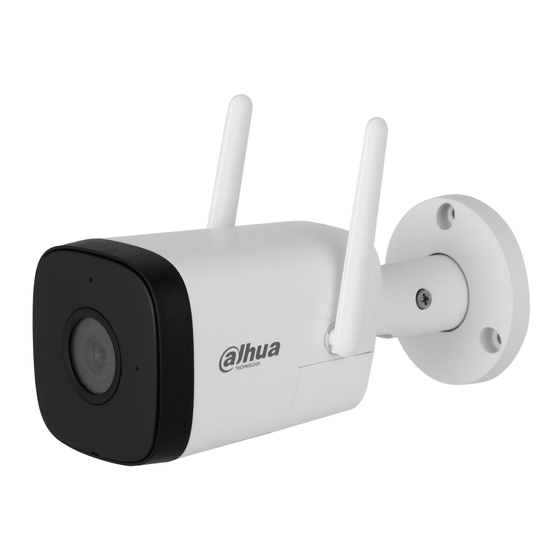
Summary of Contents for Dahua Technology DH-IPC-HFW1230DTP-STW-0360B
- Page 1 Bullet Network Camera Quick Start Guide ZHEJIANG DAHUA VISION TECHNOLOGY CO., LTD. V1.0.1...
-
Page 2: Foreword
Quick Start Guide Foreword General This manual introduces the functions, configuration, general operation, and system maintenance of network camera. Safety Instructions The following signal words might appear in the manual. Signal Words Meaning Indicates a medium or low potential hazard which, if not avoided, could result in slight or moderate injury. - Page 3 Quick Start Guide ● Upgrade the reader software or try other mainstream reader software if the manual (in PDF format) cannot be opened. ● All trademarks, registered trademarks and the company names in the manual are the properties of their respective owners. ●...
-
Page 4: Important Safeguards And Warnings
Quick Start Guide Important Safeguards and Warnings This section introduces content covering the proper handling of the device, hazard prevention, and prevention of property damage. Read carefully before using the device, comply with the guidelines when using it. Transportation Requirements ●... - Page 5 Quick Start Guide against lightning. For outdoor scenarios, strictly comply with the lightning protection regulations. ● Ground the function earthing portion of the device to improve its reliability (certain models are not equipped with earthing holes). The device is a class I electrical appliance. Make sure that the power supply of the device is connected to a power socket with protective earthing.
- Page 6 Quick Start Guide ● Use the accessories suggested by the manufacturer. Installation and maintenance must be performed by qualified professionals. ● Do not directly touch the photosensitive CMOS. Use an air blower to clean the dust or dirt on the lens.
-
Page 7: Table Of Contents
Quick Start Guide Table of Contents Foreword ........................................I Important Safeguards and Warnings ............................III 1 Introduction ......................................1 1.1 Cable ........................................ 1 1.2 LED Status ...................................... 1 2 Network Configuration ..................................3 2.1 Initializing the Camera ................................3 2.2 Changing the Device IP Address ............................4 2.3 Logging in to the Webpage .............................. -
Page 8: Introduction
Quick Start Guide 1 Introduction 1.1 Cable Waterproof all the cable joints with insulating tape and waterproof tape to avoid short circuit and water damage. For the detailed operation, see FAQ manual. Figure 1-1 Cables Table 1-1 Cable information Port Name Description ●... - Page 9 Quick Start Guide LED Status Device Status Slowly flashing red Wi-Fi disconnected. Flashing red and green Updating firmware.
-
Page 10: Network Configuration
Quick Start Guide 2 Network Configuration Device initialization and IP setting can be finished with the ConfigTool or on web page. For more information, see web operation manual. ● Device initialization is available on select models, and it is required at first-time use and after device is being reset. -
Page 11: Changing The Device Ip Address
Quick Start Guide If initialization failed, click to see more information. Click Finish. Step 4 2.2 Changing the Device IP Address ● You can change the IP address of one or more devices at a time. This section is based on changing IP addresses in batches. -
Page 12: Operating With Dmss
Quick Start Guide 3 Operating with DMSS Make sure that there are no obstacles and electromagnetic interference between the device and the router for best possible wireless performance. Step 1 Add the device. 1) Tap + button on the upper-right corner of the DMSS home page to scan the QR code on the camera. - Page 13 Quick Start Guide Figure 3-2 Configure the device hotspot Step 3 Configure the Wi-Fi. Select your Wi-Fi network from SSID list, and then enter the password. Step 4 Configure the device information. 1) Create the device name and password. 2) Set the time zone, and then click Done. Figure 3-3 Configure the device information...
-
Page 14: Installation
Quick Start Guide 4 Installation 4.1 Packing List ● The tool required for the installation such as electric drill is not provided in the package. ● The operation manual and related tool information are contained in the disk or the QR code. Figure 4-1 Packing list 4.2 Dimensions Figure 4-2 Dimensions (mm [inch]) -
Page 15: Installing The Camera
Quick Start Guide 4.3 Installing the Camera 4.3.1 Installation Methods Figure 4-3 Installation methods 4.3.2 Installing the SD Card ● SD card slot is available on select models. ● Disconnect the power before installing or removing the SD card. ● Do not open the cover for a long time to avoid spray in cameras. Press the reset button for 10 seconds to reset the device. -
Page 16: Optional) Installing The Waterproof Connector
Quick Start Guide Figure 4-5 Cable going through the side cable tray Figure 4-6 Cable going through the mounting surface 4.3.4 (Optional) Installing the Waterproof Connector This part is needed only when a waterproof connector comes with the camera and the camera is used outdoors. -
Page 17: Adjusting The Lens Angle
Quick Start Guide Figure 4-7 Install the waterproof connector 4.3.5 Adjusting the Lens Angle Figure 4-8 Adjust the lens angle... - Page 18 ZHEJIANG DAHUA VISION TECHNOLOGY CO., LTD. Quick Start Guide...


Need help?
Do you have a question about the DH-IPC-HFW1230DTP-STW-0360B and is the answer not in the manual?
Questions and answers