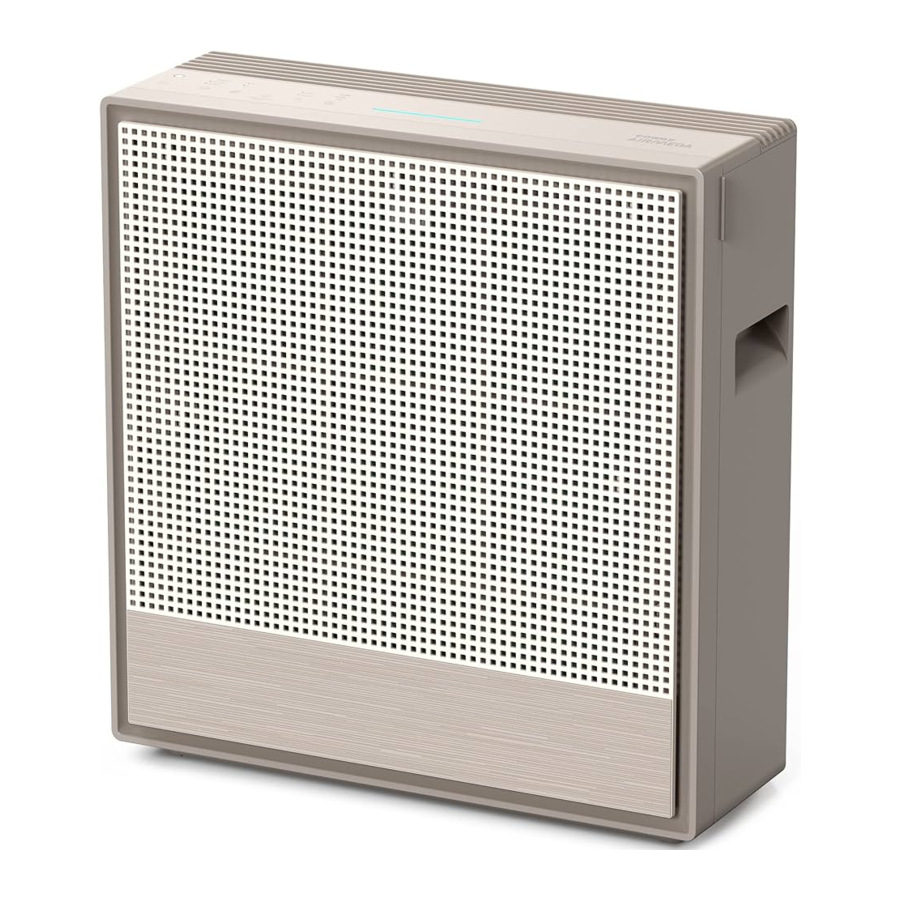
Coway Airmega 250, 250S - Air Purifier Manual
- User manual (92 pages) ,
- Manual (28 pages) ,
- User manual (70 pages)
Advertisement
Feature Highlights
 | Real-time Air Quality Monitoring Airmega's pollution sensor tells you the indoor air quality in real-time. The brightly colored LED bar lets you know if your indoor air is fresh or unhealthy every minute of the day. In addition, the particle sensor classifies the particle size of the PM10 and PM2.5, and the Bar display level of air quality. |
 | Smart Mode With Smart Mode, Airmega adapts to its surroundings. Fan speeds automatically adjust based on the room's air quality and room conditions. |
 | Rapid mode Rapid mode enables faster indoor purification. The product operates at maximum performance until the air quality is reduced to level 1. |
 | Connecting the Air Purifier to the Wi-Fi Network (250S only) Find out the application pairing guide with the link provided below: https://iocare.coway.com/manual/us/air/airmega250s.html |
 | EZ release Coway's unique front open type was applied to the product to remove and insert a frequently cleaned pre-filter easily. |
 | Max2 Filter The Max2 filter (an activated carbon filter plus Green True HEPA filter) reduces more than 99% of volatile organic compounds (VOCs), odors such as NH 3, CH 3 CHO, CH 3 COOH. It also captures and reduces up to 99.97% of airborne particles in the air such as pollen, pollution, and other allergens * Filter lifetime: Approximately 12 months(based on daily 8 hours usage at max speed) |
 | Filter Lifetime Notifications With status alerts for the Max2 filter and the Pre-filter, you'll know when it's time to replace them. And because the Airmega gauges how much air has traveled through it, you can be sure the notifications are accurate. |
Quick Start Guide
Before operating the product, you must remove the plastic wrapping of the inserted Max2 filter. For details.
Do not operate the product until completing these steps first.

Connecting the Air Purifier to the Wi-Fi Network
Find out the application pairing guide with the link provided below:
https://iocare.coway.com/manual/us/air/airmega250s.html
Checking the product
Before installing the air purifier, make sure all of the components are present. If any items are missing or damaged, contact the customer service center.

* These are installed in the main unit.
Pre-filter
Captures large particles like hair, fur, and dust by micro mesh.

Max2 filter (Activated Carbon + Green True HEPA)
Captures and reduces more than 99% of VOCs and odors such as NH 3, CH 3 CHO, CH 3 COOH. It also captures and reduces up to 99.97% of airborne particles, allergens, and contaminants down to 0.3 microns in size.

PREPARATION
Parts Diagram
Check the parts of the product (exterior in the front and top view and control panel) and how they function.
Exterior
Check the parts and functions of the exterior of the product.


Control Panel (250S)

Control Panel (250)

button/indicator
 | 1 Power button Use the button to turn the product on and off.
|  | 2 Mode button / indicator Press the mode button to select the smart mode → rapid mode → sleep mode. |
 | 3 Speed button / indicator Press the speed button to select the level 1 → level 2 → level 3. The indicator is turned on when the speed level 1/level 2/level 3 is selected. |  | 4 Light button Use this button to turn on and off the indicator and air quality indicator. If you press the [Light] button while all indicators and the air quality indicator are turned on, you can turn on and off the indicators in the following order: Air quality indicator off → all indicators off → all indicators on. |
 | 5 Filter reset button / indicator When the filter replacement indicator is turned on, press the corresponding button for more than 3 seconds after cleaning and replacing the filter. The indicator stays on during the filter cleaning/replacement cycle. When the cleaning cycle or life becomes less than 2%, the corresponding indicator will emit an orange color light.
| ||
 | 6 Wi-Fi button / indicator (Only 250S) Touch the Wi-Fi button to connect to a Wi-Fi network. When connected to Wi-Fi, the status indicator's light will turn on. |  | 6 Timer button / indicator (Only 250) Press the timer button to set the timer. |
 | 7 Light sensor This sensor detects light around the product. |  | 8 Air quality indicator This indicator displays the indoor air quality in LED colors. Good (blue) → Moderate (green) → Unhealthy (yellow) → Very unhealthy (Red) |
INSTALLATION
Setting Up the Product
Before using the product, you must remove the plastic wrapping of the inserted Max2 filter.

Make sure that the power cord is unplugged before opening the covers.
- Open the cover located at the front of the product.
Cover![]() Pre-filter
Pre-filter ![]() Max2 filter
Max2 filter

- Remove the plastic wrapping for Max2 filter.
Discard the plastic wrapping for Max2 filter.

![]()
- When removing the plastic wrapping from the filter, be careful not to damage the surface of filter.
- Do not allow children to play with the plastic wrapping.
- Return the filter and cover in reverse order at the first step.
Max2 filter![]() Pre-filter
Pre-filter ![]() Cover
Cover

NOTE- Place the Max2 filter into the filter case with the green side facing the product. Reversed placement may affect the filter lifetime.
- The product will not turn on If the cover is installed in correctly.


Connecting the Power and Turning On the Air Purifier
When your filters are prepared, connect the power and turn on the air purifier.
This product is for 120 V~ 60 Hz use only. Make sure your power supply meets these requirements.
- Insert the power plug into a power outlet.
The indicators on the air purifier will blink.

- Touch the [Power] button to turn the air purifier on.
You will hear a chime sound when the air purifier starts to operate.


- Do not touch the control panel while connecting the power.
- Buttons may not work for a certain period of time.
- If the buttons do not work, unplug the power cord for about 10 minutes to discharge, and then connect it again.
Connecting the Air Purifier to the Wi-Fi Network (250S Only)
Find out the application pairing guide with the link provided below:
https://iocare.coway.com/manual/us/air/airmega250s.html
OPERATION
Smart Mode - Auto
If the product is set to Smart mode, it automatically adjusts the air speed according to the current air quality around the product. The air speed is adjusted as shown in the table below:
| Air Quality | Good | Moderate/unhealthy | Very unhealthy |
| Air Speed | Level 1 | Level 2 | Level 3 |
250S/250
Press the [Mode] button to select the smart mode.

Smart Mode - Sleep
If the product is set to Smart mode, Sleep mode is activated automatically, so that it can reduce noise and power consumption. It activates when the room is dark and the air quality is Good(Level 1) for 3 minutes.
If the light sensor detects light for 5 minutes or longer and/or if the air quality level in the room is Moderate(Level 2) or worse. The Smart mode will activate automatically.
250S/250
Press the [Mode] button to select the sleep mode. This mode minimizes the speed during operation for a quiet and pleasant environment.

Smart Mode - ECO
When set to Smart Mode, if the pollution level remains Good(Level 1) for more than 10 minutes, the fan stops automatically to conserve energy. If the product detects air pollution, the fan will automatically restart again. If the pollution level remains Good(Level 1) for more than 10 minutes in smart mode, the fan stops automatically to save energy. If the product detects air pollution, the fan will automatically restart. Also, if the ECO mode maintains for 30 minutes, the fan will restart as well. If the pollution level remains Good for more than 10 minutes after restarting, the ECO mode will be activated again.

Rapid Mode
Press the [Mode] button to select rapid mode. When the air quality is maintained at level 1 for more than 5 minutes, it is switched to the smart mode. When the product continues to operate for more than a maximum of 60 minutes, it is switched to the smart mode.
- The maximum fan speed in the rapid mode is the same as level 3.
250S/250

Setting the Timer
You can set the product to automatically turn off after an hour, 4 hours, or 8 hours. Use this feature to save energy when you leave home or go to bed.
250S
For 250S users, you can set the timer and scheduler using Airmega application.

250
Touch the [Timer] button until the indicator light displays the desired time.

Checking the Air Quality
You can easily check the current air quality around the product using the air quality indicator on the front of the product.
NOTE
For 250S/250 users, you can also check the current air quality in the smart phone application.
Air quality indicator
This indicator displays the indoor air quality in LED colors. Good (blue) → Moderate (green) → Unhealthy (yellow) → Very unhealthy (Red)

Adjusting the Sensor Sensitivity
You can adjust the pollution sensor's sensitivity.
- While the product is operating, press the [Mode] button and the [Speed] button at the same time for more than 2 seconds. The speed indicator blinks to display the current sensor sensitivity level.

- Initial sensor sensitivity is at the normal level.
- Press the [Mode] button to adjust it to the desired sensitivity. The mode indicator blinks as shown below once sensor sensitivity has been selected.
![]()
1 2 3 Less Sensitivity Sensitive Normal Less sensitive 
- Press the [Mode] button and the [Speed] button at the same time for more than about 2 seconds, the selected sensitivity will be inputted and the product will start operating normally.

- If the [Speed] button are not pressed for 10 seconds, the selected sensitivity of the sensor is automatically entered.


Cover Open Notification Display
When opening the cover while using the product
When the front cover is detected open for more than 2 seconds, all indicators will turn off and the product stops all operation. When the front cover is detected closed for more than 1 second, the product returns to the previous operation mode.


Reset The User-Selected Filter Replacement Cycle
This instruction is a guide for the next filter replacement maintenance. The filter replacement and cleaning cycle selected by the user when the user replaces or cleans a filter by themselves before the filter replacement notification is displayed.
- Press the [Filter reset] button and [Light] button at the same time for more than 2 seconds.

- The pre-filter indicator will start blinking. Then press the [Filter reset] button to select the filter that needs to be replaced or cleaned. Also, if you press the [Filter reset] button for more than 2 seconds, the selected filter option will reset.

- A filter is selected in the following order. Pre-filter → max2 filter → pre-filter & max2 filter → pre-filter
- If you do not reset the filter and press the [Light] button and the [Filter reset] button again at the same time for about more than 2 seconds, or if you do not press the [Mode] button or the [Filter reset] button for 10 seconds, the filter is automatically canceled.


NOTE
- If you replaced or managed the filter before a filter replacement alarm is displayed, reset the filter replacement cycle using the user-selected filter replacement cycle reset function.
- Adjusting the sensitivity of air quality sensor and resetting the user-selected filter replacement cycle have the same entering and canceling method.
MAINTENANCE
Filter Maintenance and Cleaning Parts
Clean the Pre-filter and each part of the main unit and replace the Max2 filter regularly for optimum performance. The following tables show the recommended maintenance cycle for filters and the cleaning cycle for each part.
| Maintenance Filter | Maintenance Cycle |
| Pre-filter* | Cleaning the filters whenever the filter indicator is on** |
| Max2 filter* | Replacing the filters whenever the filter indicator is on*** |
* After cleaning or replacing the filters, make sure to reset the filter indicator on the control panel.
** 250S: Approximately 2 weeks (based on daily 8 hours usage at max speed) The filter cleaning cycle can be adjustable in the smartphone application.
250: Approximately 2 weeks (based on daily 8 hours usage at max speed)
*** Approximately 12 months (based on daily 8 hours usage at max speed)
The filter lifetime may differ depending on the real running time of the product and the fan speed. The figures above are evaluated on a general basis.
| Cleaning Parts | Cleaning Cycle |
| Front cover | Every 2 months (recommended) |
| Air outlet | |
| Pollution sensor |
- Be sure to turn off the power and disconnect the power plug before cleaning each part or replacing the Max2 filter.
- Do not use detergents that contain solvents, thinners, bleach, chlorine, or abrasives.
- Do not immerse the product in water or spray the product with water.
- If you use water to clean the pre-filter, dry the pre-filter in the shade before re-installing it.
NOTE
- If you are using the product in a polluted environment, clean each part or replace the Max2 filter more frequently than the recommended cycle.
- Using a Airmega genuine filter is recommended for optimum performance.
- The Max2 filter are not reusable. Do not try to clean them with water. Always replace them with a new one.
- When disposing of the old Max2 filter, follow your local regulations.
Exterior

Wipe the exterior of the product with a soft dry cloth.
When the exterior is dirty, use a slightly damp cloth.
Pre-filter
When the [Pre Wash] indicator is on, clean your pre-filter on front. Follow these instructions below to clean the
- Open the front cover by pulling out the top part of it.

- Pull the pre-filter upward to take it out.
- Be careful not to let dust fall off when removing.
- Remove dust with a vacuum cleaner or water depending on the degree of pollution.

- Be careful not to let dust fall inside the product when cleaning.
![]()
If you use water to clean the pre-filter, dry the pre-filter in the shade before re-installing it.
- Be careful not to let dust fall inside the product when cleaning.
- Push in the dried pre-filter inside the product all the way to install. Close the side cover again.

- When assembling the pre-filter, press the hooks on both sides completely.
- And touch and hold the [Filter reset] button.


Max2 filter
How to replace the Max2 Filter
Touch and hold the [Filter reset] button.
Front Covers
Clean the front covers frequently for optimum performance. Follow these instructions below to clean the covers.
- Remove the front covers.

- Lift and pull the upper part of front cover to remove it.
- Remove dust with a soft, dry cloth or brush.

- Fit the cover to the grooves at the bottom of the product, and push the cover into place.
NOTE
The product will not turn on if the right and left covers are installed incorrectly.


Air outlet
Cleaning the detachable air outlet and grille
- Lift up the detachable air outlet grille mounted on top of the air outlet.

- Clean the grill and the air outlet using a soft brush or vacuum cleaner.

- Do not let dusts drop into the air outlet when you clean it.


Pollution Sensor
Clean the pollution sensor approximately every 2 months for optimum performance. Follow these instructions below to clean it.
- Use a soft brush or vacuum cleaner to clean the air inlet and the air outlet of the air quality sensor.

- Be careful not to let dust fall inside the product when cleaning.
- Open the air quality sensor cover on the right-hand side of the product. (by using the hole on the air quality sensor cover.)

- Wet a cotton swab lightly and clean the lens, dust inlet, and dust outlet. Clean them with a dry cotton swab to remove the remaining moisture.
NOTE
Without regular cleaning, the performance of the air quality sensor deteriorates.
When using the product in a dusty environment, clean the sensor more often.


Check Wi-Fi Connection And Status
Connecting the air purifier to the Wi-Fi network
Find the application pairing guide with the link provided below:
https://iocare.coway.com/manual/us/air/airmega250s.html

If displayed as below when connecting to Wi-Fi, please refer to the following.
- When the wireless router connection is denied, the indicators on smart, sleep, and speed level 1 will blink.

- When the wireless router search continues for 1 minute (TIME OUT status), the indicators on smart, speed level 1, and speed level 3 will blink.

- If there is no response from the wireless router, the indicators on smart, speed level 1, and speed level 2 will blink.


If displayed as below when connecting to the Wi-Fi, please refer to the following.
NOTE
- Check the power of the wireless router.
- Check that you can connect to the Internet through the Wi-Fi of the wireless router.
- If the wireless router operates properly, the product automatically connects to the Wi-Fi to which the product has been previously connected.
- If the product does not connect automatically after a certain period of time, use the IoCare app to reconnect.
- If the product has never been connected to Wi-Fi, or if the Wi-Fi name/password has been changed, please connect through the IoCare app.
- If the connection is lost or the connection is terminated when there is no server response, the indicators in smart, sleep, and speed level 1/2/3 blink.


This is a network or server error that may occur temporarily. After a certain period of time, the server is connected correctly (automatic reconnection). If the above phenomenon persists even after a certain period of time, please follow the instructions below.
NOTE
- Please check the Internet is available with the corresponding Wi-Fi and network first. (In case of network failure, it is difficult to provide the time required to connect to the server.)
- If the above message continues to appear on the product while the Wi-Fi LED blinks, please reconnect through the IoCare app.
- If the problem persists after this, please contact customer service (1-800-285-0982). Abnormal termination (upon temporary power failure or reconnecting immediately after removing the power plug) errors may occur when reconnected with the server. In this case, please reconnect in 5 minutes after removing the power cord. 5 If the wireless router's encryption information is inconsistent, the indicators in smart, sleep, speed 1, and speed 3 will blink. You need to check the wireless router's password. Check the password and retry the Wi-Fi connection.
- If the wireless router's encryption information is inconsistent, the indicators in smart, sleep, speed 1, and speed 3 will blink. You need to check the wireless router's password. Check the password and retry the Wi-Fi connection.


Troubleshooting
Before contacting the customer service center, please attempt the following solutions. All other servicing should be done by an Airmega authorized service center.
No air comes out from the air outlet
| Check | Is the power plug connected? |
| Solution | Connect the power plug to an AC power outlet (120 V~ 60 Hz). |
| Check | Are all the indicators turned off? |
| Solution | Touch the [Power] button to turn on the product. |
| Check | Has power failure occurred? |
| Solution | Wait until the power is restored, and then try to use the product. |
Air speed from the air outlet is significantly low
| Check | Have the filter cleaning and replacement cycle passed? |
| Solution | Confirm the filter cleaning and replacement cycle, and then clean or replace the filter if necessary. (P. 19, P. 20) |
The pollution level does not change
| Check | Is the pollution sensor's lens polluted? |
| Solution | Clean the pollution sensor. (P. 22) |
| Check 1 | Does the pollution level remain 'Very unhealthy' after operating the air purifier for more than two hours? |
| Check 2 | Does the pollution level remain 'Good' for more than an hour when operating the air purifier in a polluted environment? |
| Solution | Adjust the pollution sensor's sensitivity. (P. 16) |
A bad smell comes out from the air outlet
| Check | Have the filter cleaning and replacement cycle passed? |
| Solution | Confirm the filter cleaning and replacement cycle, and then clean or replace the filter if necessary. (P. 19, P. 20) |
* Regarding Airmega app troubleshooting, please visit www.cowaymega.com for more information.
Specification
The specification is subject to minor changes to improve the product performance.
| Item | Specification | |
| Model Name | Airmega 250S (AP-1720G) | Airmega 250 (AP-1720H) |
| Coverage | 930 ft2 (86 ㎡)* 465 ft2 (43 ㎡)** | |
| Filter | Washable Pre‐Filter + Max2 filter set (Activated Carbon + Green True HEPA) | |
| Rated Voltage | 120 V~ 60 Hz | |
| Power | 64 W | |
| Weight | 20.5 lb (9.3 kg) | |
| Size (WxDxH) | 18.5 x 8.03 x 19.7 inch (47.0 x 20.4 x 50.1 cm) | |
The coverage area of the air purifier is based on an area where the air cleaner can make two air changes per hour (ACPH). An air change per hour translates to how many times an air purifier can clean an area, assuming the height of a ceiling to be 8 ft, in one hour. Therefore * means two air changes per hour means that the cleaner can clean the area once every 30 minutes. And ** means air changes per hour means that the air purifier can clean the area once every 15 minutes.
The energy efficiency of this ENERGY STAR certified model is measured based on a ratio between the model's CADR for Smoke and the electrical energy it consumes, or CADR/Watt. (250 model only)
BEFORE USING THE PRODUCT
Symbols Used in This Manual
The following symbols are used in this manual to explain procedures, restrictions, handling precautions, and instructions that should be observed for safety.

Warning indicates a potentially hazardous situation that may result in death or severe injury to the user or others.
Caution indicates a potentially hazardous situation that may result in injury to the user or others, or the loss of property.
NOTE
Note indicates useful tips or additional information for procedures and product use.
[ ]
This square bracket represents control buttons and indicators on the product.
e.g., [Power]
Safety Instructions
Read and follow all the safety tips and warnings before using the product.
- Do not exceed the voltage and power rating of the power outlet or connection device. This may generate excessive heat and cause electric shock or fire.
- Only use the appropriate type of electric socket for the product. Connecting the product to an incorrect socket may result in damage.
- Do not immerse the product or any of its parts in water. Operate the product only after a qualified technical examines and replaces the parts that were under water.
- Do not touch the power plug with wet hands.
- If the electric outlet is wet, do not connect the power plug of the product. Wait till the electric outlet dries completely before use.
- Do not operate the product if the motor fan fails to operate or is damaged.
- Disconnect the power plug from the electric outlet if strange sounds, smells, or smoke come from the product. Contact the customer service center immediately for instructions.
- Disconnect the power plug from the electric outlet when the product is not in use and before cleaning, inspecting, or replacing parts.
- Use a dedicated electric outlet for the product. Do not connect the product to a power strip that has connections to several other products.
- Do not operate the product if the power plug or cords are damaged.
- Do not forcibly bend, twist, pinch, or damage the power cord.
- Do not force the power plug into an incorrect electric outlet or into a loose electric outlet. Contact a qualified technician to install a proper electric outlet.
- A damaged power plug or cord must be replaced by the manufacturer or a qualified technician
- Remove the power plug from the electric outlet by grasping the power plug and pulling it gently. Never pull the cord to remove the power plug.
READ AND SAVE THESE INSTRUCTIONS
Read and follow all the safety tips and warnings before using the product.
- Keep the electric cord away from heat sources.
- Do not repair the product unless this manual recommends it. Doing so will void your warranty. All repair work must be carried out by a qualified technician.
- This product has a polarized plug (one blade is wider than the other). To reduce the risk of electric shock, this plug is intended to fit in a polarized outlet only one way. If the plug does not fit fully in the outlet, reverse the plug. If it still does not fit, contact a qualified electrician. Do not attempt to defeat this safety feature.
- Do not use this product in industrial areas or factories where oil, grease, or dust particles may be present. This product is for household use only.
- Do not change the filter while the product is operating.
- This product should not be used by children under 8 without supervision.
- This product should not be used by persons with reduced physical, sensory, or mental capabilities or lack of experience without supervision or instruction concerning to the use of the product in a safe way and understand the hazards involved.
- Do not allow children to play with the plastic wrapping and product.
- Do not use this product with any solid-state speed control device, as it may result in electric shock or fire.
- Do not use an adapter or extension cord, as it may cause fire, shock, or personal injury.
- Do not use attachments or filters not recommended by the manufacturer.
- Exercise caution while removing the components from the product. Ensure that your body parts do not get stuck or scratched while servicing the product.
- Do not insert any objects or finger into the openings of the product. If any objects fall into the openings, immediately turn off the product and unplug the power plug. Contact a qualified technician or the manufacturer to remove the object.
- Do not wash or reuse the Max2 filter.
- Do not block the air outlet of the product. Doing so may decrease the efficiency of the product and increase the risk of injury.
Always turn off the product and unplug the power plug before accessing the components inside the product. - Do not place the product near a humidifier or in humid areas, such as bathrooms or laundry rooms, where the product may come into contact with water.
- Do not place the product near flammable gases, cigarettes, incense, and other combustible materials.
- Do not place the product on a bed or against soft objects, such as curtains.
- Do not clean the product using detergents, paint thinner, or other household solvents.
- Do not spray insecticides or other flammable materials near the product.
- This product is for household use as described in this manual. Using it in an industrial environment or any other place not recommended by the manufacturer and may result in electric shock, fire, and injury to person.
- Do not place anything on top of the product.
- Do not run the power cord under carpets or cover it with rugs.
- Change the filters at the recommended intervals so that excess dust does not accumulate.
- Do not place the product where the both sides of product are blocked.
- Do not place the product in direct sunlight.
- Do not place the product next to or on windows.
- Place the product on a firm, flat, and dry surface that provides sufficient air circulation.
- Keep the product and its cord out of way, where it cannot be stepped on or tripped over.
- The end user has to be informed to keep at least 20 cm separation with the antenna while this end product is installed and operated.
- Operation is subject to the following two conditions:
- this device may not cause harmful interference and
- this device must accept any interference received, including interference that may cause undesired operation.
READ AND SAVE THESE INSTRUCTIONS
Documents / Resources
References
Download manual
Here you can download full pdf version of manual, it may contain additional safety instructions, warranty information, FCC rules, etc.
Advertisement


Need help?
Do you have a question about the Airmega 250 and is the answer not in the manual?
Questions and answers