Table of Contents
Advertisement
1. PRECAUTIONS FOR USE .................................................................................................................... 4
2. RECYCLING INSTRUCTIONS - OUR ENVIRONMENT POLICY ......................................................... 5
3. SAFETY PRECAUTIONS ...................................................................................................................... 6
4. INSTALLING THE APPLIANCE ............................................................................................................ 7
4.1 Wall fixing ........................................................................................................................................................ 7
4.2 Electrical connection ....................................................................................................................................... 8
4.3 Room ventilation ............................................................................................................................................. 9
4.4 Combustion gas discharge .............................................................................................................................. 9
4.5 Connection to gas ........................................................................................................................................... 9
5. ADAPTATION TO DIFFERENT TYPES OF GAS ............................................................................... 10
5.1 Replacement of the cooking hob nozzles ..................................................................................................... 10
5.3 Arrangement of the burners on the cooking hob ........................................................................................... 11
5.2 Burner and nozzle characteristics table ........................................................................................................ 11
6. FINAL OPERATIONS .......................................................................................................................... 12
6.1 Regulation of the hob burner minimum level for natural gas ......................................................................... 12
6.2 Regulation of the hob burner minimum level for LPG ................................................................................... 12
6.3 Positioning and levelling the appliance ......................................................................................................... 12
7. GETTING TO KNOW YOUR COOKER .............................................................................................. 13
8. BEFORE INSTALLATION ................................................................................................................... 13
9. DESCRIPTION OF THE CONTROLS ON THE FRONT PANEL ........................................................ 14
10. USING THE COOKING HOB ............................................................................................................ 17
10.1 Lighting the hob burners ............................................................................................................................. 17
10.2 Practical hints for using the hob burners ..................................................................................................... 17
10.3 Elecrtic plate ................................................................................................................................................ 17
10.4 Pan diameters ............................................................................................................................................. 17
11. OVEN CAVITY .................................................................................................................................. 18
12. USING THE OVEN ............................................................................................................................ 19
12.1 Warnings and general advice ...................................................................................................................... 19
12.2 Cooling system ............................................................................................................................................ 19
12.3 Using the electric grill (auxiliary oven) ......................................................................................................... 19
12.4 Using the grill (static and multifunction oven) .............................................................................................. 20
12.5 Attention ...................................................................................................................................................... 20
12.6 Storage compartment .................................................................................................................................. 20
12.7 Description of the selectable functions ........................................................................................................ 21
13. AVAILABLE ACCESSORIES ............................................................................................................ 22
14. ELECTRONIC PROGRAMMER ....................................................................................................... 23
14.1 Setting the time ........................................................................................................................................... 23
14.2 Semiautomatic cooking ............................................................................................................................... 23
14.3 Automatic cooking ....................................................................................................................................... 23
14.4 End of cooking ............................................................................................................................................ 24
14.5 Timer ........................................................................................................................................................... 24
14.6 Adjusting the buzzer volume ....................................................................................................................... 24
14.7 Stopping the buzzer .................................................................................................................................... 24
14.8 Deleting the data set ................................................................................................................................... 24
14.9 Modifying the data set ................................................................................................................................. 24
15. CLEANING AND MAINTENANCE .................................................................................................... 25
15.1 Cleaning stainless steel .............................................................................................................................. 25
15.2 Ordinary daily cleaning ................................................................................................................................ 25
15.3 Food stains or residues ............................................................................................................................... 25
15.4 Cleaning the oven ....................................................................................................................................... 25
15.5 Cleaning the door glazing ........................................................................................................................... 25
16. EXTRAORDINARY MAINTENANCE ................................................................................................ 26
16.1 Changing the light bulb ............................................................................................................................... 26
16.2 Removing the door (auxiliary and static oven) ............................................................................................ 26
16.3 Removing the door (multifunction oven) ..................................................................................................... 27
16.4 Removing the door seal .............................................................................................................................. 27
INSTRUCTIONS FOR THE USER: these contain user advice, description of the commands and the
correct procedures for cleaning and maintenance of the appliance.
INSTRUCTIONS FOR THE INSTALLER: these instructions are intended for the qualified technician
who must perform the installation, put it into operation and test the appliance.
Contents
3
Advertisement
Table of Contents

Subscribe to Our Youtube Channel
Related Manuals for Smeg SY4110


Summary of Contents for Smeg SY4110
-
Page 1: Table Of Contents
16.3 Removing the door (multifunction oven) ..................... 27 16.4 Removing the door seal ..........................27 INSTRUCTIONS FOR THE USER: these contain user advice, description of the commands and the correct procedures for cleaning and maintenance of the appliance. INSTRUCTIONS FOR THE INSTALLER: these instructions are intended for the qualified technician... -
Page 2: Precautions For Use
Precautions for use 1. PRECAUTIONS FOR USE THIS MANUAL IS AN INTEGRAL PART OF THE APPLIANCE. THEREFORE IT MUST BE KEPT IN ITS ENTIRETY AND IN AN ACCESSIBLE PLACE FOR THE WHOLE WORKING LIFE OF THE COOKER. WE URGE YOU TO READ THIS MANUAL AND ALL THE INFORMATION IT CONTAINS CAREFULLY BEFORE USING THE APPLIANCE. -
Page 3: Recycling Instructions - Our Environment Policy
Before disposing of your appliance it is important to remove doors and leave shelves in position as for use, to ensure that children cannot accidentally become trapped inside during play. It is also necessary... -
Page 4: Safety Precautions
THE APPLIANCE IS BUILT TO PERFORM THE FOLLOWING FUNCTION: COOKING AND HEATING- UP OF FOOD; ALL OTHER USES ARE CONSIDERED IMPROPER. AS SOON AS YOU NOTICE A FRACTURE OR A CRACK ON THE SURFACE OF THE GLASS HOB, SWITCH THE APPLIANCE OFF AND CONTACT AN AUTHORISED TECHNICAL ASSISTANCE... -
Page 5: Installing The Appliance
The appliance must be installed by a qualified engineer in compliance with the relevant regulations. Depending on the type of installation, it belong to class 1 (Fig. A) or class 2 - sub-class 1 (Fig.B-C). It may be installed against walls one of which must be higher than the worktop surface and at least 50 mm from the side of the appliance, as shown in the installation class drawings A and B. -
Page 6: Electrical Connection
Connection to the supply may be fixed or with plug and socket. In the latter case the plug and socket must be suitable for the cable employed and conform with the regulations in force. Regardless of the type of connection, it is compulsory that the appliance be earthed. -
Page 7: Room Ventilation
• the hose is not in contact with sharp objects or sharp corners; • if the hose is not perfectly airtight and leaks gas, do not try and repair it: replace it with a new hose; • verify that the hose is not beyond its life cycle (serigraphed on the hose itself). -
Page 8: Adaptation To Different Types Of Gas
The appliance is preset for natural gas G20 (2H) at a pressure of 20 mbar. In the case of operation with other types of gas the burner nozzles must be changed and the minimum flame adjusted on the gas taps. -
Page 9: Arrangement Of The Burners On The Cooking Hob
72 (X) Semi rapid 97 (Z) Rapid 115 (Y) Ultra-rapid 135 (K) 1600 5.3 Arrangement of the burners on the cooking hob BURNERS min. and max. Ø (in cm) 1. Auxiliary 12 - 14 2. Semi rapid 16 - 24 3. -
Page 10: Final Operations
Repeat the operation on all the gas taps. For models with valves, keep the knob at minimum level for a few seconds to keep the flame lit and to activate the safety device. -
Page 11: Getting To Know Your Cooker
“15. CLEANING AND MAINTENANCE”. Before using the oven and the grill for the first time, pre-heat to the maximum temperature setting long enough to burn any manufacturing oily residues which could give the food a bad smell. -
Page 12: Description Of The Controls On The Front Panel
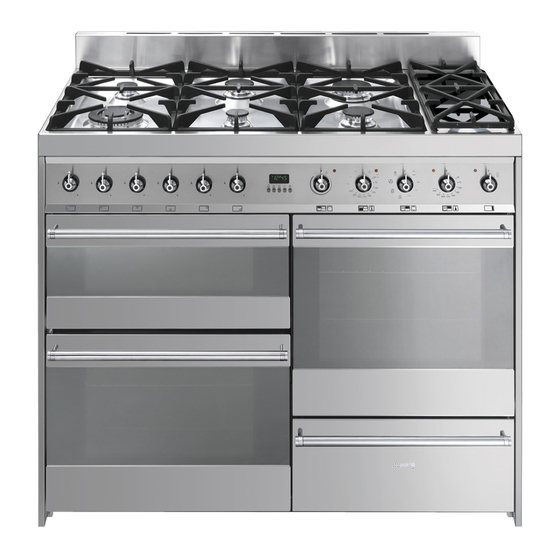
Instructions for the User 9. DESCRIPTION OF THE CONTROLS ON THE FRONT PANEL All the control and indicator lights are clearly in view on the front panel. The symbols used are described in the table below. COOKING HOB CONTROLS FRONT LEFT-HAND BURNER... - Page 13 To light the flame, press the knob and turn it counterclockwise to the minimum flame symbol To adjust the flame, turn the knob to the zone between the maximum ( ) and the minimum ( ) settings. To turn off the burner, turn the knob to the position.
- Page 14 The cooking temperature is selected by turning the knob clockwise to the desired setting, between 50° and 245°C. The indicator light comes on to indicate that the oven is heating up. The indicator light goes out when the set temperature is reached. The multifunction oven is switched off...
-
Page 15: Using The Cooking Hob
10.3 Elecrtic plate In order to keep food hot using the electric plate, you will need to remove the rack and place the small trays or saucepans containing the food directly onto the glass surface of the electric plate. The rack only functions as a support for saucepans or trays when the electric plate is not in use. -
Page 16: Oven Cavity
VENTILATION AND CIRCULAR RESISTANCE The static and multifunction ovens are equipped with an upper protection called removable roof liner. The latter makes cleaning the oven easier. For further information on how to remove the removable roof liner see point “15.4 Cleaning the oven“. -
Page 17: Using The Oven
During cooking, do not cover the bottom of the oven with aluminium foil, and do not place pans or trays on it; this may damage the enamel coating. If you wish to use greaseproof paper, place it so that it will not interfere with the hot air circulation inside the oven. -
Page 18: Using The Grill (Static And Multifunction Oven)
Instructions for the User 12.4 Using the grill (static and multifunction oven) When the oven has come on (the red indicator light comes on to confirm this), leave it to heat up for 5 minutes before placing foods inside. Foods should be seasoned before cooking. Foods should also be coated with oil or melted butter before cooking. -
Page 19: Description Of The Selectable Functions
Traditional cooking, also known as static or thermal radiation cooking, is suitable for cooking just one dish at a time. Perfect for all types of roasts, bread, and tarts and in any case particularly suitable for fatty meats such as goose and duck. BOTTOM: The heat coming just from the bottom allows to complete the cooking of foods that require a higher basic cooking temperature, without affecting their browning. -
Page 20: Available Accessories
Oven rack: for cooking food in flat pans, small cakes or roasts or foods requiring light grilling. Pan rack: for placing on top of a pan for cooking foods which may drip. Oven pan: useful for collecting fat from foods placed on the rack above. -
Page 21: Electronic Programmer
VALUE DECREASE BUTTON VALUE INCREASE BUTTON 14.1 Setting the time When the oven is used for the first time, or after an interruption in the electricity supply, the display flashes at regular intervals, showing . Press the buttons together, and at the same time press the buttons: this will increase or decrease the setting by one minute for each pressure. -
Page 22: End Of Cooking
After making the setting, to display the time remaining press the button In timer mode, the system will not cut out operation of the oven at the end of the set time. 14.6 Adjusting the buzzer volume The buzzer has 3 different volume settings. -
Page 23: Cleaning And Maintenance
• Clean the oven racks with hot water and non-abrasive detergent. Rinse and dry. • Do not allow residues of sugary foods (such as jam) to set inside the oven. If left to set for too long, they might damage the enamel lining of the oven. -
Page 24: Extraordinary Maintenance
Open the door completely and insert the pins (supplied) into the holes from the inside. Close the door to an angle of about 45° and lift it off. To reassemble, fit the hinges into their grooves, then lower the door... -
Page 25: Removing The Door (Multifunction Oven)
Open the door completely and, with the aid of a fine-cut screwdriver, turn hinges A completely (as shows in figures 1, 2, 3). Hold the door on both sides with both hands close to the hinges, stop when the door is at an angle of about 45°... - Page 26 Instructions for the User...
- Page 29 914773597/ A...
Need help?
Do you have a question about the SY4110 and is the answer not in the manual?
Questions and answers