Table of Contents
Advertisement
Available languages
Available languages
Quick Links
SAFETY WARNINGS
B E F O R E
I N S TA L L I N G T H I S P U M P, R E A D
T H I S M A N U A L A N D F O L L O W A L L
S A F E T Y R U L E S A N D O P E R AT I N G
I N S T R U C T I O N S .
SAFETY
CAREFULLY READ THE SAFETY MESSAGES IN THIS MANUAL
AND ON THE PUMP.
CAUTION
Review instructions before operating.
WARNING - ELECTRICAL PRECAUTIONS
All wiring, electrical connections, and system grounding must comply
with the National Electrical Code (NEC) and with any local codes and
ordinances. Employ a licensed electrician.
FOR DUAL VOLTAGE MOTORS:
Voltage change instructions are located on motor label or on wiring
access cover.
WARNING - RISK OF ELECTRICAL SHOCK
•
Have an electrician provide electrical power to motor.
•
A ground fault interrupter (GFI) protected circuit is recommended
for use with any electrical device operating near water.
•
For recommended cable size see Table 1, Maximum Wire Length.
•
Motor must be grounded and terminal cover in place to reduce
electrical shock hazard.
•
Keep motor operating area as dry as possible.
•
Always disconnect power before servicing.
•
Not investigated for use in swimming pool areas.
APPLICATION
The shallow well jet pump is ideal for the supply of fresh water to rural
homes, farms and cabins. This pump is suitable for installations where
the vertical distance from the pump to the water level does not exceed
*25 ft. (7.6m), including drawdown. In off-set installations, friction losses
in the suction pipe must be taken into consideration. Refer to Table 2,
Friction Loss.
*Less at high altitudes.
5'
Pump HP
1/2
12.3
3/4
15.8
1
23.2
1/2 (high pressure)
8.6
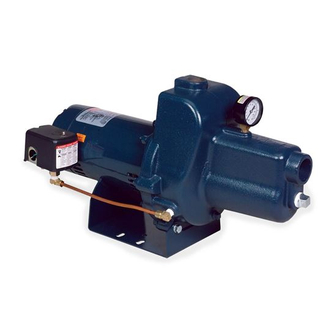
WJS/JP Self-Priming
Shallow Well Jet Pump
OWNER'S MANUAL
O P E R A T I N G
Total Suction Lift (feet)
10'
15'
20'
U.S. gallons per minute at 30 PSI
11.0
9.6
7.8
13.7
11.3
9.3
20.1
17.4
14.2
7.6
6.3
5.1
O R
PERFORMANCE
25'
Pump HP
1/2
5.5
3/4
7.0
1
10.4
1/2 (high pressure)
3.6
Total Suction Lift (meters)
1.5m
3.0m
4.5m
6.0m
Liters per minute at 30 PSI
46.6
41.7
36.4
59.8
51.9
42.8
87.8
76.0
65.8
32.6
28.6
23.9
7.5m
29.5
20.8
35.2
26.5
53.7
39.4
19.3
13.6
Advertisement
Table of Contents

Subscribe to Our Youtube Channel
Related Manuals for Franklin Electric WJS


Summary of Contents for Franklin Electric WJS
- Page 1 WJS/JP Self-Priming Shallow Well Jet Pump OWNER'S MANUAL SAFETY WARNINGS B E F O R E O P E R A T I N G I N S TA L L I N G T H I S P U M P, R E A D...
-
Page 3: Installation
WARNING - RISK OF ELECTRICAL SHOCK INSTALLATION Wiring: An electrician should be employed to do the wiring and Pump Location: The pump should be installed in a clean, dry and connect the electrical service to the pump. The pressure switch ventilated location which provides adequate room for servicing is wired to the motor at the factory and the voltage for which and protection from freezing temperatures. -
Page 4: Typical Installation
TYPICAL INSTALLATION Tank Tank Priming Plug Relief Valve Priming Plug Pressure gauge Relief (optional) Valve Pressure Gauge Drain (optional) Vent plug Drain Vent Plug Inline Check Drain plug Valve Clean-out plug Drain Plug Suction Clean-Out Plug Vent Suction Vent Well Seal Well Well Seal Foot Valve... -
Page 5: Operation
and priming plug. Repeat steps 2 through 6 above. If this does OPERATION not work, stop the pump and check the suction line for leaks. WARNING: 4. Once the pump begins pumping water continuously, firmly tighten DO NOT RUN THE PUMP BEFORE PRIMING IT; the vent plug and priming plug with a wrench. -
Page 6: Troubleshooting
Remove cap (5) and insert a screwdriver to prevent the shaft TROUBLESHOOTING from turning while unscrewing the impeller (6)(GE motors). For A.O. Smith motors, remove rear cover and hold the Motor will not start: shaft using a flat wrench inserted from the side, through the No power to pressure switch due to blown fuses, open opening in the end housing. -
Page 7: Replacement Parts
REPLACEMENT PARTS Repair Part Order Codes by Model Number Kit Grouping Number Description 1/2 hp (High Identifier 1/2 hp 3/4 hp 1 hp Pressure) Plugs kit 305446953 Casing 305446934 Pressure Gauge 305446935 Pressure Switch Attachment Kit 305446936 Diffuser 305446941 305446942 Impeller Mechanical Seal 106196221... -
Page 8: Limited Warranty
THIS WARRANTY SETS FORTH THE COMPANY’S SOLE OBLIGATION AND PURCHASER’S EXCLUSIVE REMEDY FOR DEFECTIVE PRODUCT. Franklin Electric Company, Inc. and its subsidiaries (hereafter “the Company”) warrants that the products accompanied by this warranty are free from defects in material or workmanship of the Company. -
Page 9: Consignes De Sécurité
WJS Pompes à Jet Auto-Amorçantes pour Puits Peu Profond GUIDE D’UTILISATION CONSIGNES DE SÉCURITÉ AVANT D'INSTALLER OU D'UTILISER CETTE POMPE, PRIÈRE DE LIRE LE PRÉSENT GUIDE ET SUIVRE TOUTES LES RÈGLES DE SÉCURITÉ ET INSTRUCTIONS D'UTILISATION. SÉCURITÉ LIRE ATTENTIVEMENT LES AVIS DE SÉCURITÉ SE TROUVANT DANS LE PRÉSENT MANUEL ET SUR LA POMPE. - Page 10 AVERTISSEMENT INSTALLATION - RISQUE DE CHOC ÉLECTRIQUE Emplacement de la pompe: La pompe doit être installée en un endroit propre, sec et aéré, suffisamment spacieux pour procéder Câblage: L'emploi d'un électricien est recommandé pour câbler et connecter le service électrique à la pompe. Le manostat est à...
- Page 11 INSTALLATIONS CARACTÉRISTIQUES Réservoir Réservoir Bouchon d'amorçage Soupape de sûreté Bouchon d'amorçage Soupape de sûreté Manomètre Manomètre (facultatif) (facultatif) Vidange Vidange Bouchon Bouchon à évents à évents Soupape de Bouchon de retenue vidange Bouchon de nettoyage Bouchon de Bouchon de vidange nettoyage Aspiration Aspiration...
-
Page 12: Entretien
3. Suivre les étapes 3 à 6 ci-dessus. Si la pompe ne pompe pas d’eau FUNCTIONNEMENT continuellement après 2 minutes, il faut l’arrêter, retirer le bouchon AVERTISSEMENT DE NE PAS FAIRE FONCTIONNER à évents/le bouchon d’amorçage et répéter les étapes 2 à 6 ci- LA POMPE À... -
Page 13: Guide De Dépannage
Enlevez le drain et les bouchons pour permettre le drainage GUIDE DE DÉPANNAGE de la pompe. Débranchez le tube menant au manostat. Le moteur ne démarre pas: Enlevez les 4 boulons (1) puis le carter de pompe (2). Le manostat ne fonctionne pas en raison de fusibles sautés, Forcez le diffuseur (4) hors du carter au moyen de deux d'interrupteurs ouverts ou de mauvais branchements. -
Page 14: Pièces De Rechange
PIÈCES DE RECHANGE Codes de commande des pièces de rechange par numéro de Identifiant du modèle Numéro Description groupe de 1/2 hp (High trousse 1/2 hp 3/4 hp 1 hp Pressure) Trousse de bouchons 305446953 Boîtier 305446934 Manomètre 305446935 Trousse de fixation du 305446936 manostat Diffuseur... -
Page 15: Garantía Limitada
LA PRESENTE GARANTÍA ESTABLECE LA OBLIGACIÓN EXCLUSIVA DE LA EMPRESA Y LA SOLUCIÓN EXCLUSIVA DEL COMPRADOR ANTE UN PRODUCTO DEFECTUOSO. Franklin Electric Company, Inc. y sus filiales (de aquí en adelante, “la Empresa”) garantizan los productos que acompañan esta garantía contra defectos de material o mano de obra de la Empresa. -
Page 16: Manual Del Propietario
WJS Bombas a Chorro Autocargables para Pozo Poco Profundo MANUAL DEL PROPIETARIO ADVERTENCIAS DE SEGURIDAD LEA ESTE MANUAL Y SIGA TODAS LAS REGLAS DE SEGURIDAD ANTES DE INSTALAR U OPERAR ESTA BOMBA. SEGURIDAD LEA CUIDADOSAMENTE ESTOS MENSAJES DE SEGURIDAD EN ESTE MANUAL Y EN LA BOMBA. -
Page 17: Instalación
AVISO - RIESGO DE DESCARGA ELÉCTRICA INSTALACIÓN Cableado: Se debe emplear a un electricista para hacer el Ubicación de la Bomba: La bomba se debe instalar en un cableado y conectar el servicio eléctrico a la bomba. El interruptor área limpia, seca y ventilada que proporcione suficiente espacio de presión es cableado al motor en la fábrica y el voltaje para para su mantenimiento y protección contra temperaturas de el cual el motor está... -
Page 18: Instalaciones Típicas
INSTALACIONES TÍPICAS Tanque Tanque Tapón de Tapón de Válvula de Cargado Cargado desfogue Válvula de desfogue Manómetro Manómetro (opcional) (opcional) Drenaje Drenaje Tapón de Respiradero Tapón de Respiradero Válvula de chequeo en línea Tapón de drenaje Tapón de Limpieza Tapón de drenaje Tapón de Limpieza Succión... -
Page 19: Operación
necesitará aproximadamente un litro de agua por cada 3 pies OPERACIÓN de línea de succión. AVISO: NO OPERAR LA BOMBA ANTES DE CARGARLA, 3. Siga los pasos del 3 al 6. Si dentro de 2 minutos no se bombea EL SELLO Y EL PROPULSOR PODRÍAN DAÑARSE agua continuamente, apague la bomba. - Page 20 Abra un grifo en el sistema de agua para reducir la GUÍA PARA DETECTAR PROBLEMAS presión. Quite los tapones de drenaje y de cargado para dejar que El motor no prende: la bomba se drene. No llega electricidad al interruptor de presión debido a fusibles Desconecte la tubería que va al interruptor de presión.
-
Page 21: Piezas De Repuesto
PIEZAS DE REPUESTO Códigos de pedido para piezas de repuesto por número de modelo Identificador Número Descripción del grupo del 1/2 hp (High 1/2 hp 3/4 hp 1 hp Pressure) Kit de tapones 305446953 Funda 305446934 Medidor de presión 305446935 Kit de conexión del interruptor 305446936 de presión... -
Page 22: Garantie Limitée
CETTE GARANTIE ÉNONCE LA SEULE OBLIGATION DE L'ENTREPRISE ET LE RECOURS EXCLUSIF DE L'ACHETEUR POUR LE PRODUIT DÉFECTUEUX. Franklin Electric Company, Inc. et ses filiales (ci-après « la Société ») garantit que les produits accompagnés par cette garantie sont sans défauts de matière ou de fabrication de la Société. - Page 23 9255 Coverdale Road, Fort Wayne, Indiana 46809 Tel: 260.824.2900 Fax: 260.824.2909 106511101 Rev. 2 09-13 www.franklin-electric.com...
Need help?
Do you have a question about the WJS and is the answer not in the manual?
Questions and answers