Advertisement
- 1 OUTDOOR INSTALLATION GUIDE
- 2 OPERATING INSTRUCTIONS
- 3 IGNITION PROCEDURE
- 4 CLEANING & STORAGE
-
5
TROUBLESHOOTING
- 5.1 Power supply interrupted
- 5.2 Poor type of solid fuel used
- 5.3 Solid fuel is damp
- 5.4 Solid fuel incorrectly distributed in charcoal chamber
- 5.5 Timer or element not working
- 5.6 Internal components not aligned correctly
- 5.7 Barbeque not cleaned
- 5.8 Weather conditions and ambient temperature
- 5.9 Power supply interrupted
- 5.10 Rotisserie rod not seated in motor correctly
- 5.11 Rotisserie overloaded
- 5.12 Rotisserie motor has jammed
- 6 BARBEQUE AND PEDESTAL ASSEMBLY
- 7 MAINTENANCE
- 8 PARTS LIST: HBCE1B & HBCE1BS
- 9 IMPORTANT SAFETY INSTRUCTIONS
- 10 APPLIANCE DETAILS
- 11 Documents / Resources
OUTDOOR INSTALLATION GUIDE
This Appliance shall only be used in an above ground open-air situation with natural ventilation, without stagnant areas, where products of combustion are rapidly dispersed by wind and natural convection.
This appliance must not be used indoors. Do not use your barbeque in garages, porches, sheds or other enclosed areas. The barbeque is not intended to be installed in or used on recreational vehicles (e.g. boats, camping vans) and should not be placed close to or under any surfaces that will burn or are sensitive to heat. Do not block/ obstruct the fl ow of air and combustion around the barbeque housing while in use.
Any enclosure in which the appliance is used shall comply with one of the following:

- An enclosure with walls on all sides, but at least one permanent opening at ground level and no overhead cover.
- Within a partial enclosure that includes an overhead cover and no more than two walls
- Within a partial enclosure that includes an overhead cover and more than two walls, the following shall apply-
- at least 25% of the total wall area is completely open: and
- at least 30% of the remaining wall area is open and unrestricted.
In the case of balconies, at least 20% of the total of the side, back and front wall areas shall be and remain open and unrestricted.
OPERATING INSTRUCTIONS
GENERAL INSTRUCTIONS
A fairly protected location is desirable for pleasant and efficient cooking. Try to keep the barbeque sheltered from strong winds as this will drastically alter cooking efficiency. If this is unavoidable, position the length of the barbeque to be parallel in the direction of the wind. Keep the barbeque level. Check frequently that the charcoal stays ignited (this does not necessarily mean a flame is visible), and that flare ups are not occurring. Make sure the minimum distances of the barbeque to any wall or combustible surface are met, and that when not using the pedestal, the supporting surface can withstand the heat. When using the pedestal, take care that the ground is level and no combustible material is close by.

This barbeque will become very hot, do not move it during operation. For more specific information (including set-up illustrations and diagrams) and up to date cooking instructions, please visit the Everdure by Heston Blumenthal website at www.everdurebyheston.com.
FUEL TYPE AND CONSUMPTION
This barbeque is designed to cook with lump charcoal and charcoal briquettes. The heat produced and consumption time may vary dramatically depending on the type of fuel used, and the prevailing weather conditions. Please see the Quick User Guide for more information on charcoal ignition and cooking. Do not use accelerants for fuel ignition or fuels impregnated with accelerants in this appliance as they may cause damage to the appliance or injury.
When igniting the charcoal, pile the charcoal up over the charcoal grid (this is the circular grid above the element in the centre of the charcoal chamber) so that it overflows the grid by no more than 20mm. When in use, the height of the charcoal should never pass the top level of the charcoal chamber and the amount being used at any one time should not exceed 1.2kg.
After cooking, the remaining charcoal should be allowed to burn off naturally (this should be taken into account when planning the cooking times). Once finished, the ash and remaining fuel should be removed and placed into a non-flammable container (a metal bucket is ideal), a small amount of water added (just in case there is still any heat left in the waste) and disposed of safely as per local council rules. Note that protection from heat should always be used.
CHROME OPEN GRILL
The cooking surface for this barbeque is a chromed open grill, which can be fully removed or levered up from either side to add additional charcoal. The grill should be positioned so that the hinges are facing down (they will allocate in two notches at the front and rear of the charcoal chamber). Take care that food cooked is wider than the gaps in the grill or positioned lengthways so it doesn't fall through. Over time, the surface of the grill will discolour with the heat of the fuel (this is a normal process and not a fault). It is recommended that the grill is placed on the barbeque after the charcoal has ignited and any adjustment on the fuel distribution has been done. If needed please remove the grills for greater clearance. After use, allow the grill to cool and then clean. After cleaning, coat with a little cooking oil to minimise any rusting.
ROTISCOPE TECHNOLOGY™
Rotiscope TechnologyTM is the patent pending built-in rotisserie system of the barbeque. The maximum rated capacity of the motor is 15kg, Please check the dimensions of the meat are suitable for the product before purchasing.
The rotisserie rod and Cliplock ForksTM are stored in the compartment at the front of the left hand side panel. Lift the storage door up, remove the Cliplock ForksTM (take care of the sharp points of the fork fingers) and pull the rod out from the storage bracket (this is enclosed so the rod will not interfere with the electrical wiring). Note: If the barbeque has been in operation, the rotisserie parts may be hot – remove before cooking or use heat proof gloves. The handle of the rotisserie rod must first be extended by rotating the handle anti-clockwise until the thread releases, extending the handle fully and tightening in place by rotating anti-clockwise again. To fit food onto the rotisserie, first slide a Cliplock ForkTM (base first) onto the rod, and lock off by pressing down the small fork lever. Push the food onto the rotisserie rod and onto the Cliplock ForkTM. Push the second set of Cliplock ForksTM onto the rod and into the other end of the food, and lock in position by pressing down the small fork lever.
To extend the rotisserie poles, first press and release them so the first section pops out from the barbeque. Pull the poles up and rotate clockwise to allocate the poles in one of the 3 height settings. The pole to the right contains the rotisserie motor. Take the rotisserie rod with the food attached and place the pointed end in the motor hole at the top of the right hand side pole. Lever the handle side of the rod down into the slot of the left hand pole (take care the slot in the rod allocates to the keyway) and close the pole cover. Turn on the rotisserie by pressing the right button (an audible sound and LED will indicate this has turned on). Adjust charcoal to suit the food being cooked.
Do not leave the appliance cooking for extended periods of time unattended. As food cooks on the rotisserie, fat can drip off causing flair-ups which can spoil food. Constant supervision can help to reduce the incidence of food spoilage.
When the food has finished cooking, press the right button again (the LED at the switch will turn off), to stop the rotisserie from turning. Hold the handle with one hand and lift the other end from the motor (using heat resistant gloves). Place food on a platter and release the outer Cliplock ForkTM, then remove using metal tools. Release the second Cliplock ForkTM and remove the rod. Pull the second fork from the food. Note: Take care as the rotisserie parts will be hot. Clean the rod by rubbing down with water and detergent, and clean the Cliplock ForksTM by first soaking in hot water and then rubbing down with water and detergent. Once dry, the rod can be coated with a thin film of cooking oil. Rotate the rod handle clockwise and lock in the shorter setup.
With the barbeque cool, open the storage door on the left hand side of the barbeque and push the rod into the round hole, then overlap the forks and put next to the rod handle. Rotate the two rotisserie poles anti-clockwise and then lower. To fix into the barbeque, press them slightly below the top level of the barbeque and release (the internal spring switch will then hold them in place).
AFTER COOKING
- After cooking and whilst the barbeque is still warm, remove scraps from the grill with a scraper.
- Excess fat and meat scraps can be scraped off the inside of the barbeque by removing the grill to gain access.
![]()
Some surfaces may still be hot – please use protective gloves. - Remove wastes from inside charcoal chamber, and under the charcoal grid and element.
IGNITION PROCEDURE
 READ ALL OPERATING INSTRUCTIONS BEFORE IGNITING THE CHARCOAL. TAKE CARE THE POWER CORD CANNOT TOUCH ANY HOT SURFACES OR IGNITED CHARCOAL.
LIGHTING THE BARBEQUE USING THE FAST FLAME IGNITION SYSTEM™
The FAST FLAME IGNITION SYSTEM™ works on the principle that charcoal will ignite when heated above a certain temperature (it is not dependant on a flame to ignite). First pile the charcoal over the charcoal grid (allowing it to overflow up to 20mm). With the charcoal in place, press the left button (an audible sound and LED will indicate that the element has turned on). The element will heat up and run for 7 minutes. During this time, the charcoal closest to the element will ignite. As it heats up and ashes, the surrounding charcoal will do the same. After 7 minutes the element will turn off and the ignition of the charcoal will continue to naturally ignite. After 10-15 minutes (depending on the weather conditions and the fuel used), most of the charcoal should have partially or fully ignited. Using metal tools, spread the charcoal inside the charcoal chamber and add extra fuel if necessary (extra fuel can be added during the cooking period as well). Never use more than 1.2kg of fuel at any one time. See the Quick User Guide for more information.
CLEANING & STORAGE
EXTERNAL CLEANING
Before cleaning the barbeque exterior and pedestal, ensure the appliance has cooled and is safe to touch, and that the appliance has been removed from the power supply. Painted and plastic surfaces can be cleaned using a mild household detergent or cleaner and a clean cloth (do not use scourers or harsh detergents). It is advisable to test cleaners on a small section of the appliance first. NEVER use paint thinners or similar solvents for cleaning and NEVER pour cold water over hot surfaces. Dry the surface afterwards.
Rotisserie poles should be wiped down with a soft cloth to remove an oil or grit (do not allow water to flow down the poles and into the barbeque).
INTERNAL CLEANING
Before cleaning the internal parts of your barbeque, ensure the appliance has cooled and is safe to touch. The inside of the charcoal chamber can be cleaned by using some water, mild detergent and a sponge or mild scouring pad.
For hard to clean areas, use a little baking soda on a wet sponge. Do not use abrasive cleaners.
All ash and any leftover fuel should be removed after every cook (take care that it is fully extinguished and cold). After cleaning the charcoal chamber, remove the charcoal grid and carefully twist the element upwards. Remove the element bracket (X) and remove and empty the heat shield. Clean any ash or oil that may have dropped into the element bowl, and replace the heat shield and element bracket. Twist the element back over the bracket and replace the charcoal grid. Note: all parts MUST be in place correctly before cooking again.
The surfaces of the open grills may be hot. Please ensure heat resistant gloves are worn.
STORAGE
When the appliance is not in use, the barbeque (and pedestal if supplied) can be stored outdoors, but must be under cover and covered (preferably with a purpose made FUSIONTM Barbeque cover), out of the weather. Ensure the cooking surface is clean before storing away.
Do not leave the power cord connected to the power supply for extended periods of time (disconnect after use).
TROUBLESHOOTING
Solid fuel is not igniting or taking longer than expected to ignite:
Power supply interrupted | Check the LED at the ignition switch is lighting when pressed. Check cord is connected & turned on. Check power is being supplied to appliance (power outage or tripped circuit breaker). Check that retractable power cord has not been pulled out too far (it can interrupt the internal power connection). |
Poor type of solid fuel used | Fuel may be wrong size (parts too large). Break up larger parts so they can ignite easier. Purchase a different type of charcoal and try. We recommend using 100% natural lump charcoal in this appliance (see Hestonbyeverdyre.com). |
Solid fuel is damp | Solid fuels can become damp over time, which retards ignition. Store in a dryer place & repurchase fresh solid fuel. |
Solid fuel incorrectly distributed in charcoal chamber | Follow the instructions on placing the solid fuel in the charcoal chamber. If charcoal has compacted down tight, remove some solid fuel so air can flow freely through and assist in ignition. If too little fuel is used, the heat and ignition may not pass as fast between separate pieces. |
Timer or element not working | Remove fuel and check LED on ignition switch is lighting up when pressed. Check for heat from the element (without fuel this should run for 7 minutes before turning off) with a hand at a safe distance. If not running, contact your nearest Service Centre. |
Internal components not aligned correctly | Check element heat shield, support bracket and element are correctly positioned. Check charcoal chamber correctly allocated in lower tabs. Check charcoal grid is correctly allocated in charcoal chamber. |
Barbeque not cleaned | Check ash has not collected inside the element bowl or heatshield, or blocked the charcoal grid. |
Weather conditions and ambient temperature | Cold, windy and wet conditions will affect the ignition and combustion process. Move barbeque to a more suitable location. |
Rotisserie not operating:
Power supply interrupted | Check the LED at the rotisserie switch is lighting when pressed. Check cord is connected & turned on. Check power is being supplied to appliance (power outage or tripped circuit breaker). Check that retractable power cord has not been pulled out too far (it can interrupt the internal power connection). |
Rotisserie rod not seated in motor correctly | Remove rod from poles and check motor socket is rotating. Check rod handle is fully extended. Place rod in motor and check handle end is correctly allocated in the slot and keyway of the left hand pole. |
Rotisserie overloaded | Check rod rotates without food, and then with food. Remove some of the food from the rotisserie and try again |
Rotisserie motor has jammed | Motor or internal parts have seized. Contact your nearest Service Centre. |
BARBEQUE AND PEDESTAL ASSEMBLY
The barbeque and pedestal (if supplied) must be assembled before use. Only a medium size Philips screwdriver is needed.
Open the carton from the top and remove the parts. Remove all packaging (especially check inside the barbeque and under the charcoal grid) and place parts on a clean surface. Check for any damage or missing parts (if found, contact your service department).
INCLUDED PARTS FUSIONTM

PACKAGING
Remove all internal cartons and packaging from within the barbeque assembly. Remove all external packaging and remove the appliance from the packaging base before operation. Recycle as per your local government laws.
- Take the M3 spring washers (F02) and M3 washers (F03) and place them onto two M3x8mm screws (F01). Take the two lid hanging brackets (04) and fit onto two M3x8mm screws (F01) (the legs of the brackets should hang around the screw heads). Place the handle (02) on the inset side of the lid (03) and align the handle legs with the two holes. Fix the lid hanging brackets to the bottom of the lid by screwing the screws into the handle legs (take care that the hanging brackets are running parallel to the lid shorter sides). Tighten fully. If assembled correctly, the lid will hang from the bracket at the rear of the barbeque using the lid hanging brackets to hook it in place.

- If not already assembled, lever up the element and place the heat shield (09) inside the bowl. Take the two element supports (08), fit them together and place them centrally on the heat shield. Lever the element back down onto the element supports.*

- Place the charcoal chamber (07) centrally within the barbeque (it will allocate on four tabs) and place the charcoal grid (06) in the centre hole above the element.

- Place the grill (hinges down) on the eight pins inside the chassis, above the charcoal chamber.

- / The rotisserie rod and Cliplock Forks TM are stored in the compartment at the front of the left hand side panel. Lift the storage door up, remove the Cliplock Forks™ (11) (take care of the sharp points of the fork fingers) and pull the rotisserie rod (10) out from the storage bracket.
Note: If the barbeque has been in operation, the rotisserie parts may be hot – remove before cooking or use heat proof gloves. The handle of the rotisserie rod must first be extended by rotating the handle anti-clockwise until the thread releases, extending the handle fully and tightening in place by rotating anti-clockwise again. The Cliplock Forks™ slide on the rod and are locked in place by pressing down on the fork levers.
![]()
- To extend the rotisserie poles, first press and release them so the first section pops out from the barbeque. Pull the poles up and rotate clockwise to allocate the poles in one of the 3 height settings. The pole to the right contains the rotisserie motor.

- Take the rotisserie rod with the food attached and place the pointed end in the motor hole at the top of the right hand side pole. Lever the handle side of the rod down into the slot of the left hand pole (take care the slot in the rod allocates to the keyway) and close the pole cover.

- Place the pedestal base cover (S04) face down on a flat, clean surface and place the pedestal base (S05) inside. If not already fitted, attach the six rubber feet (F07) onto the pedestal base with six M3x10mm screws (F05). Place the pedestal support bracket (S06) onto the bottom of the pedestal base (centred on the pole hole). Align the four outer holes and fix together using four M4x8mm screws (F06). Tighten fully.

- Place the pole support on top of the pedestal base (centred on the pole hole). Centre over the pole hole and align the 4 central holes. Fix together using four M8x25mm screws. Tighten fully.
![]()
- Place the pedestal pole (S02) into the pole support. Align the three inner holes and fix together using three M8x 25mm screws (F04). Fully tighten.

- Place the pedestal pole cover (S03) over the pole and place on the pole support..

- Place the pedestal top (S01) over the pole. Adjust the position of the pedestal top so it is directly over the pedestalbase, align the three holes and fix together using three M8x25mm screws. Leave slightly loose.

- To place the barbeque on the pedestal (when supplied), pick it up from the centre of the bottom of the shorter sides, so that when placed on the pedestal top, hands are positioned in the slots at the pedestal top sides. Always take care not to trap fingers under the barbeque. Do not do when the barbeque is hot.
![]()
- With the barbeque in a secure position, fully extend the power cord from the recess on the right hand side (do not over-extend) and connect to your power supply.


MAINTENANCE
It is recommended that, at the commencement of each barbeque season, the following maintenance be conducted:
BARBEQUE
- Wipe over the outer areas of the barbeque with a clean cloth.
- Check all oils and ash has been cleaned from the charcoal chamber and under the element.
- Check all fasteners for tightness and re tighten where necessary to ensure rigidity of the structure.
- Check retractable power cord is operational and the cord/plug is undamaged.
PEDESTAL
- Check all fasteners for tightness and re tighten where necessary to ensure rigidity of the structure.
- Wipe over barbeque pedestal with a clean cloth.
Wear and tear to this barbeque can be reduced by covering and storing out of the weather when not in use.
PARTS LIST: HBCE1B & HBCE1BS

| PART NAME | QTY | PART NAME | QTY | ||
| 1 | Cliplock Forks™ Assembly | 2 | 23 | Storage Door | 1 |
| 2 | Rotisserie Rod Assembly | 1 | 24 | Barbeque Chassis | 1 |
| 3 | Lid Handle | 1 | 25 | Storage Box | 1 |
| 4 | Lid | 1 | 26 | Front Heat Shield | 1 |
| 5 | Lid Hanging Bracket | 2 | 27 | Side Insulation | 1 |
| 6 | Open Grill | 1 | 28 | Retractable Power Cord | 1 |
| 7 | Charcoal Grid | 1 | Bracket | ||
| 8 | Charcoal Chamber | 1 | 29 | Retractable Power Cord | 1 |
| 9 | Element | 1 | 30 | Power Plug Recess | 1 |
| 10 | Element Support | 2 | 31 | Side Heat Shield | 1 |
| 11 | Element Heat Shield | 1 | 32 | PCB Cover | 1 |
| 12 | Element Bowl | 1 | 33 | PCB | 1 |
| 13 | Inner Chassis | 1 | 34 | PCB Mounting | 1 |
| 14 | Element Bowl Bracket | 1 | 35 | Element Switch | 1 |
| 15 | Inner Pole Assembly Left | 1 | 36 | Rotisserie Motor Switch | 1 |
| 16 | Pole Flange | 2 | 37 | Rod Guide Tube Assembly | 1 |
| 17 | Outer Pole Assembly | 2 | 38 | Bottom Insulation | 1 |
| 18 | Inner Pole Assembly Right | 1 | 39 | Bottom Plate | 1 |
| 19 | Inner Pole Positioning Pin | 2 | 40 | Thermostat Mount | 1 |
| 20 | Rear Insulation | 4 | 41 | Thermostat | 1 |
| 21 | Rear Heat Shield | 1 | 42 | Leg Assembly | 4 |
| 22 | Grill Support Pin | 8 |
Note: List does not include fasteners.

| PART NAME | QTY | |
| 1 | Pedestal Top | 1 |
| 2 | Pedestal Pole | 1 |
| 3 | Pole Support Cover | 1 |
| 4 | Pole Support | 1 |
| 5 | Pedestal Base Cover | 2 |
| 6 | Pedestal Base | 1 |
| 7 | M4 x 10mm Screw | 6 |
| 8 | Rubber Foot | 6 |
| 9 | M8 x 25mm Bolt | 10 |
| 10 | M4 x 8mm Screw | 4 |
| 11 | Pedestal Support Bracket | 1 |
OPTIONAL ACCESSORY: COOKING ACCESSORIES
Please see everdurebyheston.com for full range of accessories
IMPORTANT SAFETY INSTRUCTIONS

Read the safety precautions of this booklet carefully before removing the barbeque from its carton or connecting the barbeque to the power supply. If you are unsure about anything regarding your barbeque, please contact Everdure by Heston Blumenthal in Australia on 1300 HESTON or in New Zealand on (09) 415 6000 before operating your appliance.
- This electric ignition charcoal barbeque and pedestal set are intended for OUTDOOR USE ONLY. Do not use indoors!
- For your safety and enjoyment, read all operating instructions before using this appliance.
- In certain circumstances electrical appliances may be a health hazard. Unplug the appliance before cleaning or carrying out maintenance. When the appliance is not in use, unplug the appliance from the outlet and retract the power chord fully.
- This appliance is not intended for use by persons (including children) with reduced physical, sensory or mental capabilities, or lack of experience or knowledge, unless they have been given supervision or instruction concerning the use of the appliance by a person responsible for their safety. Children should be supervised to ensure that they do not play with the appliance. Unsupervised children or pets should not be near a barbeque while cooking or during warm up or cool down. Ensure children or pets are kept a distance well away from the barbeque whilst it is in use. WARNING! Keep children and pets away.
- Ensure that all electrical connections are secure, dry and protected from moisture before operating this appliance. Do not disconnect the appliance with wet hands and do not disconnect the power cord with extreme force.
- Always fully extend the retractable power cord when in use (leaving the power cord fully or partially retracted can cause the cord to overheat & become damaged). Take care not to exert undue force on the cord and its assembly when adjusting the length. If use of an extension power lead cannot be avoided, always use good quality (low resistance) leads that are suitable for the environment where cooking is taking place, and use the shortest length possible to reduce any power lost to the appliance.
- Do not use this appliance with a programmer, timer or any other device that switches the appliance on automatically, since a fire risk exists if the appliance is covered or positioned incorrectly.
- If the power cord is damaged, it must be replaced by the manufacturer, an authorised service centre or similarly qualified persons to avoid a hazard.
- Do not immerse the barbeque in water (only removable grills, charcoal grids and rotisserie parts can be immersed).
- As charcoal can smoulder for an extended period of time, take care when removing ash after cooking. It is recommended that a non-combustible container (metal or ceramic) be used to contain any ash before being doused in water and disposed of correctly.
- This barbeque has been designed to be used either on a FUSIONTM pedestal, a raised bench or the ground. When using a raised surface (table etc.) or the ground, ensure the surface is level, large enough and strong enough to support the barbeque and will withstand temperatures of 80°C above ambient temperature. When using the pedestal, ensure that your barbeque is in a level position and the barbeque is positioned fully on the pedestal.
- People with flammable clothing such as nylon etc. should keep well away from the barbeque when it is operating.
- Do not use this appliance for any purpose other than what it is intended for.
- In case of fat fire, remove food (if possible) and allow the fire to burn out naturally. Most fat will burn off quickly when it contacts the charcoal, but regular cleaning after use should reduce the build-up of fat and food residues which are combustible and can result in a fat fire. Fat fires can be prevented with diligence in cleaning fats and oil from the heat shield and bowl around the electrical element and the inner chassis. Do not allow ash to build up inside the chassis – clean up after every use. For more information on controlling fat fires see the Quick User Guide.
- Ensure that the product has adequate clearance from combustible materials. The appliance is designed so that heat will not affect the pedestal. All combustible materials must be kept more than 250mm from the sides and rear of the barbeque and more than 1500mm above the cooking surface of the barbeque.
- Keep your barbeque protected against strong wind where possible (the lid can be used as a rear wind shield by hanging it from the bracket at the rear of the appliance). As charcoal cooking can vary in time and intensity, it is recommended that the barbeque not be left for more than 5 minutes at a time while cooking.
- We recommend that you regularly maintain your barbeque and keep it in good condition. This can be achieved by following the cleaning and maintenance suggestions in this booklet. Failure to follow these instructions will void your warranty.
- This appliance is not suitable for mounting in a movable vehicle (boat, trailer etc).
- Do not use or store this appliance in areas of high salt content (a marine environment) or an area with caustic fumes or liquids (such as a domestic pool), as these chemicals can cause the appliance materials to deteriorate (and void the warranty). Regular cleaning and covering with an Everdure by Heston Blumenthal barbeque cover can help can help to reduce this.
![]()
Accessible parts may become hot when used.- Charcoal and coal products produce carbon monoxide when burned. When the appliance is being used with solid fuels, always keep the appliance in a well ventilated area to prevent the gasses produced from building up.
- Do not use solid fuels impregnated with fire accelerants or use any other type of accelerant on this appliance. This appliance is designed for electrical charcoal ignition only. Using any accelerant could cause serious property damage or personal injury.
![]()
Do not use spirit or petrol for lighting or re-lighting! Do not use firelighters for lighting or re-lighting! - During ignition, follow the recommended charcoal area placement guide. Once the initial batch of charcoal has ignited, it can be mixed in with fresh charcoal and spread throughout the charcoal chamber. Overloading the charcoal chamber can result in damage to the appliance and food – it is recommended that the height of the charcoal never passes the top level of the charcoal chamber. For more information on charcoal placement, see further on in the instruction manual and the Quick User Guide.\
- The ignition timer is set to 7 minutes. Whilst this in operation, the element will run, heating and igniting the charcoal above it. Once the timer has finished, do not start again as the heat from the element will interfere with the natural progression of the charcoal ashing. Note: If the combined heat from the charcoal and element get too high, an over-temp switch will disable the element (the timer will continue to operate until the 7 minutes have elapsed).
- Always allow the solid fuel to burn out naturally after cooking. Do not use any liquids to douse the charcoal. Do not move the appliance while the coals are still burning as hot ash, coal particles, unburned fuel and hot cooking fats & oils could spill and accessible parts may be very hot. The barbeque should only be lifted by the base at either side. If a pedestal is available, move the barbeque and pedestal separately.
- Do not use volcanic rock or any type of non-combustible product in the charcoal chamber. If in doubt on what fuels can be used, check the Everdure By Heston Blumenthal website or contact the Service Department.
- Solid fuels differ widely in burning time, heat, size and combustion. Always be aware of your surroundings and potential fire hazards caused by sparks or spitting fuels. Never dispose of solid fuels or hot ashes in areas where they can be trodden on or be a fire hazard. Never dispose of unburned solid fuels or ash until it has completely extinguished.
The barbeque must be installed on a secure level base prior to use. We recommend using 100% natural lump charcoal in this appliance (see everdurebyheston.com). - Always check with your local/state authorities before using this appliance for any fire restrictions regarding the use of an outdoor barbeque (due to local weather conditions).
- When using solid fuels, take care that the surrounding environment is clear of combustible materials. Do not cook under overhanging buildings or close branches of trees. Note that solid fuels will produce varying amounts of smoke – take this into consideration when setting up the barbeque.

- DO NOT OPERATE THIS APPLIANCE BEFORE READING THE INSTRUCTION BOOKLET
- DO NOT PLACE ARTICLES ON OR AGAINST THIS APPLIANCE
- DO NOT STORE CHEMICALS OR FLAMMABLE MATERIALS OR SPRAY AEROSOLS NEAR THIS
- DO NOT OPERATE THIS APPLIANCE INDOORS
- DO NOT ENCLOSE THIS APPLIANCE. THE MINIMUM CLEARANCE FOR THIS UNIT IS 1500mm ABOVE THE COOKING SURFACE AND 250mm FROM ANY SIDE
- DO NOT OPERATE THIS APPLIANCE IN ENCLOSED AREAS
- DO NOT USE ACCELERANTS OR FUEL IMPREGNATED WITH ACCELERANTS IN THIS APPLIANCE
- DO NOT OVERFILL THE CHARCOAL CHAMBER AT IGNITION
- DO NOT ALLOW FATS/OILS, ASH AND UNBURNED FUEL TO BUILD UP IN THE APPLIANCE BETWEEN COOKING SESSIONS
APPLIANCE DETAILS
Electrical:
220-240V ~50-60Hz, 1800W.
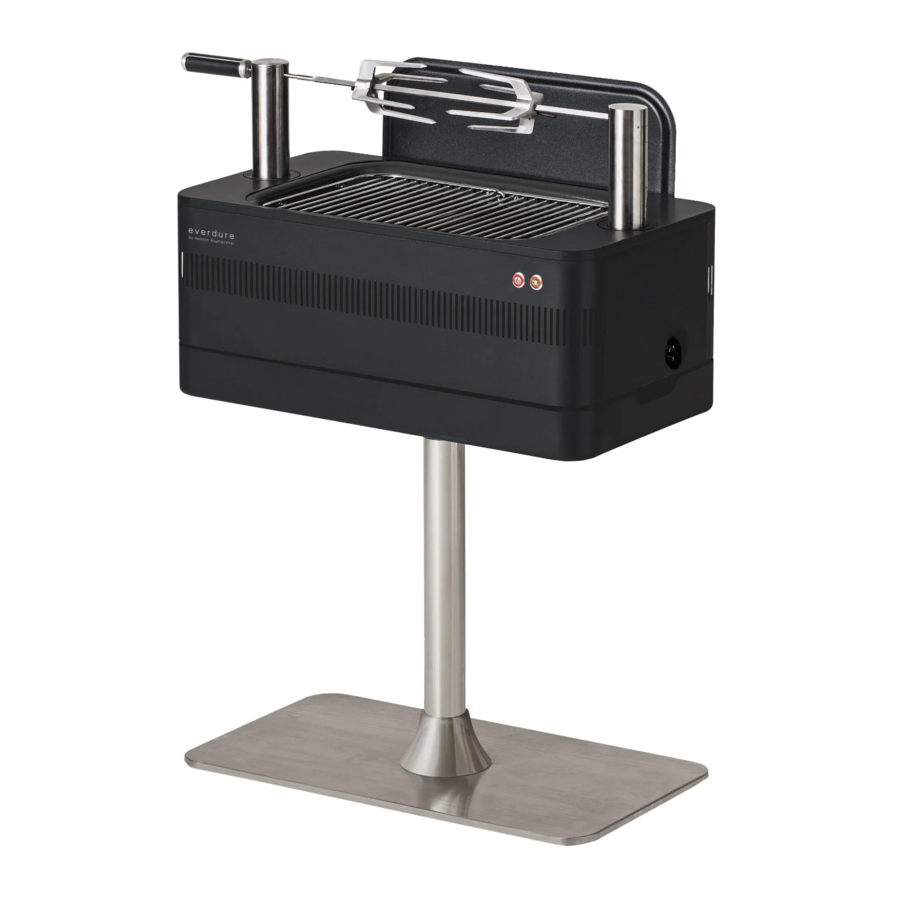
| FUSIONTM | |||
| Barbeque only | LENGTH (mm) | WIDTH (mm) | HEIGHT (mm) |
| 730 | 400 | 300 | |
| Barbeque and Pedestal | 730 | 400 | 900 |
Note: Fully extended, the rotisserie poles increase the height by 170mm.
Note: The HBCE1B is not supplied with a pedestal, but the pedestal can be bought as an accessory.
Documents / Resources
References
Download manual
Here you can download full pdf version of manual, it may contain additional safety instructions, warranty information, FCC rules, etc.
Advertisement


Need help?
Do you have a question about the FUSION and is the answer not in the manual?
Questions and answers