
Related Manuals for Klarstein BOLERO SMART


Summary of Contents for Klarstein BOLERO SMART
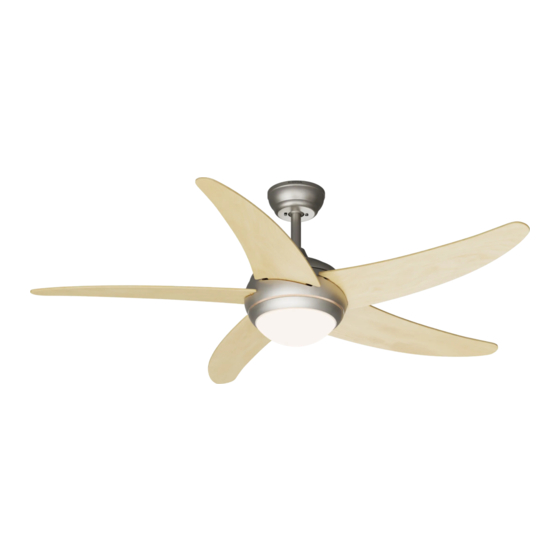
- Page 1 BOLERO SMART Deckenventilator Ceiling Fan Ventilateur de plafond Ventilador de techo Ventilatore a soffitto 10046058 10046081 10046082 10046083 www.klarstein.com...
-
Page 3: Table Of Contents
Sehr geehrter Kunde, wir gratulieren Ihnen zum Erwerb Ihres Gerätes. Lesen Sie die folgenden Hinweise sorgfältig durch und befol- gen Sie diese, um möglichen Schäden vorzubeugen. Für Schäden, die durch Missachtung der Hinweise und unsachgemäßen Gebrauch entstehen, übernehmen wir keine Haftung. Scannen Sie den QR-Code, um Zugriff auf die aktuellste Bedienungsanleitung und weitere Infor- mationen rund um das Produkt zu erhalten. -
Page 4: Sicherheitshinweise
SICHERHEITSHINWEISE • Befestigen Sie den Lüfter niemals an einer Steckdose, sondern an der Decke selbst. • Der Mindestabstand zwischen den Ventilatorblättern und dem Boden muss mehr als 2,3 m betragen. Die Mindesttragfähigkeit des Hakens, an dem der Ventilator aufgehängt wird, muss 100 kg betragen. •... -
Page 5: Lieferumfang
LIEFERUMFANG Öffnen Sie die Verpackung vorsichtig. Nehmen Sie die Teile aus den Styroporeinlagen. Nehmen Sie das Motorgehäuse ab und legen Sie es auf einen Teppich oder Styropor, um eine Beschädigung. der Oberfläche zu vermeiden. Überprüfen Sie anhand der Teileliste, ob alle Teile enthalten sind. Deckenstange und Kugel Baldachin Deckenstange... -
Page 6: Montage
MONTAGE Vorbereitung der Installation Um Verletzungen und Schäden zu vermeiden, stellen Sie sicher, dass die Klingen an der Aufhängung einen Abstand von 2,3 m vom Boden und 76 cm von jeder Wand 76 cm von oder jedem Hindernis haben. der Wand 2.3 m zum nächsten Flügel zum Boden... - Page 7 Befestigung der Deckenhalterung Holzdecke Betondecke Bitte bohren Sie ein Loch (⌀8 mm) in die Betondecke und setzen Sie die Dübel und die Schraube ein. Richten Sie die Halterung am Loch aus und ziehen Sie die Halterung mit der Mutter fest.
- Page 8 Zusammenbau und Aufhängen des Ventilators elektrische Verdrahtung Baldachin Schacht für Zierblende hängende Kugel Haltebolzen Splint Adapter Jochgewindestift Wenn Sie die Aufhängelänge Ihres Ventilators verlängern möchten, müssen Sie die Aufhängekugel von der mitgelieferten 6-Zoll-Stange entfernen, um sie mit einer verlängerten Stange (im Lieferumfang enthalten) verwenden zu können (wenn Sie die 6-Zoll-Stange verwenden möchten, fahren Sie bitte mit den Anweisungen unten fort).
- Page 9 Anschluss an die Fernbedienung grün-gelb gestreift green/yellow stripe Ground Erde White Neutral (N) weiß Neutral N ( ) wire Light L blue Lampe (L) blau ( ) schwarz (Black) Remote Grey DC motor L Motor (Gleichstrom) L (grau) control receiver input N Eingang N Motor (Gleichstrom) L (rosa)
- Page 10 Montage der Flügel Zeitersparnis: Unterlegscheiben für Flügelschrauben können vor dem Einbau der Klingen auf jede Klingenschraube gesetzt werden. Die Schrauben und Unterlegscheiben für die Rotorblattbefestigung befinden sich in einem der Materialpakete. Halten Sie den Flügel an das Loch und richten Sie die Löcher aus.
- Page 11 Anbringen der Lampenschale Bringen Sie die Abdeckung und den Lampenschirm wieder an der Lapenschale an und befestigen Sie sie mit Zierklammern und Schraubenmuttern.
-
Page 12: Inbetriebnahme Und Bedienung
INBETRIEBNAHME UND BEDIENUNG LED-Farbton Licht ein/aus Ein/Aus Stufe Wechsel der Drehrichtung Timer... - Page 13 Austausch der Batterien • Benutzen Sie die Fernbedienung, um die Windgeschwindigkeit zu ändern und das Licht oder den Ventilator ein- bzw. auszuschalten. • Schieben Sie die Klappe des Batteriefachs zurück und legen Sie zwei AAA- Batterien (nicht im Lieferumfang enthalten) ein. Achten Sie darauf, dass Sie die Batterien richtig herum einsetzen.
-
Page 14: Gerätesteuerung Per Smartphone
GERÄTESTEUERUNG PER SMARTPHONE Wenn Sie Ihr Klarstein-Gerät in Ihr heimisches WLAN einbinden, können Sie es ganz bequem über die dazugehörige Klarstein-App bedienen. Die App ermöglicht es Ihnen, nicht nur das Gerät über Ihr Smartphone fernzusteuern, sondern bietet Ihnen zudem Zugang zu Rezepten und weiterführenden Informationen. - Page 15 Fehlerbehebung bei Verbindungsproblemen Wenn Ihr Klarstein-Gerät im WLAN nicht gefunden werden kann, überprüfen Sie Folgendes: Das Gerät ist nicht eingesteckt. Stellen Sie sicher, dass Ihr Gerät an eine Steckdose angeschlossen ist. Das Gerät befindet sich nicht im Kopplungsmodus. Stellen Sie sicher, dass die WiFi-Anzeige (LED) auf dem Bedienfeld des Smart-Geräts blinkt, wie in der...
-
Page 16: Spezielle Entsorgungshinweise Für Verbraucher In Deutschland
SPEZIELLE ENTSORGUNGSHINWEISE FÜR VERBRAUCHER IN DEUTSCHLAND Entsorgen Sie Ihre Altgeräte fachgerecht. Dadurch wird gewährleistet, dass die Altgeräte umweltgerecht verwertet und negative Auswirkungen auf die Umwelt und menschliche Gesundheit vermieden werden. Bei der Entsorgung sind folgende Regeln zu beachten: • Jeder Verbraucher ist gesetzlich verpflichtet, Elektro- und Elek- tronikaltgeräte (Altgeräte) sowie Batterien und Akkus getrennt vom Hausmüll zu entsorgen. - Page 17 • Bei einem Vertrieb unter Verwendung von Fernkommunikationsmitteln ist die unentgeltliche Abholung am Ort der Abgabe auf Elektro- und Elektronikgeräte der Kategorien 1, 2 und 4 gemäß § 2 Abs. 1 ElektroG, nämlich „Wärmeüberträger“, „Bildschirmgeräte“ (Oberfläche von mehr als 100 cm²) oder „Großgeräte“...
-
Page 18: Hinweise Zur Entsorgung
Berlin Brands Group UK Limited PO Box 42 272 Kensington High Street London, W8 6ND United Kingdom Hiermit erklärt Chal-Tec GmbH, dass der Funkanlagentyp Bolero Smart der Richtlinie 2014/53/EU entspricht. Der vollständige Text der EU-Konformitätserklärung ist unter der folgenden Internetadresse verfügbar: use. berlin/10046058... -
Page 19: Technical Data
Dear Customer, Congratulations on purchasing this equipment. Please read this manual carefully and take care of the following hints on installation and use to avoid technical damages. Any failure caused by ignoring the items and cautions mentioned in the operation and installation instructions are not covered by our warranty and any liability. -
Page 20: Safety Instructions
SAFETY INSTRUCTIONS • Never attach the fan to a power point,but to the ceiling itself. • The minimum distance between the blades of the fan and the floor must be more than 2.3 m. The minimum carrying capacity of the hook from which the fan is hung must be 100 kg. -
Page 21: Scope Of Supply
SCOPE OF SUPPLY Carefully open the packaging. Remove items from Styrofoam inserts. Remove motor housing and place on carpet or Styrofoam to avoid damage to finish. Check against parts inventory that all parts have been included. canopy downrod and hanging ball downrod hanger bracket decorative covers... -
Page 22: Installaton
INSTALLATON Installation prepraton To prevent personal injury and damage, ensure that the hanging location allows the blades a clearance of 2.3m from the floor and 76cm from any wall or 76 cm obstruction. from wall 2.3 m or nearest blades to floor Be sure the outlet box is securely obstructions attached to the building structure... - Page 23 Installing the Hanger Bracket wood ceiling concrete ceiling Please drill ⌀8-mm hole on the concrete ceiling, and insert the the dowels and the bolts. Align bracket with the hole, then tighten with nut.
- Page 24 Assembling and Hanging the Fan electical wiring canopy decorative covers hanging ball slot stop pin R clip adapter yoke set screw If you wish to extend the hanging length of your fan, you must remove the hanging ball from the 6 inch downrod provided to use with an extended downrod (included) .
- Page 25 Remote control connection green/yellow stripe Ground White Neutral N ( ) wire Light L blue ( ) (Black) Remote Grey DC motor L control receiver input N Pink DC motor L (white) Red DC motor L Receiver place: Canopy assembly Raise canopy to hanging bracket, aligning loosened screws in hanging bracket with slotted holes in canopy.
- Page 26 Blade assembly Time Saver: Washers for blade screws can be set on each blade screw prior to installing blades. Located blade attachment screws and washer in one of the hardware packs. Hold blade arm up to the blade and align holes. Insert blade attachment screws {along with washers) with fingers first and then tighten screws securely with a screwdriver.
- Page 27 Lamp shade assembly Restore the cover and the lamp shade back to the LED pan, and secure them with decorative clips and bolt nuts.
-
Page 28: Use And Operation
USE AND OPERATION Light CCT Light on/off conversion Fan speed Fan switch Timer key Forward & Reverse... - Page 29 Battery replacement • Use the remote control transmitter to change the speed of the fan and to switch the light and fan on or off. • Replace the batteries by sliding the battery compartment cover on the remote control transmitter in the direction of the arrow, fit 2 x “AAA” batteries, ensure the polarity of the batteries match with the figures shown in the battery compartment.
-
Page 30: Device Control By Smartphone
Make sure your smartphone is connected to the same WiFi network that your Klarstein device is to be connected to. Open the Klarstein app. Sign in to your account. If you do not have an account, sign up in the Klarstein app. Follow the instructions from the app. - Page 31 Firewall settings of your WiFi network; the firewall setting of your WiFi network may not allow the Klarstein app to configure the WiFi settings on your smart device. Please make sure that you are not using a public WiFi network, e.g.
-
Page 32: Disposal Considerations
London, W8 6ND United Kingdom Hereby, Chal-Tec GmbH declares that the radio equipment type Bolero Smart is in compliance with Directive 2014/53/EU. The full text of the EU declaration of conformity is available at the following internet address: use.berlin/10046058 For Great Britain: Hereby, Chal-Tec GmbH declares that the radio equipment type Bolero Smart is in compliance with the relevant statutory requirements. -
Page 33: Fiche Technique
Cher client, chère cliente, Toutes nos félicitations pour l’acquisition de ce nouvel appareil. Lisez attentivement les consignes suivantes et suivez-les pour éviter d'éventuels dommages. Nous ne saurions être tenus pour responsables des dommages dus au non-respect des consignes et à la mauvaise utili- sation de l’appareil. -
Page 34: Consignes De Sécurité
CONSIGNES DE SÉCURITÉ • Ne fixez jamais le ventilateur à une prise de courant, mais plutôt au plafond lui-même. • La distance minimale entre les pales du ventilateur et le sol doit être supérieure à 2,3 m. La capacité de charge minimale du crochet sur lequel le ventilateur est accroché... -
Page 35: Contenu De L'emballage
CONTENU DE L'EMBALLAGE Ouvrez soigneusement l'emballage. Retirez les protections en polystyrène. Retirez le bloc moteur et placez-le sur un tapis ou de la mousse de polystyrène pour éviter d'endommager le sol. Vérifiez la liste des pièces pour vous assurer que toutes les pièces sont incluses. -
Page 36: Installation
INSTALLATION Préparatifs avant l'installation Pour éviter les blessures et les dommages, assurez-vous que les lames du support sont à 2,3 m du sol et à 76 cm de tout mur ou obstacle. 76 cm du mur et de l'objet le 2,3 m Assurez-vous que le support de plus proche. - Page 37 Fixation du support de plafond Plafond en bois Plafond en béton Veuillez percer un trou (⌀ 8 mm) dans le plafond en béton et insérer les chevilles et les vis. Alignez le support avec le trou et serrez le support avec l'écrou.
- Page 38 Assemblage et suspension du ventilateur câblage électrique baldaquin Cage pour boule Garniture décorative suspendue boulon de retenue goupille Adaptateur Goupille filetée à joug Pour étendre la longueur de suspension de votre ventilateur, vous devrez retirer la boule suspendue de la tige de 6" incluse afin de l'utiliser avec une tige allongée (incluse) (si vous souhaitez utiliser la tige de 6", veuillez continuer avec les instructions ci-dessous).
- Page 39 Connexion à la télécommande rayé vert-jaune green/yellow stripe Ground Terre White Neutre (N) blanc Neutral N ( ) wire Light L blue Lampe (L) bleu ( ) Noir (Black) Remote Grey DC motor L Moteur (CC) L (gris) control receiver input N Entrée N Moteur (CC) L (rose)
- Page 40 Montage des pales Gain de temps : des rondelles de vis à oreilles peuvent être placées sur chaque vis de lame avant d'installer les lames. Les vis et rondelles pour la fixation des pales du rotor se trouvent dans l'un des emballages de matériel.
- Page 41 Fixation du boîtier de la lampe Remettez le cache et l'abat-jour sur la coque en chiffon et fixez-les avec des clips de garniture et des écrous.
-
Page 42: Mise En Marche Et Utilisation
MISE EN MARCHE ET UTILISATION • Appuyez sur le bouton Vitesse de la télécommande pour sélectionner une vitesse : HI : Élevée - MED : Moyenne - FAIBLE : Faible - OFF : Désactivé. • L'interrupteur sur le boîtier du moteur peut servir à diriger le flux d'air généré par les pales du rotor. -
Page 43: Contrôle De L'appareil Par Smartphone
CONTRÔLE DE L'APPAREIL PAR SMARTPHONE Si vous intégrez votre appareil Klarstein à votre WiFi domestique, vous pouvez le contrôler confortablement à l'aide de l'application Klarstein associée. L'application vous permet non seulement de contrôler l'appareil à distance sur votre smartphone, mais vous donne également accès à des recettes et à d'autres informations. - Page 44 Vérifiez les paramètres du pare-feu de votre réseau WiFi. Le paramétrage de pare-feu de votre réseau WiFi peut ne pas permettre à l'application Klarstein de configurer les paramètres WiFi sur votre appareil connecté. Veuillez vous assurer que vous n'utilisez pas un réseau WiFi public, par ex. aéroports, dortoirs, entreprises, etc.
-
Page 45: Conseils Pour Le Recyclage
London, W8 6ND United Kingdom Le soussigné, Chal-Tec GmbH, déclare que l’équipement radioélectrique du type Bolero Smart est conforme à la directive 2014/53/UE. Le texte complet de la déclaration UE de conformité est disponible à l’adresse internet suivante : use.berlin/10046058... -
Page 47: Dati Tecnici
Gentile cliente, La ringraziamo per l'acquisto del dispositivo. La preghia- mo di leggere attentamente le seguenti indicazioni e di seguirle per evitare eventuali danni. Non ci assumiamo alcuna responsabilità per danni scaturiti da una manca- ta osservanza delle avvertenze di sicurezza e da un uso improprio del dispositivo. -
Page 48: Avvertenze Di Sicurezza
AVVERTENZE DI SICUREZZA • Non fissare mai il ventilatore a una presa elettrica, ma direttamente al soffitto. • La distanza minima tra le pale del ventilatore e il pavimento deve essere superiore a 2,3 m. La capacità di carico del gancio a cui viene fissato il ventilatore deve essere di almeno 100 kg. -
Page 49: Volume Di Consegna
VOLUME DI CONSEGNA Aprire con cura la confezione. Togliere i componenti dagli inserti in polistirolo. Togliere l'alloggiamento del motore e poggiarlo su un tappeto o sul polistirolo, in modo da evitare danni alla superficie. Con l'aiuto dell'elenco delle parti, assicurarsi che siano presenti tutti i componenti. -
Page 50: Montaggio
MONTAGGIO Preparazione dell'installazione Per evitare danni e lesioni, assicurarsi che le pale sul gancio di fissaggio si trovino a 2,3 m di distanza dal pavimento e a 76 cm da tutte le pareti o altri ostacoli. 76 cm dalla parete all'og- 2,3 m Assicurarsi che il supporto a getto più... - Page 51 Fissaggio del supporto a soffitto Soffitto di legno Soffitto di calcestruzzo Realizzare un foro (⌀8 mm) nel soffitto di calcestruzzo e inserire il tassello e la vite. Posizionare il supporto in corrispondenza del foro e stringere saldamente il supporto con il dado.
- Page 52 Assemblare e fissare il ventilatore Cablaggio elettrico Baldacchino Vano per la sfera Pannello decorativo sospesa Bullone di fissaggio Stecca Adattatore Perno filettato del giogo Per estendere la lunghezza del gancio di fissaggio del ventilatore, è necessario rimuovere la sfera di fissaggio dall'asta da 6 pollici in dotazione, in modo da poter utilizzare un'asta più...
- Page 53 Collegamento al telecomando a strisce giallo-verdi green/yellow stripe Messa a Ground terra White Neutro (N) bianco Neutral N ( ) wire Light L blue Lampada (L) blu ( ) nero (Black) Remote Grey DC motor L Motore (corrente continua) L (grigio) control receiver input N...
- Page 54 Montaggio delle pale Per risparmiare tempo: le rondelle per le viti delle pale possono essere posizionate su ogni vite prima di montare le pale. Le viti e le rondelle per il fissaggio delle pale del rotore si trovano in uno dei pacchetti del materiale di montaggio.
- Page 55 Installazione del portalampada Rimontare la copertura e il paralume al portalampada e fissarli con morsetti decorativi e dadi.
-
Page 56: Messa In Funzione E Utilizzo
MESSA IN FUNZIONE E UTILIZZO • Premere il tasto Speed sul telecomando per selezionare una velocità: HI: alta - MED: media - LOW: bassa - OFF: spento. • Con l'interruttore sull'alloggiamento del motore è possibile modificare la direzione del flusso d'aria generato dalle pale del rotore. Attenzione: prima di cambiare la direzione del flusso d'aria, spegnere il ventilatore e aspettare che si fermi, in modo da non ferirsi o danneggiare il motore. -
Page 57: Controllo Del Dispositivo Con Smartphone
CONTROLLO DEL DISPOSITIVO CON SMARTPHONE Se si collega il dispositivo Klarstein con la rete WiFi di casa, è possibile utilizzarlo comodamente con l’apposita app di Klarstein. La app non permette solo di controllare il dispositivo a distanza con lo smartphone, ma offre anche accesso a utili informazioni. - Page 58 Correzione degli errori in caso di problemi di connessione Se non è possibile trovare il dispositivo Klarstein nella rete WiFi, controllare i seguenti punti: La spina non è collegata. Assicurarsi che il dispositivo sia collegato a una presa elettrica. Il dispositivo non si trova in modalità di accoppiamento. Assicurarsi che l'indicazione WiFi (LED) sul pannello di controllo del dispositivo smart lampeggi come descritto alla voce "Resettare le impostazioni WiFi"...
-
Page 59: Smaltimento
272 Kensington High Street London, W8 6ND United Kingdom Il fabbricante, Chal-Tec GmbH, dichiara che il tipo di apparecchiatura radio Bolero Smart è conforme alla direttiva 2014/53/UE. Il testo completo della dichiarazione di conformità UE è disponibile al seguente indirizzo Internet: use.berlin/10046058... -
Page 61: Datos Técnicos
Estimado cliente: Le felicitamos por la adquisición de este producto. Lea atentamente el siguiente manual y siga cuidadosamente las instrucciones de uso con el fin de evitar posibles daños. La empresa no se hace responsable de los daños causados por el incumplimiento de las instrucciones y el uso indebido. -
Page 62: Indicaciones De Seguridad
INDICACIONES DE SEGURIDAD • No fije nunca el ventilador a una toma de corriente, sino al propio techo. • La distancia mínima entre las hojas del ventilador y el suelo debe ser superior a 2,3 m. La capacidad de carga mínima del gancho al que se cuelgue el ventilador debe ser de 100 kg. -
Page 63: Contenido Del Envío
CONTENIDO DEL ENVÍO Abra el embalaje con cuidado. Extraiga las piezas de los insertos de poliestireno. Retire la carcasa del motor y colóquela sobre una alfombra o poliestireno para no dañar la superficie. Utilice la lista de piezas para comprobar que se incluyen todas las piezas. -
Page 64: Montaje
MONTAJE Preparación de la instalación Para evitar lesiones y daños, asegúrese de que las cuchillas de la suspensión estén a 2,3 metros del suelo y a 76 cm de cualquier pared u obstáculo. 76 cm de la pared al 2.3 m Asegúrese de que el soporte objeto más Aspas al suelo... - Page 65 Fijación del soporte de techo Techo de madera Techo de hormigón Por favor, taladre un agujero (⌀8 mm) en el techo de hormigón e inserte los tacos y el tornillo. Alinee el soporte con el agujero y apriete el soporte con la tuerca.
- Page 66 Montaje y suspensión del ventilador Cableado eléctrico Marquesina Eje para bola Cubierta ornamental suspendida Perno de retención Pasador Adaptador Pasador roscado Si desea ampliar la longitud de suspensión de su ventilador, deberá retirar la bola de suspensión de la varilla de 6" suministrada para poder utilizarla con una varilla alargada (incluida) (si desea utilizar la varilla de 6", continúe con las instrucciones siguientes).
- Page 67 Conexión al mando a distancia Rayado verde-amarillo green/yellow stripe Ground Tierra White Neutral (N) blanco Neutral N ( ) wire Light L blue Lampara (L) azul ( ) Negro (Black) Remote Grey DC motor L Motor (corriente continua) L (gris) control receiver input N...
- Page 68 Montaje de las aspas Ahorro de tiempo: Las arandelas para los tornillos de las aspas pueden colocarse en cada tornillo de las aspas antes de instalarlas. Los tornillos y arandelas para la fijación de las palas del rotor se incluyen en uno de los paquetes de material.
- Page 69 Montaje del casquillo de la lámpara Vuelva a montar la cubierta y la pantalla en la carcasa de la lámpara y fíjelas con clips decorativos y tuercas roscadas.
-
Page 70: Puesta En Funcionamiento Y Manejo
PUESTA EN FUNCIONAMIENTO Y MANEJO • Pulse el botón Speed del mando a distancia para seleccionar una velocidad: Hi: alta - MED: media - LOW: baja - OFF: apagado. • Con el interruptor de la carcasa del motor se puede modificar la orientación de la corriente de aire que generan las aspas del rotor. -
Page 71: Control Del Aparato A Través Del Móvil
CONTROL DEL APARATO A TRAVÉS DEL MÓVIL Si conecta el aparato Klarstein a la red wifi de su casa, podrá manejarlo cómodamente a través de la aplicación «Klarstein». La aplicación no solo permite controlar el aparato a distancia a través del teléfono inteligente, sino que también da acceso a recetas y a más información. - Page 72 Solución de problemas de conexión Si el aparato de Klarstein no puede conectarse a la red wifi, compruebe lo siguiente: El aparato no está enchufado. Asegúrese de que su dispositivo esté conectado a un enchufe. El aparato no se encuentra en modo sincronización. Asegúrese de que el indicador de wifi (led) parpadea en el panel de control del dispositivo inteligente, tal y como se describe en las instrucciones «Restablecer la...
-
Page 73: Retirada Del Aparato
London, W8 6ND United Kingdom Por la presente, Chal-Tec GmbH declara que el tipo de equipo radioeléctrico Bolero Smart es conforme con la Directiva 2014/53/UE. El texto completo de la declaración UE de conformidad está disponible en la dirección Internet...
Need help?
Do you have a question about the BOLERO SMART and is the answer not in the manual?
Questions and answers