
Related Manuals for Klarstein MONTEVERDE SMART


Summary of Contents for Klarstein MONTEVERDE SMART
- Page 1 MONTEVERDE SMART Deckenventilator Ceiling Fan Ventilateur de plafond Ventilador de techo Ventilatore a soffitto 10047032 10047033 www.klarstein.com...
-
Page 3: Table Of Contents
Sehr geehrte Kundin, sehr geehrter Kunde, wir gratulieren Ihnen zum Erwerb Ihres Geräts. Lesen Sie die folgende Anleitung sorgfältig durch und befolgen Sie sie, um mögliche Schäden zu vermeiden. Für Schäden, die durch Nichtbeachtung der Anleitung und unsachgemäßen Gebrauch entstehen, übernehmen wir keine Haftung. Scannen Sie den QR-Code, um Zugriff auf die aktuellste Bedienungsanleitung und weitere Informationen rund um das Produkt zu erhalten. -
Page 4: Sicherheitshinweise
SICHERHEITSHINWEISE • Befestigen Sie den Ventilator niemals an einer Steckdose, sondern direkt an der Decke. • Der Mindestabstand zwischen den Flügeln des Ventilators und dem Boden muss mehr als 2,3 m betragen. Die Tragfähigkeit des Hakens, an dem der Ventilator aufgehängt wird, muss mindestens 100 kg betragen. •... -
Page 5: Lieferumfang
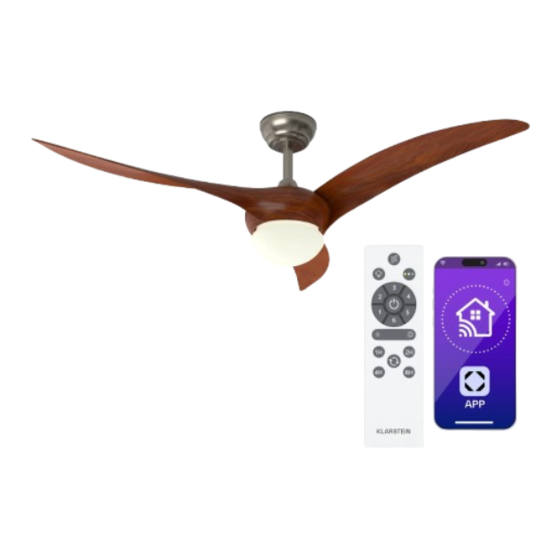
LIEFERUMFANG Abdeckung Deckenstange und Hängekugel Deckenstange Befestigungsklammer Dekorative Abdeckungen Motor Flügel Beleuchtungs-Set Lampenschirm Fernbedienung Schraubenpackung... - Page 6 Fernbedienung Natürlicher Wind Lichttemperatur kühl Licht ein/aus - warm Ventiltorgeschwindigkeit Ein/Aus Timer 1 Stunde Drehrichtung 2 Stunden 4 Stunden 8 Stunden...
-
Page 7: Übersicht
ÜBERSICHT 比例 1.000... -
Page 8: Installation
INSTALLATION Installationsvorbereitung Um Verletzungen und Schäden zu vermeiden, stellen Sie sicher, dass die Flügel in einem Abstand von 2,3 m vom Boden und 76 cm von Wänden oder Hindernissen aufgehängt werden können. Vergewissern Sie sich, dass der Anschlusskasten sicher an der Gebäudestruktur befestigt ist und das volle Gewicht des Ventilators tragen kann. - Page 9 Den Installationsort des Ventilators vorbereiten Dieser Ventilator kann mit einer Deckenstange an einer normalen oder gewölbten Decke montiert werden. Die Aufhängelänge kann durch Verwendung einer längeren Deckenstange vergrößert werden. Standard- 20 °C Stützstrebe 20° Montageart Stützstrebe Schräge Montage Die Standardmontage hängt mit einer Bei einer gewölbten oder schrägen Decken wird Deckenstange von der Decke eine schräge Montage empfohlen...
-
Page 10: Zusammenbau
ZUSAMMENBAU Zusammenbau und Aufhängung des Ventilators Elektrische Verkabelung Abdeckung Schlitz für Dekorative Abdeckungen Aufhängkugel Durchgangsklemme R-Clip Adapter Bügel-Stellschraube • Wenn Sie die Aufhängung Ihres Ventilators verlängern möchten, müssen Sie die Aufhängekugel von der mitgelieferten 6"-Stange entfernen, um sie mit einer längeren Stange (im Lieferumfang enthalten) zu verwenden (wenn Sie die 6"-Stange verwenden möchten, folgen Sie den Anweisungen unten). - Page 11 Montage der Abdeckung Abdeckung • Heben Sie die Abdeckung hoch zur Befestigungsklammer an und richten Sie dabei die gelösten Schrauben in der Befestigungsklammer mit den die Langlöcher in der Abdeckung aus. Drehen Sie die Abdeckung zum Fixieren. Setzen Sie die Schrauben wieder ein und ziehen Sie alle Schrauben mit einem Schraubendreher fest.
- Page 12 Montage des Beleuchtungs-Sets Entfernen Sie die drei Schrauben an der Motoranschlussplatte. Ordnen Sie alle Drähte im Inneren der Anschlussplatte sorgfältig an. Richten Sie die Löcher auf der Rückseite der LED-Leuchte mit den drei Schrauben auf der Motoranschlussplatte aus (siehe Abb. 1) und ziehen Sie die drei Schrauben vom Loch auf der LED-Platte aus an.
- Page 13 Anschluss für die Fernbedienung grün/gelb gestreift green/yellow stripe Ground Erdungs- draht wire (schwarz) (Black) Remote Grau DC-Motor L Grey DC motor L control receiver input N Eingang N Rosa DC-Motor L Pink DC motor L (white) (weiß) Red DC motor L Rot DC-Motor L Receiver place: Platzierung...
- Page 14 Montage des dekorativen Rahmens 比例 1.000...
-
Page 15: Gerätesteuerung Über Das Smartphone
GERÄTESTEUERUNG ÜBER DAS SMARTPHONE Wenn Sie das Gerät mit Ihrem WLAN zu Hause verbinden, können Sie es bequem über die zugehörige Klarstein-App bedienen. Die App ermöglicht Ihnen nicht nur die Fernsteuerung des Geräts über Ihr Smartphone, sondern gibt Ihnen auch Zugriff auf Rezepte und zusätzliche Informationen. - Page 16 Fehlerbehebung bei Verbindungsproblemen Wenn Ihr Klarstein-Gerät im WLAN nicht gefunden werden kann, überprüfen Sie Folgendes: Das Gerät ist nicht eingesteckt. Stellen Sie sicher, dass Ihr Gerät an eine Steckdose angeschlossen ist. Das Gerät befindet sich nicht im Kopplungsmodus. Vergewissern Sie sich, dass die WLAN-Anzeige (LED) auf dem Bedienfeld Ihres Smart-Gerätes blinkt, wie...
-
Page 17: Reinigung Und Pflege
REINIGUNG UND PFLEGE • Trennen Sie das Gerät immer vom Stromnetz, bevor Sie das Gerät reinigen oder Wartungsarbeiten durchführen. • Verwenden Sie zur Reinigung des Geräts niemals einen nassen Schwamm. • Um das Produkt nicht zu beschädigen, empfiehlt es sich, geeignete Mittel für die empfindlichen Oberflächen und Produkte zu verwenden, die die Abnutzung des Geräts verlangsamen. -
Page 18: Spezielle Entsorgungshinweise Für Verbraucher In Deutschland
SPEZIELLE ENTSORGUNGSHINWEISE FÜR VERBRAUCHER IN DEUTSCHLAND Entsorgen Sie Ihre Altgeräte fachgerecht. Dadurch wird gewährleistet, dass die Altgeräte umweltgerecht verwertet und negative Auswirkungen auf die Umwelt und menschliche Gesundheit vermieden werden. Bei der Entsorgung sind folgende Regeln zu beachten: • Jeder Verbraucher ist gesetzlich verpflichtet, Elektro- und Elektronikaltgeräte (Altgeräte) sowie Batterien und Akkus getrennt vom Hausmüll zu entsorgen. - Page 19 • Bei einem Vertrieb unter Verwendung von Fernkommunikationsmitteln ist die unentgeltliche Abholung am Ort der Abgabe auf Elektro- und Elektronikgeräte der Kategorien 1, 2 und 4 gemäß § 2 Abs. 1 ElektroG, nämlich „Wärmeüberträger“, „Bildschirmgeräte“ (Oberfläche von mehr als 100 cm²) oder „Großgeräte“...
-
Page 20: Hinweise Zur Entsorgung
Berlin Brands Group UK Limited PO Box 42 272 Kensington High Street London, W8 6ND United Kingdom Hiermit erklärt Chal-Tec GmbH, dass der Funkanlagentyp Monteverde Smart der Richtlinie 2014/53/EU entspricht. Der vollständige Text der EU-Konformitätserklärung ist unter der folgenden Internetadresse verfügbar: use. berlin/10047032... -
Page 21: Technical Data
Dear Customer, Congratulations on purchasing this device. Please read the following instructions carefully and follow them to prevent possible damages. We assume no liability for damage caused by disregard of the instructions and improper use. Scan the QR code to get access to the latest user manual and more product information. -
Page 22: Safety Instructions
SAFETY INSTRUCTIONS • Never attach the fan to a power point,but to the ceiling itself. • The minimum distance between the blades of the fan and the floor must be more than 2.3 m. The minimum carrying capacity of the hook from which the fan is hung must be 100 kg. -
Page 23: Scope Of Delivery
SCOPE OF DELIVERY Canopy Downrod and hanging ball Downrod Hanger bracket Decorative covers Motor Blade Light Kit Shade Remote control Spiral package... -
Page 24: Remote Control
Remote control natural wind light temperature light on/off cool – warm fan speed on/off light strength Timer 1 hour spinning direction 2 hours 4 hours 8 hours... -
Page 25: Overview
OVERVIEW 比例 1.000... -
Page 26: Installation
INSTALLATION Installation Preparation To prevent personal injury and damage, ensure that the hanging location allows the blades to be 2.3 m from the floor and 76 cm from any wall or obstruction. Ensure that the junction box is securely attached to the building structure and can support the full weight of the fan. -
Page 27: Installing The Hanger Bracket
Preparing the fan site This fan can be mounted on a normal or vaulted ceiling using a down rod. The hanging length can be increased by using a longer down rod. Standard 20 °C Support brace 20° Support brace Mounting Style Angled Mounting... -
Page 28: Assembly
ASSEMBLY Assembling and hanging the fan electrical wiring Canopy hanging Decorative covers ball slot through clip R-Clip Adapter yoke set screw • If you wish to extend the hanging length of your fan, you will need to remove the hanging ball from the supplied 6“ down rod to use with an extended down rod (supplied) (if you wish to use the 6“... -
Page 29: Canopy Assembly
Canopy Assembly Canopy • Lift the canopy up to the hanger bracket, aligning the loosened screws in the hanger bracket with the slotted holes in the canopy. Turn canopy to lock. Re- insert screws and secure all screws with screwdriver. •... - Page 30 Assemble Light Kit Remove the three screws from the motor connection plate. Carefully tidy up all the wires inside the connection plate. Assemble and align the holes on the back of the LED light with the three screws on the motor connection plate, please see the picture (Fig.1), then tighten the three screws from the hole on the LED plate.
- Page 31 Remote control connection green/ yellow stripe green/yellow stripe Ground Ground wire wire (black) (Black) Remote Grey DC motor L Grey DC motor L control receiver input N input N Pink DC motor L Pink DC motor L (white) (white) Red DC motor L Red DC motor L Receiver place: Receiver place...
- Page 32 Decorative Pan Assembly 比例 1.000...
-
Page 33: Device Control By Smartphone
Make sure your smartphone is connected to the same WiFi network that your Klarstein device is to be connected to. Open the Klarstein app. Sign in to your account. If you do not have an account, sign up in the Klarstein app. Follow the instructions from the app. - Page 34 Firewall settings of your WiFi network; the firewall setting of your WiFi network may not allow the Klarstein app to configure the WiFi settings on your smart device. Please make sure that you are not using a public WiFi network, e.g.
-
Page 35: Cleaning And Care
CLEANING AND CARE • Always disconnect the appliance from the power supply before cleaning the appliance or carrying out maintenance work. • Never use a wet sponge to clean the appliance. • In order not to damage the product, it is advisable to use equipment adapted to the sensitive surfaces and products, which will slow down the wear of the device. -
Page 36: Disposal Considerations
London, W8 6ND United Kingdom Hereby, Chal-Tec GmbH declares that the radio equipment type Monteverde Smart is in compliance with Directive 2014/53/EU. The full text of the EU declaration of conformity is available at the following internet address: use. berlin/10074032... -
Page 37: Datos Técnicos
Estimado cliente: Le felicitamos por la adquisición de este producto. Lea atentamente el siguiente manual y siga cuidadosamente las instrucciones de uso con el fin de evitar posibles daños. La empresa no se responsabiliza de los daños ocasionados por un uso indebido del producto o por haber desatendido las indicaciones de seguridad. -
Page 38: Indicaciones De Seguridad
INDICACIONES DE SEGURIDAD • No fije nunca el ventilador a una toma de corriente, sino al propio techo. • La distancia mínima entre las aspas del ventilador y el suelo debe ser superior a 2,3 m. La capacidad de carga mínima del gancho del que cuelga el ventilador debe ser de 100 kg. -
Page 39: Volumen De Suministro
VOLUMEN DE SUMINISTRO Marquesina Varilla y bola de suspensión Varilla de bajada Soporte de suspensión Cubiertas decorativas Motor Cuchilla Kit de luces Sombra Mando a distancia Envase en espiral... -
Page 40: Mando A Distancia
Mando a distancia viento natural temperatura de la luz Luz encender/apagar fría - cálida Velocidad del on/off ventilador Temporizador 1 hora sentido de giro 2 horas 4 horas 8 horas... -
Page 41: Descripción
DESCRIPCIÓN 比例 1.000... -
Page 42: Instalación
INSTALACIÓN Preparación de la instalación Para evitar lesiones personales y daños, asegúrese de que la ubicación para colgar las cuchillas permite que estén a 2,3 m del suelo y a 76 cm de cualquier pared u obstáculo. Asegúrese de que la caja de conexiones esté bien sujeta a la estructura del edificio y pueda soportar todo el peso del ventilador. -
Page 43: Instalación Del Soporte De Suspensión
Preparar el lugar del ventilador Este ventilador puede montarse en un techo normal o abovedado utilizando una varilla de bajada. La longitud de suspensión puede aumentarse utilizando una varilla más larga. 20 °C 20° Estilo de Soporte Soporte montaje estándar Estilo de montaje en ángulo El montaje estándar cuelga del techo mediante... -
Page 44: Montaje
MONTAJE Montar y colgar el ventilador cableado eléctrico Marquesina ranura para Cubiertas decorativas bola colgante a través de clip R-Clip Adaptador tornillo de fijación del yugo • Si desea ampliar la longitud de colgado de su ventilador, deberá retirar la bola de colgado de la varilla de bajada de 6"... - Page 45 Montaje del tejadillo Aceptar Marquesina • Levante la carcasa hasta el soporte de suspensión, alineando los tornillos aflojados del soporte de suspensión con los orificios ranurados de la capota. Gire la cubierta para bloquearla. Vuelva a insertar los tornillos y asegure todos los tornillos con un destornillador.
- Page 46 Montar el kit de luces Retire los tres tornillos de la placa de conexión del motor. Ordena cuidadosamente todos los cables dentro de la placa de conexión. Ensamble y alinee los agujeros de la parte posterior de la luz LED con los tres tornillos de la placa de conexión del motor, por favor vea la imagen (Fig.1), luego apriete los tres tornillos desde el agujero de la placa LED.
- Page 47 Conexión del mando a distancia raya verde/amarilla green/yellow stripe Ground Suelo cable wire Largo (negro) (Black) Remote Gris Motor CC L Grey DC motor L control receiver input N entrada N Motor DC rosa L Pink DC motor L (white) (blanco) Red DC motor L Rojo Motor CC L...
- Page 48 Conjunto de bandeja decorativa 比例 1.000...
-
Page 49: Control Del Aparato Mediante Teléfono Inteligente
Si conecta el aparato a su red wifi doméstica, podrá manejarlo cómodamente a través de la aplicación de Klarstein. La aplicación no sólo le permite controlar el aparato a distancia a través del teléfono inteligente, sino que también le da acceso a recetas e información adicional. - Page 50 Resolución de problemas de conexión Si no encuentra el aparato de Klarstein en la lista de la red wifi, compruebe lo siguiente: El aparato no está enchufado. Asegúrese de que el aparato está enchufado a una toma de corriente. El aparato no está en modo de emparejamiento. Asegúrese de que el indicador wifi (led) del panel de control del aparato parpadea tal y como se describe en la sección «Restablecer configuración wifi»...
-
Page 51: Limpieza Y Cuidado
LIMPIEZA Y CUIDADO • Desconecte siempre el aparato de la red eléctrica antes de limpiarlo o realizar trabajos de mantenimiento. • No utilice nunca una esponja húmeda para limpiar el aparato. • Para no dañar el producto, es aconsejable utilizar equipos adaptados a las superficies y productos sensibles, que ralentizarán el desgaste del aparato. -
Page 52: Retirada Del Aparato
London, W8 6ND United Kingdom Por la presente, Chal-Tec GmbH declara que el tipo de equipo radioeléctrico Monteverde Smart es conforme con la Directiva 2014/53/UE. El texto completo de la declaración UE de conformidad está disponible en la dirección Internet siguiente: use.berlin/10047032... -
Page 53: Fiche Technique
Cher client, chère cliente, Toutes nos félicitations pour l’acquisition de ce nouveau produit. Lisez attentivement les indications suivantes et suivez-les pour éviter d'éventuels dommages. Nous ne saurions être tenus pour responsables des dommages dus au non-respect des consignes et à la mauvaise utilisation de l’appareil. -
Page 54: Consignes De Sécurité
CONSIGNES DE SÉCURITÉ • Ne jamais fixer le ventilateur à une prise de courant, mais au plafond lui- même. • La distance minimale entre les pales du ventilateur et le sol doit être supérieure à 2,3 m. La capacité de charge minimale du crochet de suspension du ventilateur doit être de 100 kg. -
Page 55: Contenu De L'emballage
CONTENU DE L'EMBALLAGE abat-jour Tige de suspension et boule de Tige de suspension suspension Support de suspension Caches décoratifs Moteur Pale Kit d'éclairage Abat-jour Télécommande Paquet de spirale... - Page 56 Télécommande Vent naturel Température de éclairage ON/OFF lumière froid - chaud vitesse de ventilation ON/OFF Minuterie 1 heure sens de rotation 2 heures 4 heures 8 heures...
-
Page 57: Aperçu
APERÇU 比例 1.000... -
Page 58: Installation
INSTALLATION Préparatifs de l'installation Pour éviter toute blessure ou tout dommage corporel, assurez-vous que l'emplacement de suspension permet aux pales d'être à 2,3 m du sol et à 76 cm de tout mur ou obstacle. Assurez-vous que la boîte de jonction est solidement fixée à la structure du bâtiment et peut supporter le poids total du ventilateur. -
Page 59: Installation Du Support De Suspension
Préparation de l'emplacement du ventilateur Ce ventilateur peut être monté sur un plafond normal ou voûté à l'aide d'une tige de suspension. La longueur de suspension peut être augmentée en utilisant une tige descendante plus longue. Montage 20 °C 20° Support de Support de standard... -
Page 60: Assemblage
ASSEMBLAGE Assemblage et suspension du ventilateur câblage électrique Abat-jour fente pour boule Caches décoratifs suspendue à travers le clip clip R Adaptateur vis de réglage du support • Si vous souhaitez augmenter la longueur de suspension de votre ventilateur, vous devrez retirer la boule de suspension de la tige descendante de 6 pouces fournie pour l'utiliser avec une tige descendante allongée (fournie) (si vous souhaitez utiliser la tige descendante de 6 pouces, veuillez suivre les instructions ci-dessous). - Page 61 Assemblage de l'abat-jour abat-jour • Soulevez l'abat-jour jusqu'au support de suspension, en alignant les vis desserrées du support de suspension avec les trous oblongs de l'abat-jour. Tournez l'abat-jour pour verrouiller. Réinsérez les vis et serrez-les toutes avec un tournevis. • Avec le support de suspension fixé...
- Page 62 Assembler le kit d'éclairage Retirez les trois vis de la plaque de connexion du moteur. Rangez soigneusement tous les fils à l’intérieur de la plaque de connexion. Assemblez et alignez les trous à l'arrière de la lumière LED avec les trois vis sur la plaque de connexion du moteur (voir Fig.1), puis serrez les trois vis du trou sur la plaque LED.
- Page 63 Connexion de la télécommande bande verte/jaune green/yellow stripe Ground câble wire (noir) (Black) Remote Moteur à courant continu gris L Grey DC motor L control receiver input N Moteur à courant continu rose L entrée N Pink DC motor L (white) (blanc) Red DC motor L...
- Page 64 Assemblage de panneaux décoratifs 比例 1.000...
-
Page 65: Contrôle De L'appareil Par Smartphone
à distance avec votre smartphone, mais vous donne également accès à des recettes et à des informations complémentaires. Suivez ces étapes pour connecter votre smartphone à votre appareil Klarstein Téléchargez d'abord l'application Klarstein en scannant le code QR avec votre smartphone (voir ci-dessous), ou téléchargez-la directement depuis l'App... - Page 66 Dépannage des problèmes de connexion Si votre appareil Klarstein ne peut pas être trouvé sur le WiFi, vérifiez les points suivants : L'appareil n'est pas branché. Assurez-vous que votre appareil est branché sur une prise électrique. L'appareil n'est pas en mode d'appairage. Assurez-vous que l'indicateur WiFi (LED) sur le panneau de commande de l'appareil intelligent clignote comme décrit dans les instructions «...
-
Page 67: Nettoyage Et Entretien
NETTOYAGE ET ENTRETIEN • Débranchez toujours l’appareil de l’alimentation électrique avant de le nettoyer ou d’effectuer des travaux d’entretien. • N'utilisez jamais d'éponge humide pour nettoyer l'appareil. • Afin de ne pas endommager le produit, il est conseillé d'utiliser un équipement adapté... -
Page 68: Conseils Pour Le Recyclage
London, W8 6ND United Kingdom Le soussigné, Chal-Tec GmbH, déclare que l’équipement radioélectrique du type Monteverde Smart est conforme à la directive 2014/53/UE. Le texte complet de la déclaration UE de conformité est disponible à l’adresse internet suivante : use.berlin/10047032... -
Page 69: Dati Tecnici
Gentile Cliente, La ringraziamo per aver acquistato il dispositivo. La preghiamo di leggere attentamente le seguenti istruzioni per l'uso e di seguirle per evitare possibili danni. Non ci assumiamo alcuna responsabilità per danni scaturiti da una mancata osservanza delle avvertenze di sicurezza e da un uso improprio del dispositivo. -
Page 70: Avvertenze Di Sicurezza
AVVERTENZE DI SICUREZZA • Non fissare mai il ventilatore a una presa di corrente, ma al soffitto stesso. • La distanza minima tra le pale del ventilatore e il pavimento deve essere superiore a 2,3 metri. La portata minima del gancio a cui è appeso il ventilatore deve essere di 100 kg. -
Page 71: Volume Di Consegna
VOLUME DI CONSEGNA Copertura Asta e sfera di sospensione Asta Staffa di sospensione Coperture decorative Motore Pala Kit della luce Paralume Telecomando Pacchetto a spirale... - Page 72 Telecomando Ventilazione naturale Temperatura della Luce on/off luce fredda-calda Velocità di on/off ventilazione Timer 1 ora Direzione di rotazione 2 ore 4 ore 8 ore...
-
Page 73: Panoramica
PANORAMICA 比例 1.000... -
Page 74: Installazione
INSTALLAZIONE Preparazione all'installazione Per evitare lesioni e danni alle persone, assicurarsi che la posizione di fissaggio consenta alle pale di trovarsi a 2,3 m dal pavimento e a 76 cm da qualsiasi parete o ostacolo. Assicurarsi che la scatola di giunzione sia fissata saldamente alla struttura dell'edificio e possa sostenere l'intero peso del ventilatore. - Page 75 Preparazione del luogo di posizionamento per il ventilatore Questo ventilatore può essere montato su un soffitto normale o a volta utilizzando un'asta. La distanza dal soffitto può essere aumentata utilizzando un'asta più lunga. Stile di Sostegno Sostegno montaggio 20° standard Stile di montaggio inclinato...
-
Page 76: Montaggio
MONTAGGIO Montaggio e fissaggio del ventilatore Cablaggio elettrico Copertura Fessura per la sfera Coperture decorative di sospensione Attraverso la clip Clip R Adattatore Vite di fissaggio del glifo • Se si desidera estendere la lunghezza di sospensione del ventilatore, è necessario rimuovere la sfera di sospensione dall'asta da 6"... - Page 77 Montaggio della copertura Copertura • Sollevare la copertura fino alla staffa di sospensione, allineando le viti allentate della staffa con i fori della copertura. Ruotare la copertura per bloccarla. Reinserire le viti e fissarle tutte con il cacciavite. • Con la staffa di sospensione fissata alla scatola di uscita e in grado di sostenere il ventilatore, si è...
- Page 78 Assemblare il kit delle luci Rimuovere le tre viti dal pannello di collegamento del motore. Ordinare con cura tutti i cavi all'interno del pannello di collegamento. Assemblare e allineare tutti i fori sul retro della luce LED con le tre viti sul pannello di collegamento del motore (v.
- Page 79 Connessione del telecomando Striscia verde/gialla green/yellow stripe Ground Messa a terra wire Filo (nero) (Black) Remote Motore CC grigio L Grey DC motor L control receiver input N Ingresso N Motore CC rosa L Pink DC motor L (white) (bianco) Red DC motor L Motore CC rosso L Receiver place:...
- Page 80 Montaggio dell'elemento decorativo 比例 1.000...
-
Page 81: Controllo Del Dispositivo Con Lo Smartphone
SMARTPHONE Se il dispositivo viene integrato nella rete WiFi casalinga, può essere comodamente utilizzato con la app Klarstein. La app non permette solo di controllare il dispositivo dalla distanza con lo smartphone, ma offre anche accesso a ricette e informazioni aggiuntive. - Page 82 WiFi pubblica, ad es. presso aeroporti, hotel, aziende, ecc. Vengono usate credenziali diverse sullo smartphone e nella app. Assicurarsi che le credenziali WiFi inserite nella app Klarstein siano uguali a quelle a cui è connesso lo smartphone. Se non è possibile connettere il dispositivo alla app dopo aver seguito i passaggi precedenti, inviare un'email al seguente indirizzo per ricevere supporto: appsupport@go-bbg.com...
-
Page 83: Pulizia E Manutenzione
PULIZIA E MANUTENZIONE • Scollegare sempre il dispositivo dall'alimentazione elettrica prima di pulirlo o di effettuare interventi di manutenzione. • Non utilizzare mai una spugna bagnata per pulire il dispositivo. • Per non danneggiare il prodotto, si consiglia di utilizzare attrezzature adatte alle superfici e ai prodotti sensibili, che rallenteranno l'usura del dispositivo. -
Page 84: Avviso Di Smaltimento
London, W8 6ND United Kingdom Con la presente, Chal-Tec GmbH dichiara il dispositivo radio Monteverde Smart conforme alla direttiva 2014/53/UE. Il testo completo della dichiarazione di conformità UE è disponibile al seguente indirizzo web: use.berlin/10047032 Per la Gran Bretagna: con la presente, Chal-Tec GmbH dichiara il dispositivo radio Monteverde Smart conforme ai requisiti legali vigenti.
Need help?
Do you have a question about the MONTEVERDE SMART and is the answer not in the manual?
Questions and answers