JIMMY BX6 Pro - Anti-Mite Vacuum Cleaner Manual
- User manual (61 pages) ,
- User manual (27 pages)
Advertisement
Products Installation
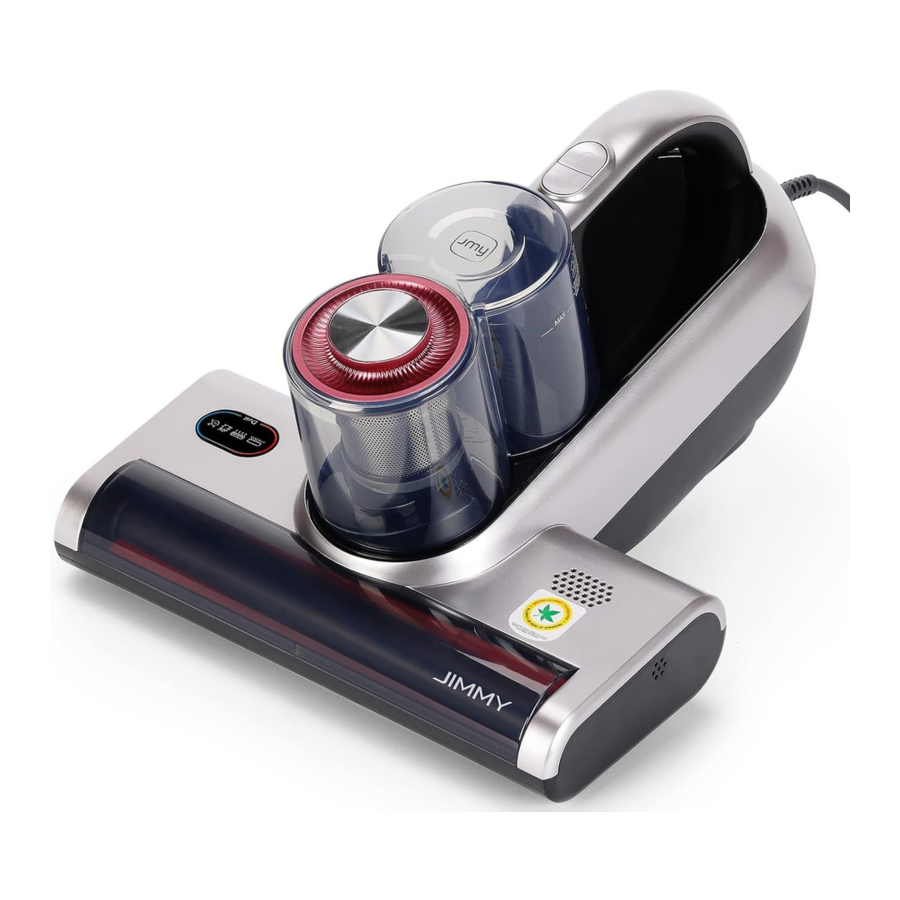
Parts Name

Packing List
Anti-mite vacuum cleaner x 1
Mini-brush x 1
HEPA filter x 1
User manual x 1
Use of the Product
Function description

Vacuum+Tap+UV Mode
After power on, the anti-mite vacuum cleaner starts with Vacuum +Tap +UV mode by default, the corresponding indicator light will be on, and the machine will start vacuuming function, brushroll tapping function, the UV light dust mite-removal function and the negative ion function.
Vacuum+Tap Mode
When the machine is in Vacuum+Tap+UV Mode, press mode button once to change to Vacuum+Tap mode. Corresponding indicator will be one and the machine will start vacuuming function, brushroll tapping function and the negative ion function
Vacuum+UV Mode
When the machine is in Vacuum+Tap Mode, press mode button once, press mode button once to change to Vacuum+UV mode. Corresponding indicator will be one and the machine will start vacuuming function, the UV light dust mite-removal function and the negative ion function.
Dust level display
When the cleaned surface is in a clean state, the dust level bar is blue. When it is in a dirty state, the dust level bar is red. When it is in a slightly dirty state, the dust level bar is yellow. As the dust level increases, the dust level bar slowly changes from blue to yellow, nd finally to red. As the dust level decreases, the dust level bar slowly changes from red to yellow until it is all blue.
Brushroll blockage indicator
This indicator flashes when the brushroll is blocked.
Cleaning and maintenance
 Note:
Note:
- HEPA filter is available for sale at JIMMY distributor.
- It is recommended to clean the dust cup in time after each use. When there is too much dust to cause HEPA blockage, it needs to be cleaned in time or replaced if necessary.
Cleaning of dust cup
Turn off the product, remove the dust cup according to the instruction label on the dust cup; Align the dust cup with the garbage can, press the bottom cover release button, open the bottom cover, and pour out the garbage.
(Figure 1)

HEPA filter cleaning
Hold the dust cup with one hand and pull out the filter assembly with the other hand. Turn HEPA bottom cover clockwise; Take out the HEPA assembly downward, tap the HEPA assembly downward to clean the dust, or use a brush to clean the dust and other debris on the HEPA assembly.
(Figure 2 -Figure 4)


After cleaning the dust cup and HEPA assembly, put the HEPA into the filter assembly and then rotate it anticlockwise to fix it. After the "click" sound is heard when rotating, and the HEPA is assembled in place without loosening. Then put the filter assembly back into the dust cup and press it to the bottom, the dust cup assembly is in place.
Note:
- Do not miss HEPA filter!
- If too much dust is accumulated in the dust cup, clean the dust cup and filter assembly with water, and wipe them with dry cloth. Pay attention that HEPA filter need to be washed as less as possible. Clean the dust and foreign matters on HEPA filter by tapping, and ensure that the dust cup and filter assembly are completely dry before installation.
Brushroll cleaning and assembly
Note: When cleaning the brushroll, be sure to disconnect the power supply to prevent the brushroll from starting by mistake and cause human injury.
Turn off the machine, unplug the power supply, push the brushroll cover latch. Turn it from the closed state to the open state, and then remove brushroll cover and take out brushroll. Clean brushroll with cleaning brush. After cleaning the brushroll, install the brushroll and brushroll cover back to mainbody in turn, and lock the brushroll latch.
(Figures 5)

Dust sensor cleaning
Dust sensor is installed inside of air inlet. Use mini brush to clean inner wall of air inlet to avoid too much dust accumulating on dust sensor and cause abnormal display of dust level.
(Figure 6)

Maintenance and Storage
Please clean dust cup and HEPA filter after each use for further use. It is recommended to replace a filter after 30-50 hours of working time(depending on specific situation) for better use.
Any paper, lead glass, plastic will greatly affect the effect of UV light. Dust or stain on UV light cover will affect the effect of UV light. Please wipe and clean the UV light cover regularly for better use.
Do not touch the UV light cover as dirt will affect UV light effect.
Put the machine in cool and dry place if the machine is to be idled. Do Not leave it in direct sunlight or humid environment.
Trouble Shooting
Please check the following trouble points before contacting after service.
| Problems | Possible Reasons | Solution |
| Product does not turn on | On/off switch is not pressed down | Press down on/off switch |
| No power on socket | Check the socket | |
| Power cord is not firmly inserted | Check whether the power plug is firmly inserted | |
| Weak suction | Air inlet blocked | Clean air inlet |
| HEPA blocked | Clean dust cup and HEPA | |
| Cyclone blocked | Clean cyclone | |
| UV light does not work | Machine tilt and micro switch left cleaning surface | Machine tilting degree cannot exceed 30 degree |
| UV light defect | Contact after service to replace UV light | |
| Machine stop working suddenly | Dust cup full | Stop using the product and clean blockage and use the machine af- ter 2 hours |
| Machine air inlet blocked | ||
| HEPA blocked | ||
| Brushroll stop working suddenly | Brushroll entangled | Take out brushroll, clean it and reassemble |
| Belt loose or broken | Contact after service to replace belt |
Product Specifications
Technical Parameter
| Model No | BX6 Pro |
| Rated voltage | 220-240V~ |
| Rated frequency | 50-60Hz |
| Rated power | 600W |
Circuit Diagram

Cautions
- Please read this instruction manual carefully before use, properly save and store it for future use.
- The product design and spec in the manual may slightly vary from the actual product. Please take physical product shall prevail.
- Never leave the machine working without supervision.
- Please turn off the power switch and unplug the power cord if the machine is to be idled. Do Not unplug the power cord with humid hand in case of electric shock.
- Cut off power when machine is under cleaning, repairing or is not used.
- Keep the power cord away from sharp objects and do not drag the cord to move the machine in case of cord damage.
- For safety reasons, please do not use the product to clean hot objects such as carbon, cigarette butts, sharp objects such as broken glass, corrosive liquids, flammable and explosive materials such as gasoline and alcohol. Otherwise it may cause product damage or fire.
- Do not use this machine to pick up water or wet dust, and avoid the machine from being exposed to rain, water or being used in wet places (such as bathrooms, washrooms, laundry rooms, etc.) to avoid failure.
- Avoid the product approaching heating appliances or being exposed to the sun to avoid fire.
- Do not let children play with or operate the product to avoid accidents.
- Avoid product running for a long time when the suction port is blocked to avoid damage.
- The product is equipped with UV light. Do not view the bottom of the machine when the power is turned on to prevent UV rays from causing harm to human body.
- Please do not let UV light shine on plants to avoid damaging them. Do not concentrate UV light in one place for continuous use, which may cause damage to the cleaned objects.
- Do not sit on the product to avoid damage.
- Do not remove brushroll when machine is powered on or running to avoid damage.
- This product can only use for cleaning of textiles such as mattresses, blankets, pillows, sofas, etc.
- If there is damage on power cord, to avoid danger, it should be replaced or repaired by manufacturer, repairing agency or professional person.
Documents / ResourcesDownload manual
Here you can download full pdf version of manual, it may contain additional safety instructions, warranty information, FCC rules, etc.
Advertisement


Need help?
Do you have a question about the BX6 Pro and is the answer not in the manual?
Questions and answers