Table of Contents
Advertisement
Quick Links
Advertisement
Table of Contents

Related Manuals for Yolink YS7906-UC

Summary of Contents for Yolink YS7906-UC
- Page 1 Water Leak Sensor 4 YS7906-UC Installation & User Guide Revision Jun. 07, 2023...
-
Page 2: Table Of Contents
Contents . Welcome! . Before You Begin . In the Box . Get to Know Your Water Leak Sensor 4 . Power Up . Install the App . Add Your Fob to the App . What Can I Do With My WL Sensor 4 . -
Page 3: Welcome
Welcome! Thank you for purchasing YoLink products! We appreciate you trusting YoLink for your smart home & automation needs. Your 100% satisfac- tion is our goal. If you experience any problems with your installation, with our products or if you have any questions that this manual does not answer, please contact us right away. -
Page 4: Before You Begin
Download the most current version of the user guide by scanning the QR code: Your Water Leak Sensor 4 connects to the internet via a YoLink hub (SpeakerHub or the original YoLink Hub), and it does not connect directly to your WiFi or local network. In order for remote access to the device from the app, and for full functionality, a hub is required. -
Page 5: In The Box
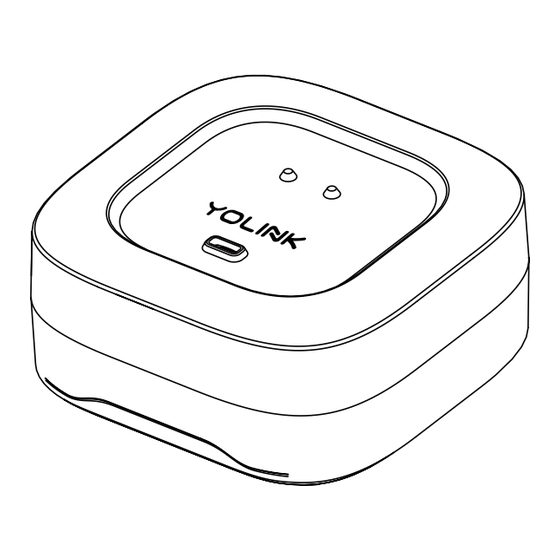
In the Box Quick Start Guide Water Leak Sensor 4 AAA Batteries (2) Installed Get to Know Your Water Leak Sensor 4 Alert LED Probe Sounder Probe Status LED SET Button... -
Page 6: Get To Know Your Water Leak Sensor
Get to Know Your Water Leak Sensor 4, Continued LED & Beep Behaviors Blinking Red Once, then Fast Blinking Green Green Once Control-D2D Pairing in Device Start-Up Progress Blinking Red And Green Blinking Red Once Alternately Device is connected to Restoring to Factory the cloud and is Defaults... -
Page 7: Install The App
Install the App If you are new to YoLink, please install the app on your phone or tablet, if you have not already. Otherwise, please proceed to the next section. “YoLink app” on the appropriate app store. Apple phone/tablet Android phone/tablet iOS 9.0 or higher... -
Page 8: Add Your Fob To The App
Add Your Water Leak Sensor 4 to the App 1. Tap Add Device (if shown) or tap the scanner icon: Scanner icon 2. Approve access to your phone’s camera, if app. 3. Hold the phone over the QR code so that the Add Device screen will be displayed. - Page 9 Add Your Water Leak Sensor 4 to the App, Continued 4. You can change the device name and assign it to a room later. Tap Bind device. 5. If successful, the screen will appear as shown. Tap Done.
- Page 10 Roomba robot vacuum cleaner). Please note: the button functions available to these third-party applications are in addition to press of button 1 might control a YoLink smart plug as well as activate an IFTTT routine). For more information on using your Water Leak Sensor 4 with one or more of these third-party applications, refer to page 27.
- Page 11 What Can I Do With My Water Leak Sensor 4, Continued Place the Water Leak Sensor where a leak or flooding may occur Suggested Additional Applications : Basement Floors Under Laundry Machines Under Dishwashers Under Refrigerators (w/Ice Machines) Near Sump Pumps Under Fish Tanks/Aquariums Inside Hot Tubs* Locations Subject to Freezing Pipes*...
- Page 12 Install the Water Leak Sensor 4 Sensor location considerations: Before placing and setting up your Water Leak Sensor 4, consider the following important factors: 1. The Water Leak Sensor 4 is intended for indoor use, only. It should only be used in indoor environments and within the temperature and listing and product support page on our website.
- Page 13 Install the Water Leak Sensor 4, Continued Water Leak Sensor 4 Probe Floor Water detected (Water depth >0.01 inch) 4. Applications for the Water Leak Sensor 4 are many, and they can not be covered in detail in this quick start guide. If you are unsure where to place your Water Leak Sensor 4, please contact 5.
- Page 14 Install the Water Leak Sensor 4, Continued 6. Consider how water may flow and pool or collect if there is a leak at each possible leak location. Consider the slope of the floor or the surface that water may drip onto. A leak at a sink cleanout will result in water directly below the sink, and this water may run towards the front of the vanity or cabinetry or to the back, draining...
- Page 15 Install the Water Leak Sensor 4, Continued Place the leak sensor After you have selected a location for the leak sensor, simply place it on the floor or surface, with the cupped part of the sensor facing up. Test the leak sensor Functionally test each sensor.
-
Page 16: Introduction To Wls 4 App Settings
Introduction to Water Leak Sensor 4 App Settings In the app, tap on your Water Leak Sensor 4’s icon. Your fob’s main screen should be similar to the one shown below. Tap to exit this screen Device name Tap for contact & support resources Tap for device Water Leak Sensor 4... - Page 17 B73768A9E0 Device Serial Number Temperature 77 °F Temperature Signal Intensity Strong (-37 dBm) Battery Signal Intensity (From YoLink Hub) Firmware 0313 Battery Firmware Revision Delete (Refer to page 26) Remove Device From Current Account - Tap to delete the device from your...
-
Page 18: Wls 4 Settings: Device Control
Water Leak Sensor 4 Settings: Device Control To control one or more YoLink devices, you have several options, including controlling one or more devices by assigning them to one of the buttons via app settings, by activating a scene (that might include taking an action on one or... - Page 19 Water Leak Sensor 4 Settings: Device Control, Continued 4. To use the click/short-press function of the button, tap the + button in that section. Otherwise, tap the + button in the long press section. 5. Tap Device Actions. The Choose and Set screen opens.
-
Page 20: Wls 4 Settings: Home Assistant
Home Assistant support for the Water Leak Sensor 4 will be included in the next update. Refer to the Home Assistant website and the YoLink integration page for instructions. Programmers and developers are encouraged to join us on Discord. Sign up here:... -
Page 21: Wls 4 Settings: Scenes
Water Leak Sensor 4 Settings: Scenes Before you can assign a scene to a button, you 1. In the app, from the Favorite or Rooms screen, tap the Smart button (on the bottom bar of the app). 2. The Smart screen is displayed. This screen has two parts or tabs, the Scene tab, on the left, and the Automation tab (on the right). -
Page 22: Wls 4 Settings: Alarm Strategies
Water Leak Sensor 4 Settings: Alarm Strategies You can use your Water Leak Sensor 4 to enable or disable or edit an Alarm Strategy. (It is not in the scope of this user guide to cover Alarm Strategy creation and settings. Please refer to product and app support resources to familiarize yourself with Alarm Strategy settings.) 1. - Page 23 Water Leak Sensor 4 Settings: You can actually send yourself or other account you have a SpeakerHub, have it play an attention-getting tone, followed by it playing your message via text-to-speech. An example of needed getting out of bed. In this example, we will create a garage door status checker, that will play a message, only if the door is closed.
-
Page 24: Wls 4Settings: Alexa
Alexa (you can still use the long-press behavior for other things as Alexa ignores it) and in fact, you can still assign a YoLink app function to this button (although you are probably unlikely to need to do this). It is not in the scope... -
Page 25: Wls 4 Settings: Ifttt
IFTTT You can use the Water Leak Sensor 4 to trigger IFTTT applets. You must have the IFTTT app installed, the YoLink service installed and connected to your YoLink app account. Please note, IFTTT.com is a paid service, typically offering 5 free applets. - Page 26 Water Leak Sensor 4 Settings: IFTTT, Cont. 9. Review your applet settings, if they are correct tap Finish. Test your new applet by short- or long-pressing on the appropriate Water Leak Sensor 4 button.
-
Page 27: Control-D2D Device-To-Device Pairing
Control-D2D, YoLink devices can be controlled without the Hub or an internet connection. (Use of YoLink Control-D2D is optional; you can use the Automation feature in the app OR use YoLink Control, but YoLink Control-D2D offers the connection.) One device controls another, directly. - Page 28 Control-D2D Device-to-Device Pairing, Continued the responder, close the valve using SET button or via YoLink app (verify the valve is shown to be Closed on the app).Press and hold the SET button for 5-10 seconds until the LED quickly blinks green, then, release the button.
- Page 29 Sensor to normal (no water detected) does not open the valve Water Leak Sensor 4 Probe Floor Water detected (Water depth >0.01 inch) More advanced sequences, controlling multiple outputs (e.g.close valve and activate siren)are available via the YoLink app Water Pipe Opened Closed...
-
Page 30: Unpairing
Unpairing Please visit our website’s Support page for the settings and instructions: www.yosmart.com/support-and-service... -
Page 31: Battery Replacement
Battery Replacement Tools Required : Small Philips Screwdriver Tweezers 1. To maintain the watertight design of your Water Leak Sensor, use extreme care and follow the battery replacement instructions closely 2. Do not mix old and new batteries 3. Make sure that the bottom shell and sealed rubber pads are tightly secured.Otherwise, the entry of water into the sensor may cause severe damage... - Page 32 Battery Replacement, Continued Use tweezers to take out the four sealed rubber pads at the base of the device Use a screwdriver to unscrew the screws at the base of the device and remove the base Remove the two old batteries...
- Page 33 Battery Replacement, Continued Install two new AAA batteries 2 × AAA Close and secure the base by reinstalling and tightening the four screws Reattach the four sealing rubber pads...
- Page 34 Voltage : 3V DC (2 - alkaline non-rechargeable AAA batteries) IP Rating : IP68 Dimensions : 2.44 × 2.44 × 0.93 inches (62 × 62 × 23.5 millimeters, L×W×D) Environment : Working Temperature : 32°F - 122°F (0°C - 50°C) Working Humidity : non-condensing...
-
Page 35: Factory Reset
Factory Reset When directed by customer support, and/or as an attempt to resolve a problem with your fob, it may be necessary to perform a factory reset. Factory resetting your fob returns it to the factory default programming and settings. This is a simple process: Hold the SET Button for 20 to 30 seconds, until the LED blinks red and green... -
Page 36: Firmware Updates
Firmware Updates Your YoLink products are frequently being improved, with new features and functions added over time. It is periodically necessary to optimal performance of your device, and to give you access to any improvements made to your installed (added to your device) when they become available. -
Page 37: Troubleshooting
Firmware Updates, Continued the overall operations of the fob, for example, determining when and how the fob’s sounder should beep. These settings are added to the fob when it is manufactured, and they are periodically updated, as needed, to add improvements, new features, new integrations, etc, to your fob, as they become available. -
Page 38: Warnings
Warnings For optimal performance and lifetime of your fob, please adhere to the following warnings: The Water Leak Sensor 4 is water-resistant but not waterproof. Do not allow your fob to get wet or be submerged in water or other liquids. Promptly dry off your fob if it does get wet. -
Page 39: Warranty
Warranty 2 Year Limited Electrical Warranty YoSmart Inc. warrants to the original user (“customer”) of this product that it will be free from defects in materials and workmanship, under normal use, for 2 years from the date of purchase. This warranty does not apply to devices that have been improperly installed, subjected to acts of God (such as floods, lightning, earthquakes, etc.). -
Page 40: Aa Fcc Statement
FCC Statement This device complies with part 15 of the FCC Rules. Operation is subject to the following two conditions: (1) This device may not cause harmful interference, and (2) this device must accept any interference received, including interference that may cause undesired expressly approved by the party responsible for compliance could void the user's authority to operate the equipment. - Page 41 20cm distance between the radiator and your body: Use only the supplied antenna. PRODUCT NAME: Water Leak Sensor 4 PARTY: YOSMART, INC. TELEPHONE: 831-292-4831 MODEL NUMBER: YS7906-UC ADDRESS: 15375 BARRANCA PKWY SUITE J-107, IRVINE, CA 92618 USA EMAIL: SERVICE@YOSMART.COM...
-
Page 42: Ab Contact Us
Contact Us We are here for you, if you ever need any assis- tance installing, setting up or using a YoLink app or product! Need help? For fastest service, please email us 24/7 at service@yosmart.com Or call us at 831-292-4831 (US phone support...
Need help?
Do you have a question about the YS7906-UC and is the answer not in the manual?
Questions and answers