
Related Manuals for Exquisit GS81-051C black


Summary of Contents for Exquisit GS81-051C black
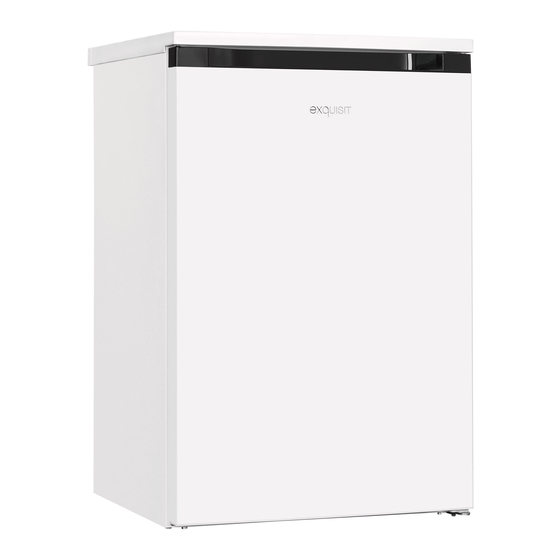
- Page 1 Gefrierschrank GS81-051C schwarz GS81-051C inoxlook-az Freezer GS81-051C black GS81-051C inoxlook-az Gebrauchsanweisung Instruction Manual...
- Page 2 Einleitung Vor Inbetriebnahme des Gerätes unbedingt die Gebrauchsanweisung aufmerksam durchlesen. Die Gebrauchsanweisung enthält wichtige Sicherheitshinweise für den Betrieb und den Unterhalt des Gerätes. Korrektes Bedienen trägt wesentlich zur effizienten Energienutzung bei und minimiert den Energieverbrauch im Betrieb. Eine unsachgemäße Verwendung des Gerätes kann gefährlich sein, insbesondere für Kinder.
- Page 3 Gerät kennenlernen Lieferumfang Gerät Gebrauchsanweisung Servicekarte Gefrierraum Gefrierfach mit Klappe Gefrierschublade Eiswürfelschale Bezeichnung 1) Abdeckplatte 2) Temperaturregler 3) Gefrierfach mit Klappe 4) Mittlere Gefrierschublade 5) Untere Gefrierschublade 6) Verstellbare Standfüße Temperaturregler Stufe • = AUS/OFF Stufe 1 – 4 = Gefrierstufen *) Im Textverlauf wird der Begriff Gerät für Gefrierschrank verwendet.
-
Page 4: Table Of Contents
Inhaltsverzeichnis Zu Ihrer Sicherheit ............................ 6 Bestimmungsgemäße Verwendung ......................6 Fehlgebrauch ............................7 Sicherheit zu bestimmten Personengruppen ..................7 Restgefahren ............................8 Gefahren durch Kältemittel........................8 Aufstellen und Anschließen ........................9 Türanschlag wechseln / Türgriff montieren .................... 9 Gerät aufstellen ............................. 10 Nivellieren ............................. - Page 5 Putting into operation ........................29 11.1 Switch appliance ON/OFF ........................30 11.2 Proper storage of food .......................... 30 11.3 Overview of storage recommendations for freezer compartment ............32 11.4 Saving energy ............................32 Service and maintenance ........................33 12.1 Cleaning the appliance .......................... 33 12.2 Cleaning/replacing the appliance door seal ..................
-
Page 6: Zu Ihrer Sicherheit
1 Zu Ihrer Sicherheit Für eine sichere und sachgerechte Anwendung die Gebrauchsanweisung und weitere produktbegleitende Unterlagen sorgfältig lesen und für spätere Verwendung aufbewahren. Alle Sicherheitshinweise in dieser Gebrauchsanweisung sind mit einem Warnsymbol versehen. Sie weisen frühzeitig auf mögliche Gefahren hin. Diese Informationen unbedingt lesen und befolgen. -
Page 7: Fehlgebrauch
Zu Ihrer Sicherheit 1.2 Fehlgebrauch Folgende Tätigkeiten gelten als Fehlgebrauch und sind somit untersagt: • Keine Medikamente, Blutplasma, Laborpräparate oder ähnlichen der Medizinprodukterichtlinie 2007/47/EG zu Grunde liegenden Stoffe und Produkte im Kühlschrank lagern und kühlen. • Keine explosiven Stoffe oder Sprühdosen mit brennbaren Treibmitteln, wie z.B. Butan, Propan, Pentan usw. -
Page 8: Restgefahren
Zu Ihrer Sicherheit 1.4 Restgefahren GEFAHR STROMSCHLAGGEFAHR! • Den Netzstecker am Netzkabel beim Einstecken und Herausziehen nie mit feuchten oder nassen Händen anfassen. • Das Gerät nur nach Angaben der Gebrauchsanweisung montieren und anschließen. • Im Notfall sofort den Netzstecker aus der Steckdose ziehen. •... -
Page 9: Aufstellen Und Anschließen
Aufstellen und Anschließen Vorgehen bei beschädigtem Kältekreislauf: • Offenes Feuer und Zündquellen unbedingt vermeiden. • Den Raum, in dem das Gerät steht, gut durchlüften. • Den Kundendienst kontaktieren. 2 Aufstellen und Anschließen Vor dem Aufstellen und Anschließen des Geräts sicherstellen, dass •... -
Page 10: Gerät Aufstellen
Aufstellen und Anschließen Türanschlag wechseln SCHRITTFOLGE BILD 1. Die Tür öffnen und das obere Scharnier (1) an der rechten Seite der Arbeitsplatte abschrauben. 2. Die Tür aus dem Schrank nehmen. 3. Die Schrauben (2) an der linken Seite der Arbeitsplatte entfernen. -
Page 11: Nivellieren
Inbetriebnahme Mindestabstände für Be- und Entlüftung Die Luftzirkulation an der Geräterückwand, -seite und -oberkante beeinflusst den Energieverbrauch und die Gefrierleistung (je nach Modell). Unbedingt die Mindestabstände für die Belüftung des Gerätes einhalten, die in der nachfolgenden Zeichnung aufgeführt sind. Bei Nichteinhalten der Mindestabstände kann die gestaute Luft nicht ableiten und der Kompressor ist durchgehend in Betrieb, was die Lebensdauer des Gerätes verkürzt. -
Page 12: Gerät Ein-/Ausschalten
Inbetriebnahme 3.1 Gerät ein-/ausschalten 1. Zum Einschalten das Gerät am Strom anschließen. 2. Den Temperaturregler auf die gewünschte Gefrierstufe drehen. Der Temperaturregler befindet sich an der Front des Gerätes. ACHTUNG SACHSCHADEN! Das Gerät nicht unmittelbar nach einem Stromunterbruch einschalten. Temperatur einstellen Die Temperatur hängt von bestimmten Faktoren ab, wie z.B. - Page 13 Inbetriebnahme • Kontamination von Lebensmitteln mit rohem Fleisch und rohem Fisch vermeiden. Fleischsaft darf nicht mit anderen Lebensmitteln in Berührung kommen. • Nicht zu große Mengen auf einmal einfrieren. Die Qualität der Lebensmittel wird am besten erhalten, wenn sie schnell bis zum Kern durchgefroren sind. Die maximale Menge an Lebensmitteln, die Sie innerhalb von 24 Stunden einfrieren können, ist auf dem Typenschild und im Produktdatenblatt angegeben.
-
Page 14: Übersicht Lagerempfehlungen Gefrierraum
Inbetriebnahme 3.3 Übersicht Lagerempfehlungen Gefrierraum ❶ ❷ ❸ ➢ Gefriervermögen der maximalen Menge an Lebensmitteln innerhalb von 24 Stunden ist auf dem Typenschild (im Innenraum oder auf der Rückseite des Gerätes) und dem Produktdatenblatt ersichtlich. Eiswürfel herstellen Eiswürfelschale (nicht im Lieferumfang enthalten) zu drei Vierteln mit Wasser füllen und waagerecht auf den Boden des Gefrierabteils stellen. -
Page 15: Wartung Und Pflege
Wartung und Pflege 4 Wartung und Pflege Aus hygienischen Gründen das Gerät außen und innen, einschließlich Türdichtung und Innenausstattung, regelmäßig reinigen. Vor allen Wartungs- und Pflegetätigkeiten sicherstellen, dass das Gerät vom Stromnetz getrennt ist (s. Sicherheitskapitel Stromschlag). VORSICHT VERLETZUNGSGEFAHR! • Keine elektrischen Heizgeräte, offene Flammen, Messer o.ä. -
Page 16: Gerätetürdichtung Reinigen / Wechseln
Wartung und Pflege 4.2 Gerätetürdichtung reinigen / wechseln Luftdichtheit der Dichtungen von Tür oder Deckel prüfen 1. Ein ausreichend langen Papierstreifen von 50 mm Breite und 0,08 mm -Dicke an verschiedenen Stellen des Gerätes einklemmen. → Lässt sich das Papier mit einem leichten Widerstand durchziehen, ist die Gerätetürdichtung dicht. -
Page 17: Gerät Außer Betrieb Nehmen
Betriebsgeräusche / Fehler beheben 4.4 Gerät außer Betrieb nehmen Zum Abschalten des Gerätes den Netzstecker ziehen oder Sicherung abschalten bzw. herausdrehen. ✓ Lebensmittel entnehmen. ✓ Netzstecker ziehen oder Sicherung abschalten bzw. herausdrehen. ✓ Gerät abtauen und gründlich reinigen (s. Kapitel Wartung und Pflege). ✓... -
Page 18: Ersatzteile / Kundenservice
Ersatzteile / Kundenservice 6 Ersatzteile / Kundenservice Folgende Ersatzeile sind beim Kundendienst erhältlich (Abhängig vom Gerät): (1) Thermostate, Temperatursensoren, Leiterplatten und Lichtquellen; (2) Türgriffe, Türscharniere, Einlegeböden und Einschübe Die Ersatzteile sind 7 Jahre nach dem Inverkehrbringen des letzten Exemplars eines Modells erhältlich. -
Page 19: Garantiebedingungen
Garantiebedingungen 7 Garantiebedingungen Als Käufer eines Exquisit Gerätes stehen Ihnen die gesetzlichen Gewährleistungen aus dem Kaufvertrag mit Ihrem Händler zu. Zusätzlich räumen wir Ihnen eine Garantie zu den folgenden Bedingungen ein: Leistungsdauer Die Garantie läuft 24 Monate ab Kaufdatum (Kaufbeleg ist vorzulegen). Während der ersten 6 Monate beseitigt der Kundendienst Mängel am Gerät unentgeltlich. -
Page 20: Entsorgung
Entsorgung 8 Entsorgung Verpackung entsorgen Die Verpackung sortenrein entsorgen. Pappe und Karton zum Altpapier und Folien in die Wertstoffsammlung geben. Altgerät entsorgen (DE) Altgeräte dürfen nicht in den Hausmüll Das Symbol der durchgestrichenen Abfalltonne auf Rädern auf dem Produkt oder seiner Verpackung bedeutet, dass das Gerät nicht im Hausmüll entsorgt werden darf, sondern eine separate Entsorgung erfordert. - Page 21 Seite 21 von 40...
- Page 22 Introduction It is essential to read the instruction manual carefully before operating the appliance. The instruction manual contains important safety information for the operation and maintenance of the appliance. Proper operation makes a major contribution to efficient energy use and minimises the energy consumption of the appliance. Improper use of the appliance can be dangerous, particularly for children.
- Page 23 Getting to know your appliance Scope of supply appliance Instruction manual Service card Freezer compartment freezer compartment with flap Freezer drawers Ice cube tray Designation 1) Cover plate 2) Temperature control 3) Freezer compartment with flap 4) Middle freezer drawer 5) Bottom freezer drawer 6) Adjustable feet...
-
Page 24: For Your Safety
9 For your safety For safe and proper use of the appliance, read the instruction manual and other documentation accompanying the product and keep in a safe place for future reference. All safety instructions in this instruction manual are marked with a warning symbol. They draw your attention to potential hazards. -
Page 25: Improper Use
For your safety 9.2 Improper use The following activities are considered improper use and are therefore prohibited: • Do not store or refrigerate medicines, blood plasma, laboratory preparations or similar substances and products based on the Medical Devices Directive 2007/47/EC in the refrigerator. •... -
Page 26: Residual Risks
For your safety 9.4 Residual risks DANGER ELECTRIC SHOCK HAZARD! • Never touch the mains plug on the mains power cable with wet or damp hands when plugging it in or unplugging it. • Install and connect the appliance only in accordance with the description in the instruction manual. -
Page 27: Setting Up And Connecting
Setting up and connecting What to do if the refrigeration circuit is damaged: • Avoid naked flames and ignition sources. • Ventilate the room in which the appliance is installed thoroughly. • Contact After Sales Service. 10 Setting up and connecting Before setting up and connecting the appliance, ensure that •... -
Page 28: Setting Up The Appliance
Setting up and connecting Changing the door hinge STEP-BY-STEP INSTRUCTIONS FIGURE 1. Open the door and unscrew the upper hinge (1) on the right side of the worktop. 2. Take the door out of the cupboard. 3. Remove the screws (2) on the left side of the worktop. 4. -
Page 29: Levelling
Putting into operation Minimum clearances for ventilation Air circulation at the rear, side and top of the appliance influences energy consumption and refrigerating (depending on model). It is essential that the minimum clearances for ventilation of the appliance are observed as shown in the following drawing. If the minimum clearances are not observed, the accumulated air cannot escape and the compressor is in continuous operation, which shortens the life of the appliance. -
Page 30: Switch Appliance On/Off
Putting into operation 11.1 Switch appliance ON/OFF 1. To switch on the appliance, connect the appliance to the mains power supply. 2. Set the temperature regulator to the desired cooling setting. The Temperature control is located on the front of the appliance. ATTENTION APPLIANCE DAMAGE! Do not switch on the appliance immediately after a power interruption. - Page 31 Putting into operation • Avoid contamination of food with raw meat and raw fish. Meat juice must not come into contact with other foodstuffs. • Do not freeze large quantities at once. The quality of the food is best retained if it is quickly frozen through to the core.
-
Page 32: Overview Of Storage Recommendations For Freezer Compartment
Putting into operation 11.3 Overview of storage recommendations for freezer compartment ❶ ❷ ❸ ➢ Freezing capacity of the maximum amount of food within 24 hours can be seen on the type plate (inside or on the back of the appliance) and the product fiche. -
Page 33: Service And Maintenance
Service and maintenance 12 Service and maintenance For hygiene reasons, regularly clean the appliance inside and out, including the door seal and interior fittings. Before carrying out any maintenance and servicing work, ensure that the appliance is disconnected from the mains power supply (see safety chapter Electric Shock). CAUTION RISK OF INJURY! •... -
Page 34: Cleaning/Replacing The Appliance Door Seal
Service and maintenance 12.2 Cleaning/replacing the appliance door seal Checking the airtightness of the door seals or cover seals 1. Clamp a sufficiently long strip of paper 50 mm wide and 0.08 mm thick at various points on the appliance. →... -
Page 35: Decommissioning The Appliance
Operating noises / troubleshooting 12.4 Decommissioning the appliance To switch off the appliance, remove the mains plug and switch off or unscrew the fuse. ✓ Remove the food. ✓ Remove the mains plug or switch off or unscrew the fuse. ✓... -
Page 36: Spare Parts/After Sales Service
Spare parts/After Sales Service clearances (see chapter 2.2). 14 Spare parts/After Sales Service The following spare parts are available from After Sales Service (depending on the appliance): (3) Thermostats, temperature sensors, circuit boards and light sources (4) Door handles, door hinges, shelves and drawers Spare parts are available 7 years after the last appliance of a model has been placed on the market. -
Page 37: Warranty Terms
Warranty terms 15 Warranty terms As the buyer of an Exquisit appliance, you are entitled to the statutory warranties arising from the purchase contract with your dealer. In addition, we grant you a warranty on the following terms: Warranty period The warranty period is 24 months from the date of purchase (proof of purchase must be presented). -
Page 38: Disposal
Disposal 16 Disposal Disposal of packaging materials Sort packaging materials before disposal. Paper and cardboard with the waste paper and plastic film in the recycled materials bin. Disposing of old appliances (EN) Old appliances must not be disposed of with household waste The symbol of the crossed-out wheeled bin on the product or its packaging means that the appliance must not be disposed of with household waste but requires separate disposal. - Page 39 Page 39 of 40...
- Page 40 GGV HANDELSGES. MBH & CO. KG AUGUST-THYSSEN-STR. 8 41564 KAARST GERMANY GS81-051C_BDA_DE_EN_E1-1-2023-07.DOCX www.exquisit.de...
Need help?
Do you have a question about the GS81-051C black and is the answer not in the manual?
Questions and answers