
Related Manuals for HPE FlexNetwork MSR3000


Summary of Contents for HPE FlexNetwork MSR3000
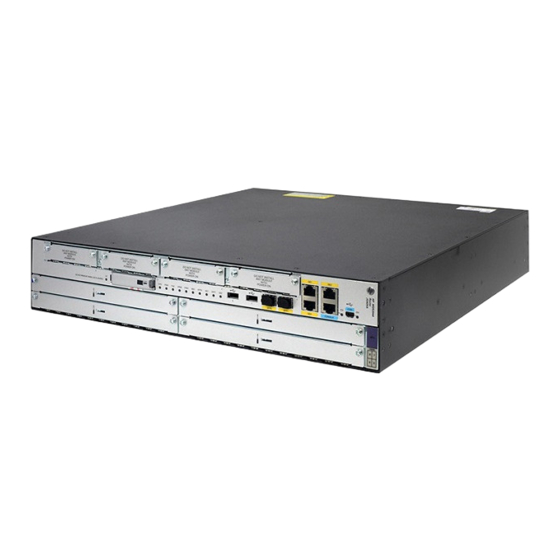
- Page 1 HPE FlexNetwork MSR3000 Routers Installation Guide Part number: 5200-7387a Document version: 6W105-20220225...
- Page 2 © Copyright 2016 ,2022 Hewlett Packard Enterprise Development LP The information contained herein is subject to change without notice. The only warranties for Hewlett Packard Enterprise products and services are set forth in the express warranty statements accompanying such products and services. Nothing herein should be construed as constituting an additional warranty. Hewlett Packard Enterprise shall not be liable for technical or editorial errors or omissions contained herein.
-
Page 3: Table Of Contents
Contents 1 Preparing for installation ············································································· 1 Safety recommendations ··································································································································· 1 Safety symbols ··········································································································································· 1 General safety recommendations ·············································································································· 1 Electricity safety ········································································································································· 2 Laser safety ················································································································································ 2 Examining the installation site ···························································································································· 2 Temperature and humidity ························································································································· 2 Cleanliness ················································································································································· 2 Cooling system ···········································································································································... - Page 4 Locating internal modules ································································································································ 49 Removing chassis covers ························································································································ 49 Locating internal modules ························································································································ 51 Replacing a VPM ············································································································································· 55 Replacing a memory module ··························································································································· 56 Replacing an air filter ······································································································································· 57 Replacing a CF card ········································································································································ 58 Replacing a Micro SD card ······························································································································ 59 Replacing a hard disk·······································································································································...
- Page 5 7 Appendix C Slot arrangement ··································································· 97 8 Document conventions and icons ····························································· 99 Conventions ····················································································································································· 99 Network topology icons ·································································································································· 100 9 Support and other resources ·································································· 101 Accessing Hewlett Packard Enterprise Support····························································································· 101 Accessing updates ········································································································································· 101 Websites ················································································································································ 102 Customer self repair ·······························································································································...
-
Page 6: Preparing For Installation
HP MSR3024 AC Router BJNGA-BB0007 MSR3024 JG407A HP MSR3024 DC Router BJNGA-BB0007 MSR3024 JG408A HP MSR3024 PoE Router BJNGA-BB0007 MSR3016 R8V32A HPE MSR3016 AC Router BJNGA-BB0053 MSR3012 JG409A HP MSR3012 AC Router BJNGA-BB0008 MSR3012 JG410A HP MSR3012 DC Router BJNGA-BB0008 MSR3620-DP JM044A... -
Page 7: Electricity Safety
Electricity safety • Locate the emergency power-off switch in the room before installation. Shut the power off at once in case accident occurs. Disconnect the power cord of the router if necessary. • Make sure the router is correctly grounded. •... -
Page 8: Cooling System
Table1-3 Dust concentration limit in the equipment room Substance Concentration limit (particles/m ≤ 3 x 10 Dust particles (No visible dust on desk in three days) NOTE: Dust particle diameter ≥ 5 µm The equipment room must also meet strict limits on salts, acids, and sulfides to eliminate corrosion and premature aging of components, as shown in Table1-4. -
Page 9: Esd Prevention
Figure1-2 Airflow through the MSR3044/3046/3048/3064 chassis To ensure good ventilation, the following requirements must be met: • The air inlet and outlet vents are not blocked, and leave at least 10 cm (3.94 in) of clearance. • The installation site has a good cooling system. ESD prevention CAUTION: Check the resistance of the ESD wrist strap for safety. -
Page 10: Lightning Protection
• A conduction pattern of capacitance coupling. • Inductance coupling. • Electromagnetic wave radiation. • Common impedance (including the grounding system) coupling. To prevent EMI, perform the following tasks: • If AC power is used, use a single-phase three-wire power receptacle with protection earth (PE) to filter interference from the power grid. -
Page 11: Installation Accessories
Installation accessories Front mounting brackets Rear mounting brackets for the Front mounting brackets for Front mounting for the MSR3012/3026 the MSR3012/3016/3026 brackets for the MSR3044/3046/3048 /3024/3620-DP/3044/3046/3048/3064 /3024/3620-DP MSR3064 Cage nut (user Grounding cable Rubber feet M6 screw (user supplied) supplied) Shoulder screw for the Releasable MSR3012/3026... - Page 12 Item Requirements Result Temperature 0°C to 45°C (32°F to 113°F). Relative humidity 5% to 95% (noncondensing). • Dust concentration ≤ 3 × 10 particles/m Cleanness • No visible dust on desk within three days. • The equipment and floor are reliably grounded. •...
-
Page 13: Installing The Router
Installing the router WARNING! To avoid injury, do not touch bare wires, terminals, or parts with high-voltage hazard signs. IMPORTANT: • The barcode on the router chassis contains product information that must be provided to local sales agent before you return a faulty router for service. •... - Page 14 Figure2-1 Installation flowchart Start Install an air filter Mount the router to a rack Mount the router to a workbench Mount to a specific position? Mount the router Examine the to a rack workbench Ground the router Install an interface module Connect interface cables Install a CF card Install a micro SD card...
-
Page 15: Installing The Router
Installing the router Installing an air filter No air filter is provided with the router. Purchase one yourself. Only the MSR3044, MSR3046, MSR3048, and MSR3064 support air filters. To install an air filter: Face the left side (side of the inlet vents) of the router. Install the upper and lower guide rails of the air filter to the chassis. -
Page 16: Mounting The Router On A Workbench
Mounting the router on a workbench IMPORTANT: • Ensure good ventilation and 10 cm (3.94 in) of clearance around the chassis for heat dissipation. • Avoid placing heavy objects on the router. To mount the router on a workbench: Make sure the workbench is clean, stable, and properly grounded. Place the router upside down on the workbench and attach the rubber feet to the four round holes in the chassis bottom. - Page 17 Figure2-6 Front mounting brackets MSR3012/3016/3026 MSR3044/3046/3048 MSR3064 /3024/3620-DP Figure2-7 Rear mounting brackets Rack-mounting clearance requirements Figure2-8 MSR3012/3024 router dimensions 4 8 3 m m 6 0 m m 6 5 m m E1 cabl e RPS pow er cord Front m ount i ng bracket...
- Page 18 Figure2-9 MSR3016 router dimensions 60 mm (2.36 in) Mounting bracket E1 cable Power cord 360 mm (14.17 in) 60 mm (2.36 in)
- Page 19 Figure2-10 MSR3620-DP/3026 router dimensions Front mounting bracket Ethernet E1 cable network cable 470 mm (18.50 in) 60 mm 45 mm (2.36 in) (1.77 in) Figure2-11 MSR3044/3046/3048/3064 router dimensions Front m ount i ng bracket Pow er cord E1 cabl e 4 8 0 m m 6 0 m m 6 0 m m...
- Page 20 Table2-1 Rack-mounting clearance requirements Model Router dimensions Rack clearance requirements The rack must meet all the following • requirements: Width—440 mm (17.32 in) • • A minimum of 80 mm (3.15 in) between Height—44.2 mm (1.74 in) (1 RU) the front rack post and the front door. •...
- Page 21 Model Router dimensions Rack clearance requirements The rack must meet all the following • requirements: Width—440 mm (17.32 in) • • A minimum of 80 mm (3.15 in) between Height—130.5 mm (5.14 in) (3 RU) the front rack post and the front door. •...
- Page 22 Figure2-12 Marking the positions of cage nuts for the front mounting brackets Figure2-13 Marking the positions of cage nuts for the rear mounting brackets...
- Page 23 Insert one edge of a cage nut into the hole. Use a flat-blade screwdriver to compress the other edge of the cage nut, and then push the cage nut fully into the hole. Repeat step 3 to install other cage nuts to all the marked positions on the rack posts. Figure2-14 Installing a cage nut Attach the rear mounting brackets to the rack and fasten the screws.
- Page 24 Figure2-16 Attaching the rear mounting brackets (router depth smaller than rack depth) Attach the front mounting brackets to the chassis and fasten the screws. Attach load-bearing screws to the rear of the chassis. Figure2-17 Attaching the front mounting brackets and load-bearing screws to the MSR3012/3026/MSR3024/MSR3620-DP Figure2-18 Attaching the front mounting brackets and load-bearing screws to the MSR3044/3046/3048...
- Page 25 Figure2-19 Attaching the front mounting brackets and load-bearing screws to the MSR3064 Place the router on the rack, making sure the load-bearing screws hang on the rear mounting brackets. Secure the chassis in the rack by attaching the front mounting brackets with proper pan head screws onto the back.
- Page 26 Figure2-20 Mounting the router in the rack Installing the router in a rack by using front mounting brackets WARNING! The mounting brackets can only support the weight of the router. To avoid damage to the router, do not place any objects on the router. This section applies to the MSR3016.
- Page 27 Figure2-21 Marking cage nut installation holes Install cage nuts, as shown in Figure2-22. a. Insert one ear of a cage nut into the marked installation hole. b. Use a flathead screwdriver to push another ear into the hole. Figure2-22 Installing cage nuts Attach mounting brackets to both sides of the device, as shown in Figure2-23.
-
Page 28: Grounding The Router
Figure2-23 Attaching mounting brackets to the device Put the device in the rack. Use M6 screws to attach the mounting brackets on the device to the front rack posts, as shown in Figure2-24. Figure2-24 Securing the device to the rack Grounding the router WARNING! Correctly connecting the router grounding cable is crucial to lightning protection and EMI protection. -
Page 29: Grounding The Router Through The Grounding Terminal On The Rack
Grounding the router through the grounding terminal on the rack IMPORTANT: Make sure the rack is properly grounded before grounding the router. To connect the grounding cable: Remove the two grounding screws from the rear panel of the chassis. Attach the grounding screw to the ring terminal of the grounding cable. See Figure2-25. Use a Phillips screwdriver to fasten the grounding screw into the grounding screw hole. - Page 30 Figure2-26 Grounding the router through the grounding terminal on the rack...
-
Page 31: Grounding The Router With A Grounding Strip
Grounding the router with a grounding strip If a grounding strip is available at the installation site, connect the grounding cable to the grounding strip. Follow the same procedures in "Grounding the router through the grounding terminal on the rack" to connect the grounding cable. -
Page 32: Grounding The Router With A Grounding Conductor Buried In The Earth Ground
Figure2-27 Grounding the router with a grounding strip Grounding the router with a grounding conductor buried in the earth ground If the installation site has no grounding strips, but earth ground is available, hammer a 0.5 m (1.64 ft) or longer angle iron or steel tube into the earth ground to serve as a grounding conductor. The steel tube must be zinc-coated. -
Page 33: Installing A Dsic
Figure2-28 Removing the filler panel Figure2-29 Installing the SIC Installing a DSIC CAUTION: DSIC interface modules are not hot swappable. Make sure the router is powered off before installing a DSIC. To install a DSIC: Remove the screws on the filler panel on a SIC slot of an MSR3024, MSR3044, or MSR3064 to remove the filler panel. - Page 34 Figure2-30 Removing the filler panel Figure2-31 Removing the slot divider Insert the DSIC into the slot and push it along the slide rails until it makes close contact with the backplane of the router. Figure2-32 Installing a DSIC Fasten the captive screws to secure the DSIC.
-
Page 35: Installing An Hmim
Installing an HMIM IMPORTANT: • You can install an HMIM when the router is powered on. However, before replacing an HMIM when the router is powered on, you must execute the remove hmimslot slotnumber command. • An HMIM interface module can be 1U or 0.5U. This section takes a 0.5U interface module for example. -
Page 36: Installing A Mim
Installing a MIM IMPORTANT: • To install a MIM, install it to the HMIM adapter and then insert it into the HMIM slot. • You can install a MIM when the router is powered on. However, before replacing a MIM when the router is powered on, you must execute the remove hmimslot slotnumber command. -
Page 37: Connecting The Router To The Network
Figure2-36 Installing the MIM to the router Connecting the router to the network Connect the router to the network before powering on the router. This section describes how to connect the router to the network through Ethernet cables. Connecting an Ethernet cable Plug one end of an Ethernet twisted pair cable into the copper Ethernet port (RJ-45 port) to be connected on the router. -
Page 38: Installing A Cf Card
• Never bend or curve a fiber when connecting it. • Make sure the Tx and Rx ends are properly connected. • Keep the fiber end clean. • Be sure to install the dust cover if the fiber port is not connected to a fiber connector. To connect an optical fiber: Remove the dust plug from a fiber port of the router. -
Page 39: Installing A Micro Sd Card
Insert the CF card into the slot following the direction shown in Figure2-39, and make sure it does not project from the slot. Close the CF card cover. Figure2-39 Installing a CF card Installing a Micro SD card CAUTION: • Micro SD cards on the MSR3016 and MSR3620-DP router are hot swappable. To prevent Micro SD card damage and data loss, execute the command before you hot swap a Micro SD umount... -
Page 40: Installing A Hard Disk
Figure2-40 Installing the Micro SD card Installing a hard disk Only the MSR3016 supports a hard disk. No hard disk is provided with the device. To user a hard disk, purchase one yourself. To install a hard disk: Remove the filler panel from the hard disk slot, as shown in Figure2-41. Push the hard disk slowly into the slot along the guide rails, as shown in Figure2-42. -
Page 41: Logging In Through The Console Port
Figure2-42 Installing the hard disk Logging in through the console port Connecting a console cable You can log in only through the console port by using a console or USB console cable the first time you log in to your router. IMPORTANT: When you connect a PC to a powered-on router, connect the RJ-45 connector to the router after connecting the DB-9 connector of the console cable to the PC. - Page 42 Figure2-43 Connecting the console cable IMPORTANT: Download and install the USB console driver program before configuring the device when you connect the device through a USB console cable. To connect a USB cable: Connect the USB port to the PC. Connect the other end to the USB console port of the router.
- Page 43 Click Next on the installation wizard. Figure2-45 Device driver installation wizard Click Continue Anyway if the following dialog box appears. Figure2-46 Software installation Click Finish.
-
Page 44: Setting Terminal Parameters
Figure2-47 Completing the device driver installation wizard Setting terminal parameters To access the device through the console port, you must run a terminal emulator program (HyperTerminal, PuTTY, or Tera Term) on the configuration terminal. For information about using a terminal emulator program, see the program's user guide. The following are the required terminal settings: •... - Page 45 Loosen the captive screws with a Phillips screwdriver to remove the filler panel from the slot. Keep the removed filler panel for future use. Skip this step if the router is shipped with this slot empty. Holding the handle of the power supply with one hand and supporting the bottom of the power supply with the other hand, insert the power supply slowly along the slide rails until it makes close contact with the backplane.
-
Page 46: Connecting The Power Cord
Figure2-50 Installing a PoE power supply Connecting the power cord The power cords in the figures of this section are only for illustration. Connecting an AC power cord Make sure the router is well grounded, and the power switch on the router is in the OFF position. - Page 47 Figure2-52 Connecting an AC power cord to an MSR3016 router Figure2-53 Connecting an AC power cord to an MSR3026/3620-DP router...
-
Page 48: Connecting A Dc Power Cord
Figure2-54 Connecting an AC power cord to an MSR3044/3064 router Connecting a DC power cord WARNING! Pay attention to the mark on a power cord to avoid connection errors. An MSR3016 router does not support DC input. The MSR3012, MSR3024, MSR3026, MSR3620-DP, MSR3044, MSR3046, MSR3048, and MSR3064 use different DC connectors, but the power cord connection procedures are the same. - Page 49 Figure2-55 Connecting a DC power cord for an MSR3012/3024 Figure2-56 Connecting a DC power cord for an MSR3026/3620-DP router Figure2-57 Connecting a DC power cord for an MSR3044/3046/3048/3064...
-
Page 50: Connecting An Rps Power Cord
Connecting an RPS power cord The MSR3012 and MSR3024 offer remote power supply (RPS) support. As an external power supply, RPS can provide power supply for the device in case of power supply abnormality. It enhances the reliability of the device. The router has a sticky label and a protective cover when shipped to protect the RPS receptacle. -
Page 51: Powering On The Router
System is starting... Press Ctrl+D to access BASIC-BOOTWARE MENU... Booting Normal Extended BootWare..The Extended BootWare is self-decompressing..Done. **************************************************************************** HPE MSR3064 BootWare, Version 1.60 **************************************************************************** Copyright (c) 2010-2015 Hewlett Packard Enterprise Development LP Compiled Date : Dec 17 2015 CPU ID... -
Page 52: Examining The Router After Power-On
Configuring basic settings for the router After the router is powered on for the first time, configure the basic settings for the router. For more information, see HPE MSR Routers Fundamentals Configuration Guide (V7) and HPE MSR Routers Fundamentals Command Reference (V7). -
Page 53: Replacement Procedure
Replacement procedure IMPORTANT: • The barcode on the router chassis contains product information that must be provided to local sales agent before you return a faulty router for service. • Keep the tamper-proof seal on a mounting screw on the chassis cover intact, and if you want to open the chassis, contact Hewlett Packard Enterprise for permission. -
Page 54: Locating Internal Modules
Locating internal modules Removing chassis covers WARNING! • To avoid bodily injury and equipment damage, make sure all power supplies connected to the router are powered off, all power cords and interface cables are removed before you maintain the hardware. •... - Page 55 Figure3-4 Lifting the chassis cover Removing the chassis cover from the MSR3044/MSR3064 Place the router on a flat ground. Use a Phillips screwdriver to remove the fastening screws at the top of the router from chassis cover. Lift the chassis cover and put it away. Figure3-5 Removing chassis cover screws Figure3-6 Lifting the chassis cover...
-
Page 56: Locating Internal Modules
Locating internal modules Figure3-7 MSR3012 internal module locations (1) Front panel (2) Rear panel (3) VPM... - Page 57 Figure3-8 MSR3024 internal module locations (1) Front panel (2) Rear panel (3) VPM (4) Memory module...
- Page 58 Figure3-9 MSR3620-DP internal module locations (1) Front panel (2) Rear panel (3) SSD drive slot...
- Page 59 Figure3-10 MSR3044 internal module locations (1) Front panel (2) Rear panel (3) VPMs (4) Memory module...
-
Page 60: Replacing A Vpm
Figure3-11 MSR3064 internal module locations (1) Front panel (2) Rear panel (3) VPMs (4) Memory module Replacing a VPM VPM (Voice Processing Module) functions to implement the encryption/decryption, EC and CNG of voices. The following types of VPM modules are available on the MSR3000 routers: •... -
Page 61: Replacing A Memory Module
Figure3-12 VPM To replace a VPM: Pull the release latches away from the VPM at both ends so that the VPM springs up from the slot. Holding the non-conductive edge, remove the VPM. Keep the removed VPM for future use. Align the polarization notch of a new VPM with the VPM slot on the main board and insert it into the slot along the slide rails. -
Page 62: Replacing An Air Filter
• MSR3026 • MSR3046 • MSR3048 To replace a memory module: Pull the release latches away from the memory module at both ends so that the memory module springs up from the slot. Holding the non-conductive edge, remove the memory module. Keep the removed memory module for future use. -
Page 63: Replacing A Cf Card
Figure3-17 Removing an air filter Install a new air filter. For the installation procedure, see "Installing the router." To remove the slide rails, completely loosen the fastening screws of the slide rails. To install new slide rails, see "Installing the router."... -
Page 64: Replacing A Micro Sd Card
Figure3-19 Removing the CF card Install a new CF card. For the installation procedure, see "Installing the router." If you do not install a new CF card, close the CF card cover. Replacing a Micro SD card CAUTION: • Micro SD cards on the MSR3016 and MSR3620-DP routers are hot swappable. To prevent Micro SD card damage and data loss, execute the command before you hot swap a Micro SD umount... -
Page 65: Replacing A Hard Disk
Figure3-20 Removing the Micro SD card Replacing a hard disk CAUTION: • To remove the hard disk when the device is operating, press the HD button for over five seconds. When the LED for the hard disk turns off, you can remove the hard disk. You can also use the command to unmount the file system and remove the hard disk after the unmount umount operation succeeds. -
Page 66: Replacing A Sic
Figure3-21 Removing the hard disk (1) Figure3-22 Installing the hard disk (2) Replacing a SIC CAUTION: SIC interface modules are not hot swappable. Make sure the router is powered off before installing a SIC. To replace a SIC: Completely loosen the captive screws of the SIC. Gently pull the SIC out along the slide rails. -
Page 67: Replacing A Dsic
Figure3-23 Pulling a SIC out Figure3-24 Installing a filler panel Replacing a DSIC CAUTION: DSIC interface modules are not hot swappable. Make sure the router is powered off before installing a DSIC. To replace a DSIC: Completely loosen the captive screws of the DSIC. Gently pull the DSIC out along the slide rails. -
Page 68: Replacing An Hmim
Figure3-25 Removing a DSIC Figure3-26 Installing a slot divider Figure3-27 Installing filler panels Replacing an HMIM WARNING! You can replace an HMIM when the router is powered on. However, before replacing an HMIM when the router is powered on, you must execute the remove hmimslot slotnumber command. -
Page 69: Replacing A Mim
To replace an HMIM: Completely loosen the captive screws of the HMIM. Gently pull the HMIM out of the slot along the slide rails. Install a new HMIM. For the installation procedure, see "Installing the router." If you do not install a new HMIM, install a filler panel and tighten the screws. Figure3-28 Pulling the HMIM out of the slot Figure3-29 Installing a filler panel Replacing a MIM... - Page 70 Figure3-30 Removing a MIM and the HMIM adapter Completely loosen the captive screws of the MIM, remove the screws that secure the MIM to the HMIM adapter, and pull the MIM out of the HMIM adapter along the slide rails. Keep the removed MIM for future use.
-
Page 71: Troubleshooting
If the problem persists, contact Hewlett Packard Enterprise Support. Troubleshooting fan failures Symptom After the router starts up, the following error message appears on the configuration terminal: %Jun 22 16:11:37:485 2015 HPE DEV/4/FAN FAILED: Fan 1 failed. Solution To resolve the problem: Verify that the fans are in position. -
Page 72: No Display On The Configuration Terminal
No display on the configuration terminal Symptom After the router is powered on, the console terminal does not display anything. Solution To resolve the problem: Verify that the power supply system is operating correctly. Verify that the console cable is properly connected and the connected serial port is the same as the port configured on the terminal. -
Page 73: Troubleshooting User Password Loss
Troubleshooting user password loss Symptom If you lose your user password, you cannot log in to the system. Solution To resolve the problem: Select 8 on the main BootWare menu to clear the console interface login password: ===========================<EXTEND-BOOTWARE MENU>=========================== |<1> Boot System |<2>... -
Page 74: Troubleshooting Interface Module, Cable, And Connection Failure
Troubleshooting interface module, cable, and connection failure Symptom After an interface module is installed and the router is powered on, the LEDs on the interface module panel indicate that the interface module is operating improperly. Solution To resolve the problem: Verify that the interface module makes good contact with the rear panel of the router slot. -
Page 75: Appendix A Chassis Views And Technical Specifications
Appendix A Chassis views and technical specifications Chassis views The following figures are for illustration only. MSR3012 AC (JG409A) Figure5-1 MSR3012 AC (JG409A) front view (1) Gigabit Ethernet port (GE1) (2) Gigabit Ethernet port (GE2) (3) USB console port (CON) (4) USB port 1 (5) SFP interface (SFP0) (6) RPS receptacle cover... -
Page 76: Msr3012 Ac (Jg409B)
MSR3012 AC (JG409B) Figure5-3 MSR3012 AC (JG409B) front view (1) Gigabit Ethernet port (GE1) (2) Gigabit Ethernet port (GE2) (3) USB console port (CON) (4) USB port 1 (5) SFP interface (SFP0) (6) RPS receptacle cover (7) Power switch (8) AC-input power receptacle (9) Power cord bail latch (11) Console port/AUX port (10) USB port 0... -
Page 77: Msr3012 Dc
MSR3012 DC Figure5-5 MSR3012 DC front view (1) Gigabit Ethernet port (GE1) (2) Gigabit Ethernet port (GE2) (3) USB console port (CON) (4) USB port 1 (5) SFP interface (SFP0) (6) RPS receptacle cover (7) Power switch (8) DC-input power receptacle (9) USB port 0 (10) Console port/AUX port (11) Gigabit Ethernet port (GE0) -
Page 78: Msr3016
MSR3016 Figure5-7 MSR3016 front view (1) AC power receptacle (2) Hard disk slot (3) HD button (4) Gigabit Ethernet port GE1 (5) Gigabit Ethernet port GE3 (6) SFP fiber ports 2 to 5 (7) Console port (8) Micro SD card slot (9) USB port (10) Gigabit Ethernet port GE2 (11) Gigabit Ethernet port GE0... -
Page 79: Msr3024 Dc
(13) Gigabit Ethernet port (GE0) Figure5-10 MSR3024 AC rear view (1) Grounding terminal (2) SIC slot (slot 4) (3) SIC slot (slot 3) (4) HMIM slot (slot 6) (5) HMIM slot (slot 5) (6) SIC slot (slot 1) (7) SIC slot (slot 2) MSR3024 DC Figure5-11 MSR3024 DC front view 12 11... -
Page 80: Msr3024 Poe
Figure5-12 MSR3024 DC rear view (1) Grounding terminal (2)SIC slot (slot 4) (3) SIC slot (slot 3) (4) HMIM slot (slot 6) (5) HMIM slot (slot 5) (6) SIC slot (slot 1) (7) SIC slot (slot 2) MSR3024 PoE Figure5-13 MSR3024 PoE front view (1) CF card cover (2) USB port 0 (3) USB port 1... -
Page 81: Msr3026
Figure5-14 MSR3024 PoE rear view (1) Grounding terminal (2)SIC slot (slot 4) (3) SIC slot (slot 3) (4) HMIM slot (slot 6) (5) HMIM slot (slot 5) (6) SIC slot (slot 1) (7) SIC slot (slot 2) MSR3026 Figure5-15 MSR3026 front view (1) HMIM slot (slot 6) (2) HMIM slot (slot 5) (3) SIC slot (slot 4) -
Page 82: Msr3620-Dp
MSR3620-DP Figure5-17 MSR3620-DP front view (1) HMIM slot (slot 6) (2) HMIM slot (slot 5) (3) SIC slot (slot 4) (4) SIC slot (slot 2) (5) SIC slot (slot 3) (6) SIC slot (slot 1) Figure5-18 MSR3620-DP rear view 11 12 (1) Grounding terminal (2) Power supply slot (PWR2) (3) Power supply slot (PWR1) -
Page 83: Msr3044
MSR3044 Figure5-19 MSR3044 front view (1) SIC slot (slot 4) (2) SIC slot (slot 3) (3) SIC slot (slot 2) (4) USB port 0 (5) USB port 1 (6) SIC slot (slot 1) (7) Gigabit Ethernet port (GE1) (8) Gigabit Ethernet port (GE2) (9) USB console port (CON) (10) Console port/AUX port (11) Gigabit Ethernet port (GE0) -
Page 84: Msr3046
MSR3046 Figure5-21 MSR3046 front view (1) SIC slot (slot 4) (2) SIC slot (slot 3) (3) SIC slot (slot 2) (4) SIC slot (slot 1) (5) Console port (CON) (6) 10/100/1000BASE-T Ethernet copper ports (1 to 8) (7) HMIM slot (slot 7) (8) HMIM slot (slot 5) (9) SFP port (SFP0) and Gigabit Ethernet port (10) 10GBASE-R-SFP+ Ethernet fiber ports (9 to 13) -
Page 85: Msr3048
MSR3048 Figure5-23 MSR3048 front view (1) SIC slot (slot 4) (2) SIC slot (slot 3) (3) SIC slot (slot 2) (5) 10/100/1000BASE-T (4) SIC slot (slot 1) (6) HMIM slot (slot 7) Ethernet copper ports (0 to 9) (7) HMIM slot (slot 5) (8) Console port (CON) (9) SFP+ ports (SFP+22 to SFP+25) (11) SFP+ ports (SFP+10 to... -
Page 86: Msr3064
MSR3064 Figure5-25 MSR3064 front view (1) SIC slot (slot 4) (2)SIC slot (slot 3) (3) SIC slot (slot 2) (4) USB port 0 (5) USB port 1 (6) SIC slot (slot 1) (7) Gigabit Ethernet port (GE1) (8) Gigabit Ethernet port (GE2) (9) USB console port (CON) (10) HMIM slot (slot 5) (11) HMIM slot (slot 7) -
Page 87: Ac Power Supply
AC power supply Figure5-27 PSR300-12A2 AC power supply (1) Captive screw (2) Power switch (3) Air outlet vent (4) Power receptacle Figure5-28 PSR150-A1 AC power supply (1) Captive screw (2) Fan (3) Power receptacle (4) Captive screw... -
Page 88: Dc Power Supply
DC power supply Figure5-29 PSR300-12D2 DC power supply (1) Captive screw (2) Power switch (3) Air outlet vent (4) Power receptacle Figure5-30 PSR150-D1 DC power supply (1) Fan (2) Captive screw (3) Captive screw (4) Power receptacle... -
Page 89: Poe Power Supply
PoE power supply Figure5-31 PSR750-A PoE power supply (1) Captive screw (2) Power switch (3) Air outlet vent (4) Power receptacle Power supply compatibility with routers Table5-1 Power supply compatibility with routers Router model PSR150-A1 PSR150-D1 PSR300-12A2 PSR300-12D2 PSR750-A MSR3026 MSR3620-DP MSR3044 MSR3046... - Page 90 Item 3012 3024 3044 3064 • DDR3 JG409A/JG410A: 1 GB • DDR3 Memory 2 GB (default) • • JG409B: 2 GB DDR3 4 GB (maximum) Built-in CF card 256 MB memory External CF card 4 GB 4 GB 4 GB memory (maximum) (maximum)
- Page 91 Item MSR3620-DP Built-in CF card memory Micro SD card slot 1 (Read/write rate: 100 Mbps, maximum capacity: 8 GB) Dimensions (H × W × D) (excluding 44.2 × 440 × 470 mm (1.74 × 17.32 × 18.50 in) rubber feet and mounting brackets) Power supply slots AC power supply Rated voltage range: 100 VAC to 240 VAC @ 50 Hz/60 Hz...
- Page 92 Item 3016 3026 3046 3048 AC power Single AC input input AC power Rated voltage range: 100 VAC to 240 VAC @ 50 Hz/60 Hz supply Rated voltage Rated voltage DC power Rated voltage range: range: –48 VDC to range: –48 VDC to – supply –48 VDC to –60 VDC –60 VDC...
- Page 93 Table5-9 PSR750-A PoE power supply specifications Item Specification Model PSR750-A Rated input voltage range 100 VAC to 240 VAC @ 50 Hz or 60 Hz 300 W to the system Rated power 450 W to PDs...
-
Page 94: Appendix B Leds
Appendix B LEDs LEDs MSR3012 Figure6-1 MSR3012 LEDs (1) Console port LED (2) USB console port LED (3) SFP port LED (SFP0) (5) Gigabit Ethernet port LED (6) Gigabit Ethernet port LED (4) Gigabit Ethernet port LED (GE0) (GE1) (GE2) (7) System LED (SYS) (8) Power supply LED (PWR) MSR3016... -
Page 95: Msr3024
MSR3024 Figure6-3 MSR3024 LEDs (1) Console port LED (2) USB console port LED (3) SFP port LED(SFP0) (4) Gigabit Ethernet port LED (5) Gigabit Ethernet port LED (6) Gigabit Ethernet port LED (GE0) (GE1) (GE2) (7) Power supply LED (PWR) (8) System LED (SYS) (9) CF card LED (10) VPM (slot 0) LED (VPM0) -
Page 96: Msr3620-Dp
MSR3620-DP Figure6-5 MSR3620-DP LEDs (1) SFP port LED (SFP0) (2) SFP port LED (SFP1) (3) SFP port LED (SFP2) (5) Gigabit Ethernet port LED (6) Gigabit Ethernet port LED (4) SFP port LED (SFP3) (GE0) (GE1) (7) Gigabit Ethernet port LED (8) Gigabit Ethernet port LED (9) SFP port LED (SFP4) (GE2) -
Page 97: Msr3046
MSR3046 Figure6-7 MSR3046 LEDs (2) 10/100/1000BASE-T Ethernet copper port LEDs (1) System LED (SYS) (1 to 8) (3) Gigabit Ethernet port LED (GE0) (4) SFP port LED (SFP0) (5) 10GBASE-R-SFP+ Ethernet fiber port LEDs (9 to (6) Power supply LED (PWR) MSR3048 Figure6-8 MSR3048 LEDs (2) SFP+ port LEDs (SFP+10 and... -
Page 98: Msr3064
MSR3064 Figure6-9 MSR3064 LEDs 12 13 (1)CF card LED (2) System LED (SYS) (3) Power supply LED (PWR) (4) PoE power supply LED (5) VPM (slot 0) LED (VPM0) (6) VPM (slot 1) LED (VPM1) (7) Gigabit Ethernet port LED (9) Gigabit Ethernet port LED (8) SFP port LED (SFP0) (GE0) -
Page 99: Led Descriptions
Figure6-11 DC power supply LEDs (1) Power input LED (2) Power output LED Figure6-12 PoE power supply LEDs (1) Power input LED (2) Power output LED LED descriptions Table6-1 LED descriptions LEDs State Description Flashing green (8 Hz) The BootWare runs. Steady green The SDRAM is performing self-test. - Page 100 LEDs State Description Steady yellow The boot.bin file does not exist. No power input, or exceptions have occurred. Steady green The power supply is operating correctly. No power input. Steady green The power supply is operating correctly. The internal power supply for at least one PoE has failed or Steady yellow no power supply for the PoE port.
- Page 101 LEDs State Description No link is present on the SFP interface. Steady green A 1000 Mbps link is present. SFP (applicable Flashing green Data is being received or transmitted at 1000 Mbps. Steady yellow A 100 Mbps link is present. MSR3016/MSR 3026/MSR3046 Flashing yellow...
-
Page 102: Appendix C Slot Arrangement
Appendix C Slot arrangement Each of the MSR3000 routers provides slots for SIC and HMIM interface cards. On the MSR3024, MSR3044, and MSR3064, you can combine two SIC slots into one DSIC slot by removing the slot divider. The fixed ports on the MSR3000 panel are located in slot 0. Table7-1 Slot arrangement on the MSR3000 routers Model Slot arrangement... - Page 103 Model Slot arrangement Interface name : Slots for SIC interface cards : Slots for DSIC interface cards : Slots for HMIM interface cards...
-
Page 104: Document Conventions And Icons
Document conventions and icons Conventions This section describes the conventions used in the documentation. Port numbering in examples The port numbers in this document are for illustration only and might be unavailable on your device. Command conventions Convention Description Boldface Bold text represents commands and keywords that you enter literally as shown. -
Page 105: Network Topology Icons
Network topology icons Convention Description Represents a generic network device, such as a router, switch, or firewall. Represents a routing-capable device, such as a router or Layer 3 switch. Represents a generic switch, such as a Layer 2 or Layer 3 switch, or a router that supports Layer 2 forwarding and other Layer 2 features. -
Page 106: Support And Other Resources
Support and other resources Accessing Hewlett Packard Enterprise Support • For live assistance, go to the Contact Hewlett Packard Enterprise Worldwide website: www.hpe.com/assistance • To access documentation and support services, go to the Hewlett Packard Enterprise Support Center website: www.hpe.com/support/hpesc Information to collect •... -
Page 107: Websites
Websites Website Link Networking websites Hewlett Packard Enterprise Information Library for www.hpe.com/networking/resourcefinder Networking Hewlett Packard Enterprise Networking website www.hpe.com/info/networking Hewlett Packard Enterprise My Networking website www.hpe.com/networking/support Hewlett Packard Enterprise My Networking Portal www.hpe.com/networking/mynetworking Hewlett Packard Enterprise Networking Warranty www.hpe.com/networking/warranty General websites Hewlett Packard Enterprise Information Library www.hpe.com/info/enterprise/docs... -
Page 108: Documentation Feedback
Hewlett Packard Enterprise is committed to providing documentation that meets your needs. To help us improve the documentation, send any errors, suggestions, or comments to Documentation Feedback (docsfeedback@hpe.com). When submitting your feedback, include the document title, part number, edition, and publication date located on the front cover of the document. For online help content, include the product name, product version, help edition, and publication date located on the legal notices page. -
Page 109: Index
Index A C D E G I L M N P R S T V W Connecting the power cord XE "installing:power cord" XE "power cord:power supply" XE AC power supply,82 "procedure:connecting power cord" XE "power cord:installing power cord" Accessing Hewlett Packard Enterprise Support,101 Connecting the router to the network XE Accessing... - Page 110 terminal on rack" XE "procedure:grounding router "rack (router installation)" XE "procedure:installing through grounding terminal on rack" XE router in rack" "grounding:terminal" Installing the router XE "installing:router" XE Grounding the router with a grounding conductor "procedure:installing the router" XE buried in the earth ground XE "hardware:grounding "hardware:router installation"...
- Page 111 MSR3026 XE "chassis views(MSR3026)" XE "hardware:replacing memory module" XE "procedure:replacing memory module" MSR3026 XE "LEDs(MSR3026)" Replacing a MIM XE "MIM:replacing" XE MSR3044 XE "chassis views(MSR3044)" "replacing:MIM" XE "hardware:replacing MIM" XE MSR3044 XE "LEDs(MSR3044)" "procedure:replacing MIM" XE "HMIM MSR3046 XE "chassis views(MSR3046)" adapter:replacing MIM"...
- Page 112 Temperature and humidity XE "preparing for "procedure:troubleshooting configuration system installation:temperature and humidity" XE failure" "installation site:temperature and humidity" Troubleshooting the power supply system failure XE Troubleshooting fan failures XE "troubleshooting:fan "troubleshooting:power supply failure" XE "power failure" XE "fan:troubleshooting failure" XE "failure supply:troubleshooting failure"...
Need help?
Do you have a question about the FlexNetwork MSR3000 and is the answer not in the manual?
Questions and answers