Maxon GPTLR Series Maintenance Manual
Hide thumbs
Also See for GPTLR Series:
- Maintenance manual (50 pages) ,
- Maintenance manual (52 pages) ,
- Installation manual (90 pages)
Table of Contents
Advertisement
Quick Links
Advertisement
Table of Contents

Subscribe to Our Youtube Channel
Related Manuals for Maxon GPTLR Series


Summary of Contents for Maxon GPTLR Series
- Page 1 M-18-16 REV. B DECEMBER 2023 © MAXON Lift Corp. 2023...
- Page 3 MAXON agrees to replace any components which are found to be defective during the fi rst 2 years of service, and will reimburse for labor based on MAXON’s Liftgate Warranty Flat Rate Schedule.
-
Page 4: Table Of Contents
TABLE OF CONTENTS SUMMARY OF CHANGES: M-18-16 REV B ................ 6 WARNINGS ........................... 8 SAFETY INSTRUCTIONS ....................9 LIFTGATE TERMINOLOGY ....................10 PERIODIC MAINTENANCE ....................12 PERIODIC MAINTENANCE CHECKS ................12 PERIODIC MAINTENANCE CHECKLIST ................15 LUBRICATION ........................16 CHECKING HYDRAULIC FLUID ..................17 CHANGING HYDRAULIC FLUID .................. - Page 5 MOTOR WILL NOT RUN ..................... 40 PLATFORM WILL NOT RAISE, BUT MOTOR RUNS ............41 PLATFORM RAISES BUT LEAKS DOWN ................42 PLATFORM RAISES PARTIALLY AND STOPS ..............44 LIFTGATE WILL NOT LIFT RATED CAPACITY ..............47 PLATFORM WILL NOT LOWER, LOWERS TOO SLOWLY, OR TOO QUICKLY ....50 RELIEF VALVE PRESSURE ADJUSTMENT - GRAVITY DOWN ........
-
Page 6: Summary Of Changes: M-18-16 Rev B
SUMMARY OF CHANGES: M-18-16 REV B PAGE DESCRIPTION OF CHANGE Cover Updated cover image, REV. and date of release. Updated illustrations for GPTLR main assembly (pump mounting bracket and power 10, 11 unit). 17, 20 Updated hydraulic fl uid level check. Updated recommended brands ISO 15 &... - Page 7 THIS PAGE INTENTIONALLY LEFT BLANK...
-
Page 8: Warnings
Comply with the following WARNINGS and SAFETY INSTRUCTIONS while maintaining Liftgates. See Operation Manual for operating safety requirements. WARNING Installing and maintaining a liftgate can expose you to chemicals, including lead, which are knowto the State of California to cause cancer and birth defects or other reproductive harm. To minimize exposure, install and maintain liftgate in a well-ventilated area and wear proper Per- sonal protective equipment (PPE). -
Page 9: Safety Instructions
Listen for scraping, grat- ing and binding noises and correct the problem before continuing to operate Liftgate. • Use only Maxon Authorized Parts for replacement parts. Provide Liftgate model and serial num- ber information with your parts order. Order replacement parts from: MAXON LIFT CORP. -
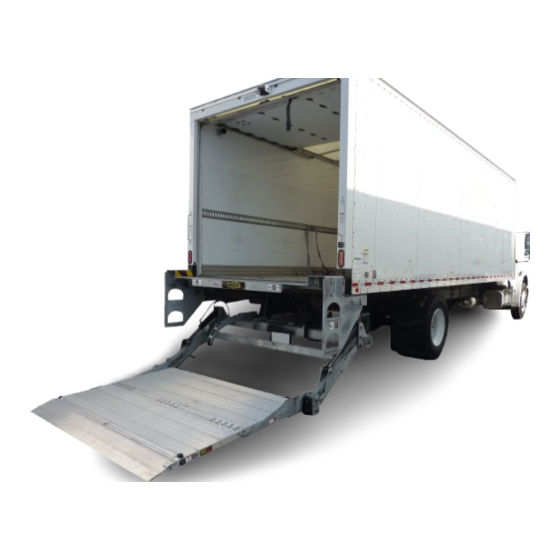
Page 10: Liftgate Terminology
LIFTGATE TERMINOLOGY EXTENSION BOLT-ON PLATE MOUNTING PLATE CONTROL SWITCH PUMP LIFT CYLINDER PARALLEL SPRING-ASSIST TORSION BAR PLATFORM OPENER ICC BUMPER HYDRAULIC LOCK MAIN FRAME LIFT FLIPOVER WITH PLATFORM FIXED RAMP PLATFORM SUPPORT GPTLR 25-33 FIG. 10-1... - Page 11 BOLT-ON EXTENSION MOUNTING PLATE CONTROL PLATE SWITCH PUMP LIFT CYLINDER PARALLEL PLATFORM SPRING-ASSIST OPENER MAIN TORSION BAR FRAME HYDRAULIC LOCK UNDERRIDE PLATFORM LIFT FLIPOVER WITH PLATFORM SUPPORT FIXED RAMP GPTLR 44-55 FIG. 11-1...
-
Page 12: Periodic Maintenance
Check for rust and oily surfaces on Liftgate. If there is rust or oil on Liftgate, clean it off . If bare metal is exposed on galvanized portions of the Liftgate, touch up the galvanized fi nish. To maintain original galvanized fi nish, MAXON recommends cold galvanize spray. Semi-annually or 2500 Cycles (whichever occurs fi rst) Visually check the platform hinge pins for excessive wear and broken welds. - Page 13 Annually or 5000 Cycles (whichever occurs fi rst) Visually check the entire Liftgate for excessively worn parts and broken welds, especially hinge pins. See PARTS BREAKDOWN section for replacement parts. TIP OF FLIPOVER 1/4” (MAX.) Check the platform and fl ipover as follows. Unfold PLATFORM &...
- Page 14 PERIODIC MAINTENANCE - Continued PERIODIC MAINTENANCE CHECKS - Continued To prevent unnecessary wear on parallel arms, check for worn THRUST BEARINGS thrust bearings as follows. Po- sition the platform 1”-2” above ground (FIG. 14-1). Push against the shackle (Item 1, FIG. 14-1A) PARALLEL and measure clearance (Item 1, FIG.
-
Page 15: Periodic Maintenance Checklist
PERIODIC MAINTENANCE CHECKLIST NOTE: Make sure vehicle is parked on level ground while performing maintenance checks. Quarterly or 1250 Cycles (whichever occurs fi rst) Check the level and condition of the hydraulic fl uid. Visually check all hoses and fi ttings for chafi ng and fl uid leaks, and check hydraulic lock. Check electrical wiring for chafi... -
Page 16: Lubrication
PERIODIC MAINTENANCE - Continued LUBRICATION NOTE: Lube fi ttings are shown for the RH cylinder, lift arm, and parallel arm. There are also lube fi ttings at the same places on the LH cylinder, lift arm, and parallel arm. Refer to the PERIODIC MAINTENANCE CHECKS and PERIODIC MAINTENANCE CHECKLIST for the recommended grease and maintenance interval. -
Page 17: Checking Hydraulic Fluid
CHECKING HYDRAULIC FLUID CAUTION Keep dirt, water and other contaminants from entering the hydraulic system. Before opening the hydraulic fl uid reservoir fi ller cap, drain plug and hydrau- lic lines, clean up contaminants that can get in the openings. Also, protect the openings from accidental contamination. - Page 18 PERIODIC MAINTENANCE - Continued ISO 32 HYDRAULIC OIL RECOMMENDED BRANDS PART NUMBER ROSEMEAD ROSEMEAD MV150 EXXONMOBIL MOBIL DTE 10 EXCEL 32 CHEVRON CHEVRON AV MV32 U.S. PRESTIGE PRESTIGE AW HVI 32 TABLE 18-1 ISO 15 OR MIL-H-5606 HYDRAULIC OIL RECOMMENDED BRANDS PART NUMBER EXXONMOBIL UNIVIS HVI-13...
-
Page 19: Changing Hydraulic Fluid
CHANGING HYDRAULIC FLUID CAUTION Keep dirt, water and other contaminants from entering the hydraulic system. Before opening the hydraulic fl uid reservoir fi ller cap, drain plug and hydrau- lic lines, clean up contaminants that can get in the openings. Also, protect the openings from accidental contamination. - Page 20 PERIODIC MAINTENANCE - Continued CHANGING HYDRAULIC FLUID - Continued GRAVITY DOWN LIFTGATES 1. Lower platform to ground. Remove drain plug (FIG. 20-1). Drain hydraulic fl uid from system. Reinstall drain plug. BREATHER RESERVOIR 2. Unscrew breather cap (FIG. 20-1) DRAIN PLUG and refi...
- Page 21 CAUTION Pump cover must be correctly secured to prevent it from becoming a hazard. To secure pump cover, the long side of the holder fl ats must butt against pump cover as shown in the illustration. Bolt on the pump cover as shown in FIG.
-
Page 22: Platform Torsion Spring Adjustment
PERIODIC MAINTENANCE - Continued PLATFORM TORSION SPRING ADJUSTMENT NOTE: Perform the following adjustment if platform feels heavy as you start to fold it for stowing. If adjusted as follows, the torsion springs will reduce the amount of eff ort you need to start folding the platform. 1. - Page 23 WARNING To prevent possible injury and damage to Liftgate, have another qualifi ed person hold platform in position to keep it from falling open. 3. Position platform and fl ipover to 90 degrees, +2 / -0 degrees (FIG. 23-1). Get a second person to hold the platform in place while you take measurements.
- Page 24 PERIODIC MAINTENANCE - Continued PLATFORM TORSION SPRING ADJUSTMENT - Continued SHACKLE BRACKET 5. If necessary, adjust the torsion springs to lower the platform to 4” or less PIN BRACKET above the ground. Unbolt pin bracket BOLT (FIG. 24-1). Then, rotate the pin bracket away from the shackle bracket until the free leg of the torsion spring makes contact with the new block...
- Page 25 NOTE: If shimming is not possible, the spring contact surface on the new stops may be ground in small 1/16” increments to lower the platform closer to the ground. 8. If shimming is not possible, grind the contact surface on the support blocks CONTACT SURFACE (FIGS.
- Page 26 PERIODIC MAINTENANCE - Continued PLATFORM TORSION SPRING ADJUSTMENT - Continued WARNING Keep hands clear of the extension plate when folding the platform under the extension plate. CAUTION Stow Liftgate under hydraulic pressure. 9. Fold platform as shown in FIG. 26-1. Then, stow Liftgate as shown in FIG.
-
Page 27: Replacing Platform Torsion Spring
REPLACING PLATFORM TORSION SPRING NOTE: The following procedure shows how to replace torsion spring on RH side of platform. Use this procedure for replacing torsion spring on the LH side. 1. Fold fl ipover onto platform. PLATFORM LOCK NUT SUPPORT BOLT 2. - Page 28 PERIODIC MAINTENANCE - Continued REPLACING PLATFORM TORSION SPRING - Continued 5. Install the new torsion spring and bushing as shown in FIG. 28-1. PLATFORM SUPPORT Make sure non-chamfered leg of CHAMFERED LOCK NUT the spring is inserted in the spring BOLT bracket (FIG.
-
Page 29: Decals
DECALS NOTE: Ensure there is no residue, dirt or corrosion where decals are attached. If nec- essary, clean surface before attaching decals. UP DECAL P/N 299038-01 DOWN DECAL P/N 299038-01 INSTRUCTION DECAL P/N 299361-01 DECAL SHEET CAPACITY DECAL (SMALL, WARNING & CAUTION) (SEE TABLE 29-1) P/N 282522-01 CAPACITY DECALS... -
Page 30: Decals & Plates
MAXON PLATE P/N 280004-01 PARTS QR CODE DECAL P/N 299348-08 SERIAL PLATE (REF) WARNING DECAL CAUTION DECAL (FLIPOVER EQUIPPED WITH LATCH ONLY) P/N 265736-02 P/N 267694-01 NOTE: MAXON 24/7 LIFTGATE SUPPORT service is only available in the Continental U.S. FIG. 30-1... -
Page 31: Nonskid & Safety Striping
NONSKID & SAFETY STRIPING NONSKID (LH) P/N 281204-01 NONSKID (RH) P/N 281204-02 SAFETY STRIPE TAPE (2 PLACES) P/N 096018-10 FIG. 31-1... -
Page 32: System Diagrams
SYSTEM DIAGRAMS PUMP & MOTOR SOLENOID OPERATION (GRAVITY DOWN) STARTER SOLENOID C1 PORT MOTOR DIRECTION OF FLOW CONTROL VALVE S1 GRAVITY DOWN POWER UNIT FIG. 32-1 POWER UNIT MOTOR & SOLENOID OPERATION SOLENOID OPERATION MEANS ENERGIZED) LIFTGATE PORT FUNCTION VALVE LOCK MOTOR VALVE*... -
Page 33: Pump & Motor Solenoid Operation (Power Down)
PUMP & MOTOR SOLENOID OPERATION (POWER DOWN) C2 PORT C1 PORT STARTER SOLENOID DIRECTION OF FLOW CONTROL MOTOR VALVE S1 POWER DOWN POWER UNIT FIG. 33-1 POWER UNIT MOTOR & SOLENOID OPERATION SOLENOID OPERATION MEANS ENERGIZED) LIFTGATE PORT FUNCTION VALVE LH LOCK RH LOCK MOTOR... -
Page 34: Hydraulic Schematic (Gravity Down)
SYSTEM DIAGRAMS-Continued HYDRAULIC SCHEMATIC (GRAVITY DOWN) HYDRAULIC HYDRAULIC CYLINDER CYLINDER HYDRAULIC LOCK VALVE 3 GPM FLOW CONTROL VALVE VENT PORT C1 OUTLET PORT S1 VALVE RELIEF VALVE GAUGE PORT (2750 PSI) (PLUGGED) CHECK VALVE PUMP MOTOR FILTER RESERVOIR DRAIN PORT (PLUGGED) FIG. -
Page 35: Hydraulic Schematic (Power Down)
HYDRAULIC SCHEMATIC (POWER DOWN) HYDRAULIC HYDRAULIC CYLINDER CYLINDER HYDRAULIC HYDRAULIC LOCK VALVE LOCK VALVE 3 GPM FLOW CONTROL VALVE C1 OUTLET C2 OUTLET PORT PORT RELIEF VALVE (1800 PSI) S1 VALVE CHECK RELIEF VALVE VALVE (2750 PSI) PUMP MOTOR TANK RETURN (PLUGGED) FILTER RESERVOIR... -
Page 36: Electrical Schematic (Gravity Down)
SYSTEM DIAGRAMS - Continued ELECTRICAL SCHEMATIC (GRAVITY DOWN) CONTROL SWITCH (UP) (DOWN) GREEN BLACK JUNCTION BLOCK WHITE CYCLE COUNTER LOCK VALVE VALVE FUSE HOLDER WITH 10 AMP FUSE CABLE WITH 175 AMP FUSE STARTER SOLENOID MOTOR BATTERY (12V OR 24V) BLACK FIG. -
Page 37: Electrical Schematic (Power Down)
ELECTRICAL SCHEMATIC (POWER DOWN) WHITE POWER DOWN MODULE BLACK GREEN BLACK WHITE WHITE SOLENOID VALVE S1 BLACK FUSE BLACK HOLDER LOCK LOCK VALVE VALVE STARTER SOLENOID WHITE WHITE BLACK NOTE: One cycle is counted when the down switch is activated for 5-7 continuous seconds. -
Page 38: Gptlr Electrical Values & Torque Specifications
SYSTEM DIAGRAMS-Continued GPTLR ELECTRICAL VALUES & TORQUE SPECIFICATIONS Solenoid Switch Coil resistance: 5.4Ω @70ºF. ±15% 20.1Ω @70ºF. ±15% Ampere: 2.2A 1.2A Coil terminal torque: 10-15 lb-in max. Contact terminal torque: 30-35 lb-in max. Solenoid Valves (A, S1, & S2) Coil resistance: 4Ω... -
Page 39: Bolt Torques
BOLT TORQUES CAUTION The torque values in the following table are provided for torquing grade 8 bolts on Liftgate mechanical parts. To prevent damage, never use the infor- mation in this table for torquing electrical or hydraulic hose connections on the pump assembly. -
Page 40: Troubleshooting
TROUBLESHOOTING MOTOR WILL NOT RUN 1. Connect voltmeter between starter solenoid terminal B and ground connection on pump TERMINAL D (FIG. 40-1). Verify that full bat- SWITCHED TERMINAL A BATTERY (+) tery voltage is at B. Recharge the STARTER LOAD SOLENOID batteries if voltmeter indicates less than 12.6 volts DC, or 25.2... -
Page 41: Platform Will Not Raise, But Motor Runs
PLATFORM WILL NOT RAISE, BUT MOTOR RUNS 1. Do the CHECKING HYDRAULIC FLUID procedure in this manual. If necessary, add hydraulic fl uid. 2. Check for structural damage and replace worn parts. CAUTION Keep dirt, water and other contaminants from entering the hydraulic system. Be- fore opening the hydraulic fl... -
Page 42: Platform Raises But Leaks Down
TROUBLESHOOTING - Continued PLATFORM RAISES BUT LEAKS DOWN 1. Check for external leaks, leaking lines and fi ttings at the cylinders and pump assembly. 2. Check that hydraulic lock valve is not stuck in the open position (FIG. 42-1). HYDRAULIC LOCK VALVE RH CYLINDER CHECKING HYDRAULIC LOCK VALVE... - Page 43 CAUTION Keep dirt, water and other contaminants from entering the hydraulic system. Be- fore opening the hydraulic fl uid reservoir fi ller cap, drain plug and hydraulic lines, clean up contaminants that can get in COIL the openings. Also, protect the openings from accidental contamination during VALVE S1 CARTRIDGE...
-
Page 44: Platform Raises Partially And Stops
TROUBLESHOOTING - Continued PLATFORM RAISES PARTIALLY AND STOPS 1. Lower platform to the ground. See OPERATION MANUAL. 2. Use voltmeter to verify the battery voltage is a minimum 10.5 volts DC, or 21 volts DC for a 24 volt system, under load from pump motor. 3. - Page 45 4. Check for structural damage and poor RESERVOIR (PUMP INLET FILTER INSIDE) lubrication. Replace worn parts. 5. Check pump inlet fi lter in the reservoir (FIGS. 45-1 and 45-2). Clean or replace fi lter, if necessary. RELIEF VALVE (2750 PSI) ADJUSTMENT COVER CHECKING THE RAISING RELIEF VALVE...
- Page 46 TROUBLESHOOTING - Continued PLATFORM RAISES PARTIALLY AND STOPS - Continued 8. Check the hydraulic cylinders. With the platform at vehicle fl oor level, remove the LOWER PORT hydraulic line from the LOWER port on the cylinder (FIG. 46-1). Hold the control switch RAISE PORT in the “UP”...
-
Page 47: Liftgate Will Not Lift Rated Capacity
LIFTGATE WILL NOT LIFT RATED CAPACITY 1. Lower platform to the ground. See OPERATION MANUAL. 2. Use voltmeter to verify the battery voltage is a minimum 10.5 volts DC, or 21 volts DC for a 24 volt system, under load from pump motor. 3. - Page 48 TROUBLESHOOTING - Continued LIFTGATE WILL NOT LIFT RATED CAPACITY - Continued 4. Check for structural damage and poor RESERVOIR lubrication. Replace worn parts. (PUMP INLET FILTER INSIDE) 5. Check pump inlet fi lter in the reservoir (FIGS. 48-1 and 48-2). Clean or replace fi...
- Page 49 8. Check the hydraulic cylinder. With the plat- LOWER PORT form at vehicle fl oor level, remove the hy- draulic line from the LOWER port on the RAISE PORT cylinder (FIG. 49-1). Hold the control switch in the “UP” position for two seconds while you watch for hydraulic fl...
-
Page 50: Platform Will Not Lower, Lowers Too Slowly, Or Too Quickly
TROUBLESHOOTING - Continued PLATFORM WILL NOT LOWER, LOWERS TOO SLOWLY, OR TOO QUICKLY 1. Connect voltmeter (+) lead to starter solenoid terminal B and TERMINAL A TERMINAL D the (-) lead to the ground wires STARTER LOAD SWITCHED connection on pump (FIG. 50-1). SOLENOID BATTERY (+) Verify that full battery voltage... - Page 51 CAUTION Keep dirt, water and other contaminants FLOW from entering the hydraulic system. Before CONTROL opening the hydraulic fl uid reservoir fi ller VALVE cap, drain plug and hydraulic lines, clean up contaminants that can get in the open- ings. Also, protect the openings from acci- dental contamination during maintenance.
-
Page 52: Relief Valve Pressure Adjustment - Gravity Down
TROUBLESHOOTING - Continued RELIEF VALVE PRESSURE ADJUSTMENT - GRAVITY DOWN NOTE: The relief valve pressure is set at the factory; however, if a pressure check shows incorrect reading, use the following procedure to set the pressure to the correct reading. 1. -
Page 53: Relief Valve Pressure Adjustment - Power Down
RELIEF VALVE PRESSURE ADJUSTMENT - POWER DOWN CAUTION Keep dirt, water and other contaminants from entering the hydraulic system. Before removing hydraulic lines, clean up contaminants that can get in the openings. Also, protect the openings from accidental contamination during maintenance. -
Page 54: Checking The Power Down Module
TROUBLESHOOTING - Continued CHECKING THE POWER DOWN MODULE PLATFORM WILL NOT RAISE 1. Set control switch to UP position. 2. Check for battery voltage (12.6 volts DC, or 24.8 volts DC for a 24 volt system) on white wire (+) connected to Power Down Module terminal #1. If no voltage, check supply voltage to control switch.
Need help?
Do you have a question about the GPTLR Series and is the answer not in the manual?
Questions and answers