Advertisement
Quick Links
Advertisement

Related Manuals for LaserPecker 4


Summary of Contents for LaserPecker 4
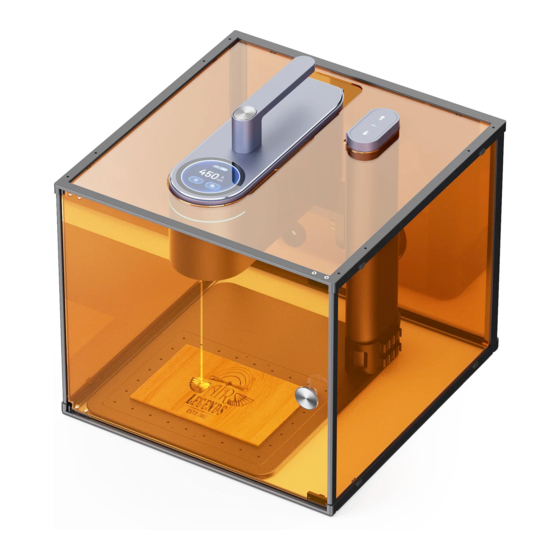
- Page 1 LaserPecker 4 User Manual Laser Protection Cover...
-
Page 2: After-Sales Services
Please contact us if you encounter any problem with your LP4 laser protection coverand we will get back to you as soon as possible. Email:support@laserpecker.com Tel: +86 0755-28913864 Bottom Fixed Black Top Panel*2 Adjustable Riser *4 Frame*1 Online User Community LaserPecker’s huge online global... -
Page 3: Component Overview
Component Overview Black Top Panel Lock Hole Exhaust Fan Wire Protection Grommet Drive Connection Cable Hall Switch Sensor... - Page 4 /Fast Assembly Guide Place the bottom fixed frame on Fold the tri-fold protective shields a flat surface as shown below. inward by 90° as shown below. Tips: The side with a drive connection cable is the Tips: The side with an exhaust fan is the back of the back of the protection cover.
- Page 5 Install the tri-fold protective shields to the bottom fixed frame as shown below. Tips: Please put both the drive and fan connection cable inside of the protection cover during installation, and ensure the shields are tightly fixed with the frame.
- Page 6 Insert six locks into three sides of the bottom fixed frame and fix the drive connection cable as shown below. Connect the Hall Switch drive cable properly.
- Page 7 Put the top retainer plate on the tri-fold protective shields as shown. Tips: The arc cutout should face the front.
- Page 8 Install the door shield by aligning the side with dowel pin to the upper and lower mounting holes.
- Page 9 Press the top retainer plate and insert locks into its three sides.
- Page 10 Cover it to LaserPecker 4 by aligning to the hole position. Adjust the position to make them perfectly match.
- Page 11 Connect the exhaust fan's cable from the bottom, and connect the power cable from the wire protection grommet as shown below.
- Page 12 Expanded Use- Connect the Power Cable IN 24V 5A OUT 5V 3A OUT 5V 3A Connect the Laser Protection Cover Connect the Accessories and the Electric Stand Slide Extension Rotary Extension...
- Page 13 Install four adjustable risers to the bottom of the cover by aligning to the hole positions. Set the height as the first grade (80mm). Tips: While LaserPecker 4 is at lower heights, the laser light may leak from the top cutouts. Please put on the black top panels to ensure safe use.
- Page 14 Expanded Use With Rotary Extension Take out the extension blocks inside of the risers and install to the cover by aligning to the hole positions. Set the height as the second grade (120mm). Tips: Put the extension blocks inside of the risers(set it to first grade) when left unused.
-
Page 15: Product Specifications
Product Specifications LP Air Purifier, Slide Extension, Rotary Extension Compatibility Size Regular:324*371*276mm With Slide Extension:324*371*355mm With Rotary Extension:324*371*395mm Wight 1.9kg Material Plastics & Acrylic & Aluminium Alloy Filtered Laser Wavelength Range 190nm-550nm,800nm-1100nm Wavelength Certification CE,ROHS,FCC,PSE,CA65,UKCA,KC... - Page 16 Shenzhen Hingin Technology Co., Ltd. We provide global online technical support services for this product. If you encounter any problems during your use, please contact us via: Email:support@laserpecker.net Tel: +86 0755-28913864...
Need help?
Do you have a question about the 4 and is the answer not in the manual?
Questions and answers